
Our new homepage is now online -- check it out at metis.strw.leidenuniv.nl and don't miss our "METIS app" metis-app.strw.leidenuniv.nl that lets you see how METIS will operate! @ASTRON_NL @ukatc @mpi_astro @univienna @CEAParisSaclay @ETH_physics @IvS_KULeuven @UniCologne
@ASTRON_NL @ukatc @mpi_astro @univienna @CEAParisSaclay @ETH_physics @IvS_KULeuven @UniCologne Our explainer app metis-app.strw.leidenuniv.nl starts off with a screen showing the optical layout of METIS and its various subsystems. 
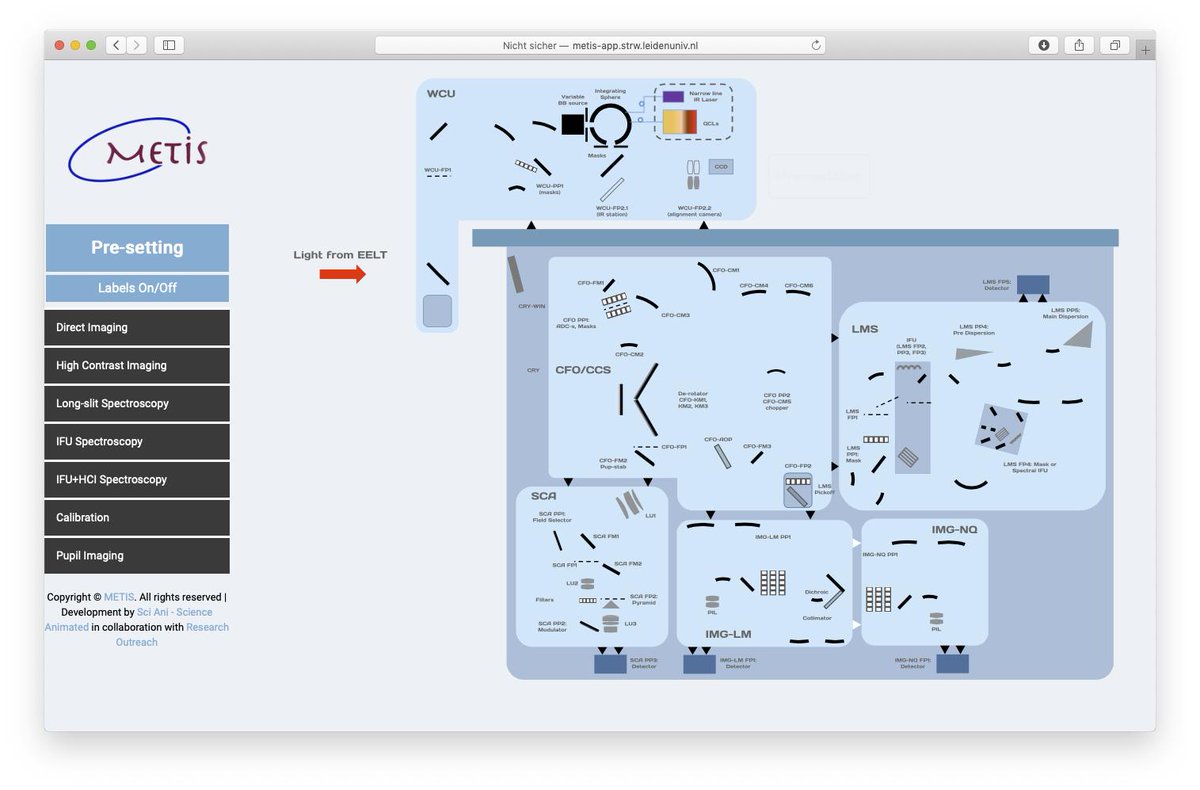
METIS offers five main observing modes (direct imaging, high contrast imaging, long-slit spectroscopy, IFU spectroscopy and IFU spectroscopy combined with high contrast imaging). In each mode, various sub-modes are available.
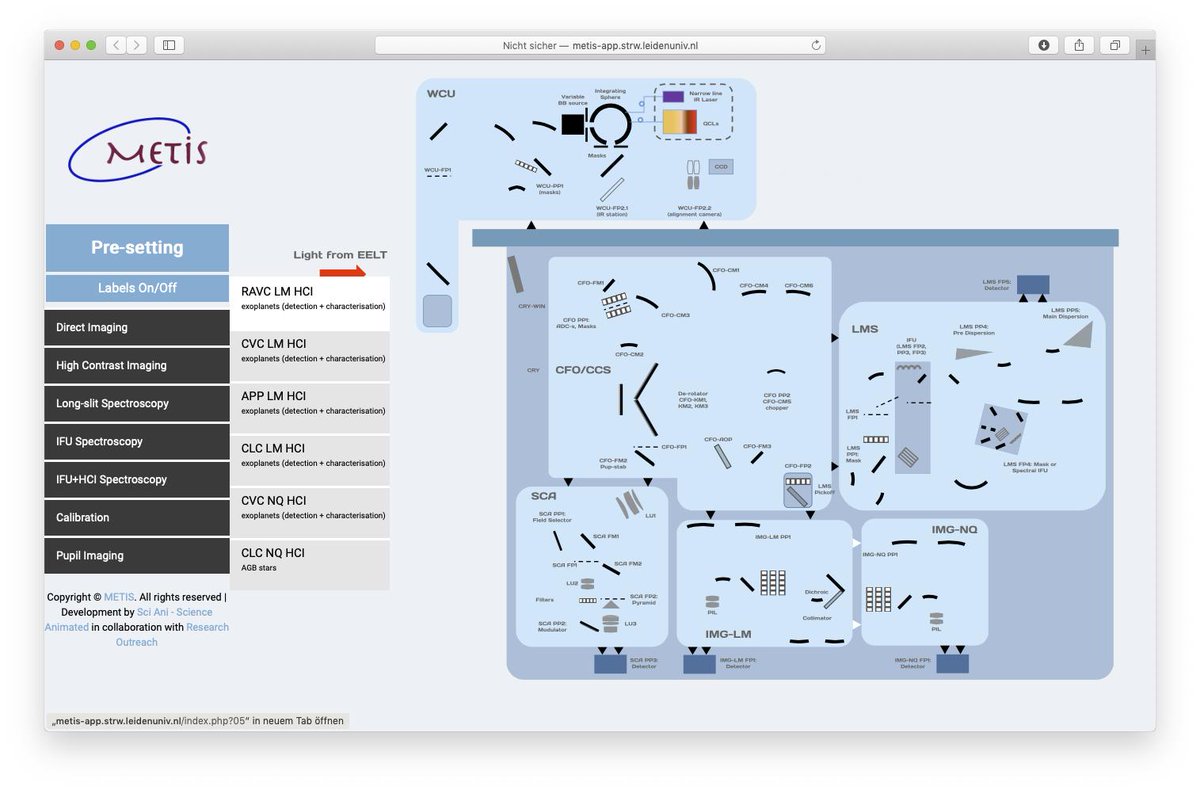
In the app, you can select which (sub)mode you would like to see by hovering over the mode button and then clicking on the sub-mode as the menu unfolds. Here we select as an example the Ring-Apodized Vortex Coronagraphy mode in L/M band imaging (designed by @AbsilOli and team).
After releasing the click, METIS starts its preset for this mode. As the various elements rotate and move, the beam (green) enters the cryogenic instrument. It passes the first curved mirror that converts the converging beam to a parallel beam.

Various elements can be inserted in this "pupil plane" location, e.g. "atmospheric dispersion correctors" (that correct for the rainbow-effect of the atmosphere) or special masks for high contrast imaging (i.e. exoplanets!). The beam then bounces off two more curved mirrors.
These mirrors focus the light again to a focal plane. But before reaching this "FP1", the light passes a bulky, rotating device, called de-rotator. This allows to rotate the field (the sky) with respect to the detector. The beam then passes the focal plane...
...where an image could be recorded by placing a detector there. But we're not quite ready yet and first need to "condition" the light a bit further and include some more functions of the instrument.
Instead the beam diverges again and passes another adjustable mirror (CFO-FM2) that can be used to stabilise the position of the pupil (i.e. the lateral location of the ~20-30cm diameter beam of light). The optical design has been devised by @tibor_agocs @ASTRON_NL
Next: Near-IR light (blue) is separated at a dichroic beam-splitter and sent to the on-board single-conjugate AO unit (built by @mpi_astro) where it is used to detect with high-precision and speed any aberrations of the wavefront, i.e. how wobbly is the wavefront.
Think about waves as they are generated when you throw a stone into a lake. A small section of the circular waves can be seen as a straight line. But the atmosphere disturbs this straight line which makes for an unsharp image (the effect is called seeing).
We can measure how unsharp the light is and then control one of the mirrors of the ELT to deform itself such that the wavefront becomes a near straight line again (to produce sharp images of stars). Cool, eh?
Light with wavelengths >~ 2.5 microns passes through this dichroic beam-splitter and reaches the "fold" mirror CFO-FM3. This is just a straight mirror that is used to make the instrument more compact (for many reasons the cryogenic volume needs to be as compact as possible).
The next three mirrors first produce another "pupil plane" (the mirror in this location is a special, very fast and accurately moving mirror, the "chopper") and then send the beam off towards the second focal plane of the instrument.
In this location we have another rotating wheel that holds various elements to modify the beam for e.g. high-contrast imaging (a mask) or spectroscopy (a slit). In this location there is also another retractable fold mirror that can send the beam off towards the "LMS".
This is the high-resolution L and M band (3-5 micron) integral field spectrometer built by @ukatc . Think of it as @JWSTObserver / #MIRI but with much higher spatial and spectral resolution. This is worth its own thread on Twitter and we'll do this another time.
We're nearly there now! The beam now enters the imaging subsystem (also built by @mpi_astro ). Another set of curved mirrors sends the beam towards a focal plane, but in between, another dichroic element separates the short and long-wavelength thermal-infrared light.
The short-wavelength light (up to ca. 5 micron; orange) passes through the dichroic and gets sent to the LM band imager, the longer-wavelength infrared (dark red) light gets sent into the N band imager and is blocked there for this observing mode.

The orange rays pass through another set of optical elements (masks, filters) before being finally focussed onto a detector where they produce electrons that are registered and put together to an image by a computer, controlled by @wimdemeester and colleagues at @IvS_KULeuven
However, this was just the preset, meaning: all this has to happen before the scientific observation (which typically lasts one hour) can begin. At the end of the preset often a short test observation is done to ensure that everything is right.
In the app you can start the real observation by clicking on "Observe" in the top left part. This loads a new animation that shows how the various elements move during the observing sequence.
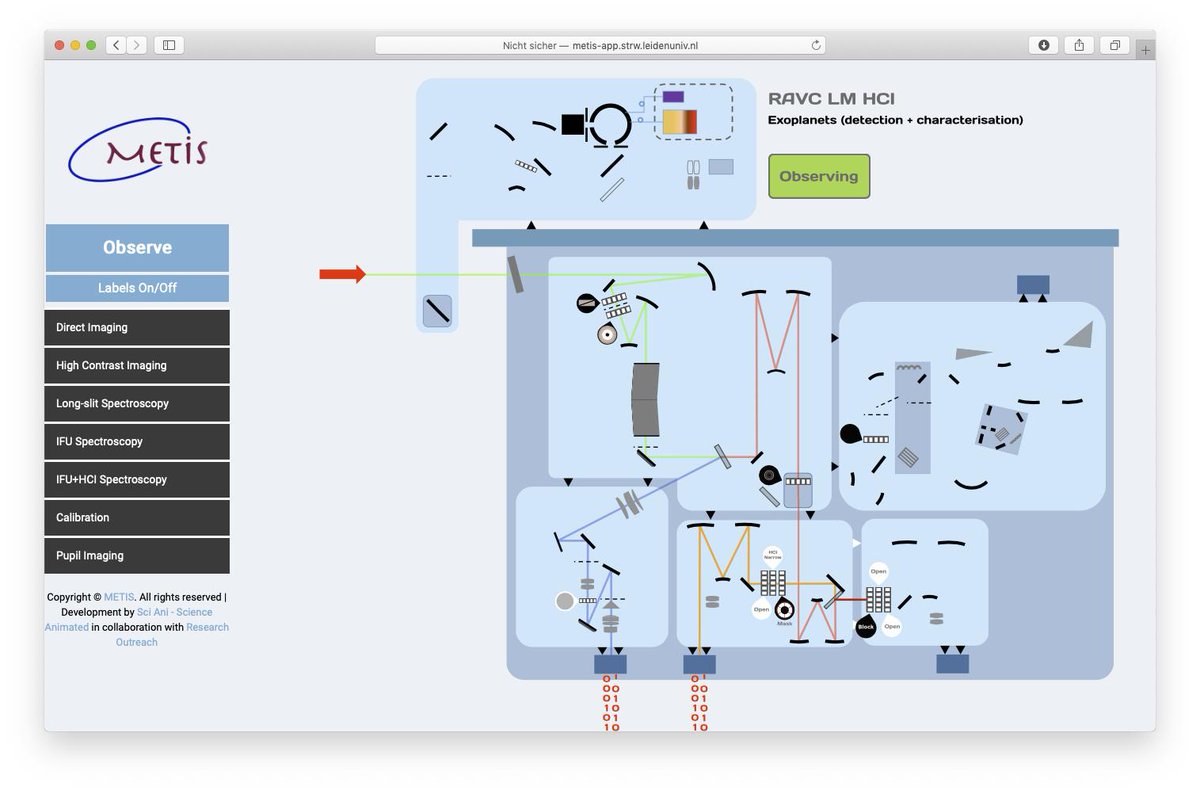
And at the very last a little quiz to check who has read until here! :-) The detectors seem to be very busy collecting data, aren't they? Can you decipher what the stream of 0's and 1's stands for? Hint: The code is simple ASCII.

