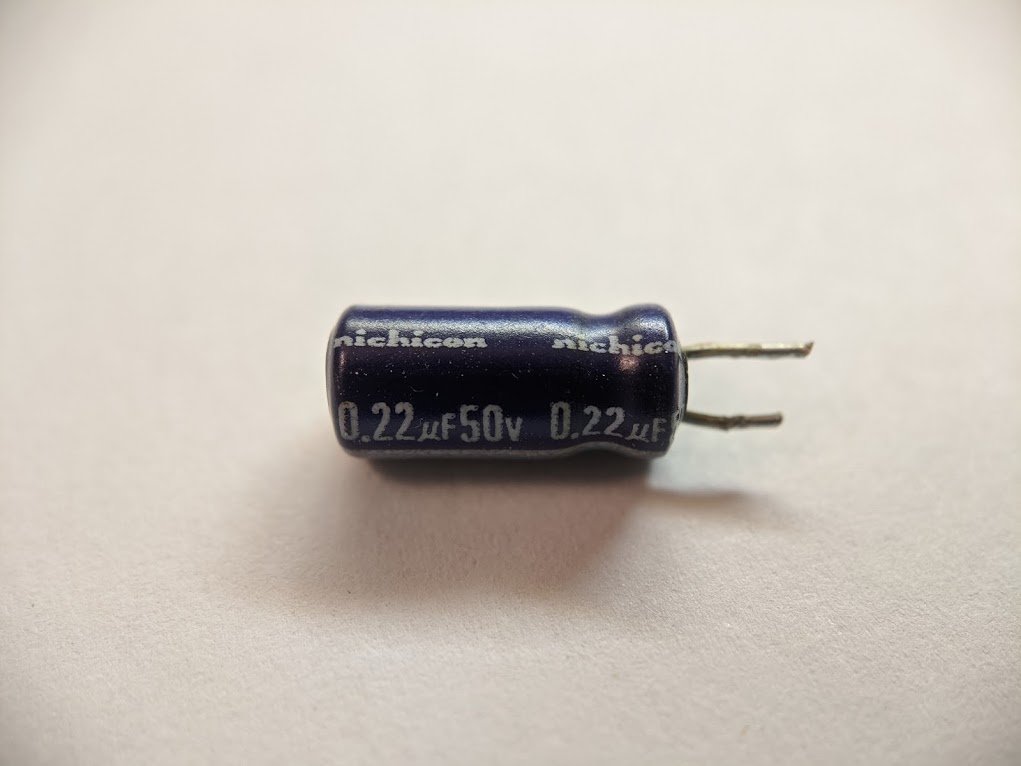
today i took apart some electrolytic capacitors, and learned some surprising things. i wanted to review the manufacturing process, but let's first take apart this capacitor. 🧵 
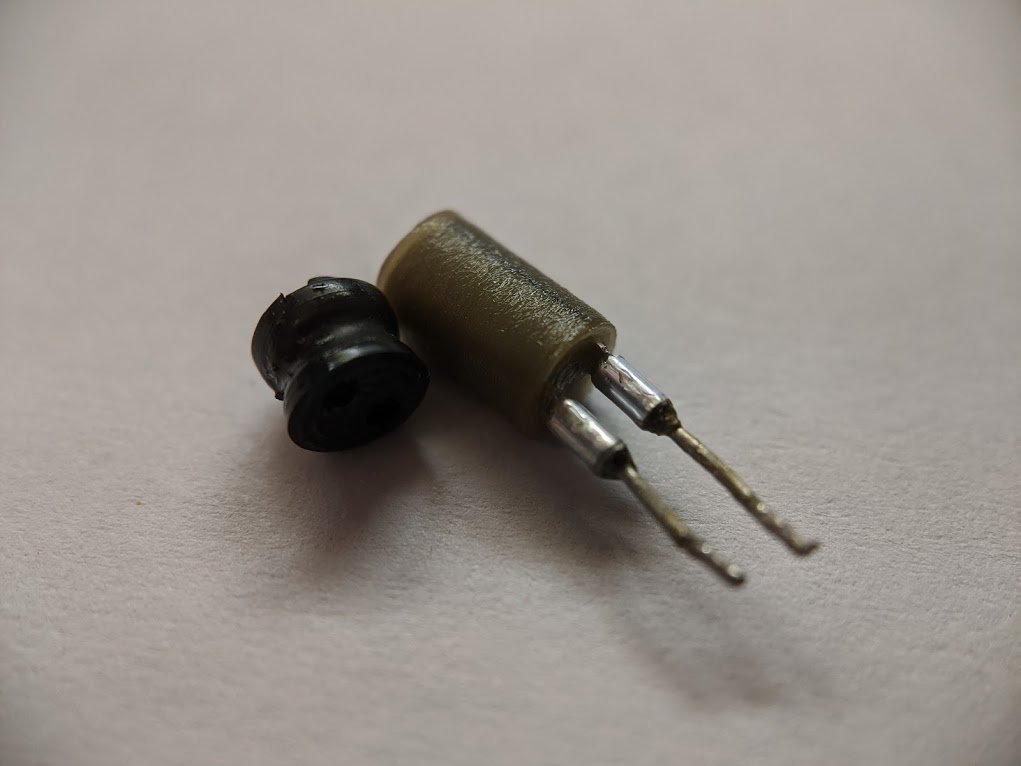
the plastic sleeve comes off easily, revealing a very shiny aluminum case. see the area where it necks down?
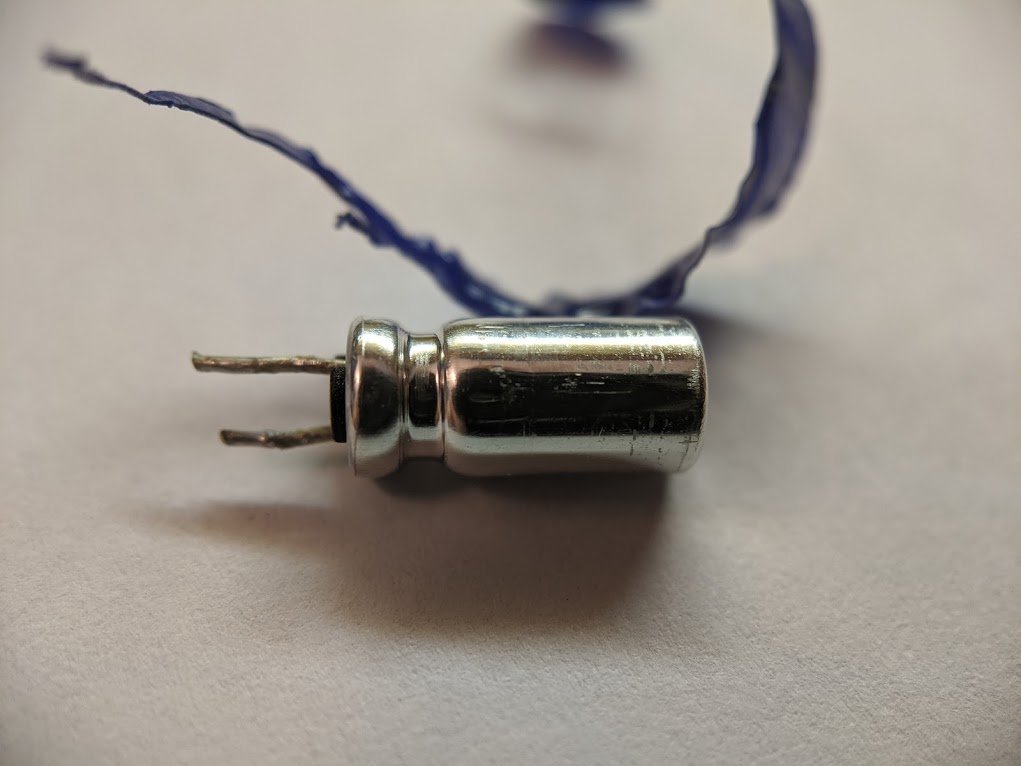
the aluminum case is crimped around this little rubber stopper which seals the capacitor.
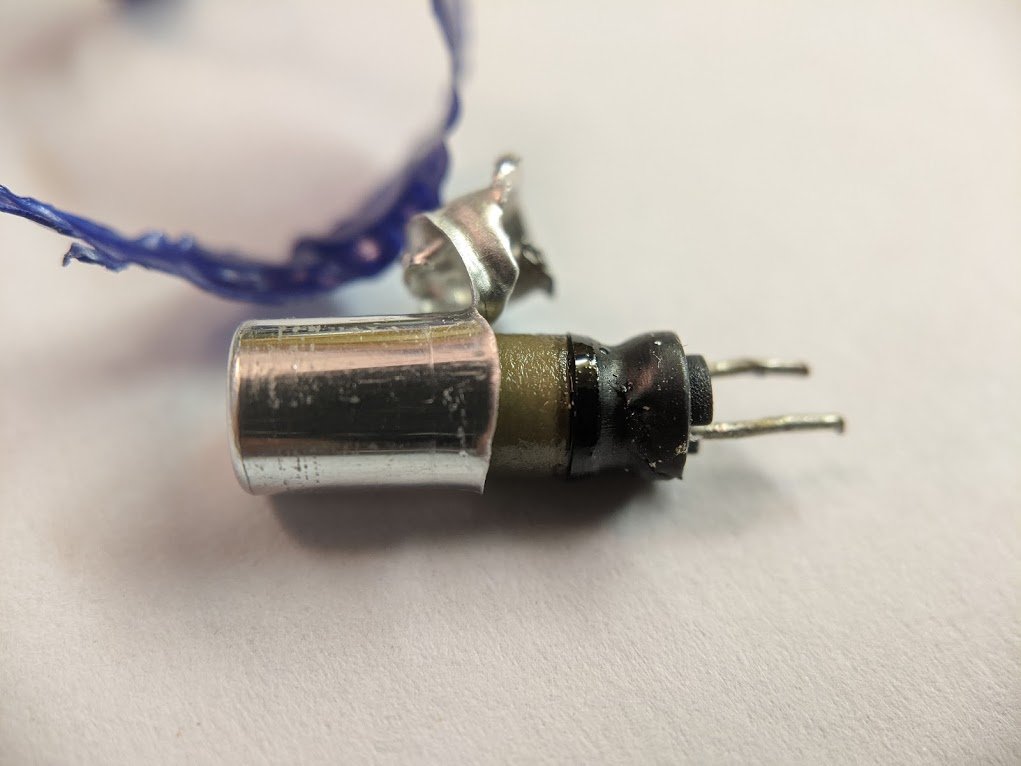
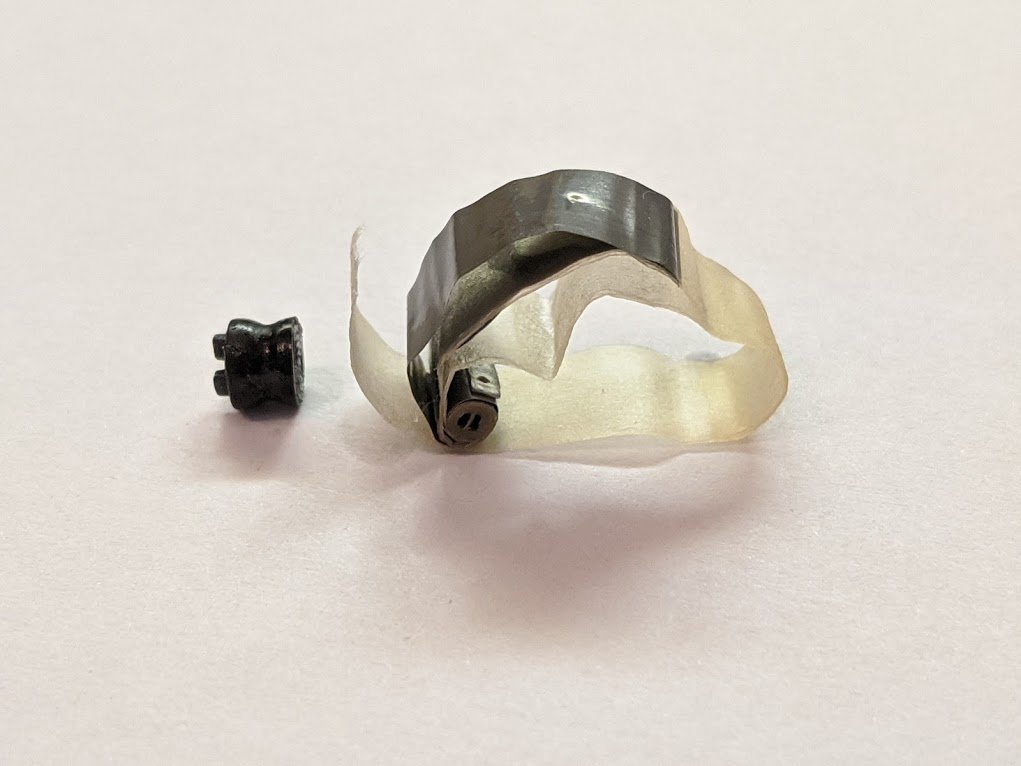
removed from the case, you can see that the capacitor appears to be made of paper that is soaking wet!
in fact, it's not just paper but it's actually rolled up with some metal foil.
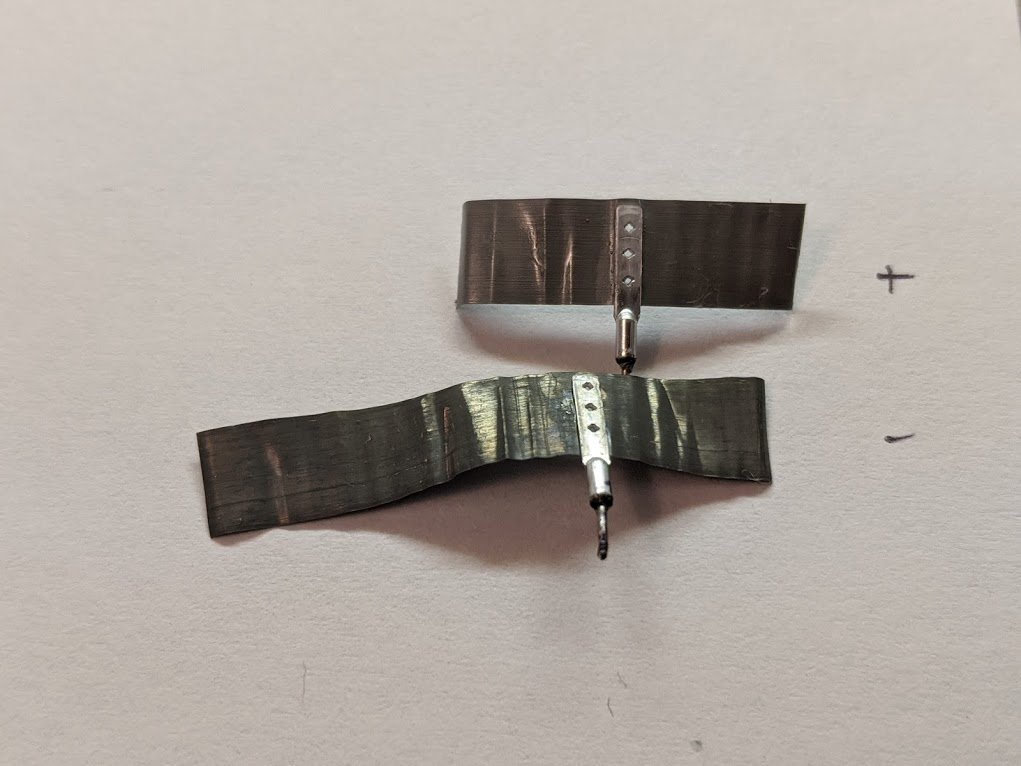
the leads come in and attach to the two pieces of metal foil.
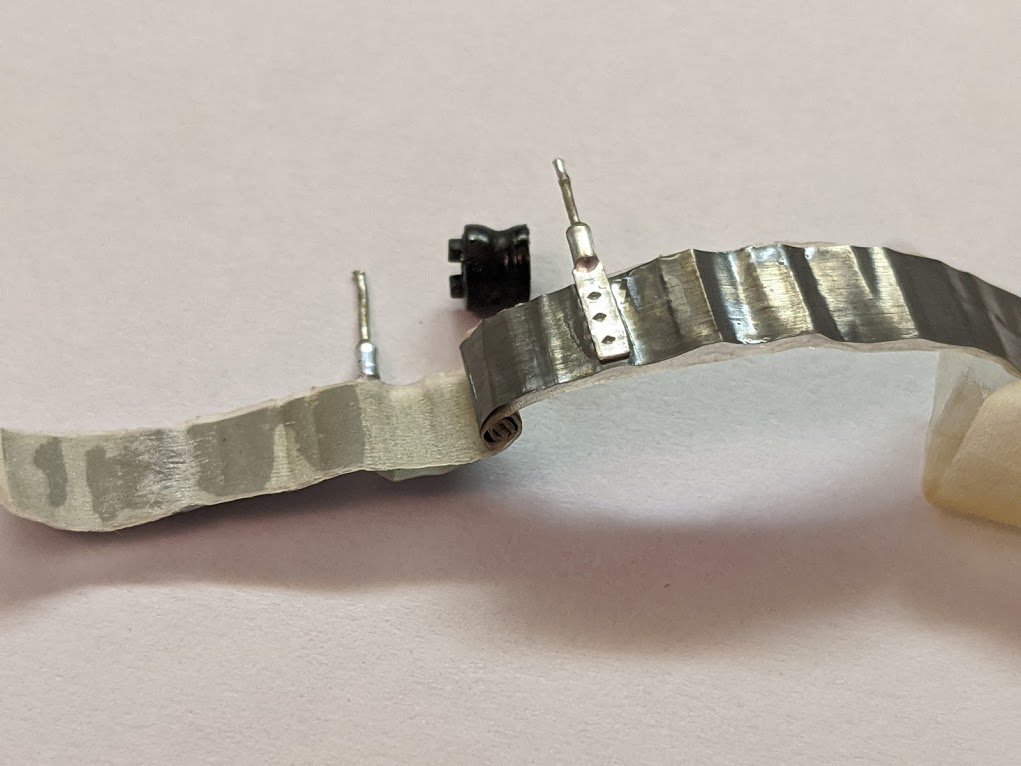
here's our first hint that something interesting is going on: one of the pieces of foil is slightly darker than the other!
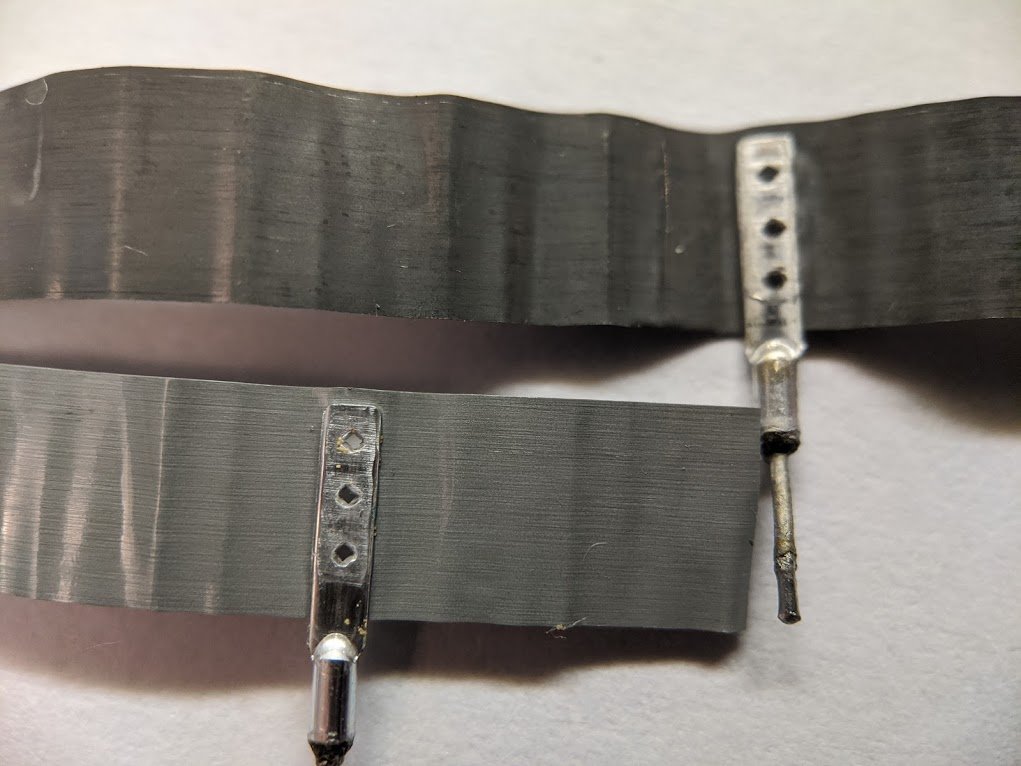
i've marked which foil is the positive terminal and which is the negative terminal. the size difference is intriguing.
so how does this electrolytic capacitor actually work? the key is the term "electrolytic" which refers to a *conductive fluid*
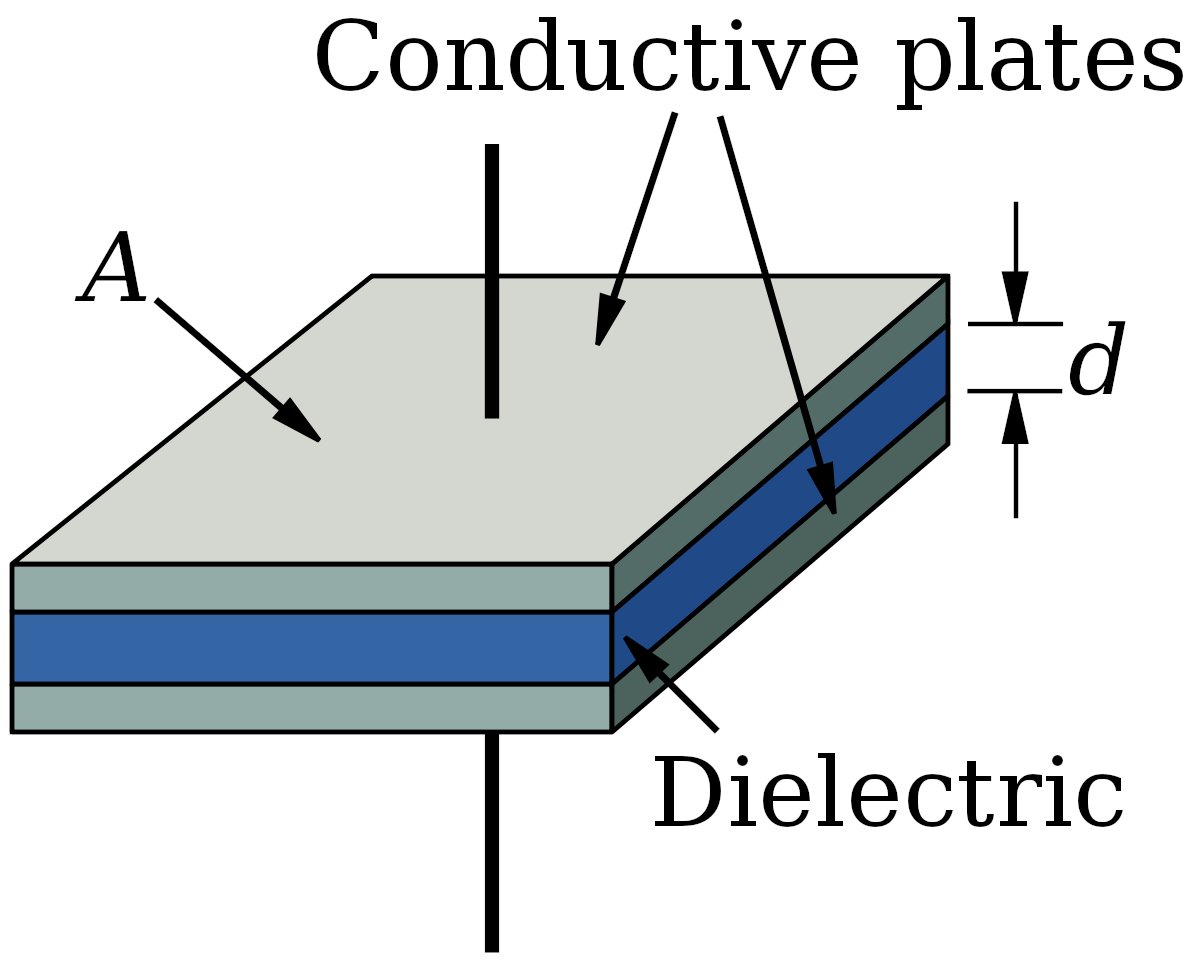
you see, for a parallel plate capacitor the capacitance is proportional to the square area of the plates divided by the distance in between. but if you calculate the square area of the foils and the distance (separated by the paper) you don't get the right value: what's going on?
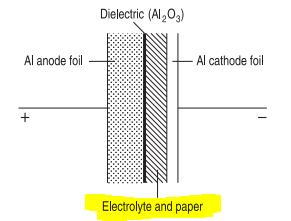
it turns out the surface of the anode (+ terminal) is *wrinkly* and has lots of microscopic surface area. it also has a thick layer of non-conductive aluminum oxide which is the actual capacitor dielectric (not the paper).

the cathode is also complex -- it is actually the fluid itself! that way, the cathode is able to extend into all the little nooks and crannies of the anode, increasing the capacitance. the foil tied to the cathode lead is basically just a contact and is not the "other plate"
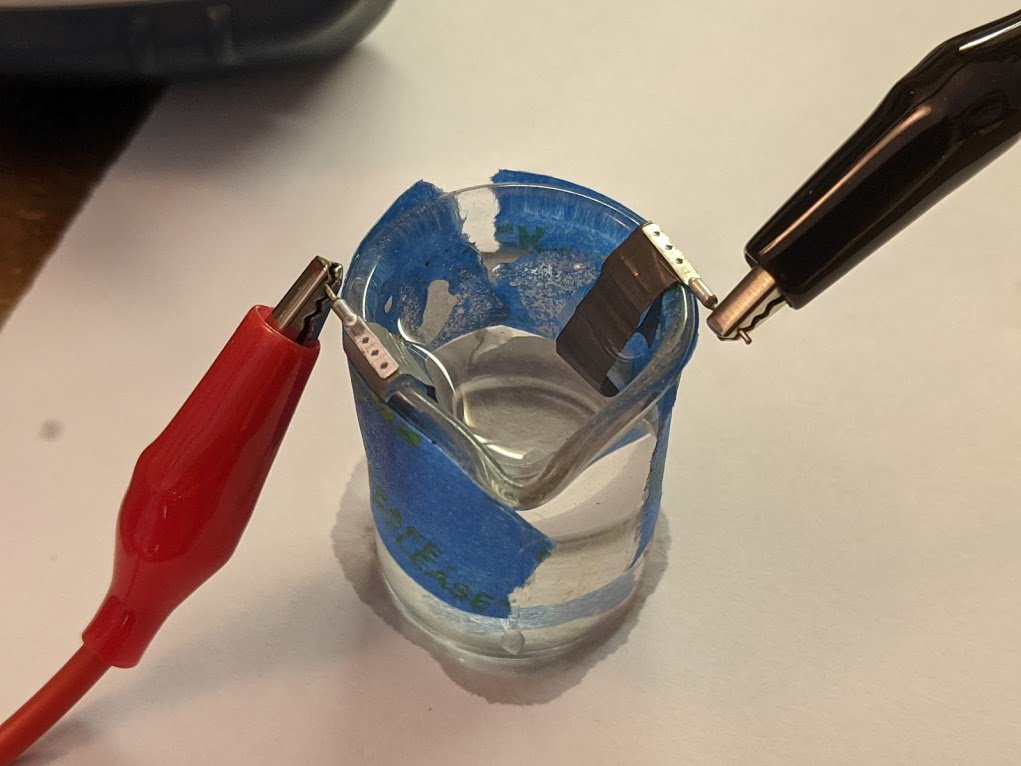
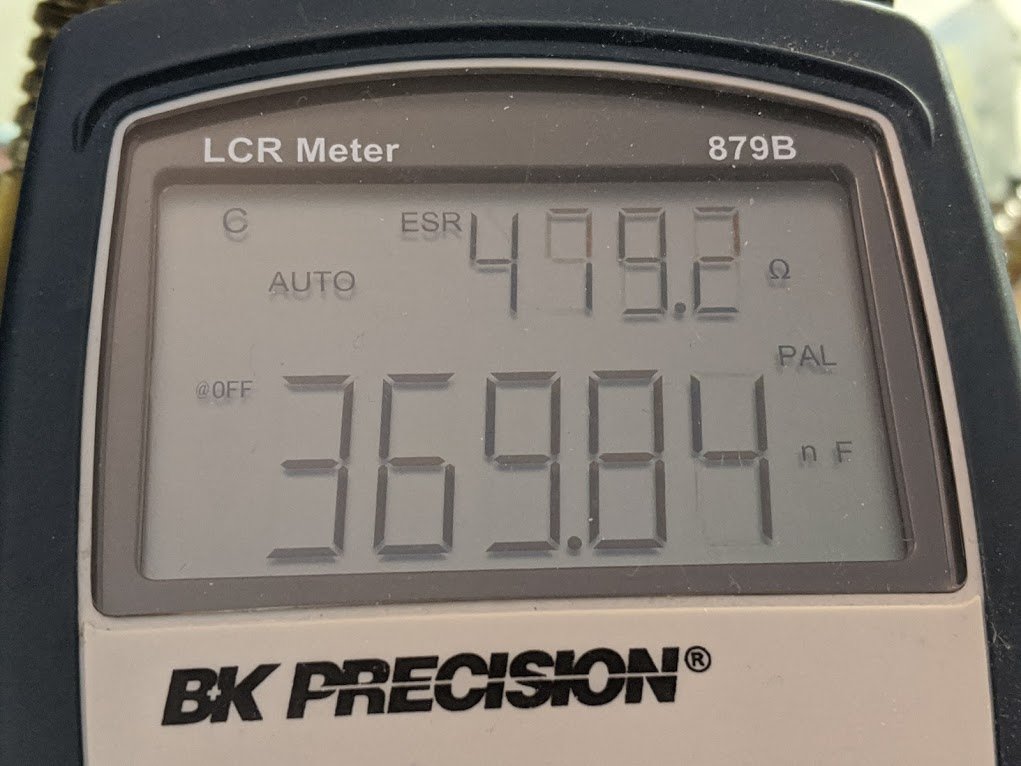
let me demonstrate. i've taken the two pieces of foil and placed them in a 10ml beaker (science-speak for "extremely cute"). the capacitance with air in the beaker is quite low, as you might expect.
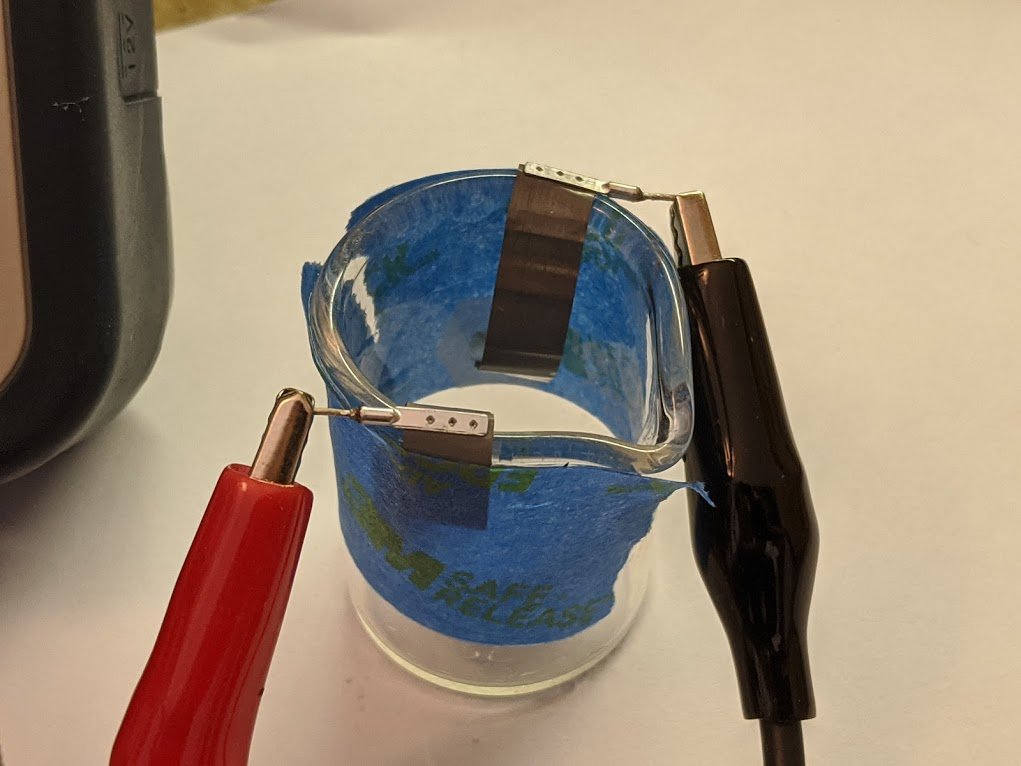
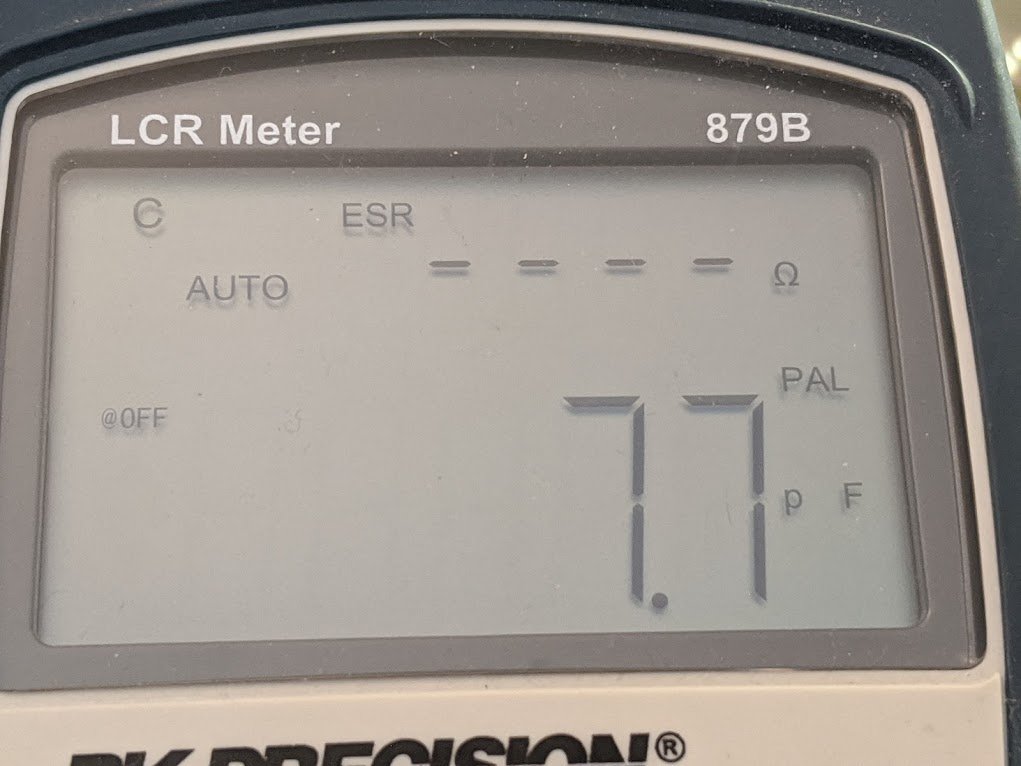
salt water makes a decent electrolyte, so that's what i've filled the beaker with. now, suddenly, we get a *lot* more capacitance--almost as much as the original 0.47uF!
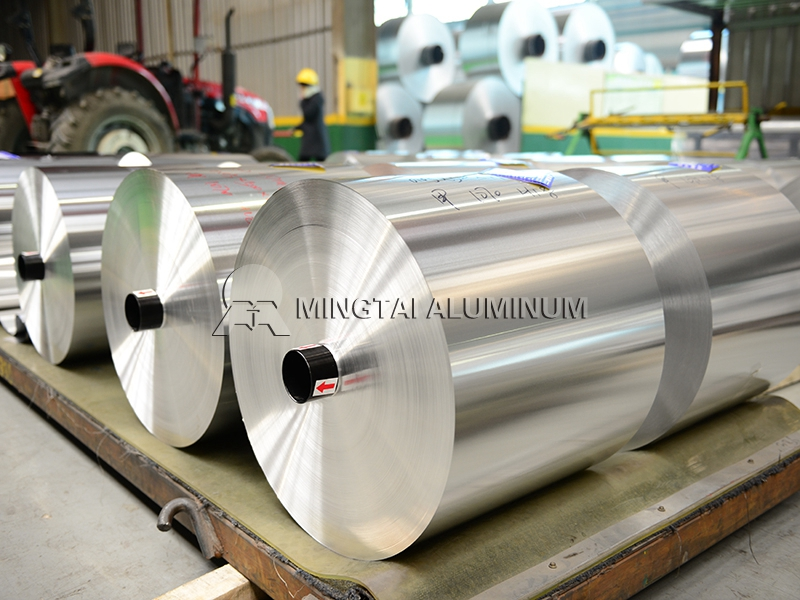
so how do electrolytic capacitors get made? the process starts with these large rolls of aluminum foil. (image shamelessly stolen from some chinese company--i don't have a capacitor factory in my back yard.)
the first step is a special etching process which produces very deep pores in the metal.

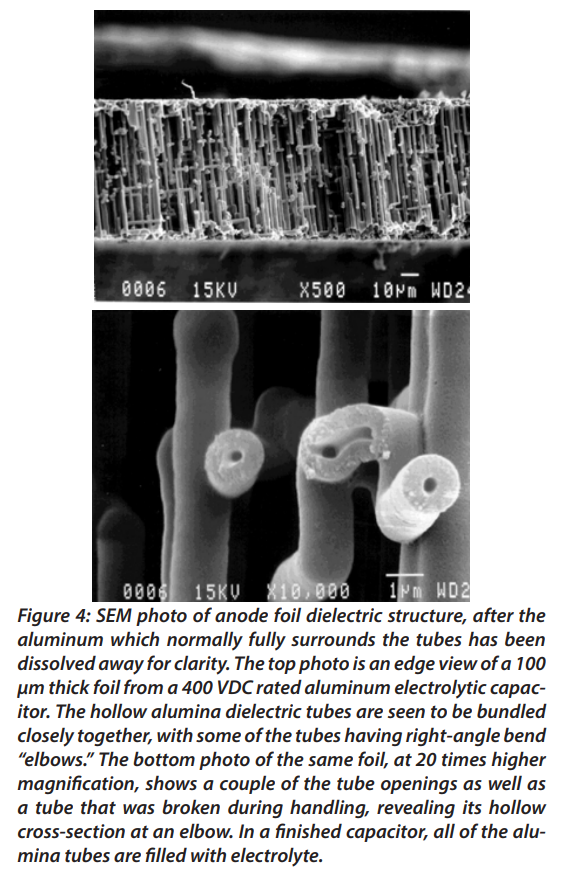
second, the foil is placed in an electrolyte bath and formed: voltage is applied which causes the foil to grow an oxide layer (Al2O3). under an electron microscope, you can see that these form a series of tubes!
after forming, the foil is slit into thinner rolls. these rolls are placed into winding machines that wrap them with the paper separators. the foils are also welded to the contact tabs at this point.
(it amuses me to pretend that the winding machine is actually a multitrack audio recording system)
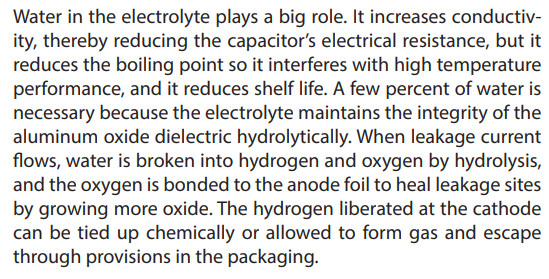
next, the wound rolls are impregnated with the electrolyte. this mixture is more secret than the Coca-Cola formula, but typically contains distilled water, boric acid, and ammonium/sodium borate.
the boric acid makes these capacitors self-healing: if part of the oxide fails and a short circuit develops, the boric acid helps create a new oxide layer.
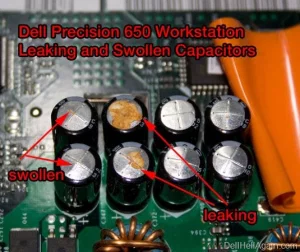
remember all the bad computer motherboards in the early '00s? the cause of the "capacitor plague" is a fascinating story about industrial espionage involving the electrolyte formula, but that is a story for another time.
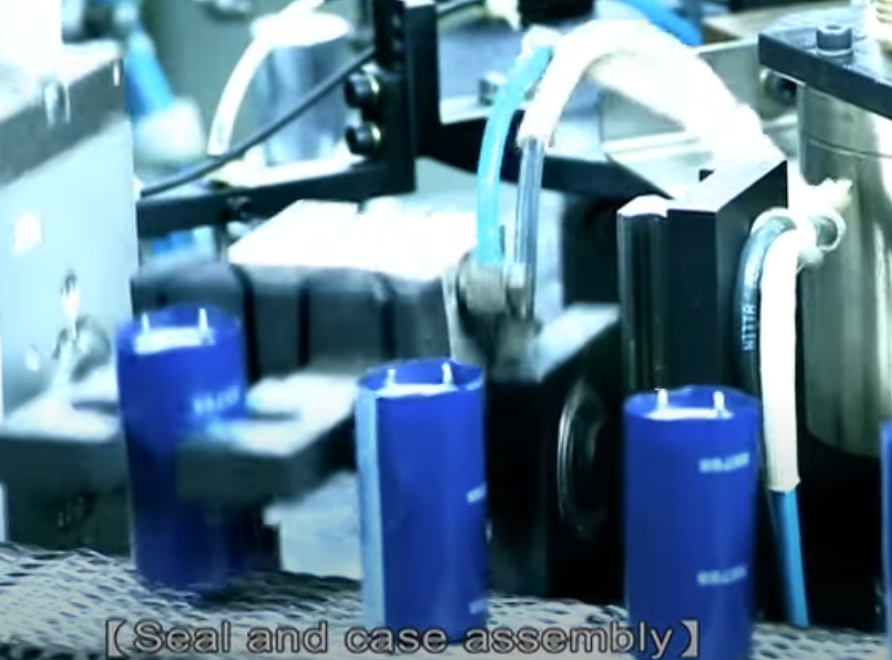
anyway, after being impregnated with electrolyte, the capacitors are inserted into the aluminum cans and then closed with rubber plugs. the rubber plug keeps the electrolyte in but allows gas to escape. yes, these capacitors generate hydrogen gas during normal operation!
finally, the capacitor is aged (voltage applied) and the plastic sleeve with the value and rated voltage gets installed (it's actually heat shrink PVC with a printed legend!)
for further entertainment, you can find factory videos on youtube. youtube.com/results?search…
more technical details are available from the various manufacturers, including TDK: tdk-electronics.tdk.com/download/53070…
and Cornell-Dubilier also has good info:
cde.com/resources/cata…
cde.com/resources/cata…
i'll leave you with this cross section of an electrolytic capacitor.
ok some questions i didn't really answer: the cathode foil is a different color because it is not etched, so it doesn't have all those tiny tubes in it.
the paper is soaking wet with the electrolyte. the paper fibers help prevent the two electrodes from touching each other and it also holds the electrolyte.
i also was afflicted by capacitor plague in the early '00s. computing away, i smell smoke! pull the power *fast*, then i notice the bad capacitors on the motherboard. i ordered new ones from digi-key and replaced them. continued computing afterwards.
what happens when you hook up a cap backwards? the electrolyte starts building oxide on the *cathode* which is a problem because of all the hydrogen gas released! pressure increases until the safety vent fails! 💨