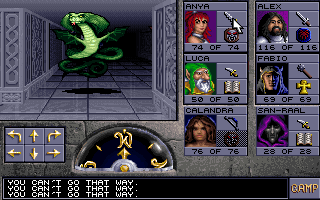
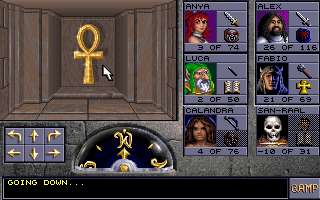
All right, I suppose this is actually happening. #dosgaming - returning to Eye of the Beholder 2 after last fumbling with it in the early 90s. Will I finish it this time? 

A screen I've never seen before - EOB2 allows you to copy your EOB save into its folder and import characters! Dom has been ditched in favour of fighter Anya as apparently thieves in this game are pretty useless. The rest of the Rhapsody gang remain intact.

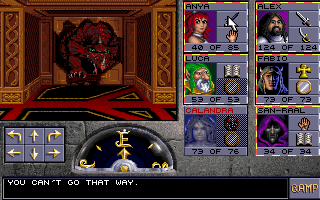
Characters created in this game start at level 7, so maybe this will give me an edge compared to last time? Maybe? I'm already noticing that when beating up wolves at the start of the game I never miss - hit rate being bizarrely a function of Strength rather than agility etc.
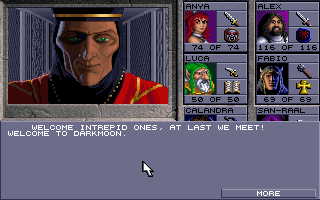
Production values definitely ramped up for this one - there are more incidental encounters and most of them have specific closeup artwork. There's a little prologue - you wander around a forest for a bit before breaking into the Temple of Darkmoon where weird things are going on.

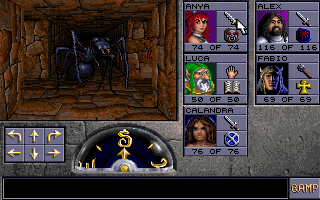
There it is! And this time I'm using a tool called All Seeing Eye by Joonas Hirvonen - ase.zorbus.net which hooks its claws into DOSBox's memory and automaps for you as you explore.

I suppose so

There's a brief part where you're above ground, but there's only a little of it to explore before it's back to the dungeons with you.

The combat waltz is more of a combat twostep now because the enemies have learned since the first game! Now they have the ability to sidestep and they often come into the square in front of you and attack immediately, not having to spend time turning around sorting themselves out

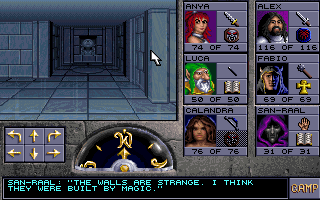
And I'm pretty sure these are the same dungeon walls as the lowest levels of the first game, just darkened a bit.

I'd forgotten about the guards who you disturb while sleeping and who emerge from their rooms in their pants!

The copy protection asks you to find a page in the manual with a given symbol, which takes ages - on the surface it seems more creative than "page 4 line 3 word 2", but it's the same thing except you have to flip through the whole thing to find the symbol. Here's an answer.

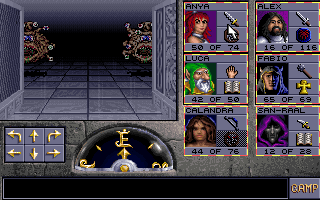
Oh no. (These first appeared on level 8 or 9 of the first game!)

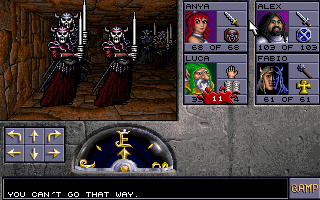
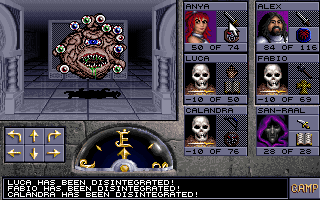
I refer to you my previous "Oh no" tweet, except much more urgently this time. This room is stuffed full of skeletons, more enemies than existed on an entire floor of the first game - and they respawn when you're not looking. I'm beginning to remember why I gave this up.
And that concludes my run-through of Eye of the Beholder 2.
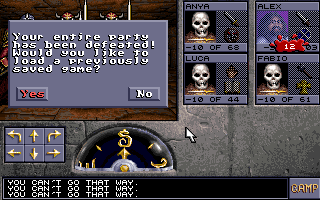
All right, I've reloaded and I'm churning through them by luring them into the corridor leading away from the room and stabbing them then running backwards. There's the occasional human hanging around with their skeleton friends - these are really dangerous as they can Hold you

Did I mention this is the second floor of the dungeon? Many years later, the room is clear - for now, at least, because another party of four skeletons can jump out behind you as soon as your back is turned. I've got a Darkmoon key, let's get out of here now.

The Darkmoon key lets you open up a door at the east side of the second floor that was previously inaccessible. What rewards lie within?

It's another door that requires a Darkmoon key.


I think this occasionally happened in EOB1, but this time there are loads of little notes that you can find lying around to give you fragments of plot. This one indicates the horn I just found might be interesting.
One of them even gives you a bit of map! But it's fairly useless and doesn't indicate anything that you wouldn't already have discovered yourself by now.

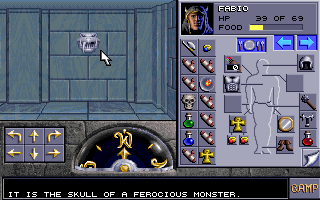
There's far too much junk to carry around so I'm using the food storage area on floor 1 as a repository for it all. Note also the scrolls in Fabio's inventory - they're impossible to tell apart, a little icon or something indicating the spell they cast would work wonders.

This is odd - an illusory wall (which Luca mentioned on the sixth or seventh walk past it) leads to a prison area and two captured NPCs. I'm certain that the dwarf is called Shorn and can join you, but he just ran off. Wonder if it's to do with your party makeup, or random chance


A fight with two clerics in the dungeon area (I wish this game would stop playing sudden musical stings when a special monster spots you, it scares me to death) finally yields the second Darkmoon key.

What follows is an extended session of banging on walls that are vaguely hinted as looking unstable, pre-empting Hexen II's stud-finding gameplay by several years. Eventually one of them yields to blows and falls over, revealing a staircase further down.
And down that staircase, a monster-face door shuts behind you and you're in the place I always gave up before, where the ability to rest is taken away (I've just realized I don't have epic Book of Revelations-style nightmares any more, ever since starting anti-anxiety medication)

These things can piss off. If these lumps of jelly ever get to attack they might randomly steal an equipped item from you! And worse - 'destroy' is a better word than 'steal', because they don't even glorp it back out when you kill them (with a bowl, spoon and some ice cream)
I've absolutely no idea what to do now. I'm pretty sure that the aim was to get into a sub-section of this floor over to the west with giant ants, but everything's locked and I lack the appropriate keys.

Oh - just walk through a wall. Obvious now you say it

Oh, it's another one of these doors! On this one, all the symbols are intact, so I'm not sure what I should be doing to open it.

Another puzzle on this level says "Leave many things behind". This is somewhat infamous, but fortunately I remember how to solve it - there are nine pressure plates in the room, you have to weigh down five of them in an X shape (or like a 5 on a dice). The game doesn't say this

Well, we're having a great time slashing endless gelatinous cubes on this level but once again I think I'm stuck - I need a Darkmoon key to go further in the east path, and a spider key in the northwest. I hope it isn't possible to get stuck here by using keys in the wrong order


Sigh, just have to run into walls again until one yields, like that game they used to play on Saturday morning television where they got a dwarf to run at one of five doors except four of them were nailed shut.
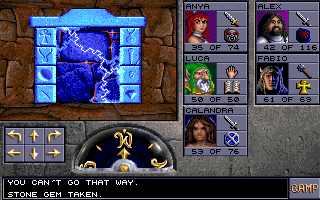
But! Once you've done that and nursed your sore noses - spider key! Darkmoon key! And the stone gem that was missing from the first game!

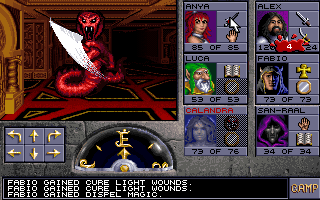
I've got what I thought was a reasonable supply of healing potions and spells but the D&D confines make them really ineffective in this scenario. "Cure light wounds" is the equivalent of giving someone's sore finger a kiss. "Cure serious" might put a plaster on it as well.
The stone gem teleports you to a temple level where you can rest and then return! I didn't know about this before and it's sort of a game changer - you don't have to do the gelatinous cubes - poisonous ants - beardy bat things mad dash all at once after all.

All right. Fully healed and with a spider key in hand, let's go down to thAAAAAAAAAAAAA
The lowest dungeon floor seems tailored to panic you. The poisonous giant ants are everywhere, you need to find three vital items (horn, spider key, Darkmoon key) and they're all buried under mounds of other items like you're on Finders Keepers. Anya has the idea.

Somehow the ants also tend to congregate around the exit/entrance, making escaping even harder. Having said that, I'm definitely noticing my front characters very rarely miss now. Did I exaggerate my misgivings with the game, or does not importing a party really disadvantage you?
A comical number of keys later... the exit from the nightmare floor. At last. It brings you up through a one-way secret door into a spidery area and then back to the first floor of the dungeon. I'll admit, this section of the game went past much more quickly than I thought.

And so, finally, we return to the Four Winds carving at the temple entrance with the... er... three horns. Hold on.

Where the flaming hell did I put that other horn

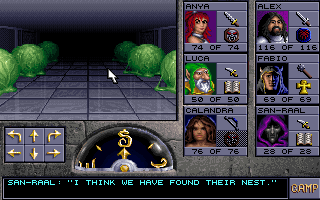
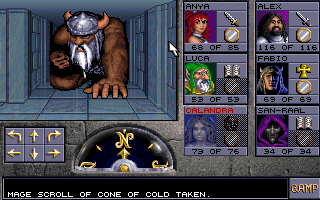
Found it! I also visited a little shrine off the temple entrance floor and revived a set of elf bones I had picked up in the ants' nest, which reconstituted into a mage called San-Raal. He was given no introduction, but I gave him a robe and stuck a spare spellbook in his hand.

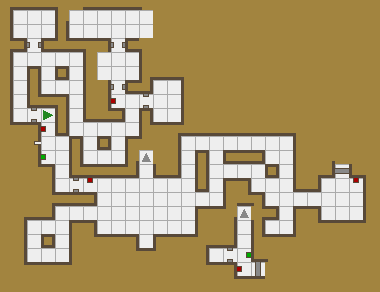
Parp out a tune on the four horns you collected from the dungeon, the carving disappears, and you can get into the next part of the game!

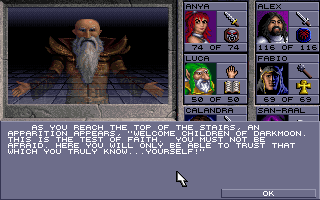
More incidental artwork after you ascend the stairs! This tower is a sort of Crystal Maze test that they apparently put new inductees into Darkmoon through, a much stricter exam than any Ivy League universities. The "trust only yourself" words are important later.
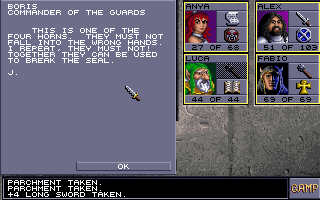
It starts with a new obstacle, these blinking light pillars that will hurt you if they're on when you step on them. There is a pattern to follow but I don't think there's a way of getting over them without getting hurt. Also, unusual "you can't rest here" message.

Right on the far edge of the light pillars, the mantises are back and you've really got to push frantically among them to get off the obstacle. Then you get stabbed and paralyzed repeatedly. I think this is where my last attempt came to an end, but higher level chars really help.
San-Raal also has a spell called "Imp Identify" which sounds fairly useless and specialist, but a check of the manual reveals this is short for Improved Identify. Finally, this lets you find out some of the properties of the magic items you've been carting around.

It works in an awkward way - you have to put one item at a time in his free hand then cast the spell to identify it. A cursed item cannot be unequipped, but you've already had to put it in his hand to find that out! So then you have to cast a Remove Curse spell and throw it away.

The amount of left and right clicking required to identify each item really isn't ideal, and if you're trying to identify a weapon that can be thrown it's very easy to accidentally fling it off into space.
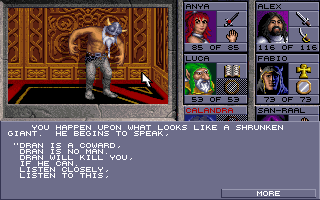
The rest of this tower is quite @KnightmareUK-like :) There are a lot of little cutscenes, mostly these mouths which will give you a clue and you have to present the right item to them. This one's obviously asking for bones, which I had picked up from the terrifying ant floor.


Speaking of which, WHAT IS IT WITH THESE GAMES AND INSECTS OUT OF SCALE These murder-hornets can poison AND paralyze you, so you can't use a poisoning cure on yourself. And if you don't have a Neutralize Poison spell available, you can't rest for one as a poisoned char will die

Is there a Summon @Rentokil spell anywhere in this game

The man in green appears again - this is where "trust only yourself" comes in, as obviously he's lying to you. The door to the right leads to the next floor - the one to the left deals some damage and puts you back to the start of the floor instead. Wankers

The challenge to my temperament started when I began the first game, to be honest

I was all set to answer this riddle (doesn't it seem like the answer should be "stomach"?) but when I clicked out of the dialogue it just belched a fireball into my face.

A parchment lying around reveals "illusionary walls" somewhere! This is potentially useful, but I don't see anywhere on my maps that they could fit into yet.

I'm fairly flying through this game compared to the first. Partly it's because the floors are smaller - EOB1 had definite "levels" where you almost always mapped one floor, got to the end and then advanced down to the next. This is a little less linear, with multiple threads.
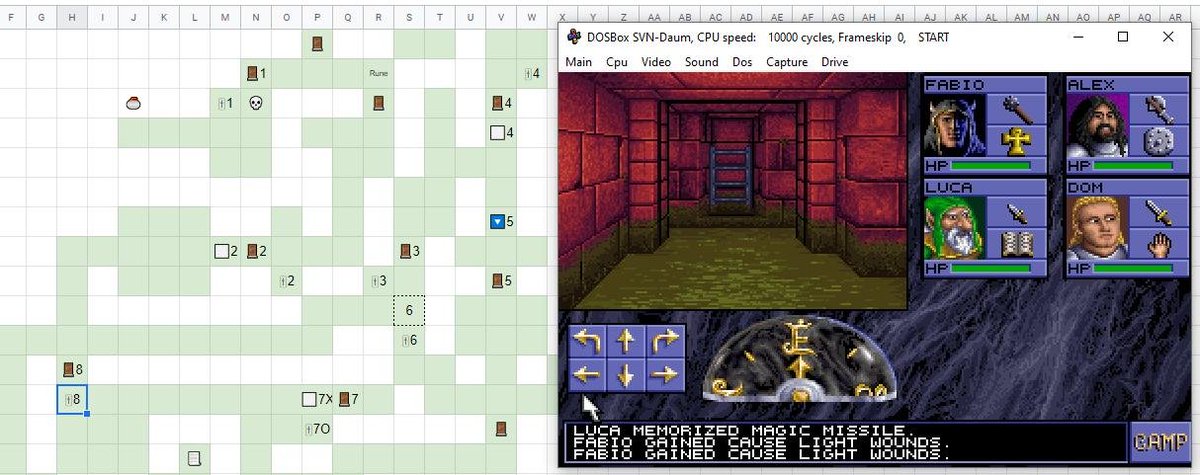
But the thing really speeding it up is the All-Seeing Eye automap - not only for it drawing a map as I step, but for pointing out the annoyingly small little buttons and switches that I'm supposed to notice on the walls.
Beholder! Except it isn't! These things are called Gas Spores and apparently evolved to look like Beholders with fake white "eyes" on their tentacles. You have to keep distance to prevent explosion damage - I first used Fireball but even a thrown dagger will work to pop it.

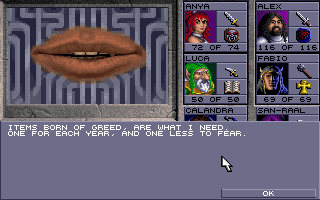
So now I'm at a place with 8 mouths I need to feed with items hinted at in their riddles. 1 is already closed and 3 are fairly obvious. I'm not sure about these four - "items born of greed" could be coins or money, but there is no money in this game. And "one for each year"?


"Famine is my feast" was rotten food. Two of the others were a bit more of a side quest - going back to the blinking lights led me to another passageway which had a dying mantis with a... slimy key. Also a sleeping adventurer who offered to join me but I rejected him


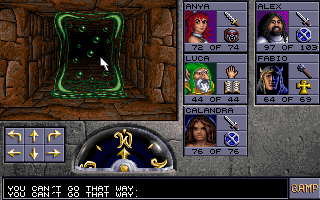
The slimy key led me to... this, with the ever observant San-Raal. At the back of this room there are a pair of stone eyes with green gems. Removing one makes ALL THE EGGS CRACK and releases a swarm of mantises that I barely survived. Maybe I could have cracked them individually
I thought this might be the gem I needed for the "nature's beauty" mouth but the game said the gem was green and not red. Putting the green gem back in made the wall disappear and revealed a new item, a Mantis Idol.
Feeding the Mantis Idol to the mouth that wanted the thing from the "fiends from down below" made a gate open at the other side of the floor (thanks, All Seeing Eye), behind which was the red gem that was the solution to the second-last mouth.


This just leaves the "items born of greed" mouth. I found it accepts rocks, but I've fed it four so far and it hasn't declared it's satisfied yet. I also don't know what the thing about years and fears is (or why rocks are born of greed).
These flappy wiggly bastards can get lost as well - there are so many of them! In fact that seems to have been a theme of EOB2 - there are many more enemies but they go down much more quickly (probably only if you've kept your equipment and characters from the first game)
Desperately searched for any stones in my previously prepared junk emporium. Didn't find any, but crept through a significant portion of the dungeons again and eventually turned up some.


I was only one short! Five stones satisfy it, but I still see no connection to why these items are "born of greed" or why there are five of them (one for each year?) or why that means there's one less to fear. Apart from those parts it's a very good riddle.

Finally through the door opened by the mouths and the temple leader finally comes to meet us! Aren't you Q from Star Trek?

He closes the door behind us (is this a point of no return? I can't think of anything I would want to go back to...) The next section is... awful. Teleports seem to pick destinations at random and all the areas look the same - automap is a godsend here to identify where you are

OH WAIT this mouth! It was "breathing the pain" in the form of a fireball because the mouths were hungering - would it have rewarded me if I'd gone back to it after I fed them?

No, just this and another fireball to the face. Tosser.


I got this message when trying to learn a new spell from a scroll, and trying to memorize spells had the same effect. I was worried I'd got the game into a bugged state where it couldn't recognize my character classes, but I think it was because the food meters were empty.

Beholders are back on this floor! And they're just as hateful as Xanathar, with the same instant death spells smashing multiple party members if they get to face you. Particularly with two in a confined space, this made for frustrating combat.

Finally finished the two of them off, though San-Raal and his very low HP took the worst of the damage. Fortunately, I have several Raise Dead scrolls saved up for emergencies!

It didn't work.

I reloaded and just ran past them to this! You get your hand stamped for re-entry, then you're teleported (with no reason given) back to the entrance room of the temple. It's a nice detail that the bare hand icons in the interface now have stigmata.


The next thing to do is in the cleric's quarters upstairs from the entrance. You can get here right at the start of the game, but you can't go far before you run into this wall with another mouth. Having the mark on your hand allows you past and immediately into another obstacle.


The shield requires a Crystal Hammer, which I missed at the top of the tower. Time to trudge all the way back up again. Generously, even though the door is sealed from when Dran trapped us, a mouth we fed earlier can open it back up - I briefly thought I'd have to edit the save

The hammer is in a section that I discovered earlier but didn't adequately explore, even though it was the area mapped out in the clue! The spell True Seeing comes in useful here, as it removes illusory walls - note the automap displays a wall in front of me here.


It sits so oddly with me that beholders can speak English. It's as weird as cacodemons/pain elementals suddenly striking up a conversation. (This one attacks you later no matter what you do)

Once he's out the way the floor above is full of beholders, the crystal hammer, and this horrifying jumpscare at the end of a long corridor (despite having extra art, killing this one doesn't give anything special). San-Raal is the worse for wear after a long string of fights.

So I had to visit this little anteroom when I got back to the ground floor. I don't think I mentioned it properly before - by pressing a button near the entrance, you open the way to this chamber with an ankh. It gives you three free revivals - this is San-Raal's second.
The shield wall crumbles before the Legend of the Crystal Hammer, and grants entrance to another tower! At the entrance, another unusual situation - you have to cast Dispel Magic on a statue on a wall to open the way forward.


Lizards are the theme of this tower! These big armadillos hit very, very hard. There are also some basilisk-looking things that don't seem dangerous - there are millions of them but I don't think any of them have landed a hit on me yet.

I was briefly stumped by a cryptic-seeming clue, but the answer is to find three gems literally called the Heart, Body and Soul and put them in. This room with the basilisk is interesting - for the first time, a monster is used as part of the puzzle, luring it to a floor plate.


Followed by an absolutely torturous section with a load of floor plates, fireball shooters and armadillos that wander around and can trigger the shooters. It's impossible to predict when one of them will activate, leading to many reloads. Would be impossible to map without ASE.

Another mouth! This time, you have to enter a teleport but drop all your spellbooks and crosses first. It's easy to innocently miss some because you'll have picked up so much junk by now - entering the teleport with a forbidden item gives you a tight room of angry armadillos.

The 'correct' route is even worse. You have to fight another armadillo room, then pass this wall by repeatedly beating it but it hurts you every time in return. San-Raal died again here - it occurred to me only afterwards that I could have rested between swipes to restore health.


After that you have to fight Bing Bong from Inside Out. After all that buildup he's very easy but you'll be on your last legs. I didn't feel San-Raal's absence much as he couldn't do anything with no spellbook. And Bing Bong had this, which looks important.

I enjoy the idea that he took the time to have another plaque made with a generic message just in case anyone got past him.

I've found a couple of these now. They just look like regular shields on the ground, but they identify themselves as Polished Shield with a special icon. Are there medusae in this game?

I also confirmed something that had been nagging at me - right-clicking on the top few pixels of the back row's lower hand activates their other hand instead! There's something wrong with the hitbox on the interface, which can cause annoying misfires.

Various observations: Bing Bong is back with a vengeance (there are about twelve of him in this room alone), this looks ominous (and indeed damages you unavoidably when you step on it), and I spent ages wandering around before eventually having to look up that glass is breakable!


Q the master of the temple (actually Dran) also tried to trick me! He appears as Khelben and tells you to allow yourself to be killed by the next horde of monsters to avoid a powerful spell, trusting in the Amulet of Resurrection you've just picked up to bring you back.

I like how the interface handles this trickery - you pick up an "Amulet of Resurrection", but if you Improved Identify it, its description changes to simply "Bauble".
Ah, no - glass is only breakable when the game says it's breakable! That's very bad for a player, having to just experiment on all of them. Same goes for walls, running into them in case they're illusions. This is why this game is vastly more enjoyable with a walkthrough to hand.
The puzzle above is made of an interesting combination of plates... the west and east ones turn two teleporters on, and you throw items through them to hit more floor plates. One of the middle three can be pressed at a time, which I think alters the velocity on the other side.
Oh dear god what now

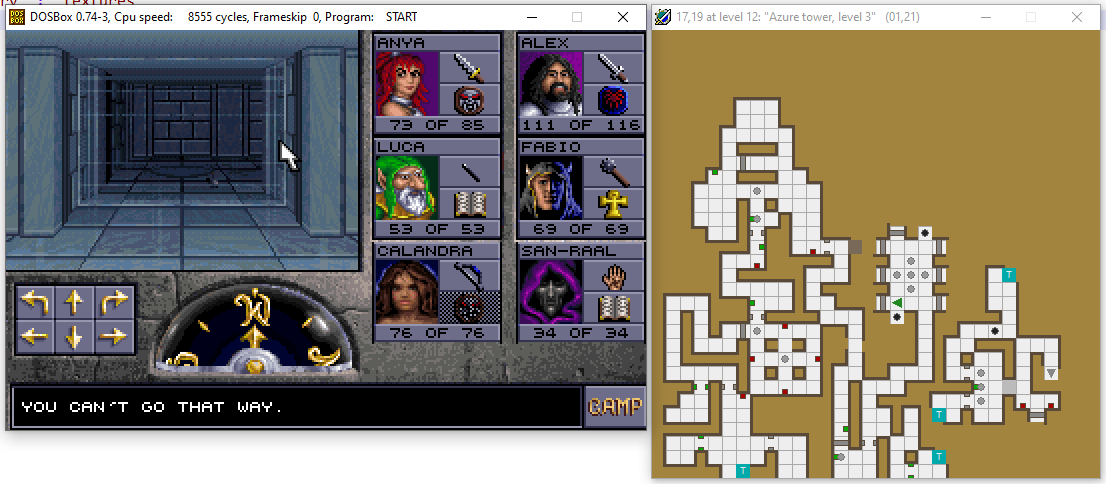
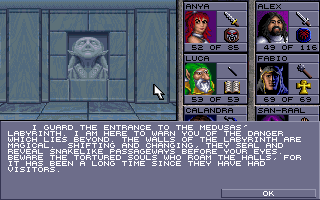
Sure enough, here I am at the aentrance to the Labaerinth of the Medusae. Actually the game calls them Medusas so forget all that. It says I need six polished shields and I've found only four - where's that walkthrough?

The first is here, beyond an undetectably illusory wall in an admitted suspicious sort of nothing floor that you arrive in when you first enter the tower. There are no enemies or puzzles here.

And the second one I missed is the fifth available - once again, just behind a wall if you happen to decide to walk into it. Either you're expected to just have the True Seeing spell on at all times now, or we were a lot more patient back then.

This also looks useful, though I'm not yet sure where.

Here we go! The statue will recognize you have the six shields only if there's one equipped for each character (even the characters who can't use shields). Then you have to hang them all up on the walls, then a door opens, then you have to take them all off and equip them again.

And here they are! There are tons of them in a vast confusing labyrinth, and they attack with a little "nyeeow" sound as their eyes glow. Fortunately the shields are doing their job so far!

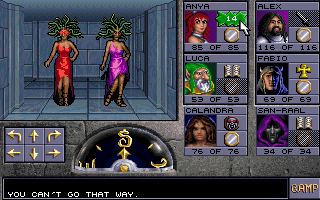
Here's an incomplete shot of the labyrinth - in the large middle section, a plaque advises you to "trap the ladies to weigh the plates down". You do this by luring them on, casting Hold Person, then running around to the other side and closing the door on them. It's frantic.

I was fortunate that Fabio happened to have a load of Hold Person spells, having not much else to do at that level. If I didn't have them there's no chance I'd have been able to rest - it's nonstop. It just feels good to finally fight a special enemy that isn't immune to magic.
I'm out! This time a secret passage is explicitly pointed out, though somewhat smugly. We have one casualty, we're now carrying around a statue of Callandra - I'm not sure how to reverse the process yet but I'm trusting the guide that it's possible.

I'm not out! This face needs a tooth and I don't have it! Back I go... perhaps I need to pay more attention to this map I picked up. The trouble is the walls of the labyrinth shift around and I can't identify a pattern.

I WAS SUPPOSED TO REMOVE THE TOOTH FROM A FACE ON THE WALL ABOUT THREE FLOORS AGO
I can't get back through the door opened by the trapped medusa puzzle and am now soft-locked. The good news is that I have a saved game from just before I went into the labyrinth. The better news is that I can't be bothered doing all that again.
That looks like a free slot in the backpack - that should do it.

Tooth.


Four inches after you get out of the labyrinth, there's an inviting floor plate. Stepping on it causes glass to appear around you (evidently the non-breakable type) and then Q appears to teleport you to another place in the tower.

On this level you're immediately attacked by giants who are unsuited for the tower's corridors. Fortunately they only have one physical attack, but unfortunately this attack is called Punch You In the Face Very Hard and damages all party members instead of just one at a time.

Despite allegedly being a prison, escaping from it is literally as easy as falling down a hole. In fact, the whole place is such a pain that my guide recommended doing this and then going all the way back to the ground floor to use the portal to get to the other end of the area.


(This meant that I had to go into the medusa labyrinth again after all, because the stone dagger I needed to teleport to the end of the giants level is hidden there and I missed it. I found medusas were no longer respawning enough to solve the floor plates room a second time.)
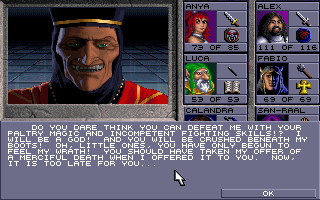
Getting to or skipping to the end of the giants level will get you to the King. He recites this at you which doesn't make any more sense with the knowledge of what happens later in the game, then vanishes. TCRF says he was originally meant to stab himself. tcrf.net/Advanced_Dunge…


The Blade is the last of the "Talon" items that have been scattered throughout the tower, along with the Eye from Bing Bong and the Hilt from the end of the labyrinth. The Crimson Key (I picked it up ages ago without realizing) lets you into a room downstairs with this carving.


Putting all three items into the carving causes the wall to melt and gives you the reassembled Talon, which is a sword that isn't quite as good numerically as the one I already have.

Behind the wall is the entrance to the last area of the game, the Crimson Tower which is gold! I have discovered a doughnut by poking at the tapestries.

These mages are a new enemy on this level. They don't come in tidal waves like the clerics lower down did, but they hit extremely hard with magic and they're fast. Best to attack them from a distance where you're able to dodge their projectile spells.

I haven't mentioned this before but resting takes actual time! It takes a second to pass five hours at a guess, during which your healer gains spells, casts them and regains them repeatedly. It doesn't actually bother me as much as it sounds it would from that description, oddly.

There's a weird puzzle here with an item called Sticky Paper (which you need to uncurse if you ever equip it). Using one crimson ring on a wall carving teleports you, then you have to put the paper on the ground to stop another one that's constantly running away from you.


In fact a ton of things are strange in this area, like they're afterthoughts that appear suddenly and then vanish again. I never worked out what this did, but found a secret passage to the next floor up by accidentally throwing it at a wall.

Apparently you can get rid of these green shimmering walls by casting Disintegrate on them. However, my mage Luca has 250,000 experience points to go before he reaches a high enough level to cast it, and hanging around to defeat 250+ more mages is infeasible at best.

That reminds me, it took me a while to work out how magic scrolls worked! When you get a mage scroll, you can either use it immediately, or use "Scribe Scrolls" in the menu to put it in a mage's spell memory and let them learn it for repeated use if they're a high enough level.
I first thought that "Scribe Scrolls" was the opposite, creating a scroll from a memorized spell for later use. And clerics don't have to do the same - they just gain all their available spells as they level and don't need to find them separately.
Also, I use the term "spell memory" instead of spellbook because the actual spellbook your mage carries doesn't seem to matter - the spells available are associated with the character themselves, and not the book that they happen to be carrying.
..."Give him a kiss"? This level's walls keep shifting and disappearing, and there are some very weird encounters. If this giant hadn't spent so much effort arranging his vital advice into rhyming couplets he might have been able to finish getting it across.

Another weird encounter with a half-giant half-tree. If you allow it to touch you he gives you this - looks like there is a coin in this game after all!


The exploration aspect of the game is behind us now and we're in the middle of a linear series of strange puzzles. This one has some dials on the wall that you use to destroy forcefields, revealing sockets.


I was stumped here until reading that they accept the three flame orbs found all the way back in the cursed dungeon! (There's also an alcove elsewhere that transforms items into flame orbs, I accidentally transformed Khelben's coin but then decided that was probably a bad idea.)

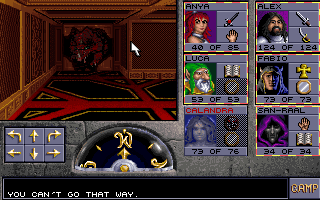
This leads you to another floor with EXTREMELY FAST STABSNAKES AAAAGH
I wonder what this Amulet of Death does.
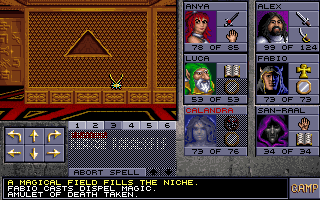
Silly of me to try, really

If you get close enough to use the crystal ball you get a cutscene showing... whatever these are. Even the game isn't sure. Maybe it becomes clearer in the third game?


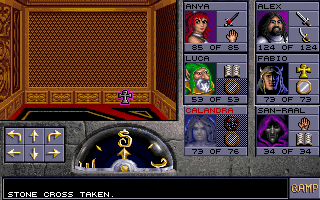
Ignoring certain death and going the other way gets you here. This mage drops a stone cross which you can never use because you can't get back to the portal from here! But TCRF confirms that it does actually work. tcrf.net/Advanced_Dunge…

And just up the stairs, at last, is Q, or "Dran Draggore" as he's called himself here. He gets ready to destroy us but first takes some time first to explain why this game is called Eye of the Beholder 2!


Dran pretty much behaves like an even faster mage enemy, and can be defeated the same way by just staying out the way of his projectile attacks and then diving in to wallop him. Then, unsurprisingly for a priest whose name is basically Draggy McDragonface...


Dran in dragon form is the fastest enemy yet and I would go so far as to say he's impossible without combat-dancing. This is the result of him landing a single attack. It's such a weird combat system, setting you up with statistics but then putting victory down to your footwork.

Resting is, of course, out of the question - uniquely, if you close a door on him, he will melt it and continue chasing you!
The dragon moves noticeably differently from other enemies, changing his patterns - instead of sidestepping like the others he'll often move forward, making you have to quickly spin around to face him. Movement in combat is definitely a very intentional part of beating him.
The guide said that only the Talon weapon I got earlier could be used to hurt him, but I didn't experience that - all the magic weapons I had equipped on my fighters were effective. After the medusa labyrinth I ditched the shields and started dual wielding for extra combat speed.
So it wasn't long before I got this cutscene where Khelben beams down, several seconds after he could have been useful. Seemingly the Lord Mage of Waterdeep overlooked the massive red flag that the temple was being run by a man whose name is an anagram of "Regard: Dragon".


I feel the word "assault" implies more resistance? This looks more like the temple's been left vacant after my party killed everyone in it and Khelben just sent three men in dressing gowns round in the morning. They cast a spell of LV6 Demolish Building and the temple fades away.


And that's everything. I've finally defeated another game that had been nagging me since the early 90s.


Nobody seemed to mind that I failed to rescue Amber, or that I delivered Callandra back to her sister as an overly decorative coat-stand. Again, a "Stone to Flesh" spell is available but I would have had to earn hundreds of thousands more experience points to get it.
Despite my misgivings, did I enjoy it? Sort of. Would I have enjoyed it without an automapper? Maybe, but ASE saved me several days at least. Would I have enjoyed it without a cluebook to refer to? No chance.
There are just so many things behind fake walls or tiny buttons that are easy to miss, so many items and locks that you need to keep track of, and at least a couple of dead ends that don't present themselves until hours after you had to do something to prevent them.
But still, here's the final screen - and if it works like before, some of these characters will carry over to the third game. Then it drops to DOS again. That's everything, now go away.


@threadreaderapp unroll
• • •
Missing some Tweet in this thread? You can try to
force a refresh