All right, let's make it three. #dosgaming "Summon the Heroes of Darkmoon" is surely one of the greatest main menu options ever put into a game. 

EOB3 was made by a different team from the first two games after Westwood left to do Lands of Lore instead, and was recoded on a new engine called Aesop. It's a bit of a shame that it starts off with quite such a "We couldn't afford any more artwork" feel, but it gets better.
As the game begins your party is in the tavern boring everyone to death by telling them for the thousandth time how you impaled Draggy McDragonface at the top of the Temple of Darkmoon, but then a mysterious stranger bursts in and asks you for a favour.

This screen is really all you need to know - we're to go to Myth Drannor and ditch the lich, and our messenger really needs his nails cut.

The heroes immediately accept the chance to have a new story to brag about, and the stranger zaps you off to the Myth Drannor suburbs. That's all the story you're getting.

The import process is bumpier than in EOB2. I'd assumed CHARCOPY was a mod tool that was bundled with wherever I got my copy years ago, but it's an official part of the game. I couldn't get it to run, but just copying in your FINAL.SAV from EOB2 and renaming it TRANSFER.SAV works


This time, I find myself underlevelled - my imported characters have about 150,000 experience points less than a EOB3 default one. However, I like them so I'm going to trust that my carried-forward equipment will make up the difference until I get far enough for it not to matter.


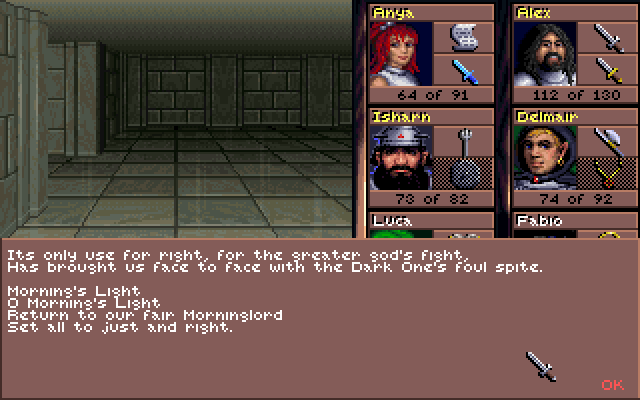
The interface has been totally redone and it looks more elegant and less chunky than before, with easier-to-select spells. Unfortunately it's gone over the top with a shine that moves up and down as you mouse over the menu options, which sounds nice but is really distracting.


And so we're starting the expedition in a forest graveyard, much like we did in EOB2! This time it's full of ghosts that, somewhat oddly, are defeated with physical weapons.


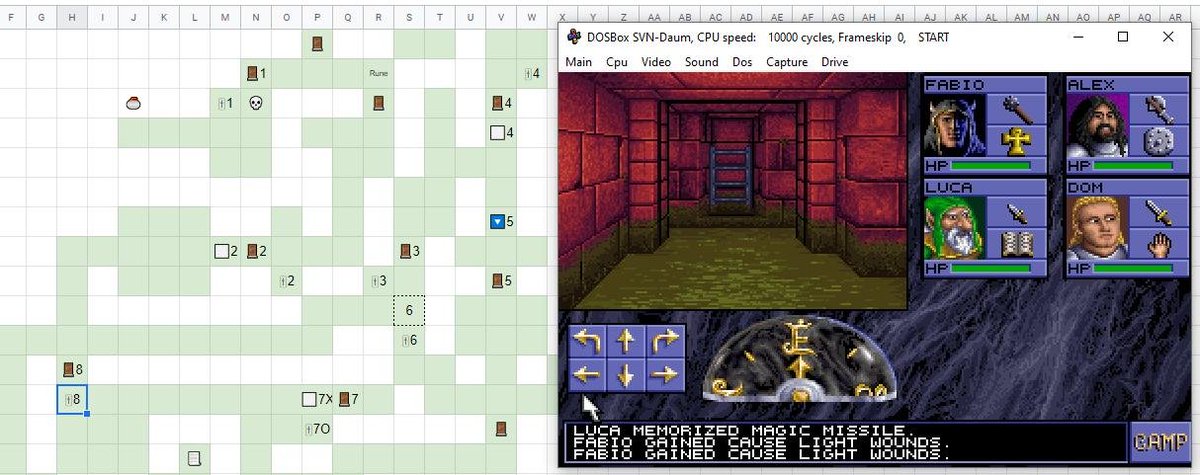
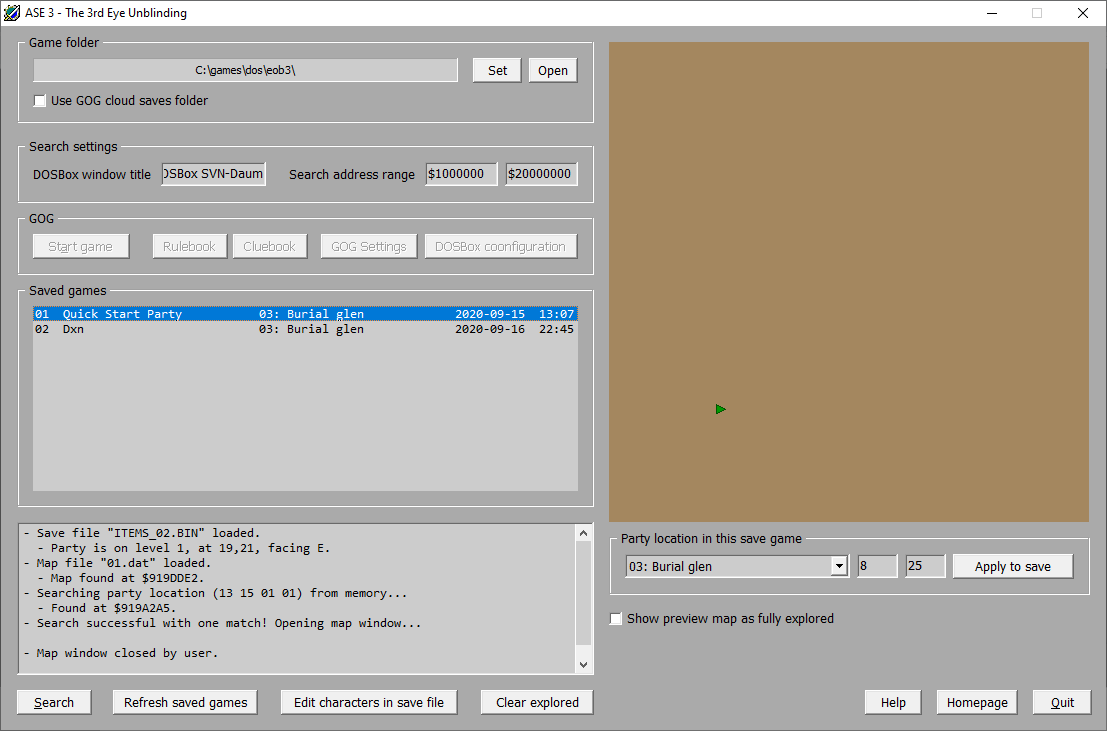
I want to acknowledge that this time I'm using The 3rd Eye Unblinding as an automapper! This is the sequel to All-Seeing Eye, and had to be rewritten because EOB3 used a completely new engine. It's flashier, but also a bit crashier because it isn't quite finished yet.
Standing close to some trees sometimes gives this message - you can find such an axe on the remains of some adventurer to the side of the woods. After finding that, you can go absolutely nuts on the forest and chop most of it down in minutes.


The forest is the biggest map that's ever been in an Eye of the Beholder game by a million miles - that is, maps are still 32x32, but the sheer amount of open space here is unequalled in the more maze-like maps from before. There's a path to the NE and a building in the middle.

I found one encounter in the forest, with some nice graphics but it seemed to be pretty inconsequential.


The building is a mausoleum! And it looks like the ideal place to hold an introductory dungeon crawl.


Inside the mausoleum, apparently built by the same people as the Darkmoon main floor, we're given four paths off the entranceway and a sign telling us what to do. So we're off.

There are some people who might call this ironic

Oh dear jesus christ what are you. Whatever this abomination is, it's very resistant to damage from physical attacks - my blows only manage 2 or 3 points each most of the time. The good news is, two games after I started, that I'm landing hits consistently on everything now.

Interesting moment here with a floor plate that make a nearby wall grow spikes and head towards you! This is new to the third game. (The sign on the wall next to the floor plate uses curiously modern English)

There's a noticeable amount of loading in EOB3, even in places like casting spells or when the game has to display a new monster for the first time. Apparently the Aesop engine wasn't in a fully complete state and they had to rush the game out without polishing it up completely.


There is actually some sort of fan patch for this, replacing the bundled "Aesop/16" with an "Aesop/32" engine that was later released by the developers, but the process of installing it was so mindboggling that I opted not to attempt it. vogons.org/viewtopic.php?…
I think I'm nearly at the end of this floor now. The arrangement is that in each quadrant, you have to find a Holy Key and then unlock a door then find a bone lever in the room beyond. I take from the clue that all of them have to be set down.


All of them are crawling with the ghost knights and have a couple of hellbeasts in them. NW has a room where you need to dodge fireballs. NE has the moving spike wall mentioned above, and a stuck lever that you need to use a Potion of Giant Strength to pull.
SW has... this corridor of floor plates, where you're meant to work out which plates to weigh down by trial and error as a fireball shoots at you when a wrong plate is moved, but it seemed to shoot a fireball at me no matter what I did.

After that there's a square in a set of passages which slams a wall down in front of you and surrounds you on the other three sides with the beasts, ensuring certain unhinted death. I just avoided it the next time as I couldn't see a way to plausibly escape in time.
And SE has... whatever this is. It's a set of levers and walls, and pulling some levers removes some of the walls and exposes more levers, depending on whether certain walls and/or levers are in a certain configuration. I cannot identify any kind of pattern to it at all.

And what's that clue "The sceptre, learned, physic must all follow this and come to dust"?! It's a Shakespeare misquotation unrelated to the "puzzle" (the cluebook and online FAQ offer no explanations, the FAQ just notes "This puzzle is horrible" and gives a move list)
It's also much, much more difficult to rest in this game even in apparently safe areas. Sometimes it almost behaves like Diablo or Etrian Odyssey where you have to gauge how far you can make it into a dungeon, then turn around and rest on the surface before going back in

I keep getting this "Character grows weaker!" message when I'm attacked by these red-eyed ghost knights. I hope it's not all that important

I know where to look for them now but I'm really not a fan of having to scour the walls for microscopic little buttons

Four bone-switches later, I'm finally on the second floor and... what?! Get lost! These zombies are pretty squishy but being hit by their attack is absolutely devastating to a ludicrous degree


The other monsters here are these completely black shadows - in keeping with the game's theme so far, they're not very strong but there are absolutely tidal waves of them.
There's a room here that releases poisonous gas when you enter, and the poison is much, much faster than any poison in EOB2. You have to fight through a pile of monsters to reach a switch that opens the door and un-gases you. The reward? Nothing, it's otherwise empty.

Resting on the second floor makes a new thief character appear! So he's the opposite of Insal from EOB2 (who I somehow missed for the first time ever during my playthrough). A new rule that polearms can be used from the second row means I now have three physical attackers!


Someone's spilled their Tate and Lyle golden syrup on the floor here. It limits you to one move roughly every four seconds and feels like the game's just having trouble keeping up. Fortunately, you can still attack at your normal speed.

It opened a pit underneath me and dumped me one floor down.

But this looks interesting, a tomb with a nameplate that I can detach and carry with me! Don't know what the sign means.


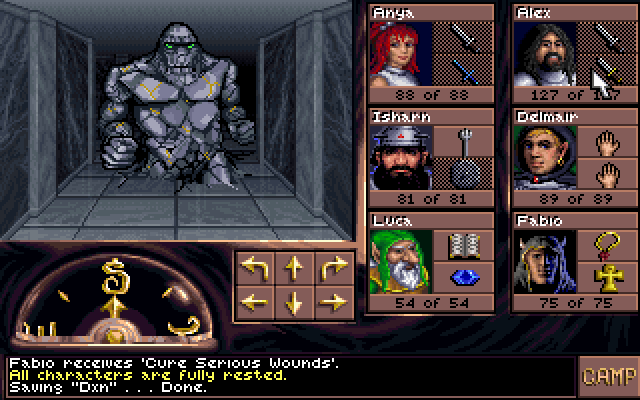
After a few more twists and turns, you open a door and meet Shredder.


Asking him to look down at his hands and observe that he can see the floor through them doesn't work - fortunately I had the tomb nameplate which did the trick. This makes him disappear and leave behind the Medallion of Friendship, which will let us out of the forest.


So I think that's this dungeon finished - but what does this switch do?

It stole all my items. I suppose I was warned.

The portals are back! I'm not sure what's happening in the middle here, though, and I don't have any of the required items.

This looks interesting

There's some sort of puzzle here but if there's a way to deduce it then I didn't notice and did it by accident. Somehow, you open three passageways from this room in turn and get a treasure from the end of each pathway.

I thought this was an elderly piece of cheese at first, but it's apparently a fragment of some rod that I need to put together. I see where this is going!

On putting all three fragments plus the orb into the slots, as if by magic...

...nothing happens.

Actually, was that plaque there before? I don't think it was - reading it just gave Fabio another level.


It also causes the rod to reform behind you, but using it does nothing to any of my characters. Apparently it's meant to be used to restore levels lost because of the monsters' attacks on this floor, but I avoided them all by careful use of the combat waltz and savescumming.


And with that, that's the first dungeon over with! Now it's time to go all the way back to the forest graveyard and look at that pathway up to the northeast that I saw ages ago.
It doesn't look very inviting, but the entrance is nicely drawn.

Immediately, the path through the forest introduces this weird thing - you can't move through these squares with the arrow keys as you would normally, you have to click on one of the three little tunnels. They'll transport you diagonally, or hop you two squares forward.

The medallion is used to... move trees out of the way. You'll get the message about "Maybe a stout axe will do the trick", but if you try it, the trees will "seem unusually resistant to axe blows". Using the medallion from your inventory makes the wall disappear.

Prince Fancypants here appears shortly into the forest path. Why not - I could do with another objective and someone who can stab reasonably well with a polearm.


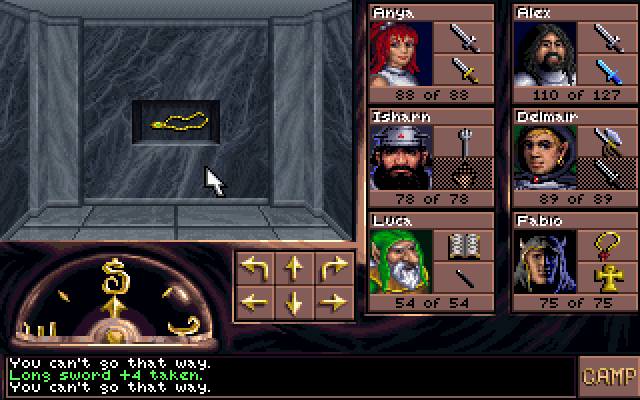
Previous EOBs had cursed weapons that you couldn't release once equipped without using Remove Curse. Oddly, EOB3 makes the rule apply to items in your backpack as well, defiantly taking up an inventory space until you uncurse and discard them.

Oh dear christ what is that. A brain on legs with three stacked mouths for parallel eating of adventurers! It also blinks in and out of visibility - the cluebook says there's a spell to cast so you can always see it, but it's not really a big deal if you just attack madly.

How rude

These minotaurs are wandering around as well. Because of my carried-forward equipment, the polearm rule and double swords at the front, I'm now actually having difficulty keeping up with attacking when a move is available, very unlike the start of EOB1 which was slow as treacle

Continuing my efforts to get around the inconvenience of actually playing the game, in addition to my WSAD->arrows hotkeys, I've now set up shortcuts to move the mouse to the weapon slots and right-click. This way I'm able to attack much more reliably with no misclicks
Again, such a weird hybrid of a game - it's based on dice rolls until it's suddenly more about your own mouse and keyboard dexterity!
The tree tiles make for an unusual pattern in the map, until you run into this transparent wizard. It occurs to me that without the automap there would be no way to tell where you're being teleported by the tree tiles and it would be nigh-impossible to map. The guide gives up.


He goes on and on and on and on.


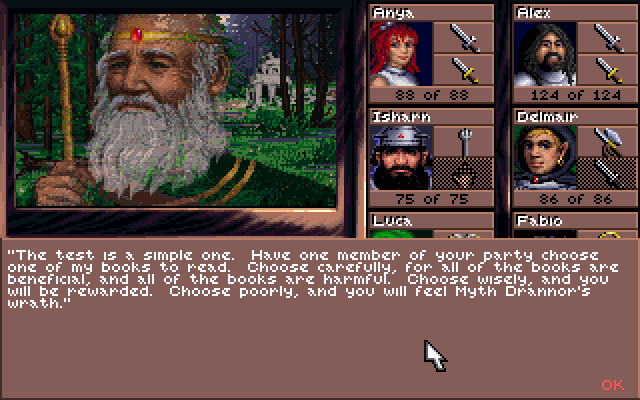
His "test" gets you to select a character and then pick from a list of books with names like "Arcane Deeds" - the right one depends on your char class. I wonder if the people who wrote Last Crusade could have any conception of how deeply these phrases would enter popular culture.


I got to try out the Rod of Restoration here, which puts you back to the level that you were on before any overly harsh penalties were applied to you.

But in the end I reloaded and gamed the system a bit - most people here are about 50,000 EXP away from their next level, but by choosing Delmair who had just got level 12, I get a ridiculous 3/4 of a million EXP bonus to reach level 13. The others won't be far behind.

It doesn't look much like it did in the brochure.


Very little time is spent on the streets of Myth Drannor before you stumble across the most tauntingly hesitant confirmation ever. To the left, a statue of two imps bonding over the discovery of a gigantic chicken drumstick.

The inside of the tower also looks pretty familiar, to be honest - at least the walls are new. There's a lot of art reuse throughout the games, but it's honestly pretty good - look at the way the marble floor appears to be reflective without having to match the walls!

We've become the Antiques Roadshow now

The inhabitants of this floor are angry magic ghosts and these sort of slug people. Neither has been particularly threatening against the six-hit combination attack.


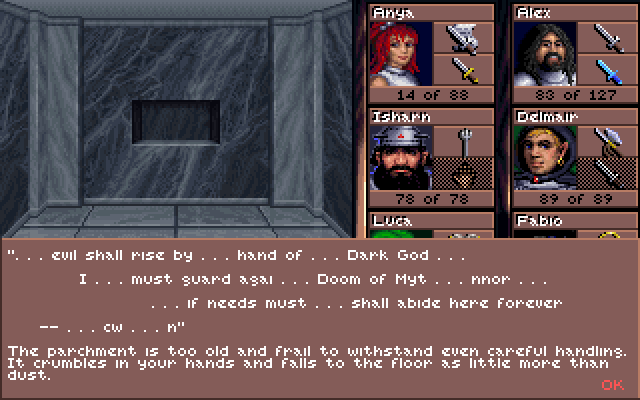
The little wall niches are drawn at the wrong height in this dungeon and it looks a bit unprofessional (or maybe the item is meant to look like it's floating there?) And why can't people write their secret plans on paper that doesn't fall apart in your hands like a wet meringue
These are next to teleporters - I tried casting fire and ice spells through a couple of them, but the puzzle was really much more straightforward and was about taking the teleports then walking into the teleport with the right picture to match the clue on the other side.


The guide mentions to look out for and learn this scroll as soon as possible because the game becomes impossible without it later.

Another potential party member shows up now that we've got to the second floor, but I'm forced to reject him due to more than six not being able to fit through the corridor at the same time.

FETCH ME A TRULY GIGANTIC POT OF BOILING WATER

The scorpions (which I thought were lobsters at first) are neutered if you have the Ring of Trobriand, which I picked up earlier and didn't pay a lot of attention to beyond thinking it was a weird name! It makes them unable to attack. Trobriand is a set of islands in New Guinea?

The next 2nd floor obstacle is a tidal wave of eerily clanking suits of armour, with some ropes to open and close doors to limit their movement. It's an area I'm calling "Five Knights at Freddy's".


The weapons laboratory makes me wish these rooms weren't just drawn all the same - the idea of a "rock +4" is hilarious. The pile also contains a spellbook that explodes when you pick it up, and this big apple of as-yet-unknown purpose.


You have to give up the Ring of Trobriand to progress further, and suddenly the scorpions aren't such a joke any more! I suppose this is what the Game Over screen looks like.


Without the ring the scorpions are extremely deadly. I think you're meant to run away at this part I died in, but with my new setup combined with a Haste spell I'm able to machine-gun out damage at such a rate that I can survive. Hardly using spells any more as they're slower.
Further on there's some sort of big cartoon magnet hidden in the walls that rips all the metal items out of your inventory. I nearly reloaded because of the massive pain that re-equipping would be, but then realized it was a good chance to dump a lot of accumulated junk.


I'm not sure when this happened, but my "Improved Invisibility" and "Remove Curse" spells have disappeared from the level 4 spell menu. I hope they come back.

Floor 3 offers this grappling hook and this puzzle. I was afraid it meant I had to leave my spellbook in a nearby niche to continue, but it really meant I had to equip the blue gem provided in a mage's hand to escape. Without one, you're irretrievably stuck in this corridor.


The enemies on this floor are these rock monsters. They're fairly slow but can absolutely devastate you if they're ever allowed a window to attack - they have the same multi-target punch-you-in-the-face attack as the Frost Giants did in EOB2.
Delmair has just been punched so hard he spontaneously turned into a tiger. What?

Okay, apparently Delmair is a were-tiger and I hadn't noticed due to him being in the second row and usually immune to physical attacks. This form gives you some allegedly good claw attacks, but they're useless from the second row and I have magic weapons up front.
The game is a bit meaner than EOB2, and that's saying something - if you click on a wall trap, your party's examination of it sets it off!

Something weird has been going on here.


Another new element on this floor - these grates that are locked with chains. The right key will open them - and uniquely doesn't cause the key to disintegrate! I'm not sure a grappling hook is the proper equipment to lift a grate - more like to forcibly board an enemy vessel.


Moving on for now, I instead found a room full of scrolls. I eagerly scribed them then discovered that they're level 9 spells that I can't memorize without another kazillion EXP. (Seriously, you can first get one at level 18, 3000K EXP and after two whole games I have 896K)


There are some green gems scattered around this floor. I don't think I was unreasonable to leave two gems here and then spend ages looking for the third. The real solution is there are only two - you put a gem in the left and right slots and then a key appears in the middle!

Oh, no chance - I've been fooled by this before.

I chose the right door and was hit in the face with a fireball.

In fact, both doors do that - just that the right door lets you continue onwards after you've extinguished yourself.
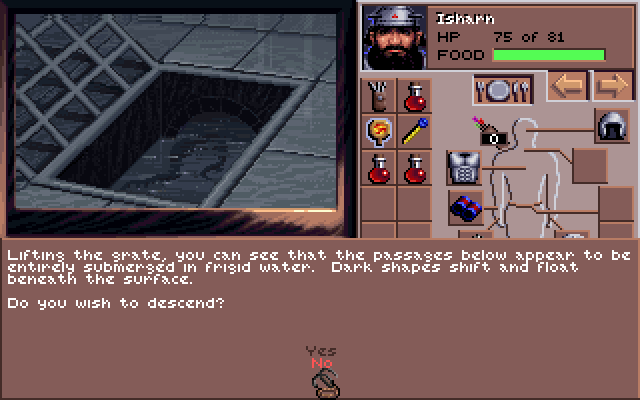
More story, if you're interested. After this I decided it was time to move on - one grate was locked with four different locks, so I considered this to be the most important one.


This floor is entirely full of water, which works strangely - you will lose a bit of health with every step, but can otherwise survive an unrealistically long time. You're prevented from resting because "the party would drown". Unsurprisingly I have found some scale mail.

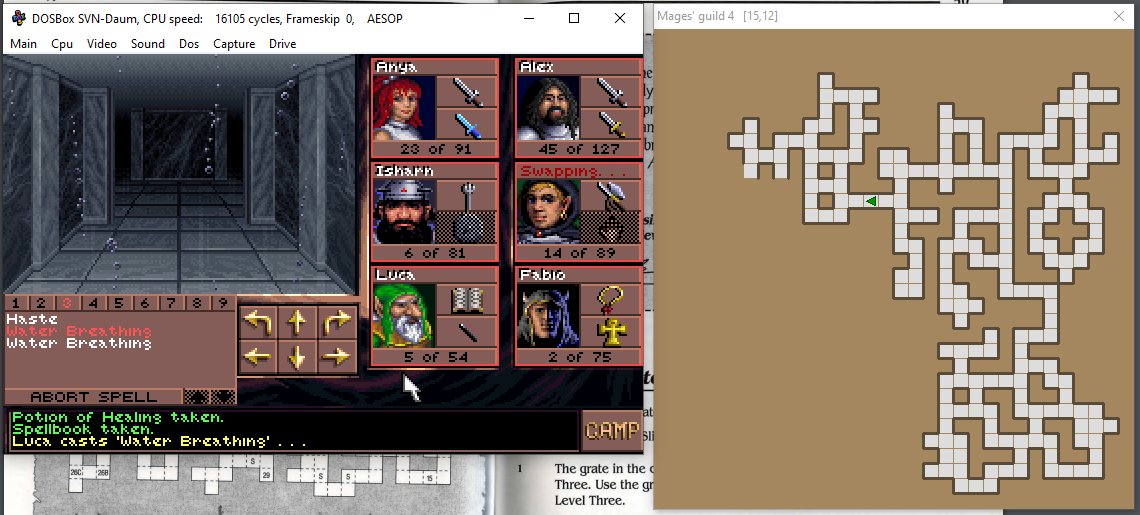
This is why the Water Breathing spell I found earlier is important - with it case, the health penalty doesn't happen and you can rest. However, it expires after resting so you need to make sure that you're always replenishing it!
The water level is full of whatever this is and whatever that is.


And the pixel-hunting for switches is trending even more firmly towards ludicrous - fortunately I haven't needed to find many of them so far to make progress.

I think this part is clever, though - the grates push you along corridors with underwater currents. You can find levers around the floor to reverse the flow and access new areas.

Here's where the game unveils its equivalent of the ant dungeon in EOB2! About halfway through the level, there's an area of the map where all magic expires. You have to proceed without the Water Breathing spell and live with losing a random amount of health per move.

The no-magic zone has roaming monsters as well, which you gradually have to clear out - if one hits you then you lose a lot of moves before death. You have to creep in and back, cast Water Breathing again once you're back at the entrance and rest then go in for another try.
Because almost all healing is normally done by magic, this section finally lets you use all the potions you've been accumulating for three games. It's odd that in this scenario, the introduction of more fluid is the solution to your drowning problems.
Luca is in particular difficulty here because of his low HP and his unrevivability, being an elf. That's yet another awkward D&D rule that the game doesn't tell you. However, this artefact on the ground comes in useful once you've got most of the way through.

It's an interesting mechanic that changes things a bit, but it's not really a good one.
There's a ton of junk down here. The trouble with non-disintegrating keys is that they start to take up space - I now have the greatest number of disparate keys I've possessed in the series.

So the second line of this is simple enough, but what about the first? The water from the grates push you away from a nearby door. I thought I was proud of working out that I needed to cast Wall of Force... but it just said "The magic fails" when I tried.


So I had to go back to the guide again. The solution... you do have to cast Wall of Force, but the spell only works in this one specific square. Humph. Well, at least the ruby works once you can get to the door.


The door leads to an apparently featureless area The pixel-hunt for switches is just rubbish, frankly

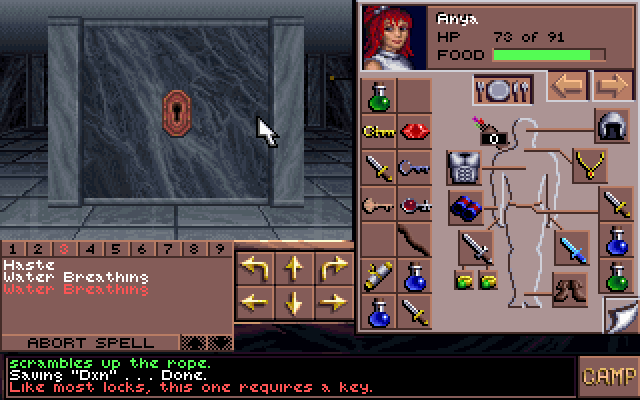
Then you're faced with another door (they're not really drawn well, more like bits of wall that are offset from the others - not sure if having them disguised is intentional. The ruby doesn't work here, but putting the Crimson Key in the non-keyhole niche does. I don't like this


And finally, you get out of the water-filled maze and are back on floor 3 of the tower. Let's never go there again.


Immediately, you're faced with a square with darts flying around and four keyholes. You have to quickly use all the keys you've found in them, and... I don't have a key that first one of them. Oh no, was I meant to pick up that crimson key once I used it?
Bfglhblbhgblub

No! That doesn't fit either. I've missed a key somewhere in the water maze, or even earlier. Arse arse arse. Time to traipse back.

Oh, Alex had it

More rock monsters through the door, and they keep respawning. Their powerful biff attack hurts multiple characters a lot, and annoyingly it still lands if you step away before the hit as long as they started the animation when you were next to them.

If not for my rapid-fire bashing hotkeys, this part would have been immensely tiresome - either from the fights multiplying up to take much longer (there are seriously about 12 of them) or having to cast spells and retreat again to rest.
Thanks to the new stricter rest rules, it's difficult to find a space to recharge anywhere on this floor - absurdly it's safer to slink down the grate again, cast Water Breathing and have a submarine nap before emerging again.
Here's an interesting if potentially confusing puzzle, though! You find 8 rings here with various + or - levels of protection, and you have to put them in the niches so that both sides add up to the same value. There's no instruction to do this, beyond the scales in the middle

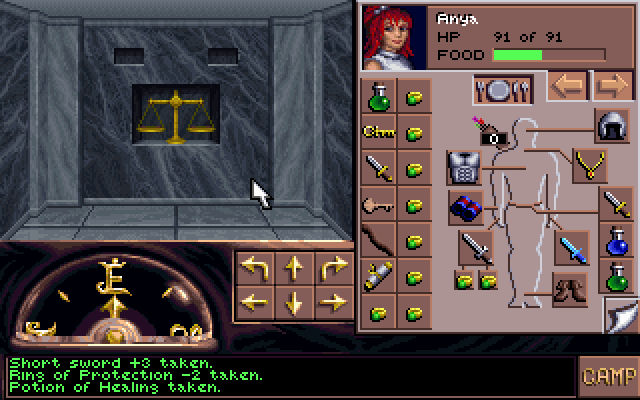
It would be a lot better if any of the rings had inventory icons that were different in any way whatsoever - the easiest way to do the puzzle is to sort them by ascending value in your inventory first and then work it out from there.

And with that done, the lich we were sent to destroy appears! We have a brief conversation, during which he honestly raises quite a good point. Toby Fox would be proud.


He fights by making a ton of clones of himself and beating you up from four sides at once. Mercifully his paralysis spell is rubbish and lasts only a few seconds (unlike any lowly monster in EOB2), and it's quite easy to hack your way out. Even his real self is dead easy.


All right, we might have made a slight mistake. A witch type person teleports in, grabs a book of some importance and vanishes - apparently she'll be the real villain of the game. If Acwellen's surprising patheticness as a boss was intentional storytelling... well done.


We've been teleported out to the ruined town again, the second dungeon (or third if you count the forest?) now behind us!

I don't like the look of these things but they die easily enough. They're worse from the front.


Found a couple of scrolls of Remove Curse and Improved Invisibility! I'm still not sure what happened to them in my menu, but I'm glad to have them back.

I really regret not taking this character, but he's just too low-level compared to my current cleric. Why are all the starting characters just boring humans?

Well, humans and the other D&D races, which are short human, short human with beard, thin human, etc
I have discovered the existence of a poorly signposted "All Attack" feature, rendering my previous hotkey trickery useless. Still, it was fun while it lasted.

These statues are dotted around this section of the city. Aren't you Insal from Eye of the Beholder 2?


Another character that I have to skip. It's a shame that you have so few openings in your party, and also that so few party configurations are really viable.

There are several areas in the ruined city that are niches absolutely stuffed full of scrolls and I have far too many in my inventory by now. Like I mentioned far above, you can scribe them into your spellbook but I need 2 million more experience points to use the Level 9 ones.


This diamond (obviously reusing the stone gem sprite) could come in useful, though.

The centre of this area has a unique door labelled "ICE CHAMBERS" and a keyhole that I don't have the key for.

The key is in this niche in the other half of the city, which I skipped over before because trying to reach into it hurt me - all you have to do is cast Dispel Magic while in front of it and you can haul them all out.


On the other side of the door is another niche and this clue. The solution is to interpret "ice" in a rather hip-hop way even though it won't be invented for another few hundred years


Jesus christ. Yes, more than you can imagine.

This one wants a wand of Fear. I suppose the "child" part refers to giving it to the statues?

Using this phrase more than once a game is pushing it. You're meant to have to select a reward from one of three alcoves and the others then grow a magic barrier around them, but you can just dispel the barriers like before and take all three rewards.


Despite being a very large map, the city really doesn't have enough in it to justify its size - it would be great if it were a bit more detailed and all the walls didn't look the same, but perhaps that would have taken too much RAM in those days. Let's go to the next dungeon.


The graphic reuse is pretty disappointing, honestly. This set of graphics from EOB2 was already used in the mausoleum earlier in the game!

The temple has four altars with plaques next to them that cryptically ask for certain things. This first one appears to want some food, but I haven't needed rations for two and a half games and I never kept them around. Will have to retrace my steps if this is important

It also contains a lot of these shadows. I suppose having monsters that are just silhouettes does wonders for the art budget.

If you ignore this warning a creepypasta happens. Going down the stairs takes you to a blank dark room that can't be escaped no matter how far you walk in any direction, while laughter from the witch monsters earlier in the game repeatedly plays. You are now softlocked. Wankers


This happens because of three altars nearby, which all contain black inverted holy symbols. I presume I have to replace them with real ones. The only two problems are: I don't have any spare holy symbols, and I don't HAVE any spare holy symbols.

On top of that, these... piles of mud have started to spawn in. They're even worse than the gelatinous cubes from EOB2 because they consume your equipment when you attack them, not if you give them a chance to attack. Magic from a distance is really the only option.

Let's see what I can do with the altars further south that were asking for items. I thought this one was pretty clearly asking for a potion, but it didn't work.


This one says something about leaving the sword behind. Seems like a great chance to finally get rid of the cursed sword that's been stuck to my backpack for the last several hours.

This opened the way to a room which contained the Holy Grail and... a statue of Lathander in the middle of getting out of the bath. The flavour text calls it a "rather revealing statue" - do these two pixels make up the earliest rendering of a penis in a mainstream DOS game?


The grail is the answer to the altar that wanted water. The sprite doesn't even display in anywhere near the right place. Get it together, SSI!

Another one wants you to put incense (found in the holy grail room) into a receptacle here. I've just realized the clues almost refer to the Four Horsemen of the Apocalypse, although oddly they went with FAMINE, WAR, PESTILENCE and DROUGHT. I'm still pending a solution to FAMINE

Oh good, more keys.

And another character I have to turn away! If you decline her joining the party she immediately dies. However, you can say "yes" and then cancel to avoid the cutscene and the guilt.


At least there's no mistaking where this key goes.

A suspicious loot pile of exactly four shields! And casting Improved Identify on them reveals that they are... shields!

They get used on this puzzle on the other side of the floor, where pressure plates shoot fireballs from the holes - I thought I had to equip them to avoid damage, but for some reason the solution is to put the shields themselves on the plates.


I'm not sure I like where this map is going

Okay, long story short - you can collect three holy symbols (but you can use your cleric's one if you feel like making him useless for the rest of the game) by completing actions around the floor. Once they're on the altars instead of the black ones, the stairs change to go up.

This is the really scary part of the game where you encounter Noel Edmonds

Waaaagh! (Despite their terrifying appearance, the skullsnakes and slime monsters are both pushovers - the slime heaps are resitant to physical damage but neither of them have done my party any major injuries yet.)

Not sure what this means

I hadn't noticed this before, but you can heal yourself a limitless number of times by gazing at Lathander's holy penis anywhere in the temple. This makes an already easy floor even more bafflingly easy

I now have 23 arrows and absolutely nobody to use them.

I'm beginning to feel why EOB3 was relatively poorly received... this last dungeon is much too big for its content. Here's a map from the cluebook - look at the wings below the area with squares 17/18/19, there are three items (SH is a monster) and the rest is just a nothing maze

The chequered area is a maze where every move will rotate you 90 or 180 degrees! ASE3 in the background is a godsend, and I think I would have found this game far more annoying if I didn't have it - the open areas and lack of landmarks throughout the game mean very hard mapping
I thought that this plaque would indicate some sort of poison protection was needed on this floor, but it didn't amount to anything.

JESUS CHRIST WHAT ARE YOU

In an unusual choice, reading any plaques on this level will damage you. Supremely pointless and annoying

Another new enemy, these miserable ghosts that moan incessantly whenever they're anywhere within a square mile

Okay, to sum up: Find four copper keys to let you into some rooms, pick up these red rocks (Embers of Hope), put them in the beacons, gather the four Cups of Good Cheer you get as rewards, get into the room in the centre of the floor. Occasional puzzles but mostly busywork


The middle room contains this spectacular replenishment (but its square is totally blank on the normal view - I wonder why so many dungeon crawlers did this? It even carried forward into Etrian Odyssey where no square looked special and you had to mark events manually on the map)


Okay, let's finish this. Lighting the beacons also quietly makes this Key of Faith appear on an altar. There's quite a lot of this in the game - doing something somewhere will quietly make something happen at the other end of the map. The walkthrough is indispensable just now

This teleporter seems useless, as it just teleports you a couple of squares away. But what's this hint? "Faith must go before all good souls". Therefore, throw the Key of Faith through before you step into it, and you're transported to the final floor!


You start stuck in a room with unopenable doors. Dispel Magic is the answer here (I really don't know if I would have thought to try this without going through absolutely every possible action to brute force it)

Wolf enemies are back! The shadow hounds are a really rubbish palette swap of the other dogs/wolves. There are about a hundred thousand of them on this floor but they vanish very quickly at the slightest nudge from a sword.

And skeleton warriors! Nice to see you back again. These are a lot more difficult in contrast - they're able to cast fireballs at you which can result in a hard time.

There's an opportunity here to take a new kind of weapon, a hammer that returns when thrown, but I didn't fancy it.

What's this? Should I try to touch it?

I shouldn't have touched it.

All right, so on this floor you have to drink from a basin on the wall and hurry around to a room that otherwise teleports you away when you approach - with the blessing you can get in and take a gnarled twig called the Staff of Life.


Touching the... thing here with the Staff of Life makes it disappear, and once again, an apparently unrelated wall moves elsewhere, allowing access to another door...

...which accepts this Sun Mask that I found hanging around on a wall (shame, it was a +3 shield). It then allows access to a teleport, which takes us to...

... a cutscene and a complete lack of surprise!


The final boss is so rubbish he's barely worth mentioning. You get stuck in a room with him, two skeletons and two wolves. After getting rid of the enemies, you can poke him a couple of times and he'll vanish. Dran from EOB2 took about eight times longer.

Please keep your legs together, Lathander


And that's the end! You get some nice artwork as a reward. Of the very first party I started in EOB that was named after the members of Rhapsody of Fire, three members remain: Alex, Luca and Fabio. This makes them a lot more cohesive than the real thing.


That's all, now go away.

@threadreaderapp unroll
• • •
Missing some Tweet in this thread? You can try to
force a refresh