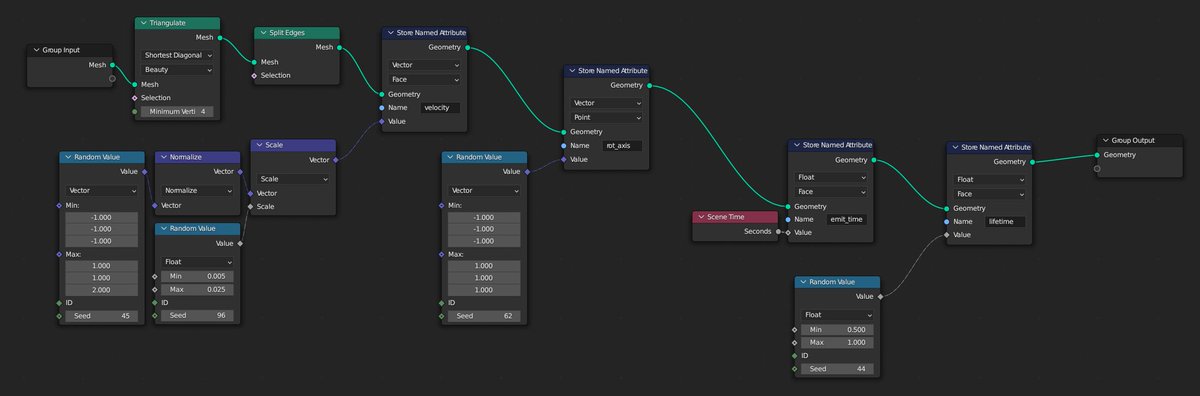
fuck I capitalized the G
I'm die, thank you forever
I wasn't sure whether to do the <name of the thing where the anime drawings turn into cubes> cubes or just generic ground-pound, so it's sort of half way in between
A tip if you're using it is to animate both scale and position of the empty. And tweak the rotation/scale colour ramp curves in the nodes to fit your style as well :)
e.g. here i pushed the noise scale ramp further outwards, so the middle part is flat and the edges shoot up (bottom ramp). Then so the middle isn't too flat i added more rotation in the middle (top ramp) as well. There are lots of bits to play around with!
There's also this map-range node in the middle which i forgot to plug into the modifier inputs. This is what controls how much things are pushed downwards (arguably the most important part lmao), so definitely tweak that as well
I have no self-control
Since a couple people asked, it works with any way of chopping up a mesh, doesn't have to be cubes. I just happened to use a grid mesh with some distortion as the base, but you can use whatever.
• • •
Missing some Tweet in this thread? You can try to
force a refresh
I've been very stressed and not blendering much, but I had a random idea for how to do fake caustics with geometry nodes 🤔
I'm sure this has been thought of before lol, but I thought it was a neat way of doing it:
basically, just displace the water surface mesh by the refracted normals of the light source, and then you can compare the face area to figure out how bright the spot should be:
In theory it should actually be pretty physically accurate, but probably it's not as simple as just dividing the face area by itself to get properly numerical results out, i guess
here's some random thing I made ages ago for doing laser shots through water
never got around to making it animate in a good way though :/
here's how it looks in the viewport - all it's doing is twisting the mesh, but it also instances some spheres on it which allow it to maintain volume and "blobbiness", without them it looks kinda flat (last 2 image comparison)
Here's the nodes for the shader as well - I annotated it a tiny bit. The two vectors going off to the right in the geo nodes screenshot only go to the group output so they can be fed into the shader
So, there's a concept I was thinking of for a while and I couldn't seem to find any existing examples...
How useful from a modelers perspective would "sparse" UV mapping be? What I'm envisioning is something that removes the [0-1] UV bounds, and instead of packing tightly you -
- do your UV unwrapping *and all your texture work* on an open, "unconstrained" area, without any concern for wasted space in between - think like PureRef board. The end result could be backed by a single texture, but you can freely change the texel density of each island easily.
Basically by doing any texture paint etc. on a (theoretically infinite) virtual texture, but at export the UV's get automatically packed, taking whatever parts of this virtual texture they cover along with them. Instead of working in that tiny 0-1 box.
Back home, realised I hadn't used blender in almost a full month :/
still thinking about Girls' Last tour...
wanted to do some stuff with the custom nodes to show them off a bit more, didn't have too long to work on this (maybe 1 hour? 1.5? something like that)
original reference image:
I used 2 curvature nodes, one for "AO" and one for the edge stuff. More obvious if i show just shading, then one, then the other, then both: