Back to Operation Charnwood, this time to look at the defensive positions standing in the way of the 59th Staffordshire Division. In particular the well planned, placed and sighted positions at Galmanche. This position could be classed as a classic hedgehog defence. 

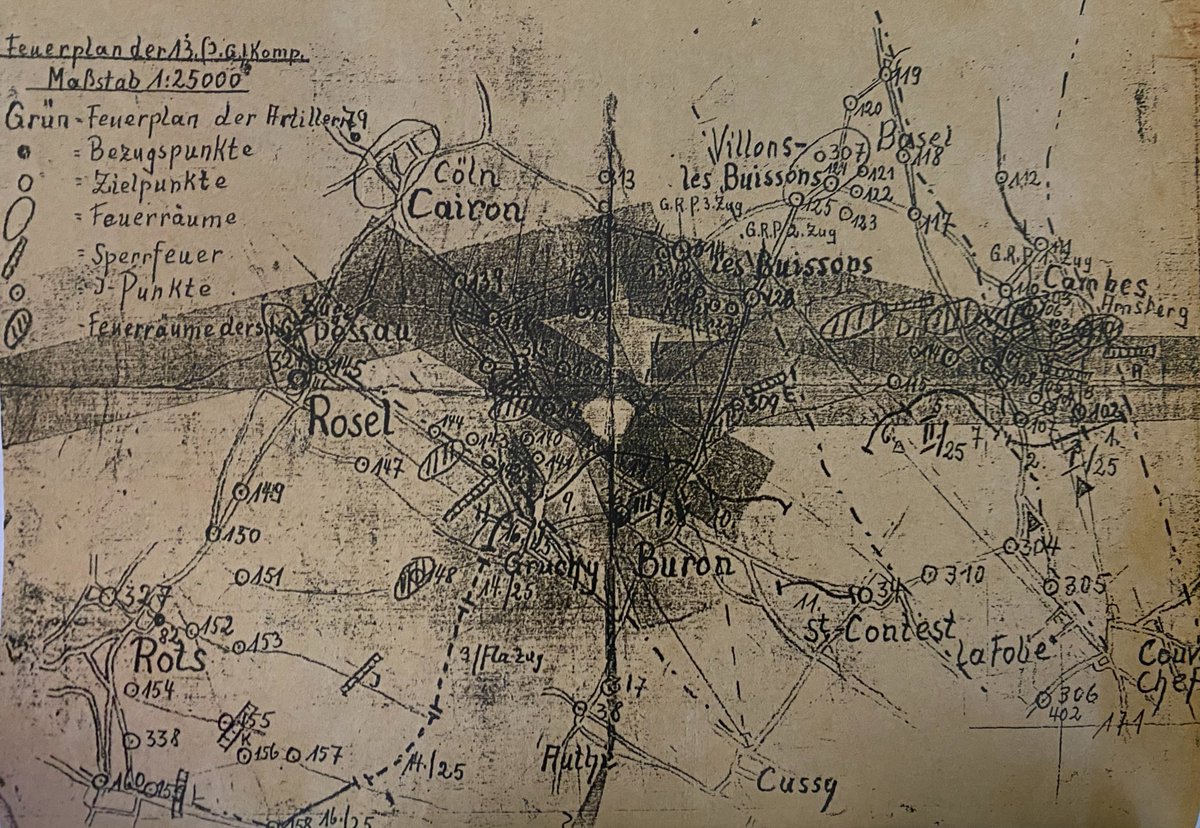
Within days of the landings, the Germans looked to bolster their units and defence around Caen. The 12. SS-Panzerdivision "Hitlerjugend" began to move into the villages north of Caen from the 7 June '44. Map- Panzerdivision Hitlerjugend Volume II, Stephen Cazenave

They would hold these positions for nearly four weeks before the British and Canadians launched Op Charnwood on the 8 July '44. Map- The 12th SS Volume one, Hubert Meyer

Defending the area around the village of Cambes and Galmanche would be the men of the battalions of the I/25 and II/25 SS Panzergrenadier Regiment. Map- Panzerdivision Hitlerjugend Volume II, Stephen Cazenave
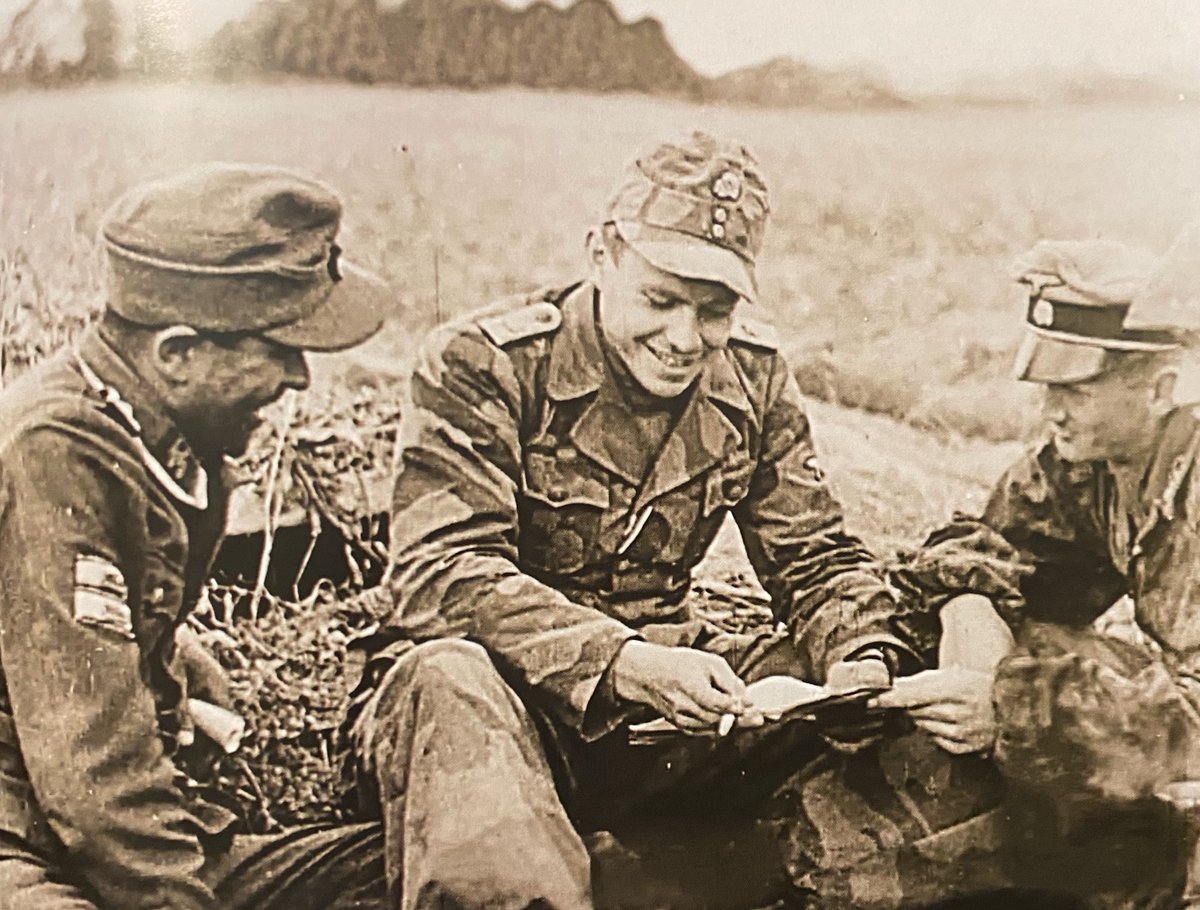
To give an idea on equipment and manpower. the I/25 Pzrgren Regt on the 6 July '44 had-
12 officer, 58 nco's, 411 or
41 Light MG's, 13 Heavy MG's, 12 81mm mortars, 2 75mm guns.
Photo- Panzerdivision Hitlerjugend Volume II, Stephen Cazenave
Stats- The 12th SS V1, Meyer
12 officer, 58 nco's, 411 or
41 Light MG's, 13 Heavy MG's, 12 81mm mortars, 2 75mm guns.
Photo- Panzerdivision Hitlerjugend Volume II, Stephen Cazenave
Stats- The 12th SS V1, Meyer
We begin to now look at the land where the II/25, with similar numbers in manpower and equipment would defend the area south of Cambes. Map- remonterletemps.ign.fr
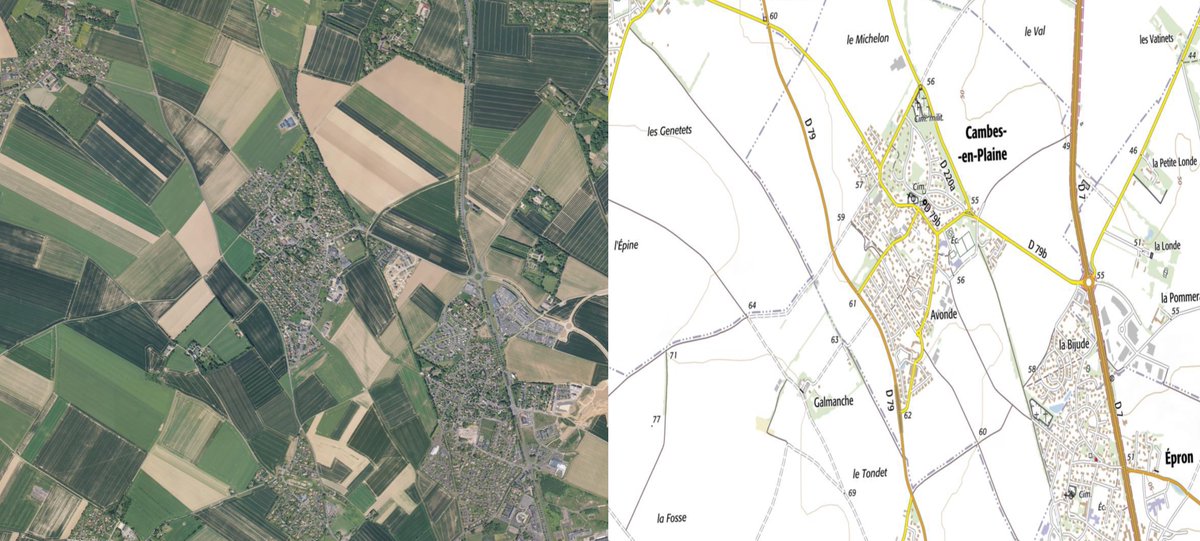
Comparing Cambes and Galmanche to photograph of 1950-65, you can see the village of Cambes has vastly expanded but Galmanche has remained nearly identical to how it was on 8 July '44. Map- remonterletemps.ign.fr
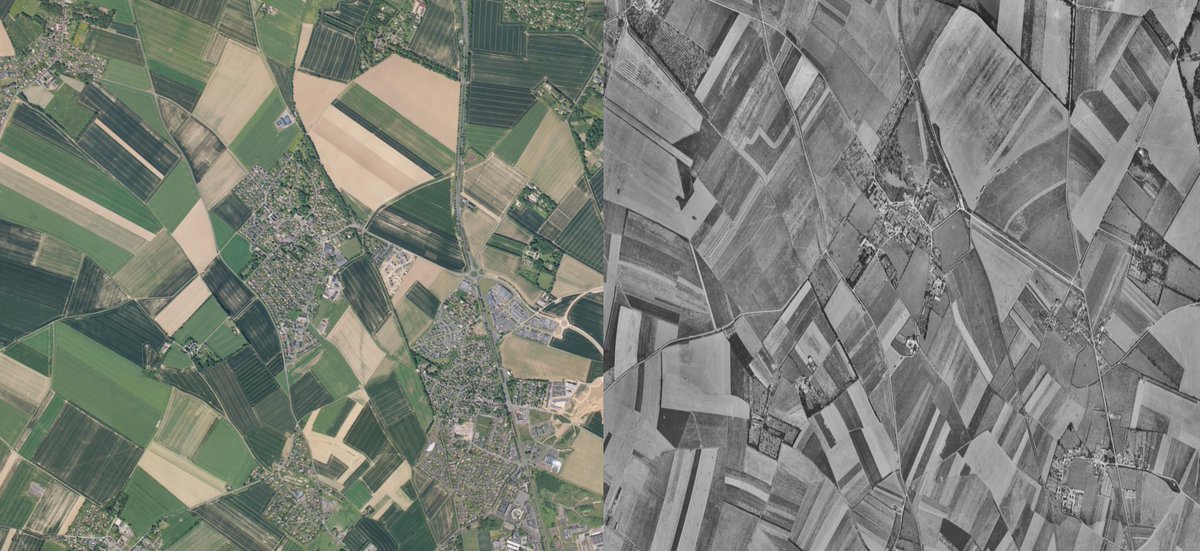
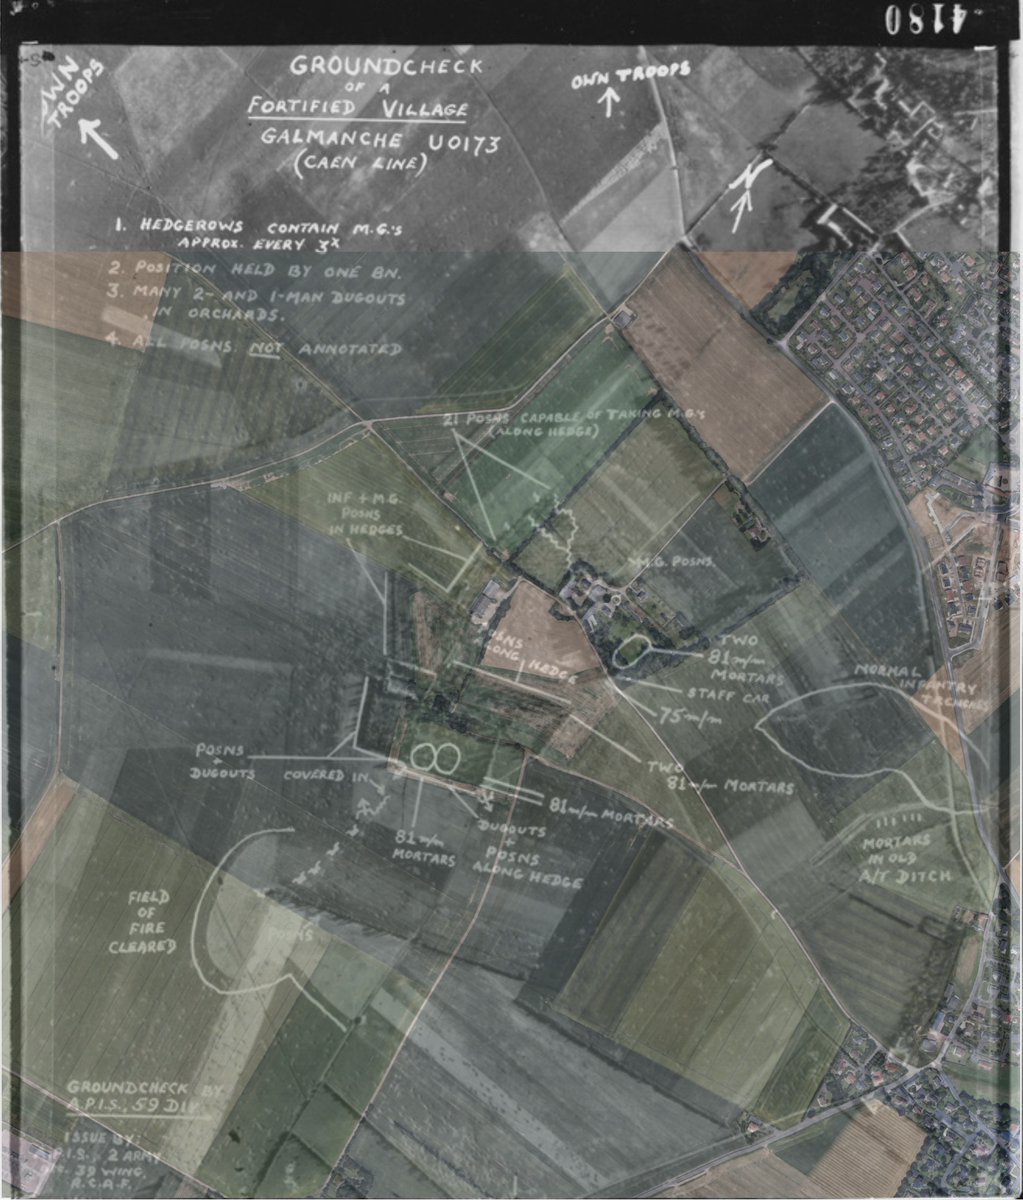
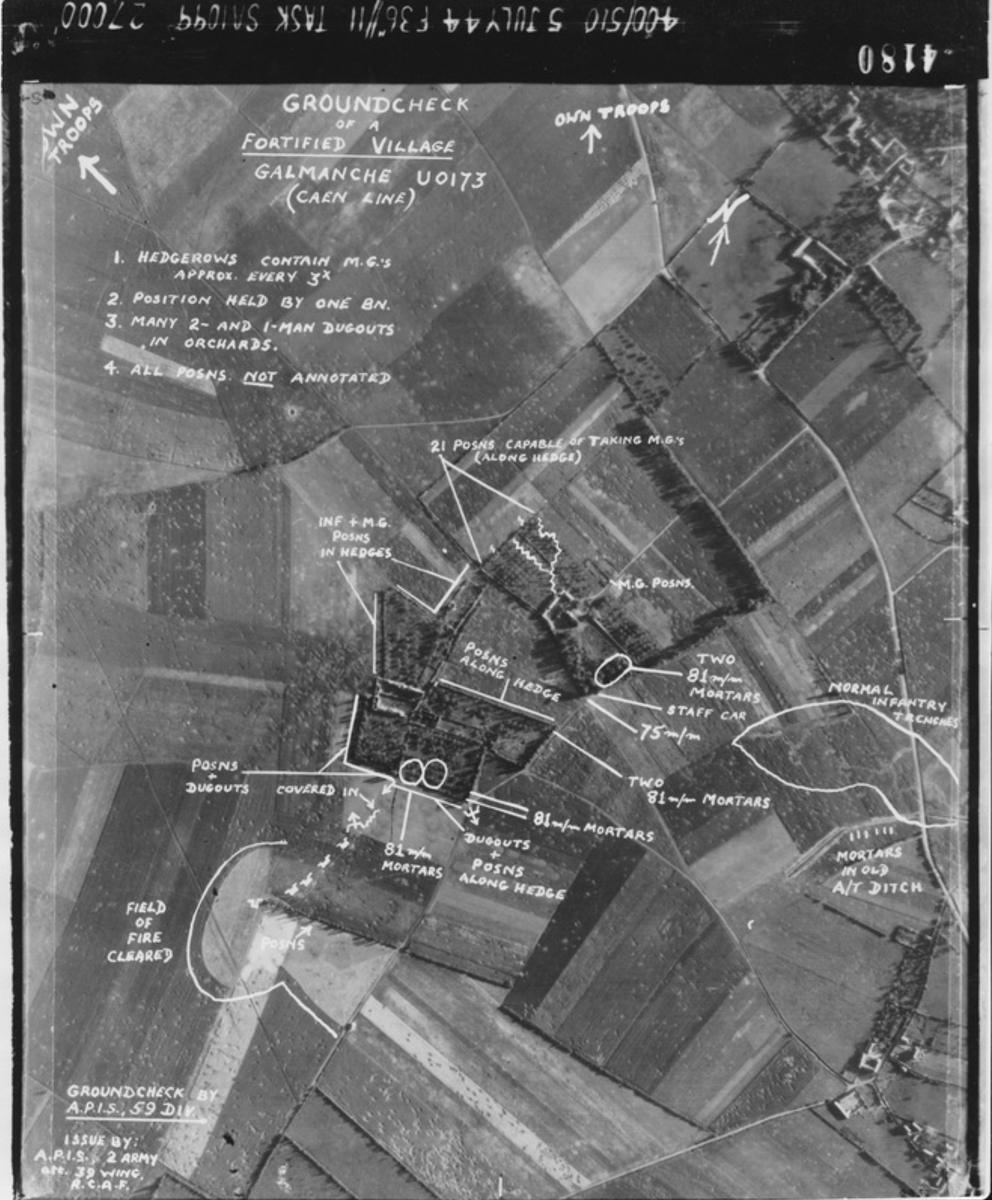
Aerial reconnaissance prior to Operation Charnwood had tried to pinpoint what would be in waiting for men of the British 59th Staffordshire Division. Galmanche would be directly assaulted from the north whilst other units flanked either side pressing for other villages.

This recent google satellite view shows the area around Galmanche has not really changed. Field boundaries have changed and hedgerows gone in some places. To the north, it is 480 meters of open ground to the edge of Cambes Village.
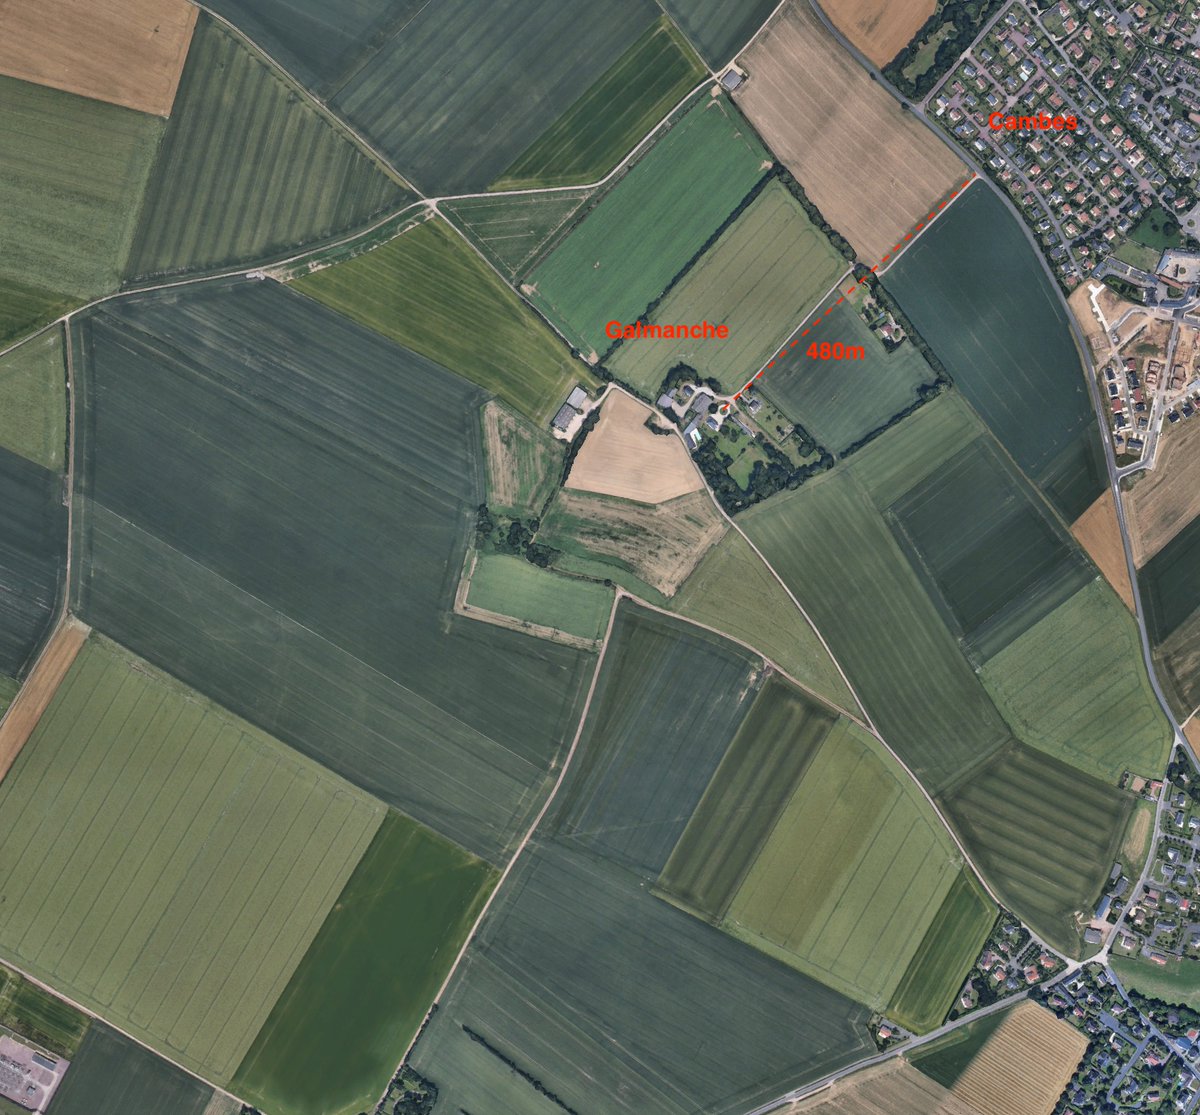
Here is an overlay of the two which makes clear the urban sprawl from Cambes but little changes around Galmanche. You can walk from Cambes to Galmanche along a farm track which has public access.
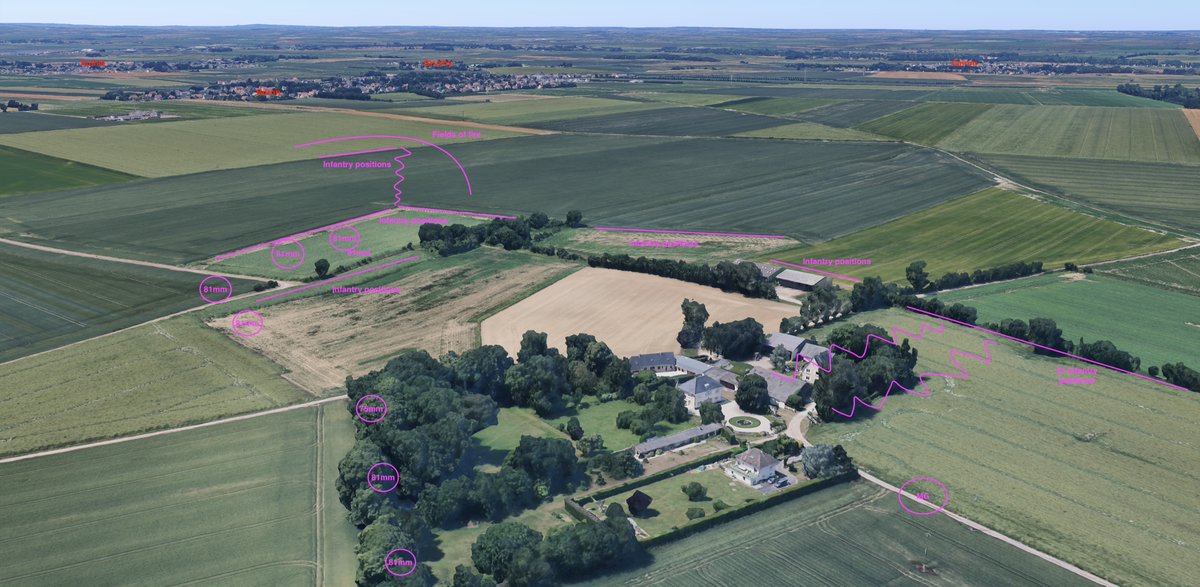
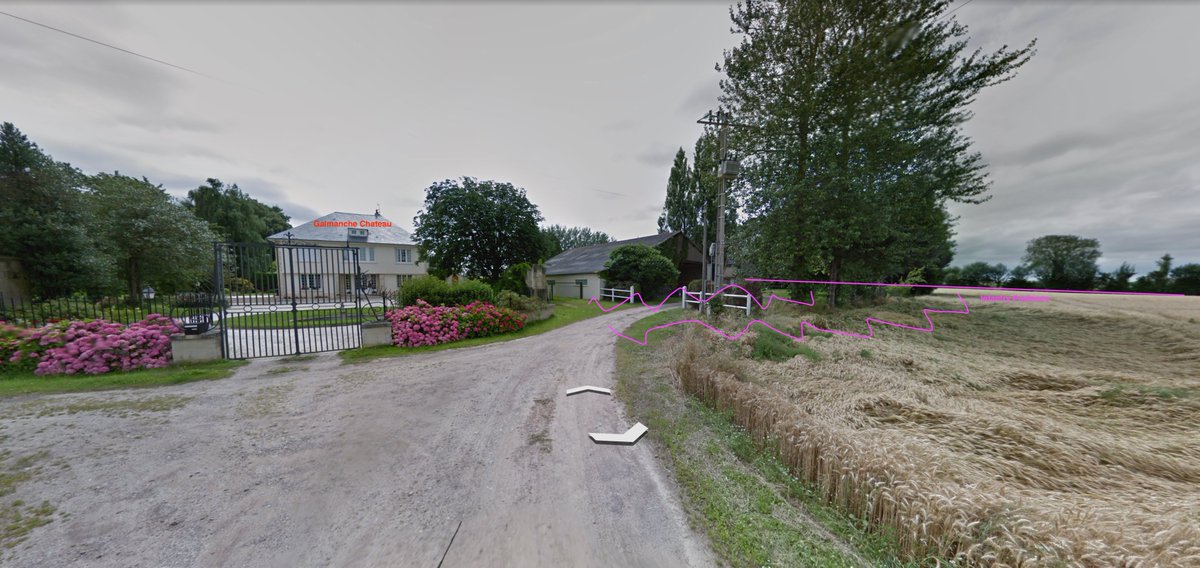
Lets start to look at the landscape. The German positions are marked in purple, I have not marked the British positions. This will be covered in another thread. This is the view north towards Cambes. Note the MG positions at the front of the Chateau with good fields of fire.

North East, the defensive position move further away towards where the I/25 Pzrgren Regt were positioned. An anti tank ditch cutting the road from Cambes to Malon with mortar positions hidden within. Infantry positions covering the road.
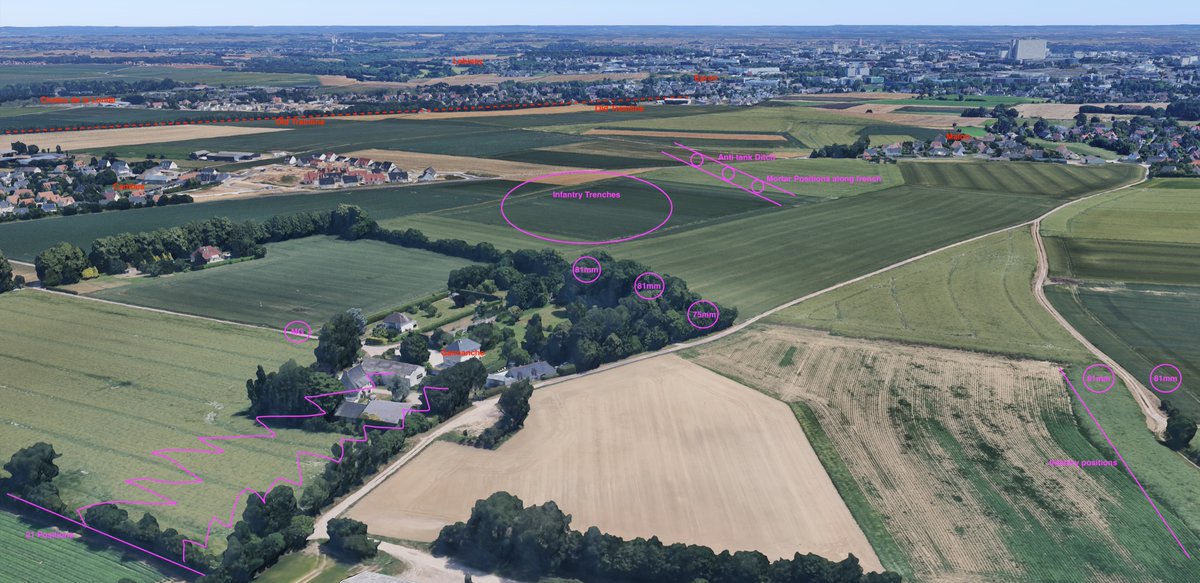
South towards St Contest. The mortar positions able to cover the eastern side of Galmanche supported by a 75mm gun. Further to the south, multiple mortars with potentially 360 degree coverage. Multiple infantry positions with MG's and rifles.
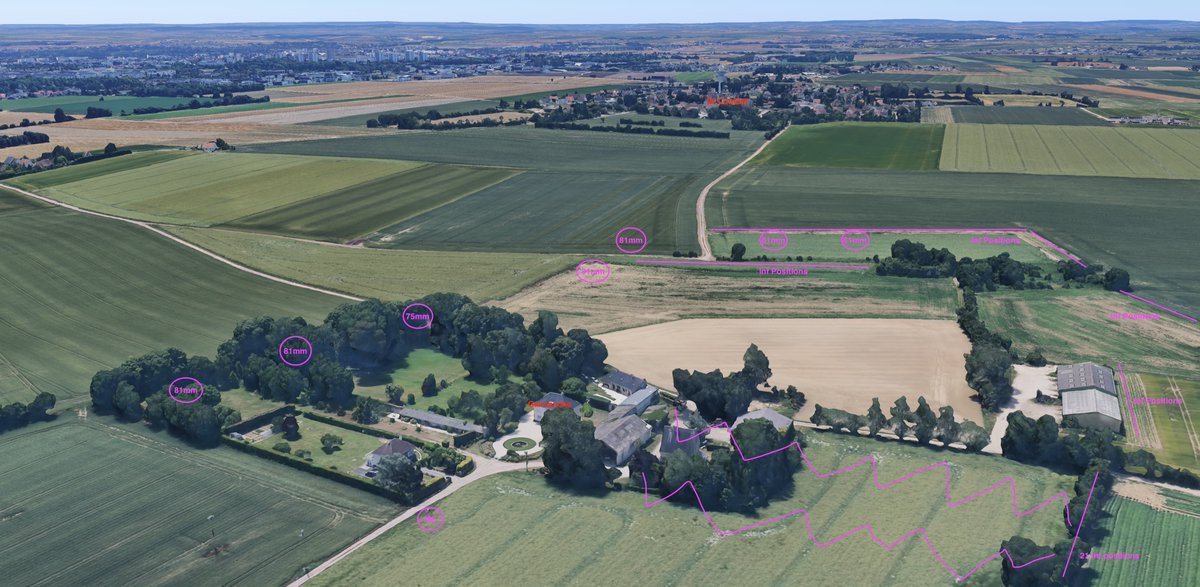
South West view from Galmanche. This looks towards both the advances of the British and Canadian Infantry advances. The openness of the ground is striking, with archive film showing only waist heigh corner for cover in this area.
West view, again, the open fields looking out across the ground where both British and Canadians would advance. The closest being the British of the 59th Inf Div advancing towards St Contest. Infantry positions along all of the hedgerows on the westside of Galmanche.
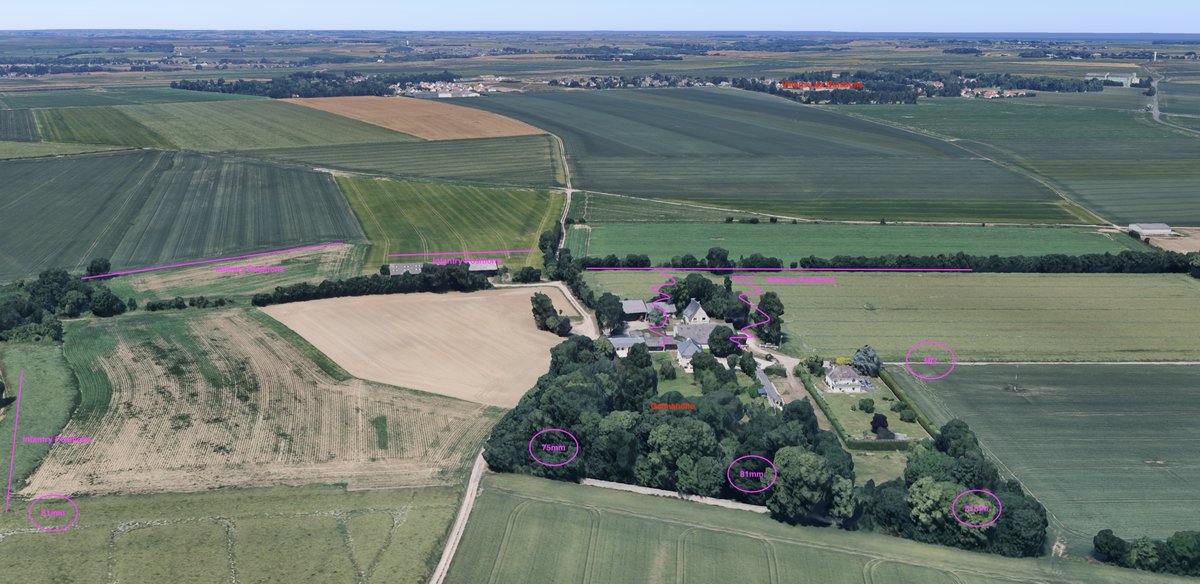
The final view looks North west and towards the area where the tanks of A Squadron, 1st East Riding Yeomanry would advance supporting the infantry. Galmanche had a 360 degree defence and well hidden emplacements.
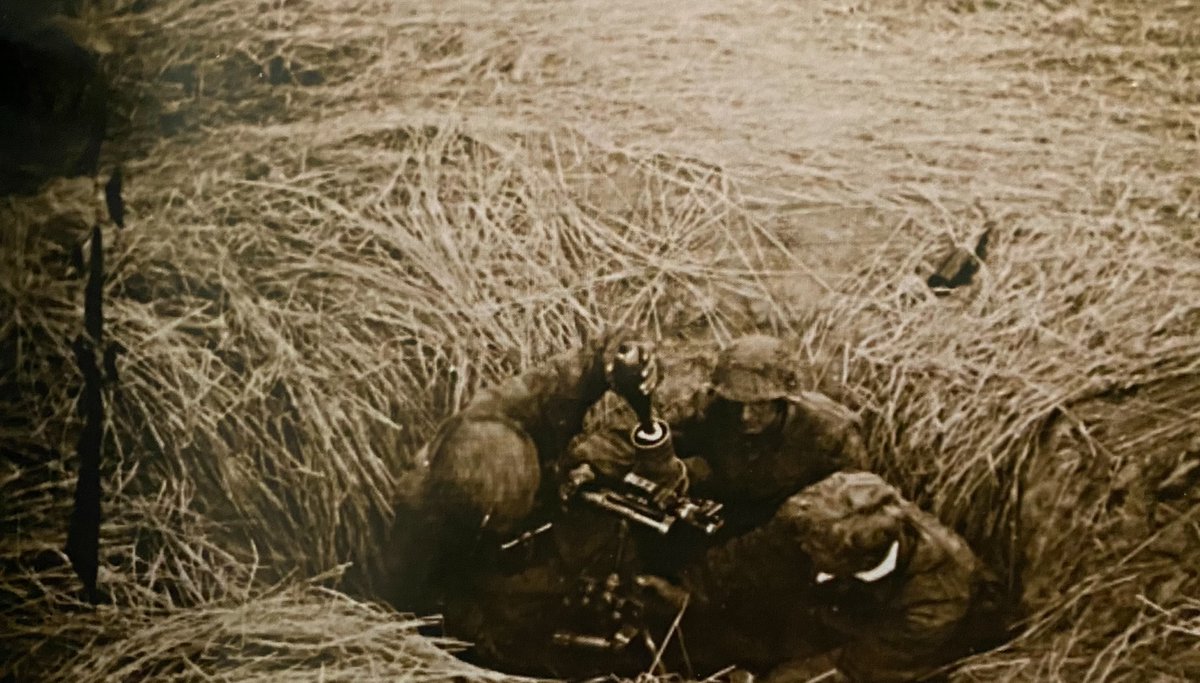
Amongst the hedgerows were barbed wire entanglements. Photo- Panzerdivision Hitlerjugend Volume II, Stephen Cazenave
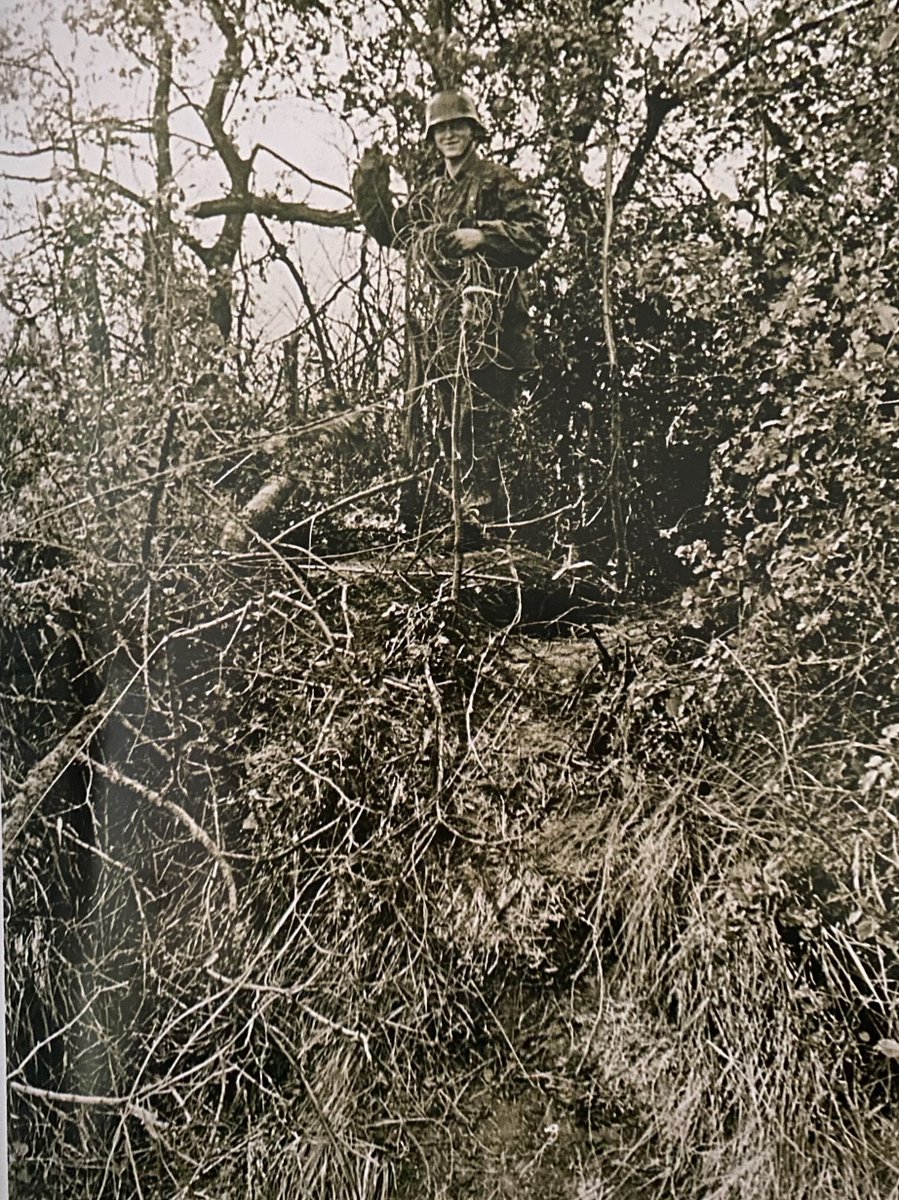
This is one of those mortar positions, photographed just south of Cambes. Well dug in, offering the crew protection. Photo- Panzerdivision Hitlerjugend Volume II, Stephen Cazenave
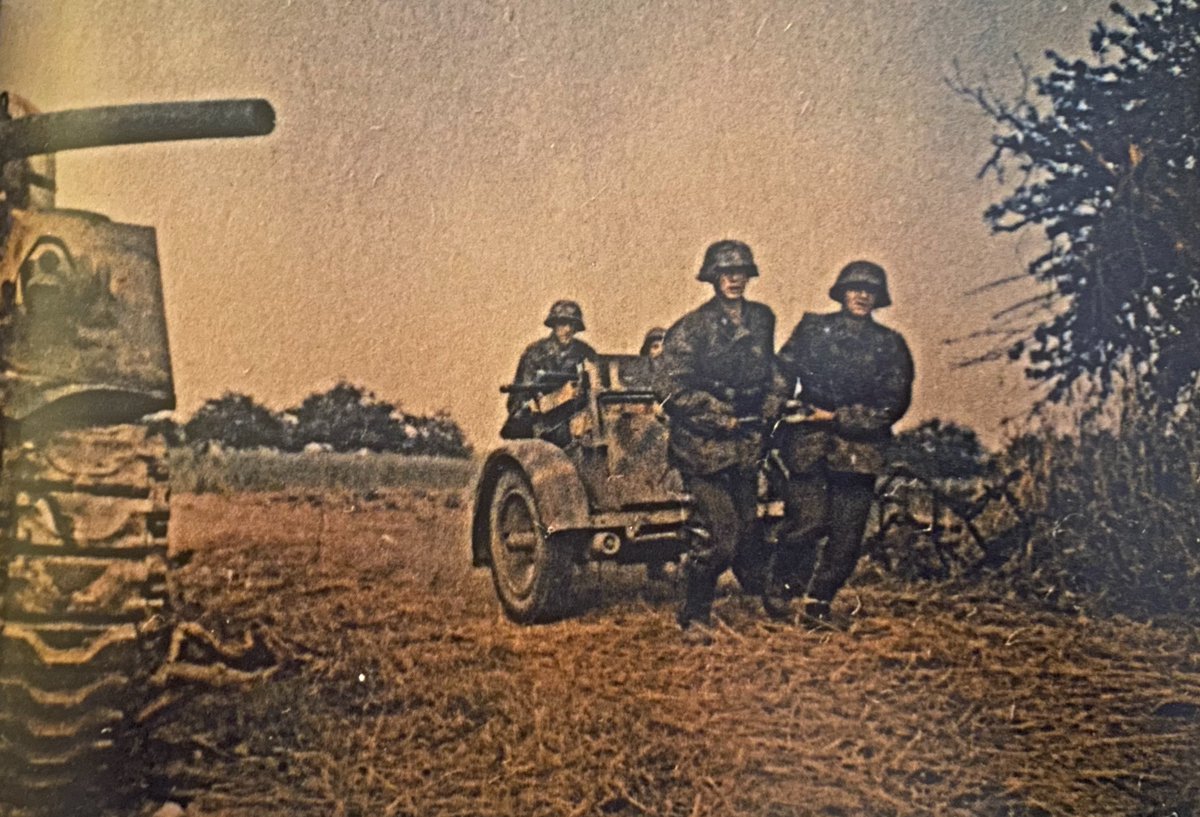
A gun crew with trailer and ammunition, possibly for the 75mm PAK Gun. This was taken weeks earlier in Cambes after knocking out tanks of 1ERY. These weapons taken back from Cambes now hidden around Galmanche. Photo- Panzerdivision Hitlerjugend Volume II, Stephen Cazenave
Dropping back down to the ground now, you can see the advantages of the well planned and prepared positions. The II/25 would have been preparing these positions from around the 10 June '44. This view is looking north from the Chateau at Galmanche. MG's covered this approach.
The view North west, it would be from this direction the British would advance in, supported by tanks of 1ERY. The tree line offering further defence to the Germans and preventing observations on their movements. Effectively a masking screen to the north.
Looking south towards the Chateau, the old outer wall still has battle damage to this day. Interlocking slit trenches lead west to the infantry positions, believed to be 21 individual positions with MG's and rifle positions.
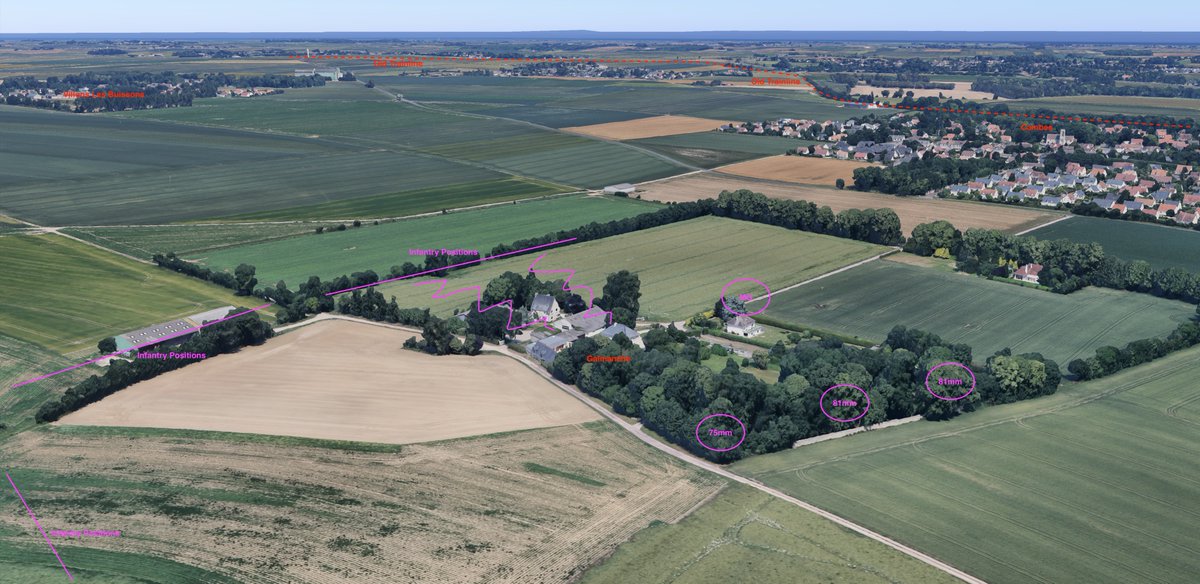
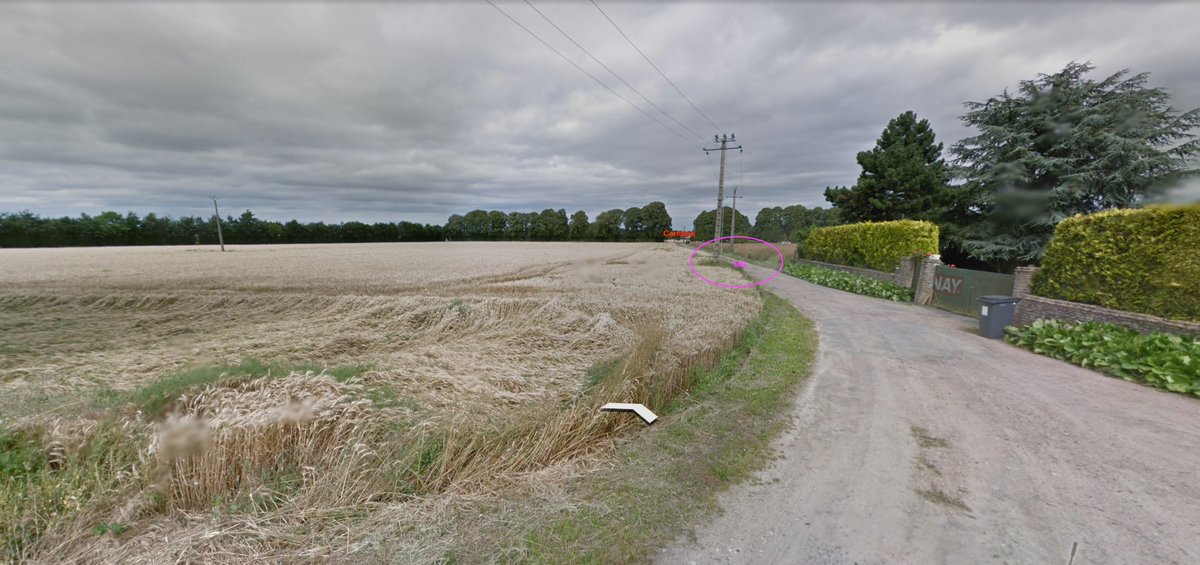
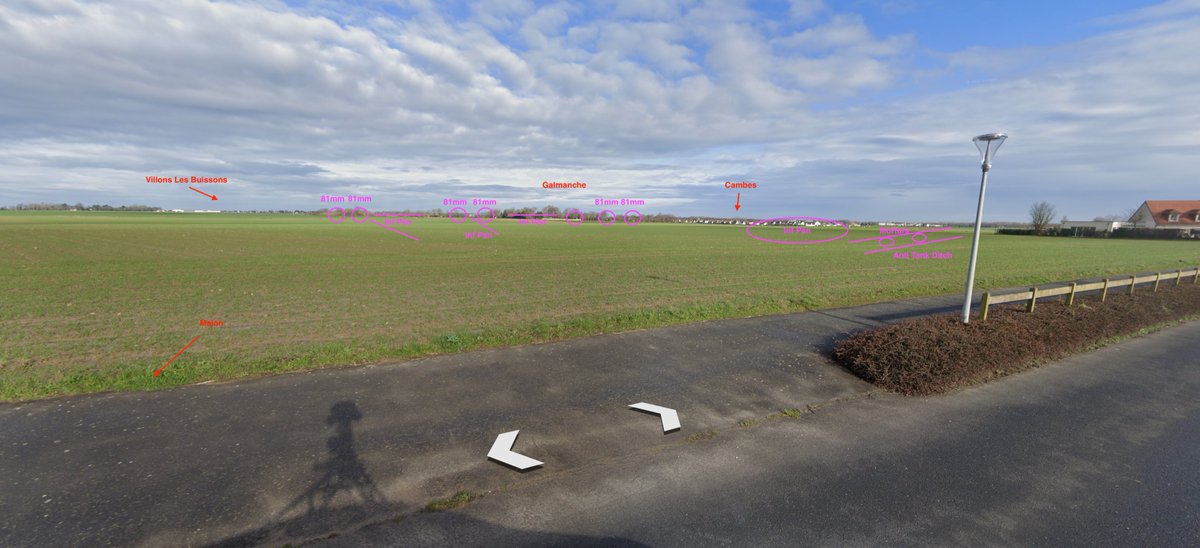
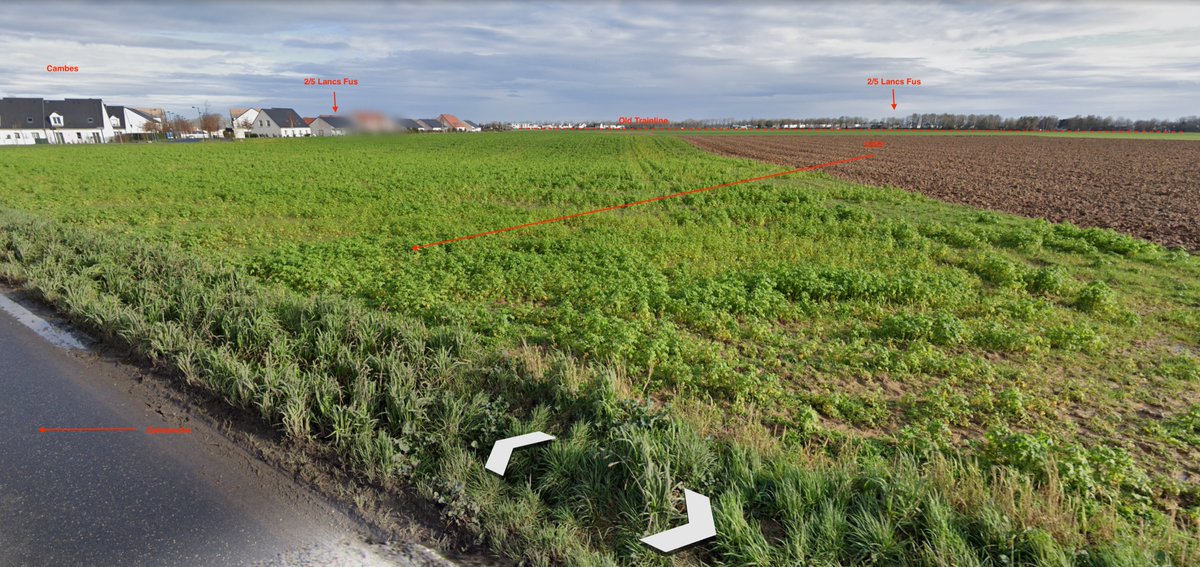
This is a view from the east looking back towards Galmanche. British Infantry should have passed through this area, the 2/5 Lancashire Fusiliers, but were pinned down prior to clearing the east of Cambes. Vast open ground, covered by mortars, 75mm, MG's and rifles.
North east of Galmanche looking towards the edge of Cambes. This should have been the ground which the 2/5 Lancashire Fusiliers advanced over moving to the left towards Malon and La Folie. This was the position of the anti tank ditch with mortar positions hidden in.
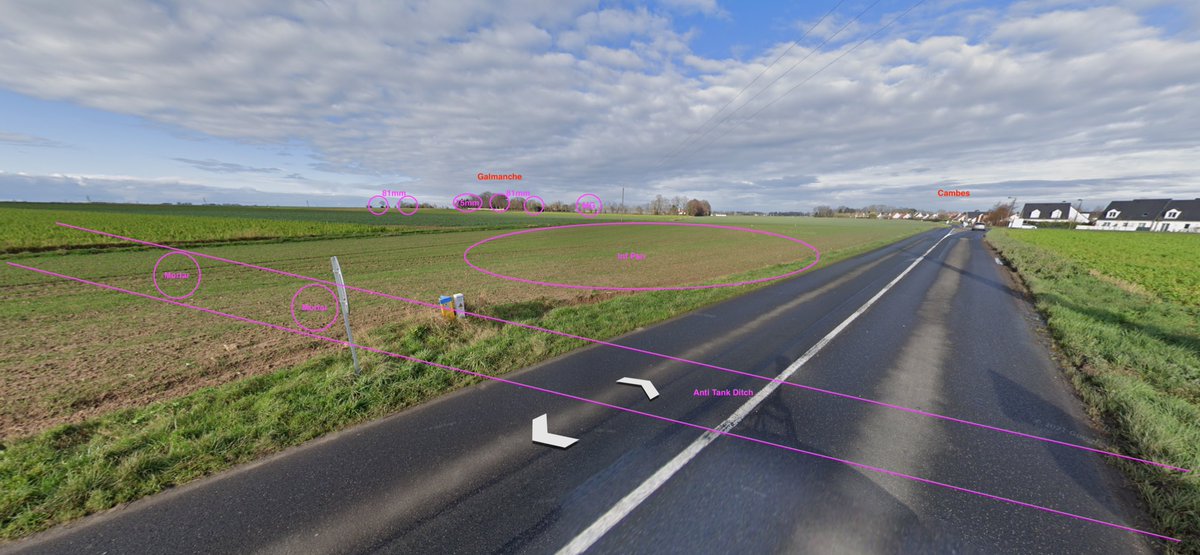
Turning slight to the right of the last image. This shows the positions of the four companies of the 2/5 Lancashire Fusiliers and where they would be pinned down from the fire all day. Tanks of 1ERY did advance towards Galmanche but also found trouble.
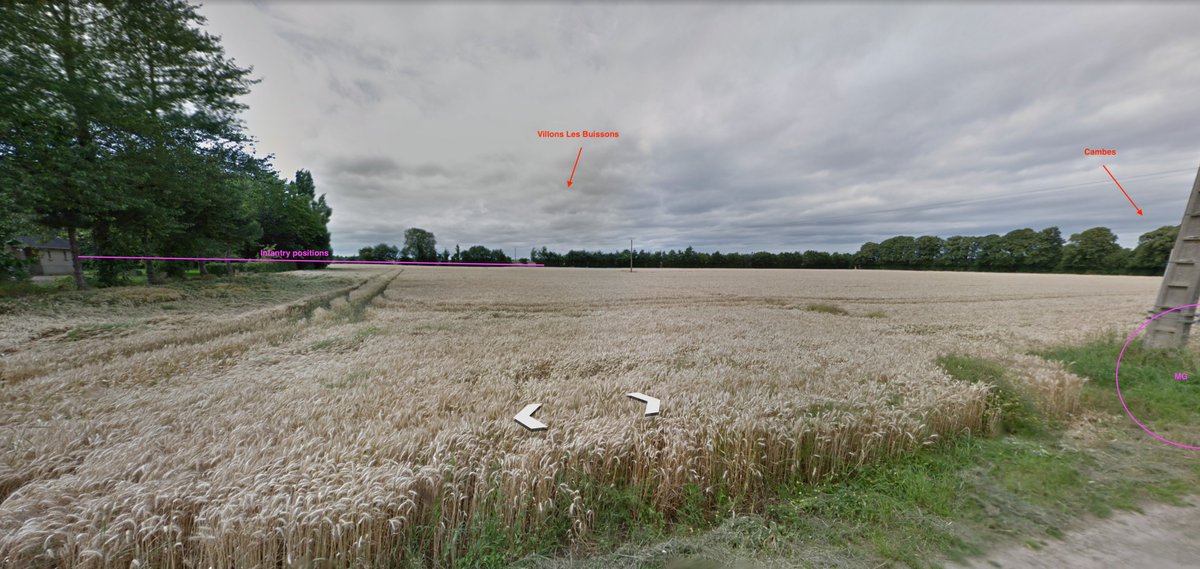
This view is from the west looking towards Galmanche and in the area where archive video footage is available. Infantry positions with excellent fields of fire across to here and covering the advance of the British towards St Contest.

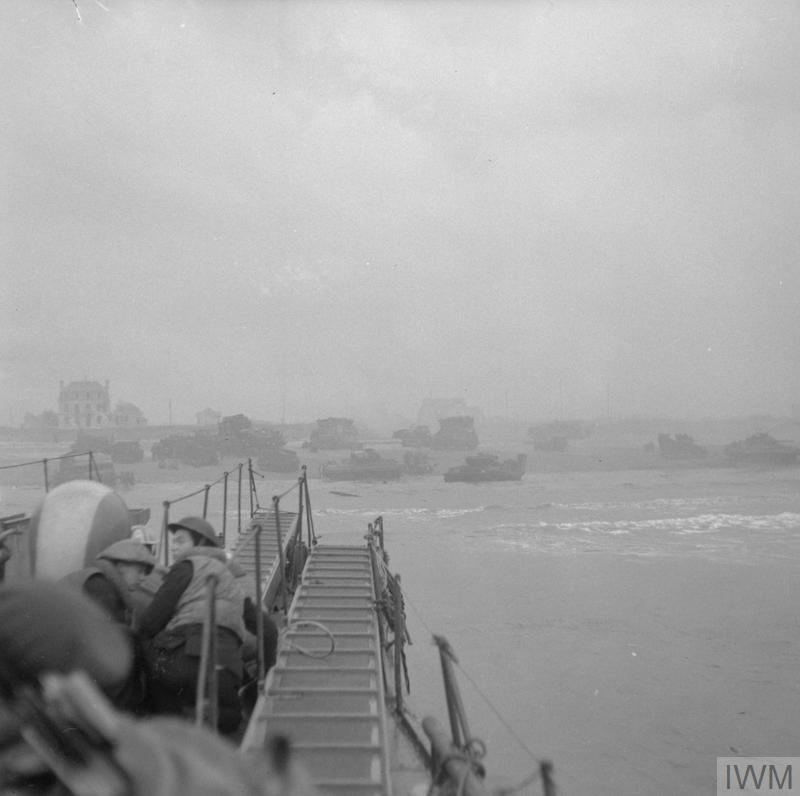
IWM A70 72-5 shows exactly that as the men of the 1/7th Royal Warwickshire Regt advance along the fields here. The only cover was the waist heigh corn or behind the Shermans of A Sqn, 1 ERY.
IWM A70 72-7 shows the advance continuing to the west of Galmanche towards St Contest. Several of the Sherman from 1ERY were knocked out, in the previous film at the end two black smoke columns are from two KO's. The fire from Galmanche would hamper the advance all day.
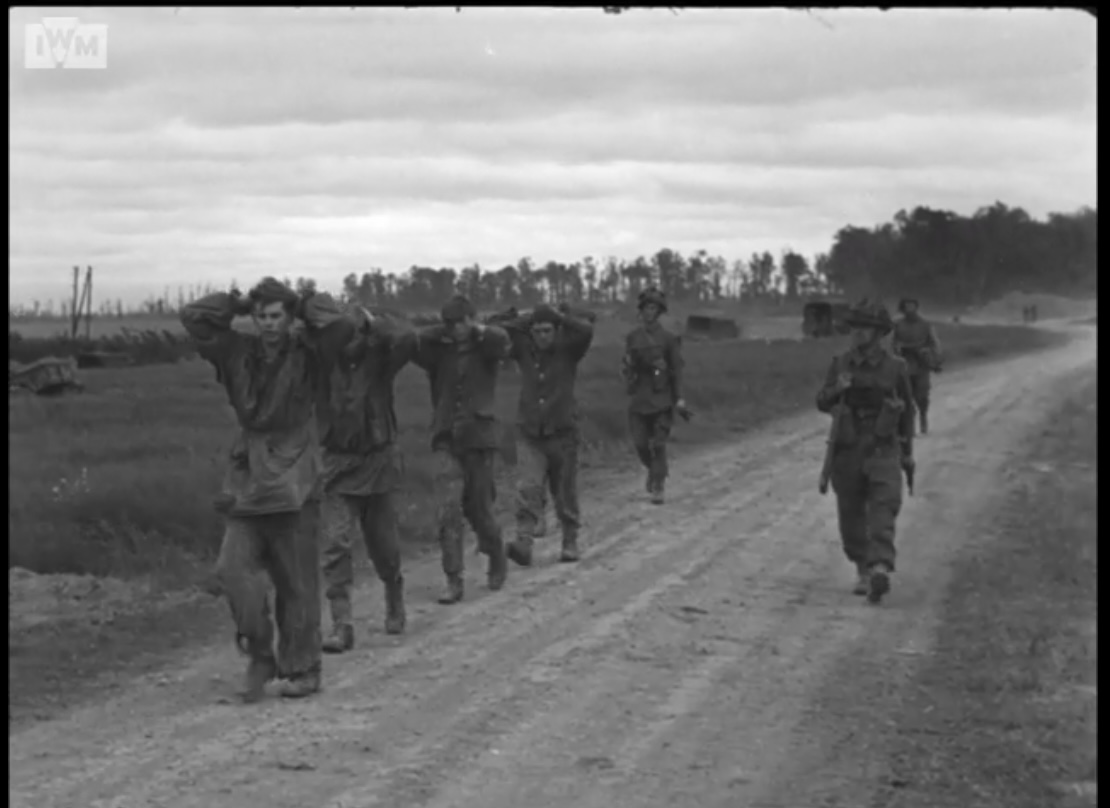
t was not till later in the day the British were finally able to bring POW's back. This is also to the west of Galmanche, men of the 12. SS said to be snipers who were hidden away. Galmanche would finally be cleared on the 9th July and a high price for the men of 59th Inf Div
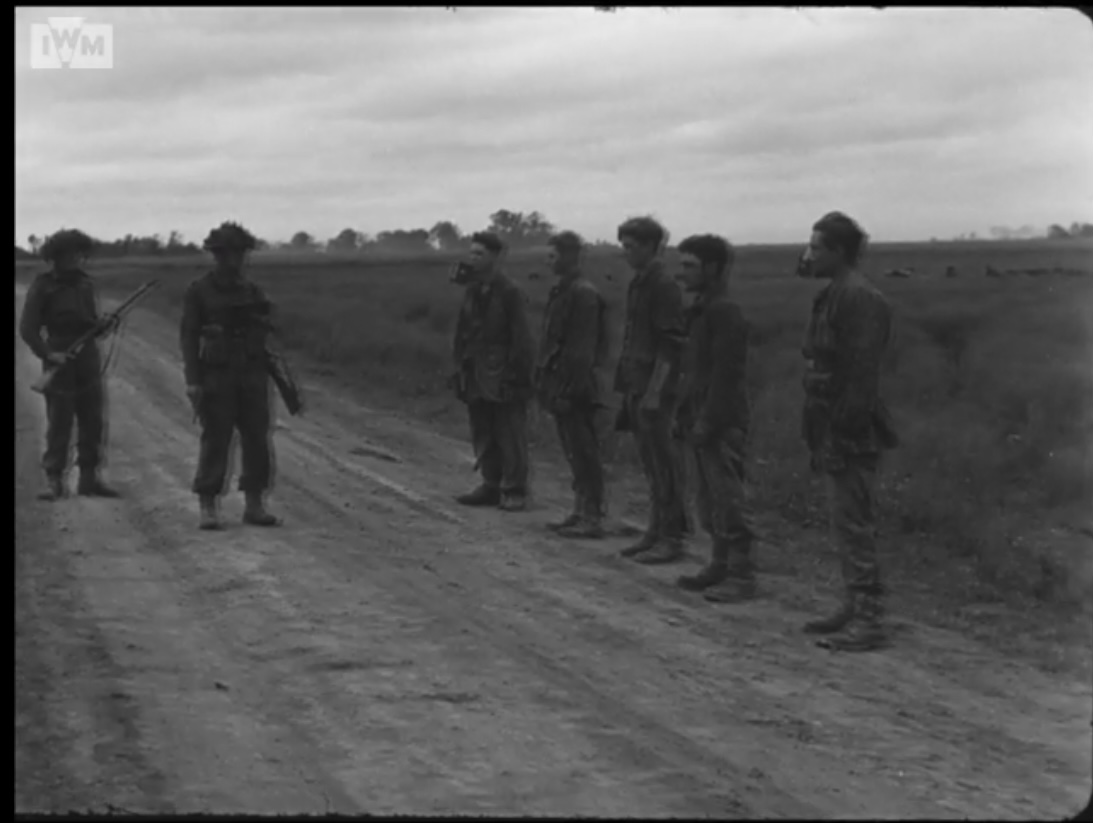
Galmanche was the furthest position north that would continue to be active and fight on till the 9th July. The reality was that it would not be able to defeat the allied advance but it did a successful job on holding it up and causing many casualties and knocking out tanks.
Figures for the Regt.25 showed for officers, NCO's and OR-
85 Dead
104 Wounded
100 missing
The British being held up at this position of Galmanche would have also created time for other units of the 12. SS to withdraw south of the Orne.
Source- The 12th SS Volume one, Meyer
85 Dead
104 Wounded
100 missing
The British being held up at this position of Galmanche would have also created time for other units of the 12. SS to withdraw south of the Orne.
Source- The 12th SS Volume one, Meyer

• • •
Missing some Tweet in this thread? You can try to
force a refresh