I retrofitted this 1978 radio with a Teensy microcontroller, 3.2" TFT LCD, amplifier, bluetooth and FM radio modules, and a working microphone. Almost all the buttons are useable, too.
Want to see how it was built? Let's rewind 🧵⤵️
Want to see how it was built? Let's rewind 🧵⤵️
https://twitter.com/t0m_fr/status/1465266235462012932
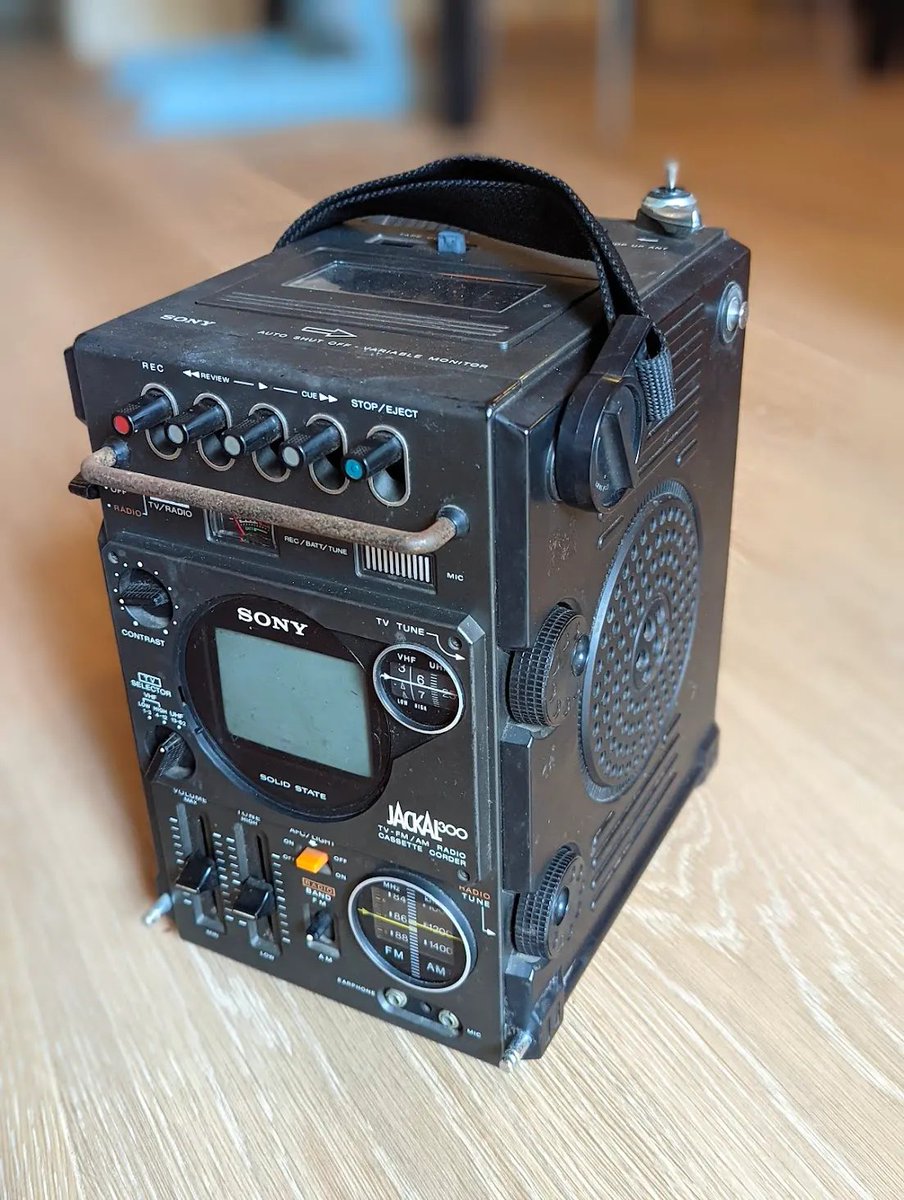
The Sony FX-300 (aka "Jackal" in 🇯🇵) caught my eye in late 2019.
A 1978 technological wonder combining a miniature B&W TV, cassette recorder with microphone and AM/FM radio all in a compact, portable design that aged really well and was oozing cyberpunk.
A 1978 technological wonder combining a miniature B&W TV, cassette recorder with microphone and AM/FM radio all in a compact, portable design that aged really well and was oozing cyberpunk.
https://twitter.com/t0m_fr/status/1180986830042341377
It was only sold in North America and Japan, and I'm in 🇫🇷.
But I kinda wanted one anyway.
Out of curiosity, I checked eBay listings in US/CA. Found some! Super expensive!
Then I switched to Yahoo auctions in Japan and found many Jackals in various states, for a lot cheaper.
But I kinda wanted one anyway.
Out of curiosity, I checked eBay listings in US/CA. Found some! Super expensive!
Then I switched to Yahoo auctions in Japan and found many Jackals in various states, for a lot cheaper.

So last May I bought 2 non-working devices for about 65€ total. Repackaging and shipping to France via sendico.com cost an additional 56€.
I chose sea freight over air to spare some CO2. Took about 3 months to arrive 😅.

I chose sea freight over air to spare some CO2. Took about 3 months to arrive 😅.


One had all the buttons but showed its age, the other had no buttons but a pristine outer shell. Nice! Only one antenna though, and the tip was broken. Meh.
And this is what a Jackal looks like when it's naked (also featuring my desk stool as a makeshift turntable 😎).
And this is what a Jackal looks like when it's naked (also featuring my desk stool as a makeshift turntable 😎).
The device is entirely hand-soldered and incredibly tightly packed. The main PCB is mounted on plastic hinges. Lots of wires and not a single connector. 

Removing the cutest CRT ever. I'll be replaced with a cheap 3.2" ILI9341 TFT LCD that matches its size almost perfectly. 

I dismantled the cassette deck. My idea was to reuse its RWD/Play/FFW buttons. I removed as many parts as possible then mounted some arcade style switches in strategic locations.
The attached PCB also contains the main power switch and input selector, so I wired that too.


The attached PCB also contains the main power switch and input selector, so I wired that too.


I made room on the main PCB 🧹 for a relay board to toggle the audio source and power things up based on the selected input, and a protoboard supporting a cheap PAM8403 3W amp, ultra cheap MH-M18 bluetooth module, and a Sparkfun SI4703 FM radio module (that I replaced later). 


The core of the project is this pyramid made of @PaulStoffregen's incredible Teensy 4.0 microcontroller (600Mhz !?!), stacked on its dedicated audio board, resting itself on a protoboard with a bunch of terminal blocks. I wanted everything to be removable. 

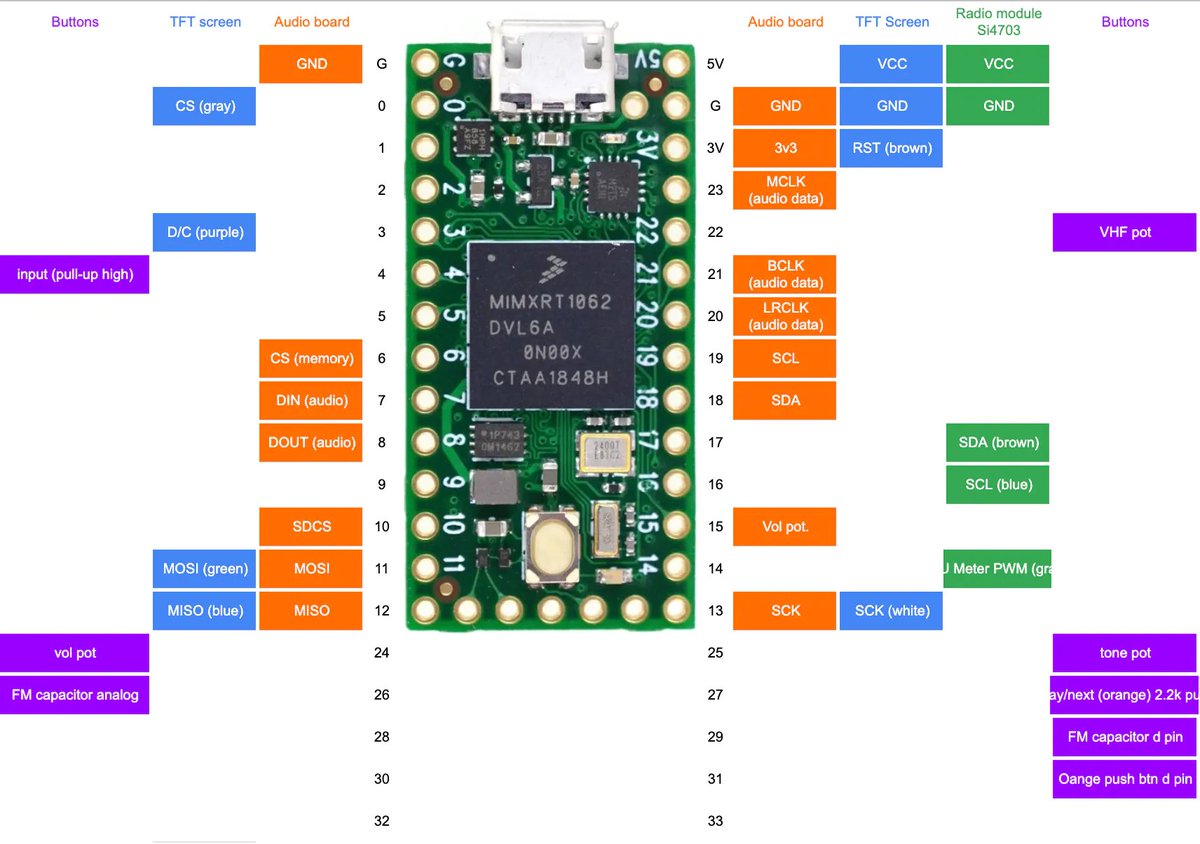
About 3/4 of the pins of the Teensy are used, including some of the inputs underneath. That led to some "creative" problem solving 😬 


The minijack here is for the audio line input coming from the relays through a ground loop isolator. I built a cable for the LCD (SPI) on my breakout board, trying to keep it as short as possible. 

This meant that my Teensy assembly had to stand right behind the LCD screen, where the body of the CRT used to be. To install the new display I had reorient its pins and to Dremel both the Jackal's plastic frame and the TFT's PCB. It's a tight fit, but it fits! 


It was shaping up. I still needed to wire all the remaining pots and switches, and work on the details... 


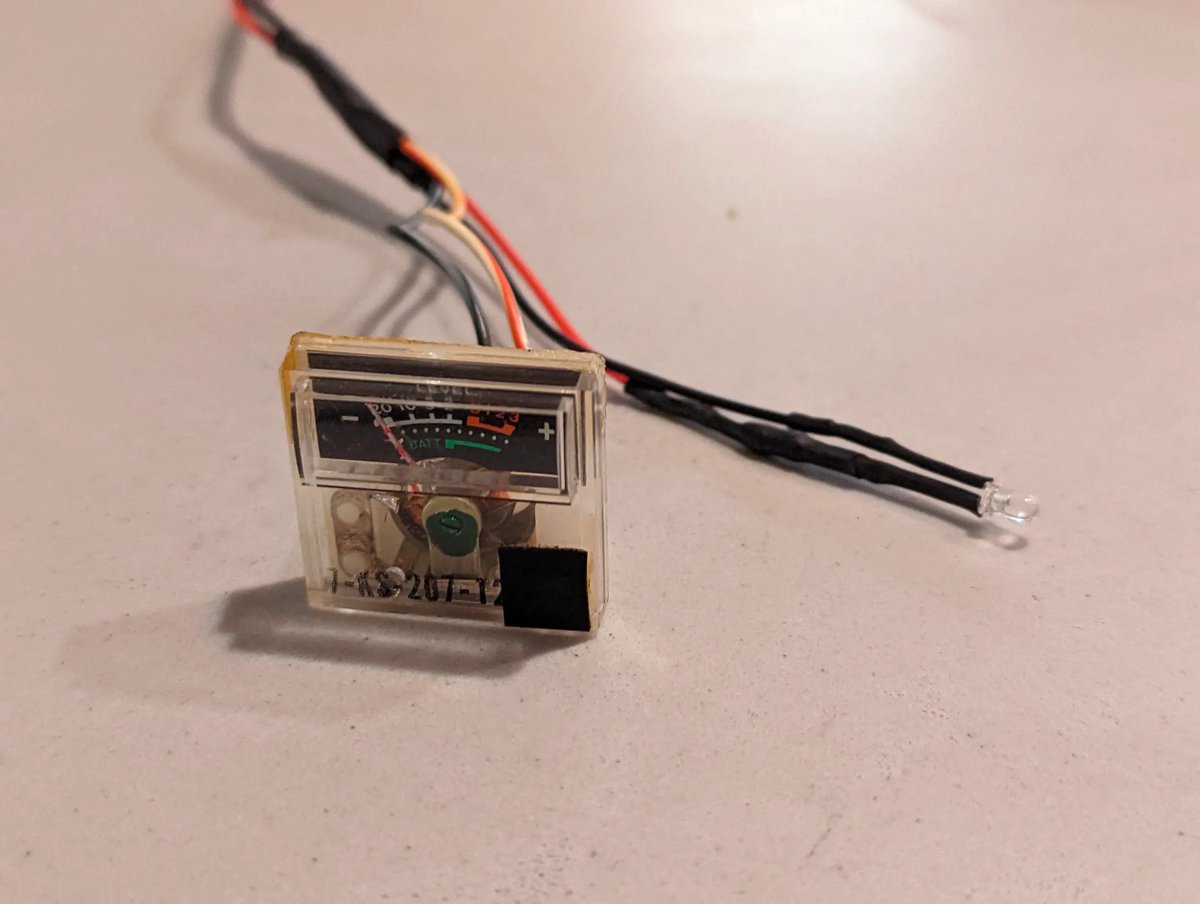
...such as adding yellow LEDs in the VU-meter and the radio's tuning capacitor. By the way, reading a capacitance with a bare Arduino is possible by using 2 pins (1 analog 1 digital) and this clever library: github.com/codewrite/ardu… 


The VU-meter is driven by the Teensy via analogOut (PWM). I also wired the headphone jack and a new electret microphone to the audio board's mic input while I was at it. And a coin cell battery for the Teensy's RTC. 

Getting the FM module to work was the trickiest bit. I accidentally destroyed the SI4703 which I ended up replacing with a RDA5807M (cheap!). Both are using I2S. I had trouble making it work until I physically separated the data and clock wire. I'm still working on the code. 

I initially intended to keep the original Sony speaker, but it wasn't sounding great so I swapped it for a 4 Ohm Visaton of the same diameter with a much better frequency response. 


Lastly I spliced an USB cable to make a power rail board toggled by the main on/off switch on the cassette deck PCB. Data lines are still working so I can program the Teensy. Otherwise a USB power bank can be plugged and tucked in the original battery compartment for regular use. 

And it's a wrap 🙂 I could do a whole other thread about the software side but I'm not 100% done with that yet.
Thanks for sticking to the end and I'll leave you with exclusive behind the scenes pictures on the set of the video shoot from the first tweet. And a movie reference.


Thanks for sticking to the end and I'll leave you with exclusive behind the scenes pictures on the set of the video shoot from the first tweet. And a movie reference.


@threadreaderapp unroll please!
• • •
Missing some Tweet in this thread? You can try to
force a refresh


