"Attention is all you need" implementation from scratch in PyTorch. A Twitter thread:
1/
1/
There are two parts: encoder and decoder. Encoder takes source embeddings and source mask as inputs and decoder takes target embeddings and target mask. Decoder inputs are shifted right. What does shifted right mean? Keep reading the thread. 2/ 
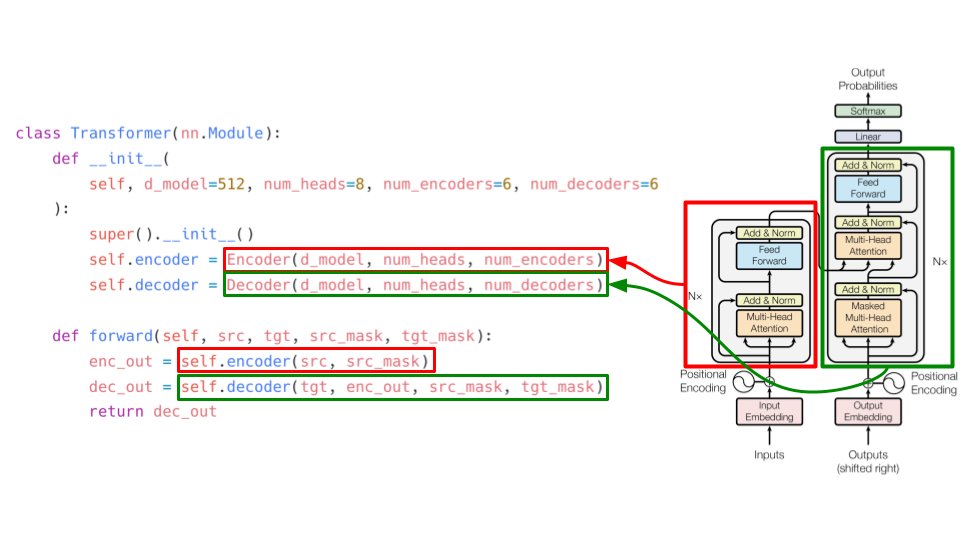
The encoder is composed of N encoder layers. Let's implement this as a black box too. The output of one encoder goes as input to the next encoder and so on. The source mask remains the same till the end 3/
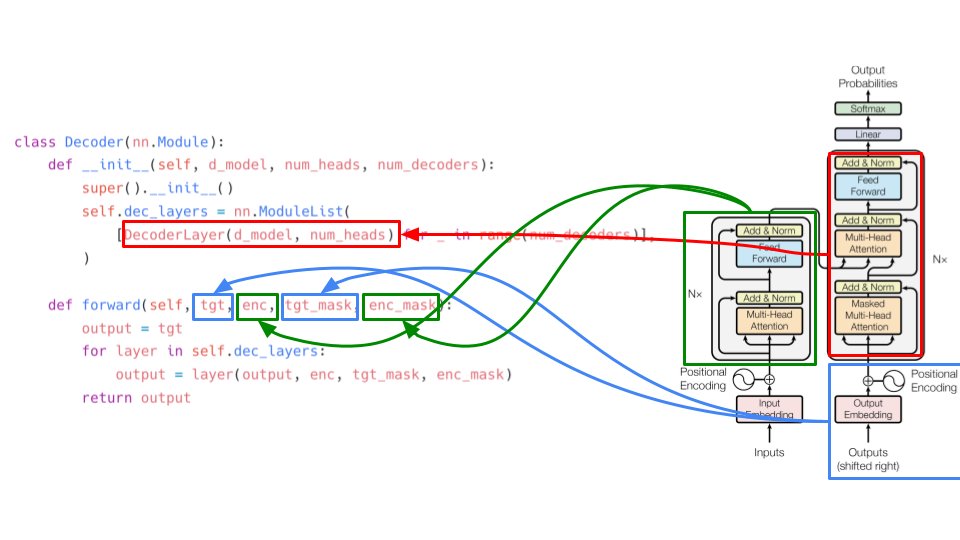
Similarly, we have the decoder composed of decoder layers. The decoder takes input from the last encoder layer and the target embeddings and target mask. enc_mask is the same as src_mask as explained previously 4/

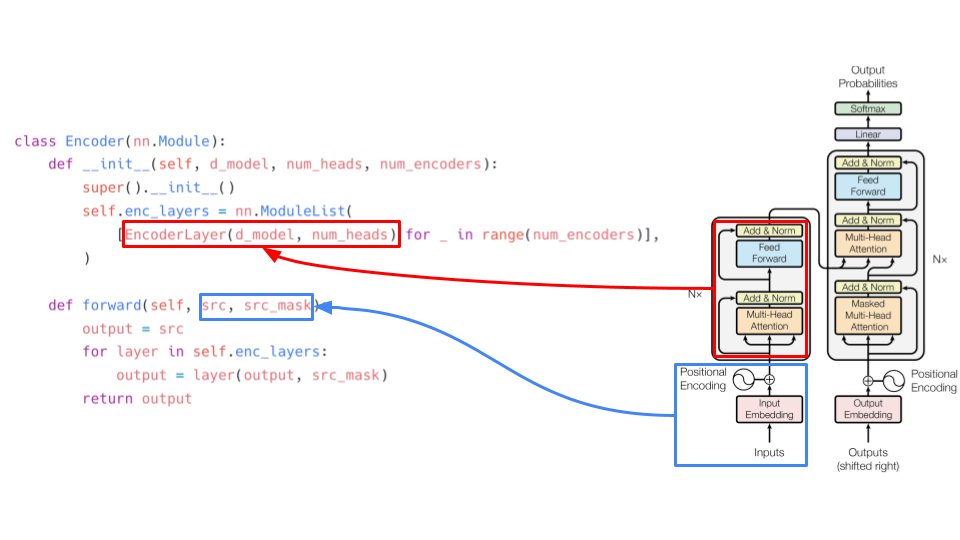
Let's take a look at the encoder layer. It consists of multi-headed attention, a feed forward network and two layer normalization layers. See forward(...) function to understand how skip-connection works. Its just adding original inputs to the outputs. 5/
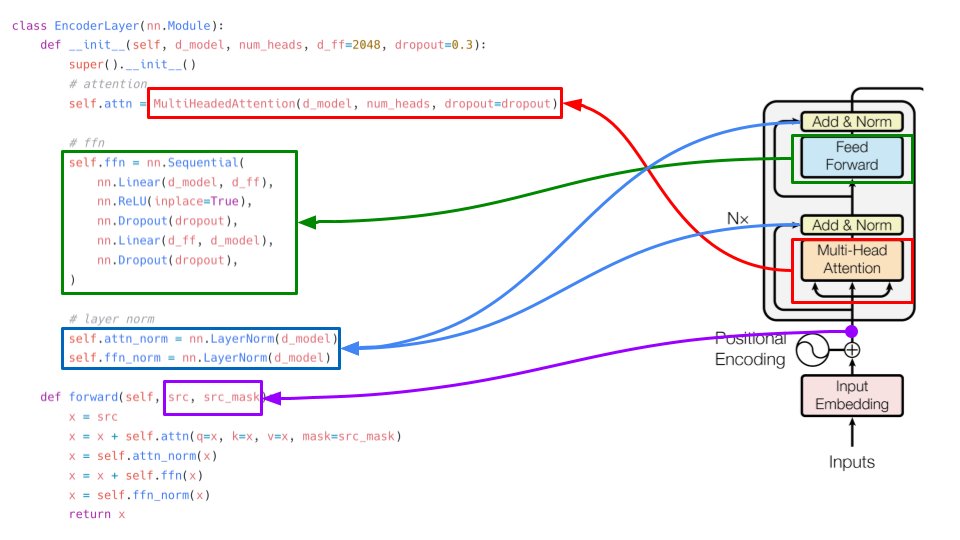
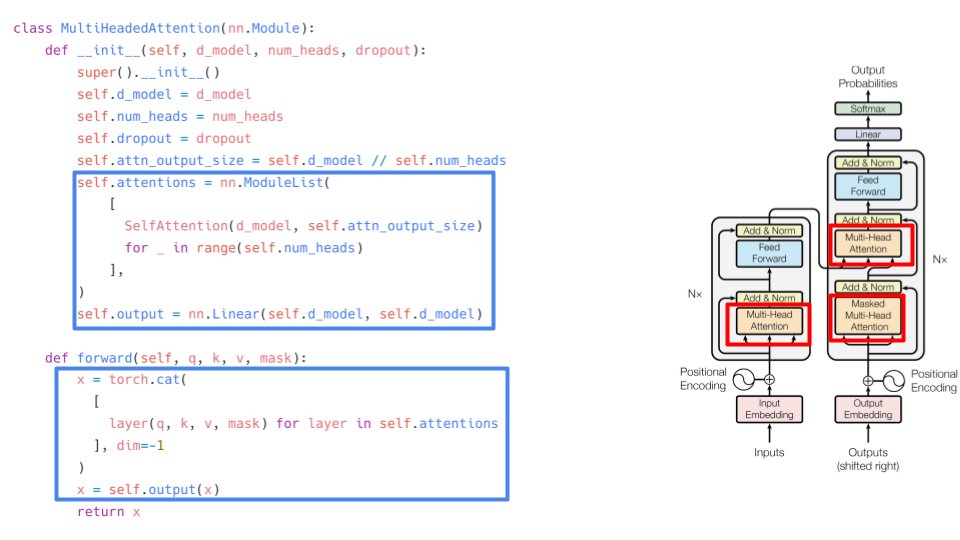
Now comes the fun part. Multi-head attention. We see it 3 times in the architecture. Multi-headed attention is nothing but many different self-attention layers. The outputs from these self-attentions are concatenated to form output the same shape as input. 6/

If the number of heads is 8 and d_model (embedding size) is 512, each self-attention will produce an output of size 64. These will be concatenated together to give the final output of size 64 x 8 = 512. This output is passed through a dense layer. 7/
self-attention in simple words is attention on the same sequence. I like to define it as a layer that tells you which token loves another token in the same sequence. for self-attention, the input is passed through 3 linear layers: query, key, value. 8/
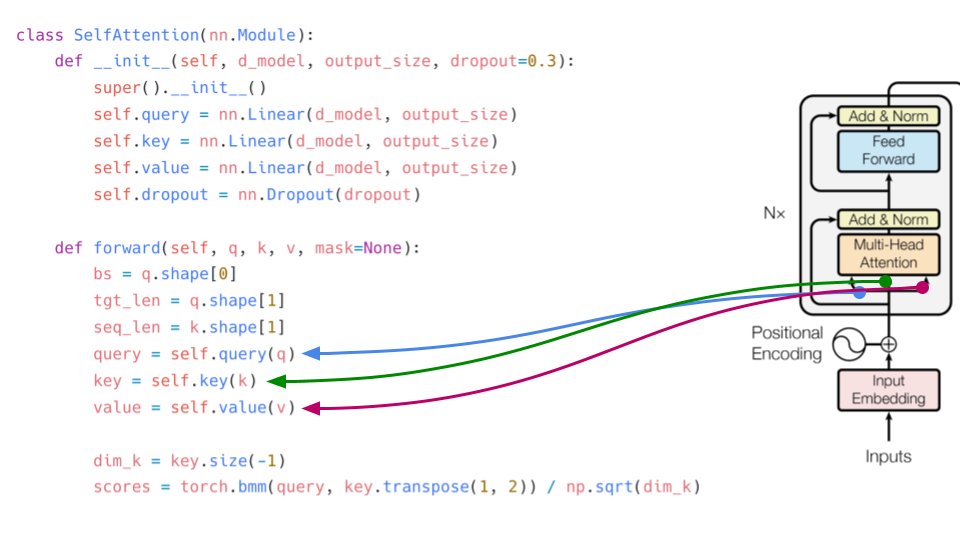
In the forward function, we apply the formula for self-attention. softmax(Q.K´/ dim(k))V. torch.bmm does matrix multiplication of batches. dim(k) is the sqrt of k. Please note: q, k, v (inputs) are the same in the case of self-attention. 9/

Let's look at the forward function and the formula for self-attention (scaled). Ignoring the mask part, everything is pretty easy to implement. 10/
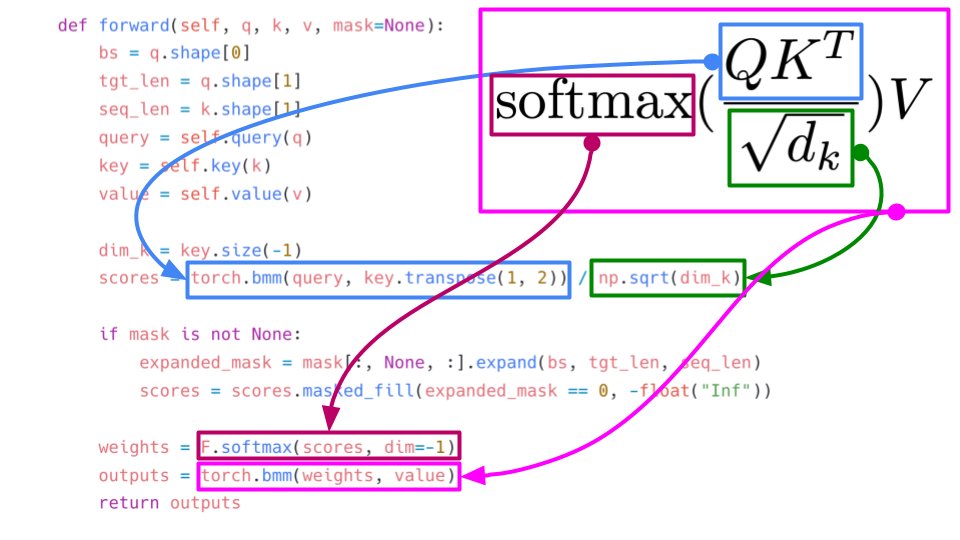
The mask just tells where not to look (e.g. padding tokens) 11/

Let's take a look at decoder now. The implementation is similar to that of the encoder except for the fact that each decoder also takes the final encoder's output as input. 12/
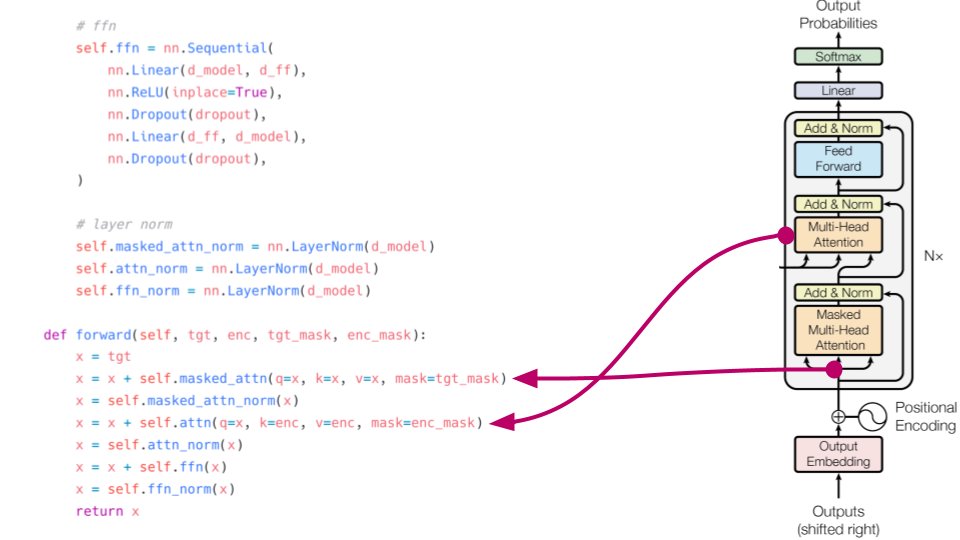
The decoder layer consists of two different types of attention. the masked version has an extra mask in addition to padding mask. We will come to that. The normal multi-head attention takes key and value from final encoder output. key and value here are same. 13/
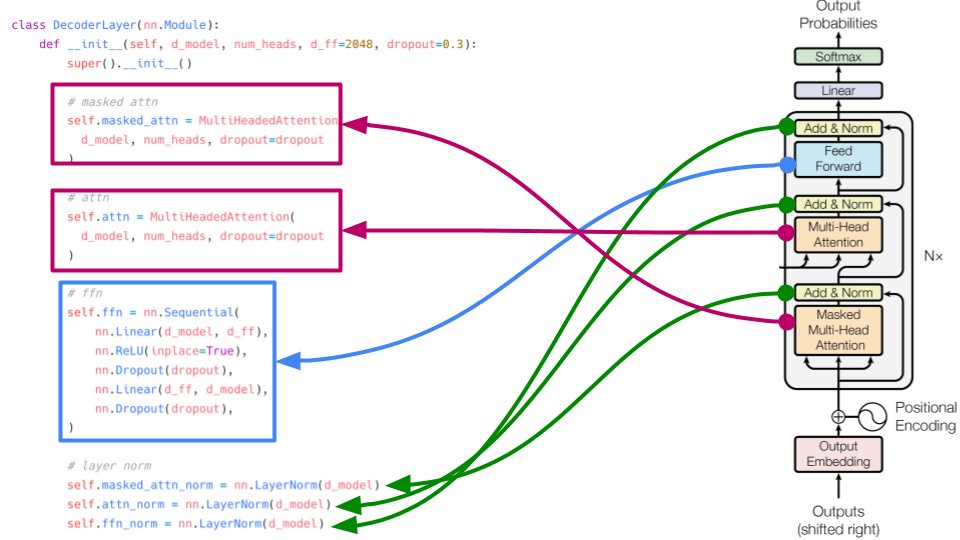
Query comes from output of masked multi-head attention (after layernorm). Checkout the forward function and things are very easy to understand :) 14/
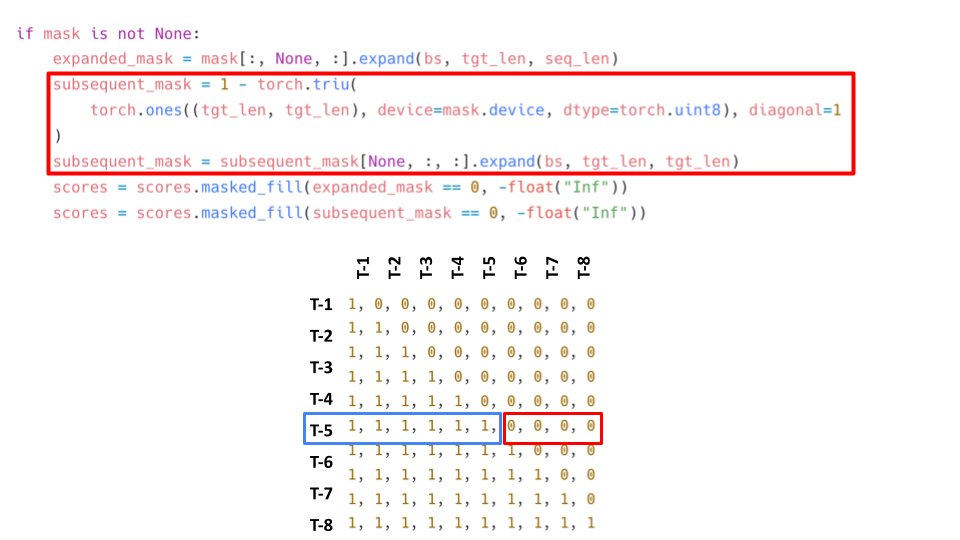
Now we come to the special mask for targets, aka subsequent mask. The subsequent mask just tells the decoder not to look at tokens in the future. This is used in addition to the padding mask and is used only for training part. 15/
Now we have all the building blocks except positional encoding. Positional encoding tells the model an idea about where the tokens are located relative to each other. To implement positional encoding, we can simply use an embedding layer! 16/
And this is how inputs and outputs will look like. Here, batch size = 32, len of input seq = 128, len of output seq = 64. We add a linear + softmax to decoder output. This gives us a token prediction for each position (a classification problem) 17/

I hope you liked this thread. If there are any mistakes in my implementation, please let me know and I can fix them :) 18/
• • •
Missing some Tweet in this thread? You can try to
force a refresh