Tuturial Thread! 🧵
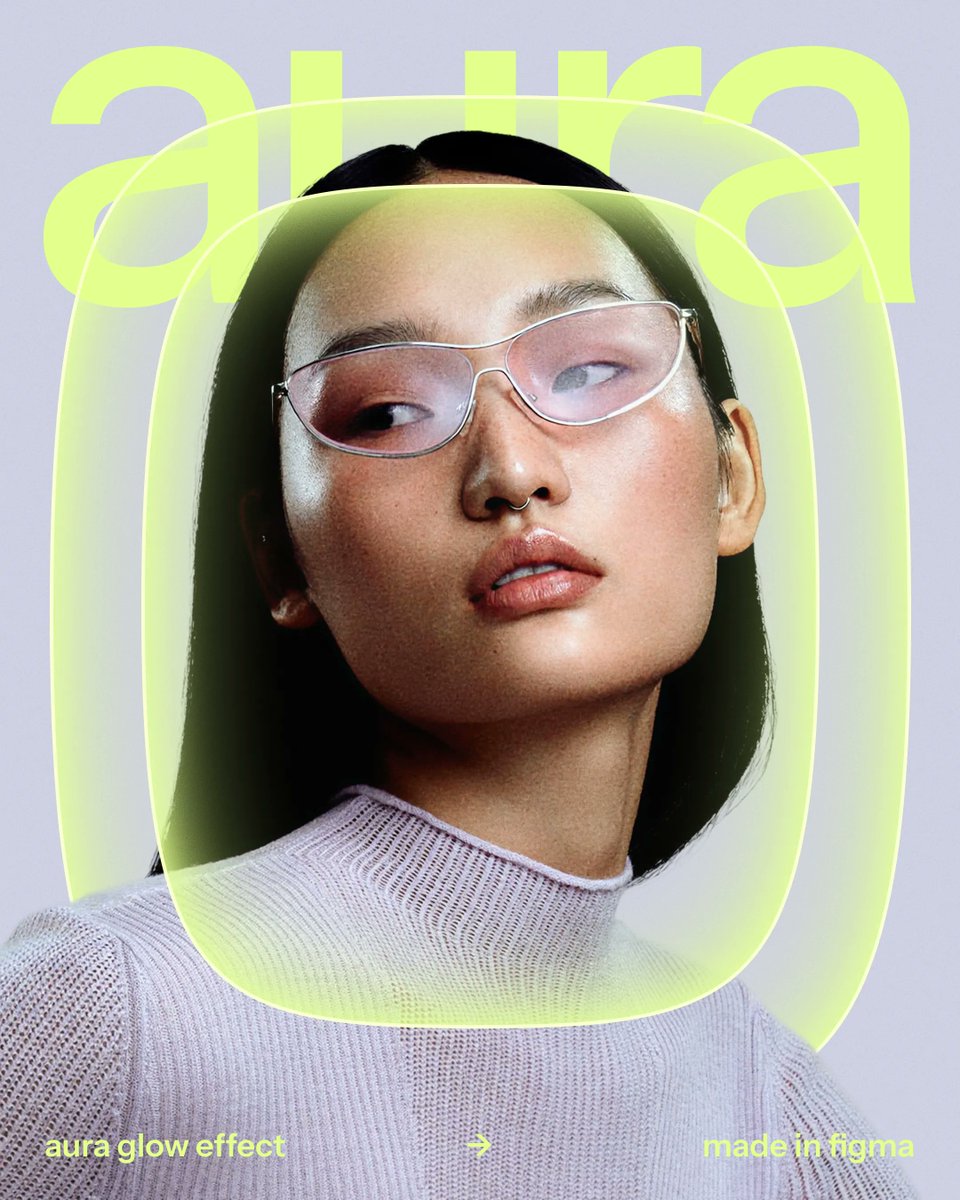
In this thread, I’ll learn you how to create a poster like the one below⚡️
I’ve used @figma and @Procreate to create it, but you can also use other tools to get the same result.
Let’s get started 👇
In this thread, I’ll learn you how to create a poster like the one below⚡️
I’ve used @figma and @Procreate to create it, but you can also use other tools to get the same result.
Let’s get started 👇

Add a new art board and use one of the paper size presets for the poster ratio
Add your backdrop, I’ve used an @unsplash picture, cropped it and set the blending mode to “screen”

Now add your model, once again I used @unsplash to find this picture. Make sure the model is looking sideways.
Tip: use remove.bg to quickly remove the background
Tip: use remove.bg to quickly remove the background

Now look for some cool photos you could use to blend in your composition. I’ve found these 2.
Using a round subject makes the next step easier.
Using a round subject makes the next step easier.

Cut out/mask the parts you want to use for your poster and position them as accurate as possible on your model.

For this step we need to jump in any design tool with a “liquify tool”
Import your model+bg as one layer and your picture overlays as a separate one.
Then mold the top layer to your model by pushing and pulling the image.
Go crazy with this! Whatever looks good, goes! ⚡️
Import your model+bg as one layer and your picture overlays as a separate one.
Then mold the top layer to your model by pushing and pulling the image.
Go crazy with this! Whatever looks good, goes! ⚡️

New to the liquify concept? Learn more here:
To blend everything together a little better, add some chromatic aberration and add a red top layer that fills your art board - play with the opacity and blend mode to give your poster a warm tint ☀️😎

Learn more about chromatic aberration here ⚡️
You can now export and jump back into @figma Figma if you want.
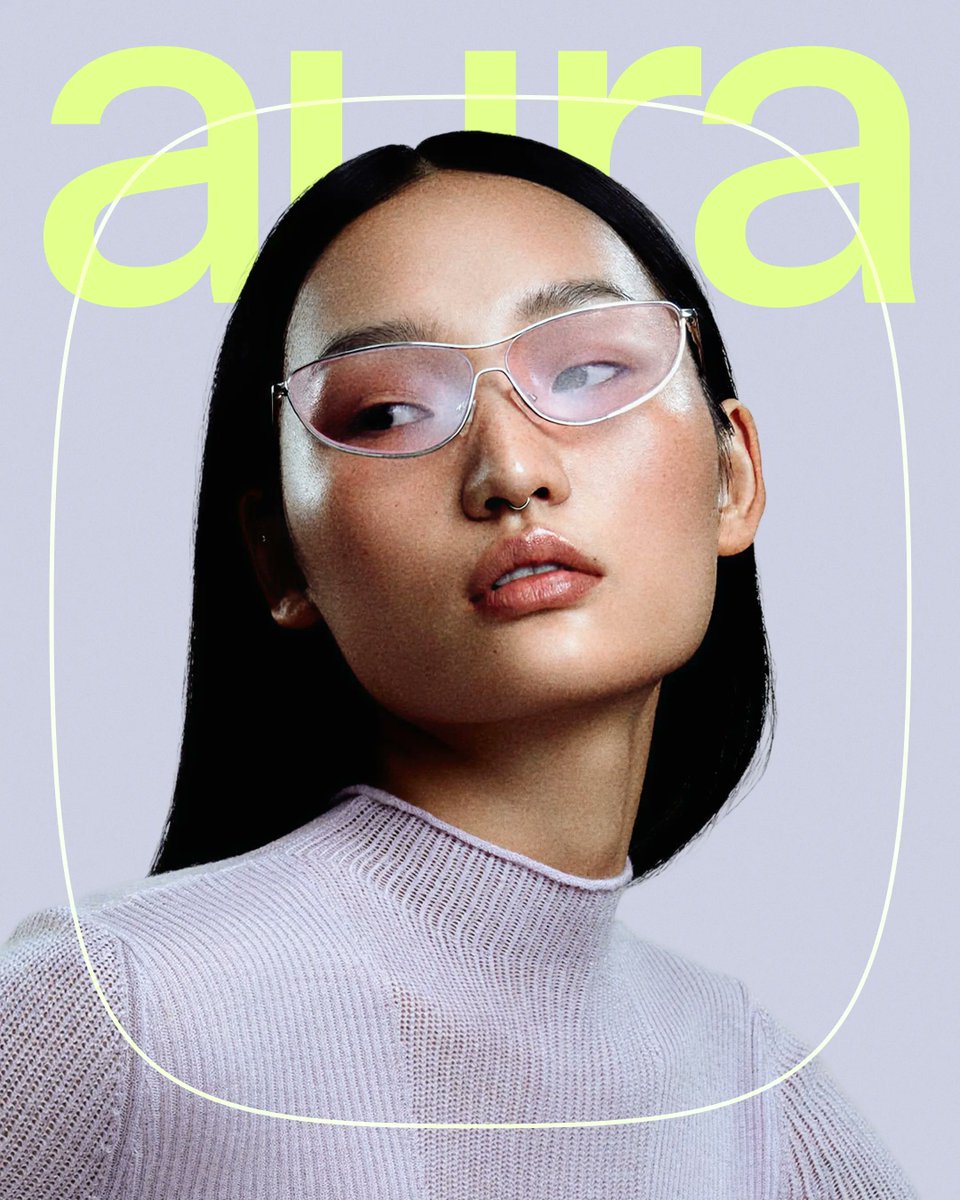
Time to add details! Add some type in a light color — try to be creative with the placement.
Tip: outline the titles, so you can manipulate the letters individually.
This is how I stretched the L & E👇
Time to add details! Add some type in a light color — try to be creative with the placement.
Tip: outline the titles, so you can manipulate the letters individually.
This is how I stretched the L & E👇

In the same color, add some lines and dots to fill up the empty looking spots - go with the flow, this is all gut feeling!
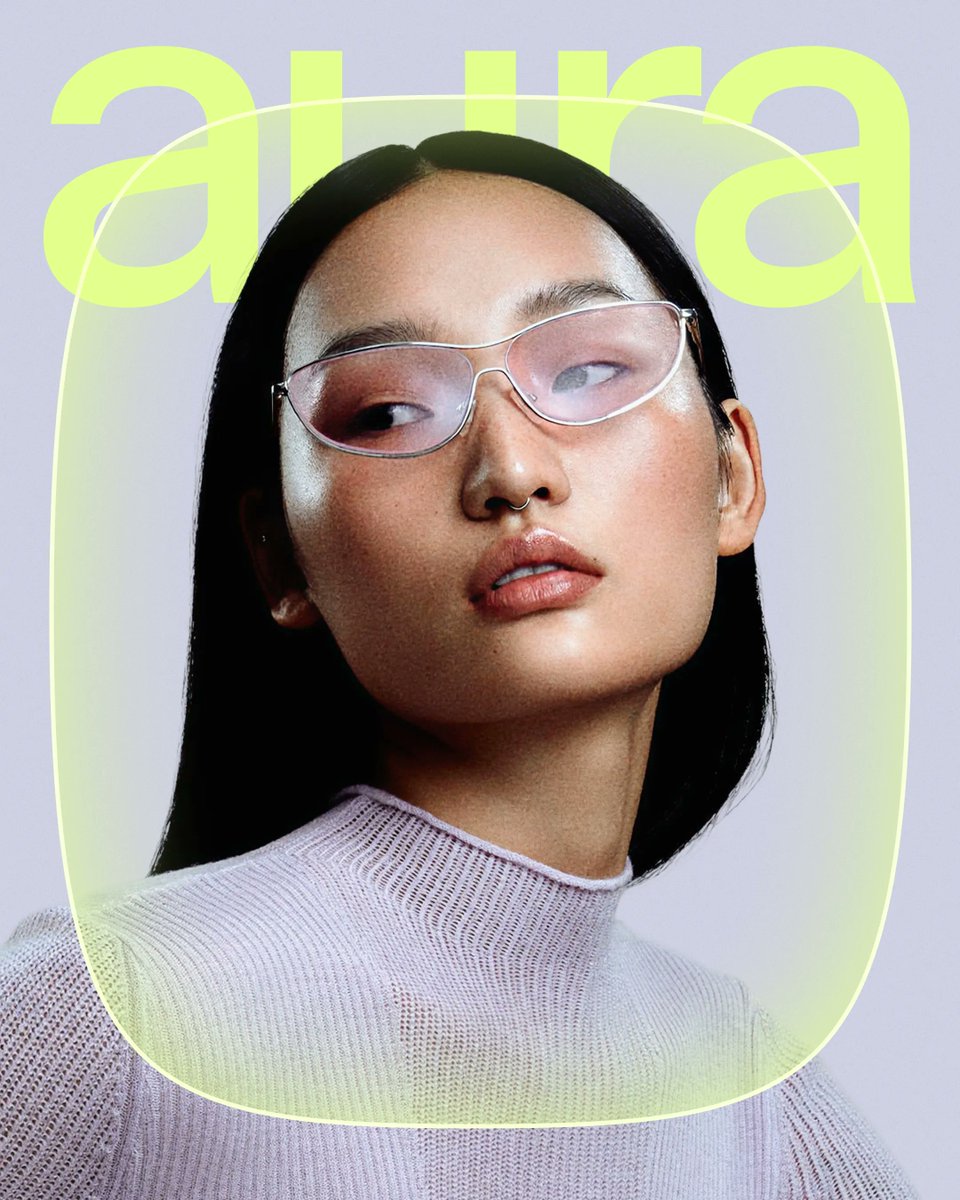
For example — with a simple curve you can create an aureole around the head! 💫
For example — with a simple curve you can create an aureole around the head! 💫

To give this aureole some glow, we’ll use the pen tool to draw a new shape which follows its curve.

Now change the fill to gradient and bam! There’s your glow. 🤩
Tip: Reduce the opacity and add a little blur to the glow to make it blend in a lil’ bit smoother 👌
Tip: Reduce the opacity and add a little blur to the glow to make it blend in a lil’ bit smoother 👌

As always, finish of with a subtle noise layer (find the noise plugin in the community) and you’re all set!

I hope you learned something from this thread. If you have any questions — Feel free drop a comment!
If you liked this tutorial, please retweet it so more people can see it 💙
I’m doing these weekly so make sure to follow me for more!
-F
I’m doing these weekly so make sure to follow me for more!
-F
• • •
Missing some Tweet in this thread? You can try to
force a refresh