
𝙂𝙥𝙤𝙨𝙚 𝙜𝙪𝙞𝙙𝙚: 𝘽𝙖𝙨𝙞𝙘𝙨 𝙤𝙛 𝙇𝙞𝙜𝙝𝙩𝙞𝙣𝙜
#ffxivscreenshots #gpose #gposeguide
Gpose has some amazing lighting tools to offer us. A lot of them often overlooked. Let's find out what there is and how to use it all!
A thread🧵(14 parts):
#ffxivscreenshots #gpose #gposeguide
Gpose has some amazing lighting tools to offer us. A lot of them often overlooked. Let's find out what there is and how to use it all!
A thread🧵(14 parts):

(1/14) Honorary mention: Full Screen Mode Gamma Correction
This setting's intended use is general gameplay. I give it a mention is because it does effect the outcome of your screenshots. It's something to keep in mind when a screenshot inexplicably becomes too bright or dark
This setting's intended use is general gameplay. I give it a mention is because it does effect the outcome of your screenshots. It's something to keep in mind when a screenshot inexplicably becomes too bright or dark


(2/14): Manual brightness adjustments
If there’s any way to describe this slider, I’d say it’s similar to exposure settings you’ll find in most editing software. The slider is used to darken or brighten your overall image.
If there’s any way to describe this slider, I’d say it’s similar to exposure settings you’ll find in most editing software. The slider is used to darken or brighten your overall image.
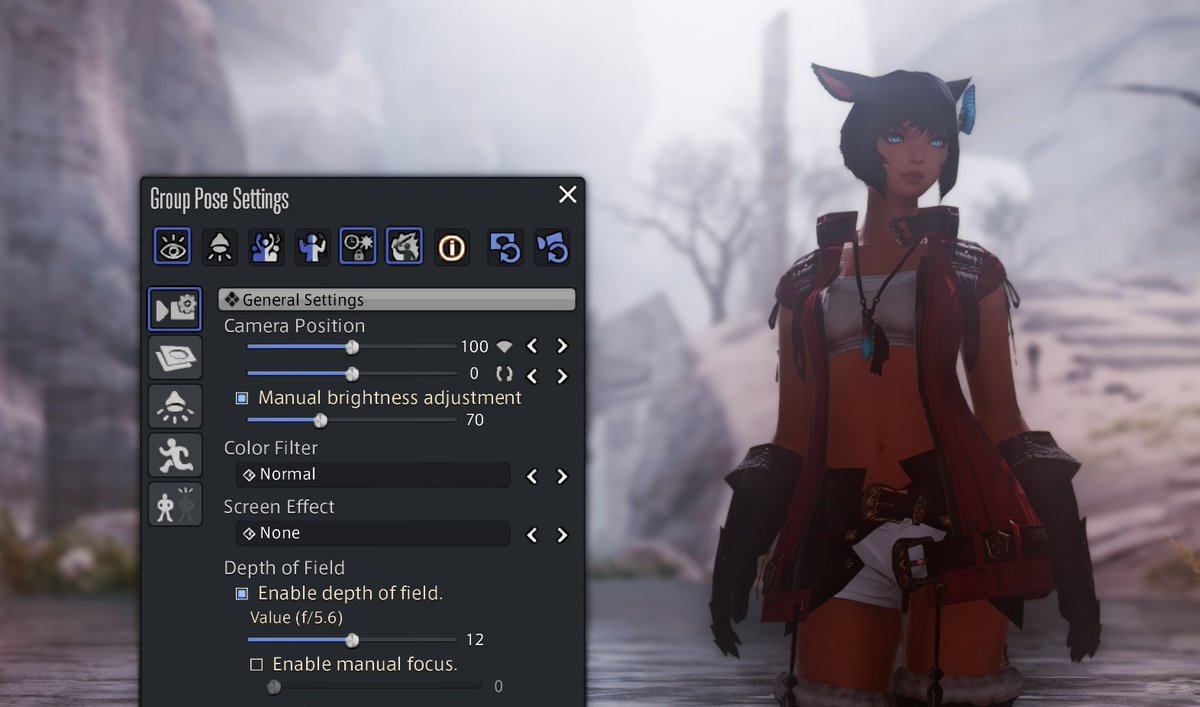

(3/14): This slider shines most when you need that little bit of boost to a dark scene, or need to reduce the brightness in an overexposed scene. Keep in mind that removing/adding too much light can also change the time of day it looks like you’re taking pictures at.


(4/14): Limb darkening
Limb darkening is not a lighting setting really. All it does is add a vignette. You can still use it to slightly brighten or darken a scene by using the lowest possible settings on these sliders.
Limb darkening is not a lighting setting really. All it does is add a vignette. You can still use it to slightly brighten or darken a scene by using the lowest possible settings on these sliders.


(5/14): Lighting Settings
In the Lighting Settings tab, you’ll find a menu with three different lights. We are able to place these three separate lights almost freely around our character. Our only restriction being how far our “camera” can reach.
In the Lighting Settings tab, you’ll find a menu with three different lights. We are able to place these three separate lights almost freely around our character. Our only restriction being how far our “camera” can reach.
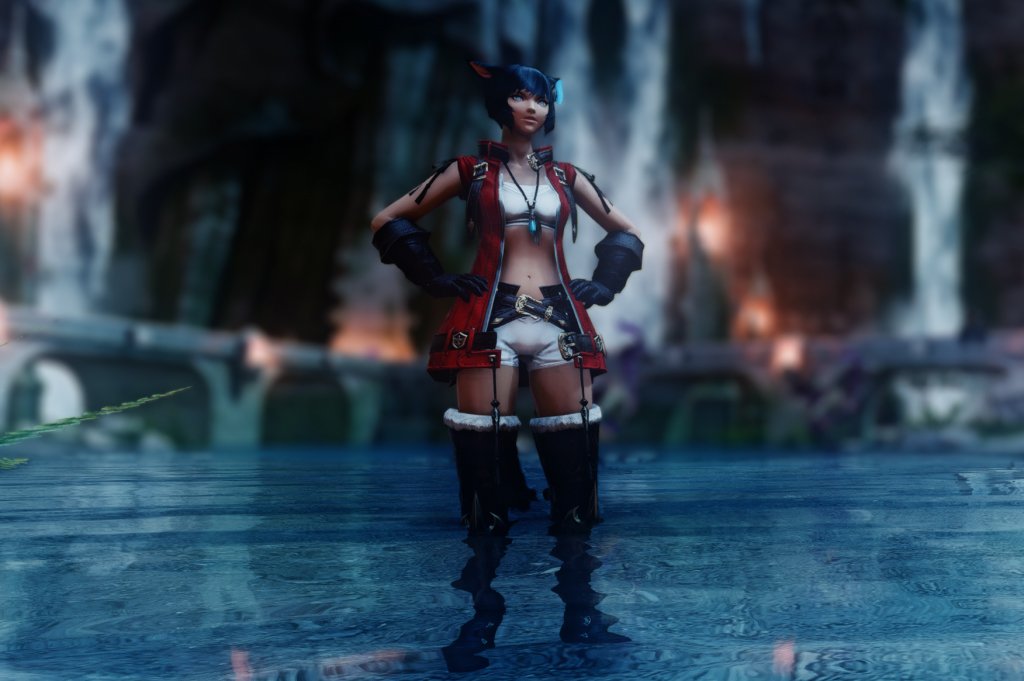
(6/14):
You can pin-point the parts of the scene you light up. You're able to enhance lights pre-existing in the scene. I.E I added a blue-toned & cool-toned lights behind/in front of the character. This emulates the light from the moon as well as the reflection of the water.
You can pin-point the parts of the scene you light up. You're able to enhance lights pre-existing in the scene. I.E I added a blue-toned & cool-toned lights behind/in front of the character. This emulates the light from the moon as well as the reflection of the water.


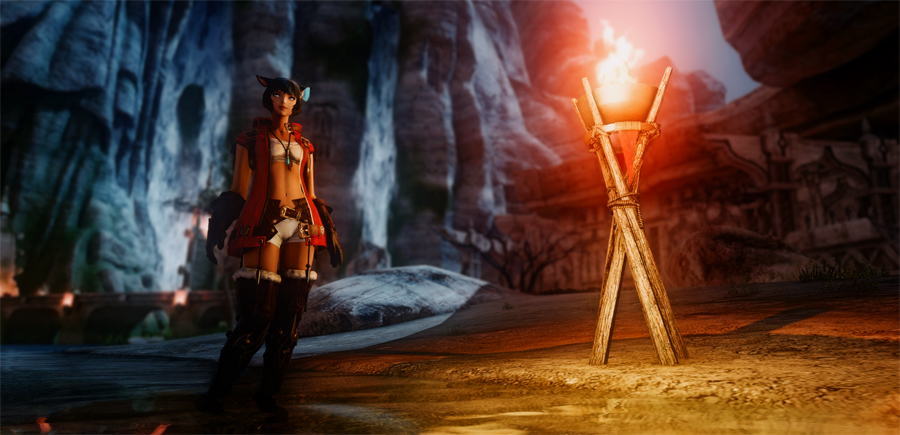
(7/14): You’re also able to enhance already existing lighting. For example, I took the existing light source, the fire, and enhanced the effects on the character by adding a light to her side.
(8/14): Lighting types
Once you’ve selected a light, you will be able to choose from three “types”. These types represent the size and intensity of the lights.
Once you’ve selected a light, you will be able to choose from three “types”. These types represent the size and intensity of the lights.

(8.1/14):
Type 1 is the softest light and can create the subtlest differences. It’s best use is lightly illuminating the character from a few steps away.
Type 1 is the softest light and can create the subtlest differences. It’s best use is lightly illuminating the character from a few steps away.


(8.2/14):
Type 2 is a middle ground type of light. It can be used the same way both Types 1 and 3 are used, however it’s not as dim or bright as either two. Personally I like to use it for overhead lights and accent lights.
Type 2 is a middle ground type of light. It can be used the same way both Types 1 and 3 are used, however it’s not as dim or bright as either two. Personally I like to use it for overhead lights and accent lights.

(8.3/14):
Type 3 is the harshest and biggest light and can alter the lighting of an entire scene. It’s best used illuminating the entire scene from far away. It can also be used effectively close by for intense and dramatic statement lights.
Type 3 is the harshest and biggest light and can alter the lighting of an entire scene. It’s best used illuminating the entire scene from far away. It can also be used effectively close by for intense and dramatic statement lights.

(9/14): Underneath the types, there's 3 color sliders. Red, green & blue. With these you can achieve different color combinations and intensities. Lower umber = subtler light. Higher number = more intense light. The intensity of the light also changes how clearly a color shows.

(10/14): Character Lighting
As the name basically already tells us, Character Lighting is a lighting option that only affects your character and what they’re holding. Like every other slider, being conservative with the values is key in using it effectively.
As the name basically already tells us, Character Lighting is a lighting option that only affects your character and what they’re holding. Like every other slider, being conservative with the values is key in using it effectively.


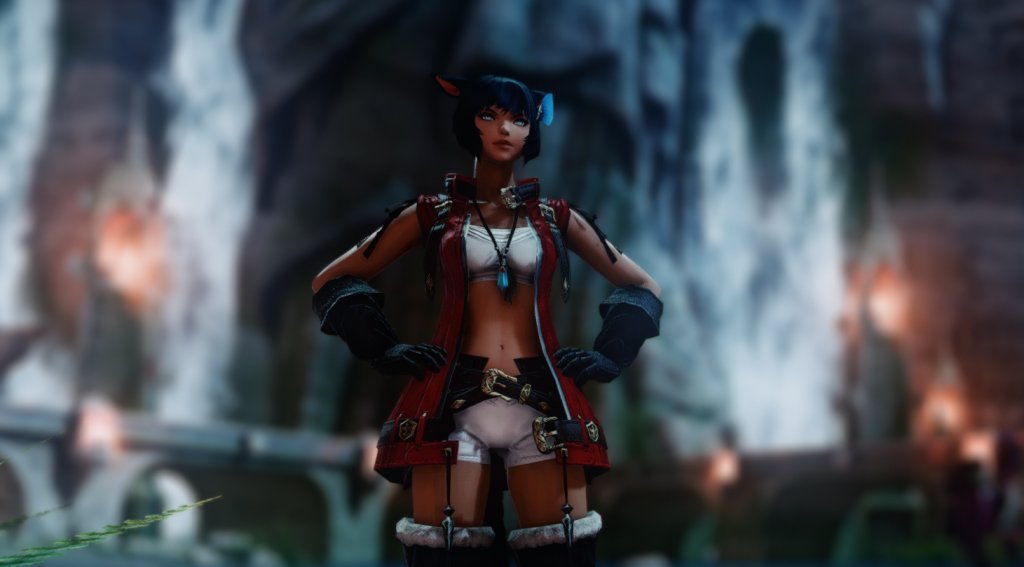
(11/14):
Cranking up this setting removes depth from your character. With a large amount “overall” light added, you also remove natural shadows.
It also looks weird when your character is unnaturally lit and doesn't match the rest of the scene.
Cranking up this setting removes depth from your character. With a large amount “overall” light added, you also remove natural shadows.
It also looks weird when your character is unnaturally lit and doesn't match the rest of the scene.

(12/14): Saving/loading your settings
At the bottom of your Gpose menu you see two bottoms with arrows on them. The first one is the save window.
At the bottom of your Gpose menu you see two bottoms with arrows on them. The first one is the save window.

(13/14):
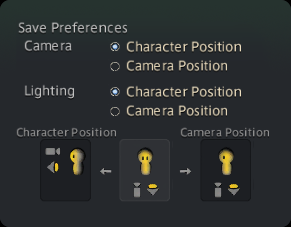
Save Preferences gives you two options for how you wish it to apply your settings next time you load them. You can choose from “Character Position” and “Camera Position”.
Save Preferences gives you two options for how you wish it to apply your settings next time you load them. You can choose from “Character Position” and “Camera Position”.
(13.1/14):
If I place a light in front of my character save with “character position checked”, Gpose will load in this light relative to where my character is facing.
If I place a light in front of my character save with “character position checked”, Gpose will load in this light relative to where my character is facing.

(13.2/14): Camera position saves lighting based on your camera as you saved it. It’s essentially a “fixed” setting and it will remain the same regardless of where your character is facing. However, the lights will still use your character as a reference.

(14/14): With that we have reached the end. I recommend combining all these settings to achieve the best lighting outcome. As always, you can find a full and more elaborate version of this guide here: nyanya.studio/lighting-in-gp…

• • •
Missing some Tweet in this thread? You can try to
force a refresh


