
say hi to the Pre-Modulation Processor (PMP) -- a critical piece of equipment in the command module of the Apollo spacecraft. 🧵 

some of you may know that i've been working with @curious_marc and team on restoring and reverse engineering parts of the historic Apollo spacecraft.

the PMP is proving to be an interesting challenge because it has a ton of wiring between it and the Command Module's control panel. there are nine panel switches and a large number of connections to other parts of the S-band communications system.

to get the PMP fully tested and working, we have to simulate a bunch of hardware that we don't have.
one piece of hardware we don't have is the massive control panel. this example, from the Smithsonian NASM, is actually from a trainer and was not a flight console. there are a LOT of switches.

but we don't need ALL of those controls. just a few in this area.
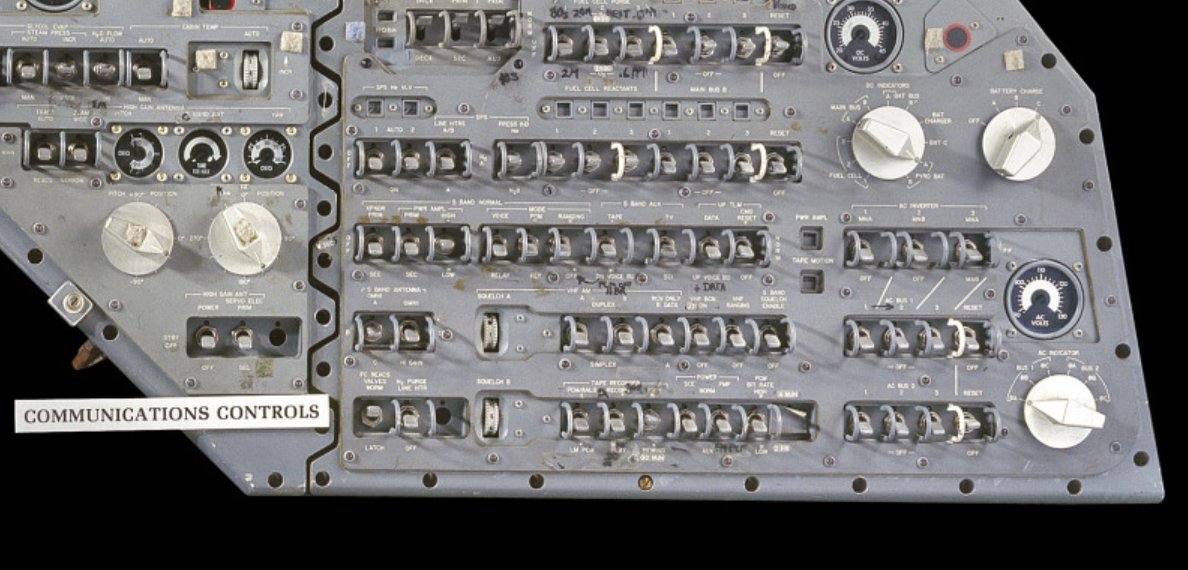
in fact, let's zoom in and take VERY close look.

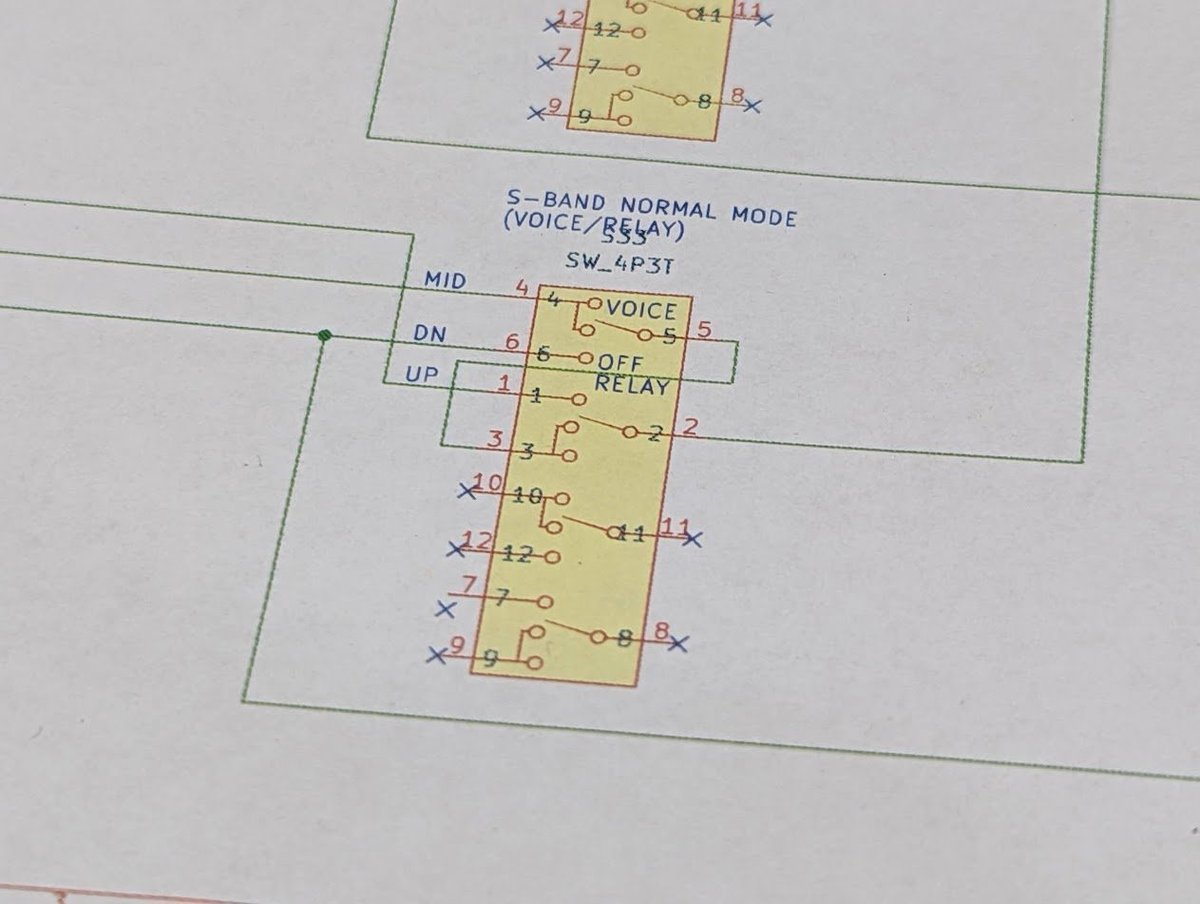
like everything Apollo, there are mountains of documentation, and only some of it has been scanned. the rest is in a warehouse that looks like the one from Indiana Jones. so do we have anything on the switches?
why yes, we do! here's the engineering drawing for one style of Apollo CM control panel switch. hmm, you know, that switch looks vaguely familiar. i wonder if i've--

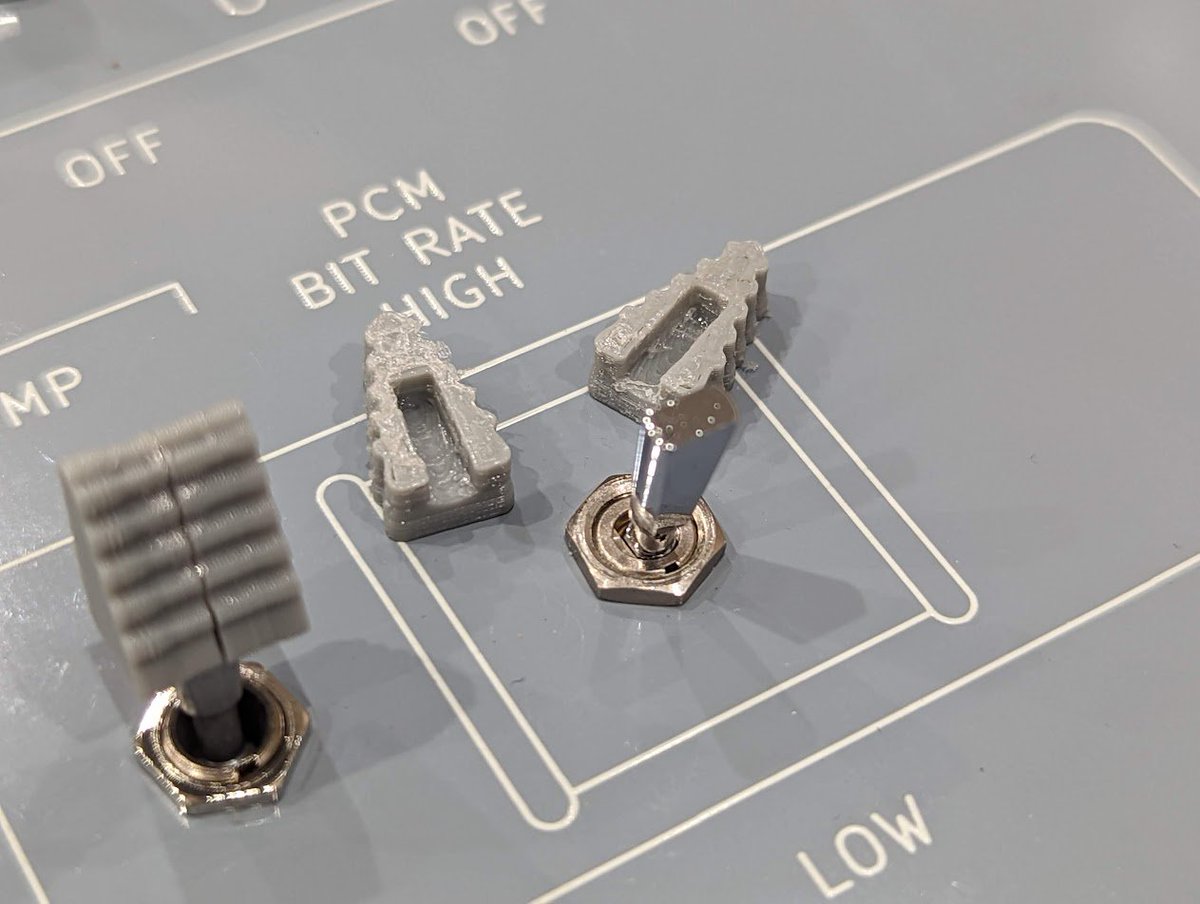
yeah, so i dug around in my junk box and found a bunch of Apollo switches! i have no idea where i bought them. they were reasonably common Honeywell switches used in 1960s equipment.

the only difference from the off-the-shelf Honeywell part is that the NASA folks wanted a custom switch tip. so naturally i used their drawing and 3D printed one.

btw, Honeywell *still* sells this style of toggle switch. it is their AT series. the price is around $300 to $2000 depending on the configuration.
sps.honeywell.com/us/en/products…
sps.honeywell.com/us/en/products…
so yeah that's a bit outside our price range. instead, we decided to use cheaper PCB-mount toggle switches and a custom circuit board!

one tricky part is that the original switches have a 3-throw design. modern switches typically are on-off-on, meaning they have connections for 2 throws but the center position is not connected to anything.

the replica control panel uses 3-throw switches where the center position is shorted to one of the adjacent throw connections. by careful wiring i was able to make them emulate a true 3-throw switch with fully independent connections.
recently the Apollo CM control panel PCBs came in from our sponsor, @PCBWayOfficial, and they look incredible!
we used PCBWay's "Advanced PCB" service, which offers the grey solder mask.
we used PCBWay's "Advanced PCB" service, which offers the grey solder mask.


so nice, it really sets my SCE to AUX.

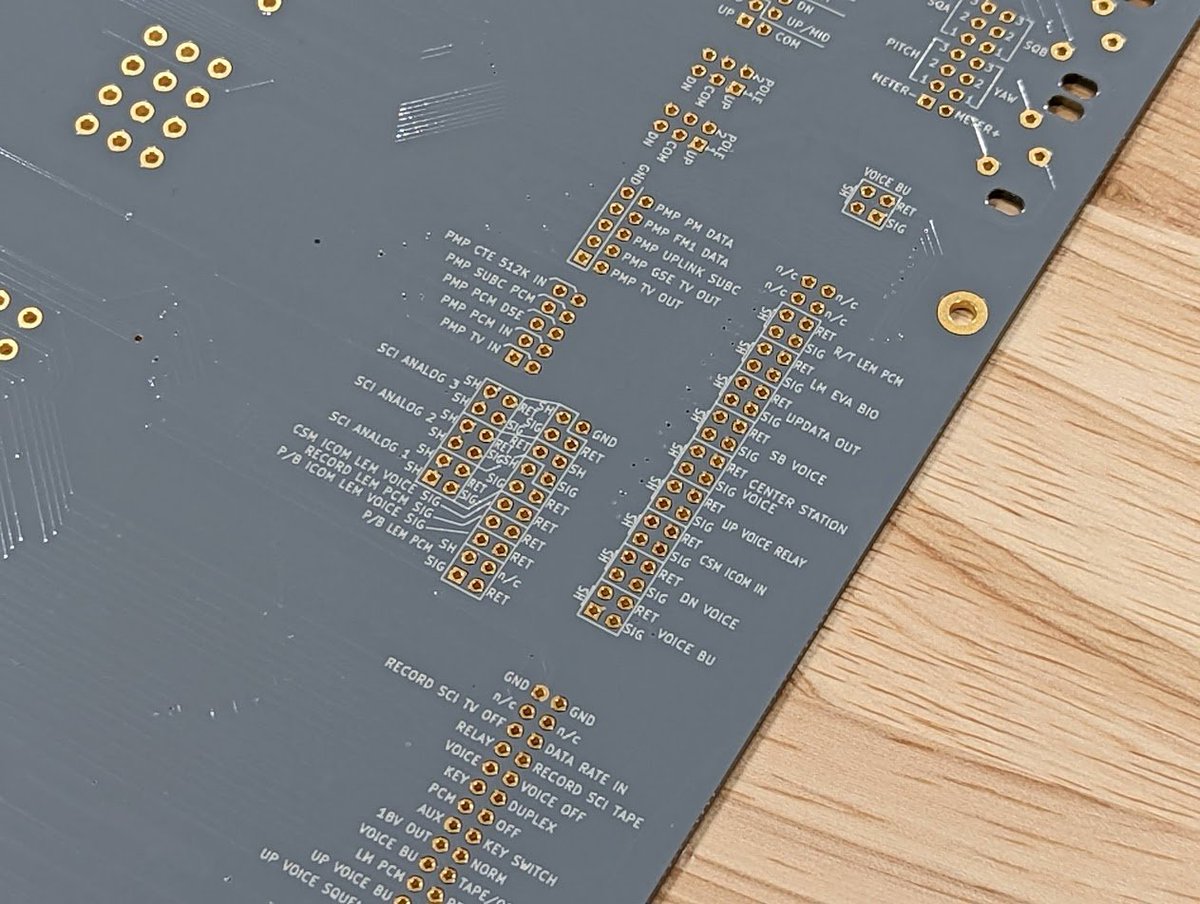
i ended up getting two PCBs. the top one is the front panel you already saw. the bottom one has the footprints for the switches and all the wiring. it also has connectors to wire up the panel to the PMP, and indicator LEDs for all the control signals.

flip the board over, and you'll see that i put signal names next to every connector pin! it's a great trick that saves a lot of time when we're building the wiring harnesses.
here it is all built up! i made a bunch of 3d-printed "greeblies" to make it look more like the real thing.

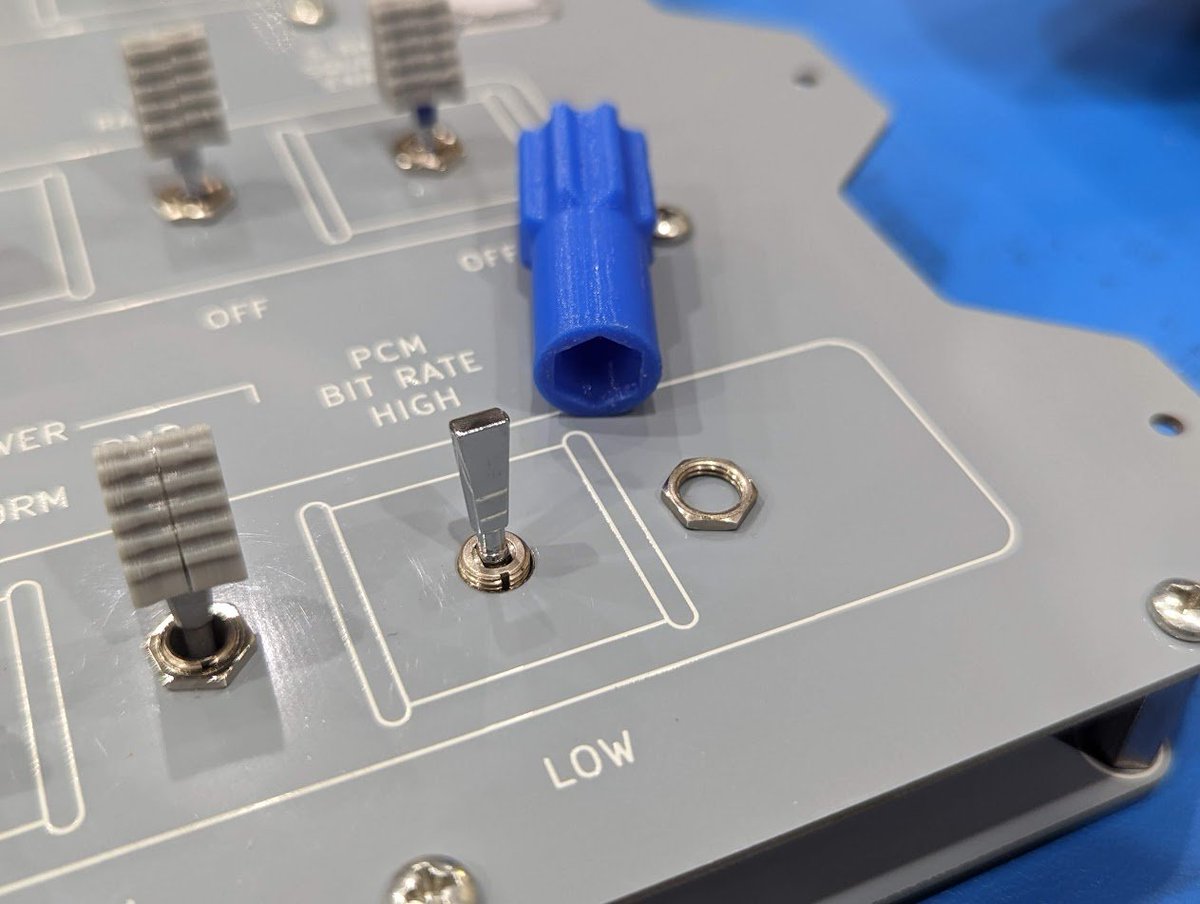
i made 3d-printed switch tips to make the boring old toggle switches look like the real thing.
the squelch knobs can actually rotate and have real potentiometers connected to them!


i spent a lot of time staring at photos of the Apollo CM's control panel and came up with these 3d-printed knobs. the real thing used several different styles of knob, so i took a few liberties with the shape (and scale!)

using the magic of 3d printing, i also made this tiny wrench to make it easier to fasten the toggle switch mounting nuts. it works *great* and doesn't scratch the PC board.

the 3d printer was also great for making up these little spacers. there are two styles of toggle switch and each one needed a different spacer height.

i even 3d printed this cute little mounting clamp for the round panel meter.

let's fire it up and try it out! watch the colorful blinkenlights!
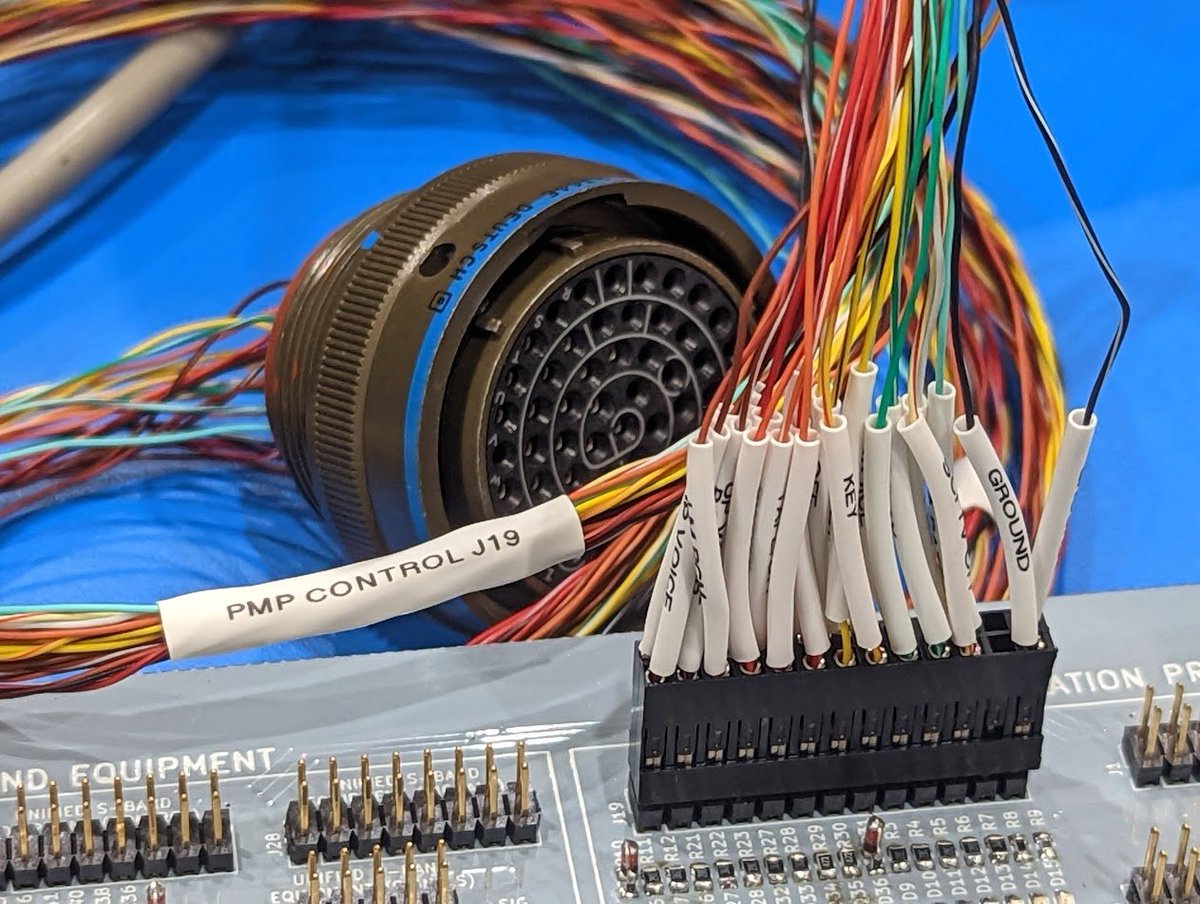
here's the first wiring harness. each wire is labeled using the special heat shrink that you can feed through your P-touch label maker (available from that very large online retailer)

(the expensive avionics connector gazes menacingly at the low-cost 0.1" header connector)
what diodes? what are you talking about? oh those weird little diode+resistor thingies? don't worry about those.

speaking of connectors, we also made up some little PCBs (sponsored by @PCBWayOfficial, natch) that we can use to plug into these really weird Deutsch coaxial connectors that are total unobtainium.

they're just short sections of brass tubing soldered down to act as the outer shield connection, and the center contact is just a PGA socket pin that happened to be the perfect diameter.


• • •
Missing some Tweet in this thread? You can try to
force a refresh


