Is your game struggling with performance?
Here is how to run your Unreal C++ code asynchronously to avoid bottlenecks.
A thread 🧵👇🏼
Here is how to run your Unreal C++ code asynchronously to avoid bottlenecks.
A thread 🧵👇🏼

A little bit of context:
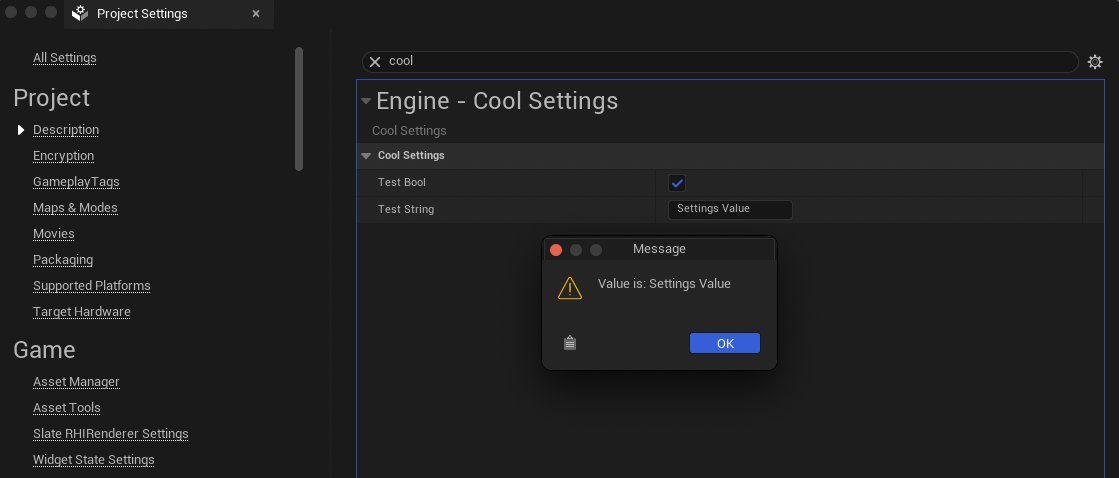
I am working on integrating @Tolgee_i18n localization tools inside Unreal Engine.
One of problem I've encountered is the performance hit coming from refreshing the Localization Manager resources.
A single call would take 450ms and drop the FPS to 2.
I am working on integrating @Tolgee_i18n localization tools inside Unreal Engine.
One of problem I've encountered is the performance hit coming from refreshing the Localization Manager resources.
A single call would take 450ms and drop the FPS to 2.

1. Investigating & diagnosing the issue
The first step we need to take is to add as many TRACE_CPUPROFILER_EVENT_SCOPE in performance-heavy code. This will measure the impact of the function's execution.
As a general rule of thumb, when in doubt, always add more.
The first step we need to take is to add as many TRACE_CPUPROFILER_EVENT_SCOPE in performance-heavy code. This will measure the impact of the function's execution.
As a general rule of thumb, when in doubt, always add more.

2. Evaluating if the code can run async
Certain functions can only be executed on the main thread (e.g.: Creating UObjects).
In most cases, Unreal's code marks these portions with: check(IsInGameThread()).
This is a clear sign the function should NOT be ran async.
Certain functions can only be executed on the main thread (e.g.: Creating UObjects).
In most cases, Unreal's code marks these portions with: check(IsInGameThread()).
This is a clear sign the function should NOT be ran async.

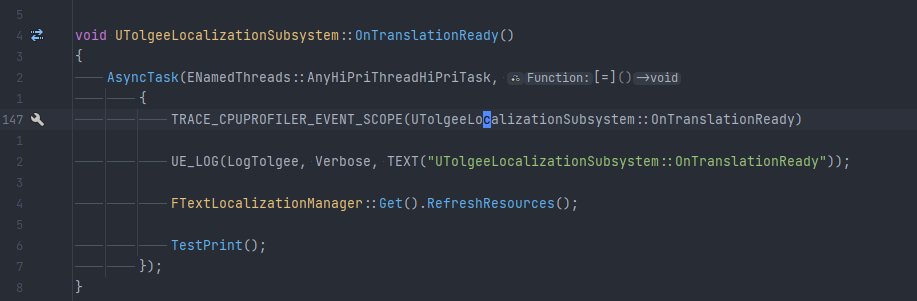
3. Converting to async
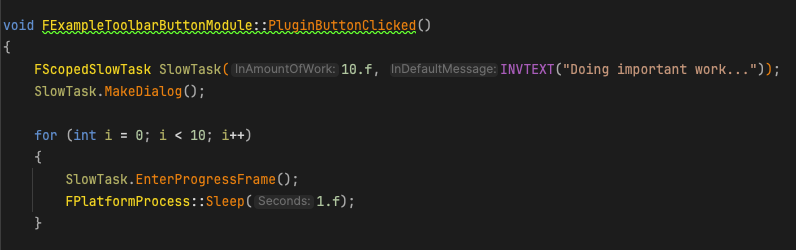
All we have to do is to wrap our code in a lambda and call AsyncTask.
The first parameter is the thread type. We will go with AnyHiPriThreadHiPriTask because we want our work to get prioritized.
The second parameter is the lambda with our code inside.
All we have to do is to wrap our code in a lambda and call AsyncTask.
The first parameter is the thread type. We will go with AnyHiPriThreadHiPriTask because we want our work to get prioritized.
The second parameter is the lambda with our code inside.
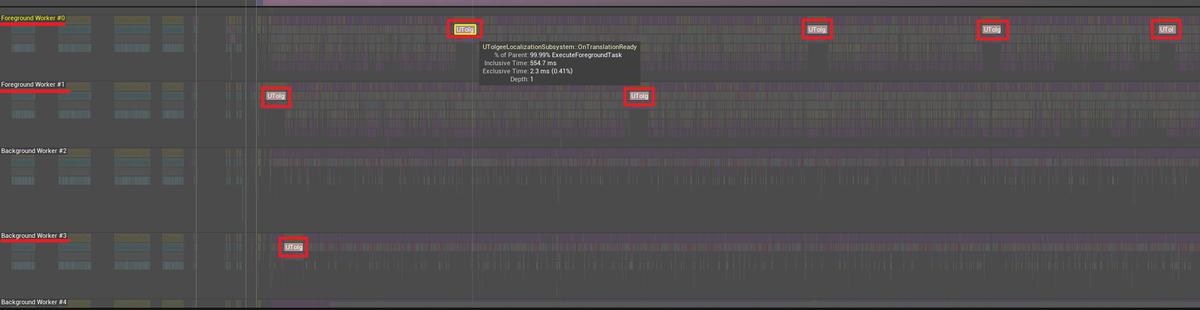
4. Re-evaluating performance
When running our latest changes we can see the calls to our functions get spread across multiple threads depending on the workload and priority.
When running our latest changes we can see the calls to our functions get spread across multiple threads depending on the workload and priority.
5. Checking result
The execution still takes 450ms, but it's no longer blocking our main thread so the player can enjoy a smooth experience.
All the FPS spikes are gone by writing just 3 lines of code.
The execution still takes 450ms, but it's no longer blocking our main thread so the player can enjoy a smooth experience.
All the FPS spikes are gone by writing just 3 lines of code.

That's all for today!
If you learned something new:
1. Follow me @OutoftheboxP for more of these
2. Retweet the tweet below to share it with your fellow developer friends.
If you learned something new:
1. Follow me @OutoftheboxP for more of these
2. Retweet the tweet below to share it with your fellow developer friends.
https://twitter.com/1166067041792614401/status/1653050695447134208
• • •
Missing some Tweet in this thread? You can try to
force a refresh