Prompt study - breakdown.
Starting with the same shell of a prompt I used in the last couple of threads (see previous tweets).
Let's break down the prompt and see the results.
Thread.
Starting with the same shell of a prompt I used in the last couple of threads (see previous tweets).
Let's break down the prompt and see the results.
Thread.

This is the initial prompt I started with:
High fashion portrait shoot of a supermodel, in the style of curved mirrors, symmetrical lines, neoclassical style, ultra-realistic, hyper-detailed --ar 16:9
These are simply my observations. It doesn't mean this is the right way.
High fashion portrait shoot of a supermodel, in the style of curved mirrors, symmetrical lines, neoclassical style, ultra-realistic, hyper-detailed --ar 16:9
These are simply my observations. It doesn't mean this is the right way.

Stripping down the prompt:
I took out curved mirrors, neoclassical style.
I added "in Iceland" (random). Add anything you'd like.
New prompt in ALT.


I took out curved mirrors, neoclassical style.
I added "in Iceland" (random). Add anything you'd like.
New prompt in ALT.


Taking out another layer.
Removed ultra-realistic and hyper-detailed.
The prompt now:
High fashion portrait shoot of a supermodel in Iceland, symmetrical --ar 16:9
The girl in white looks cold. 😆


Removed ultra-realistic and hyper-detailed.
The prompt now:
High fashion portrait shoot of a supermodel in Iceland, symmetrical --ar 16:9
The girl in white looks cold. 😆


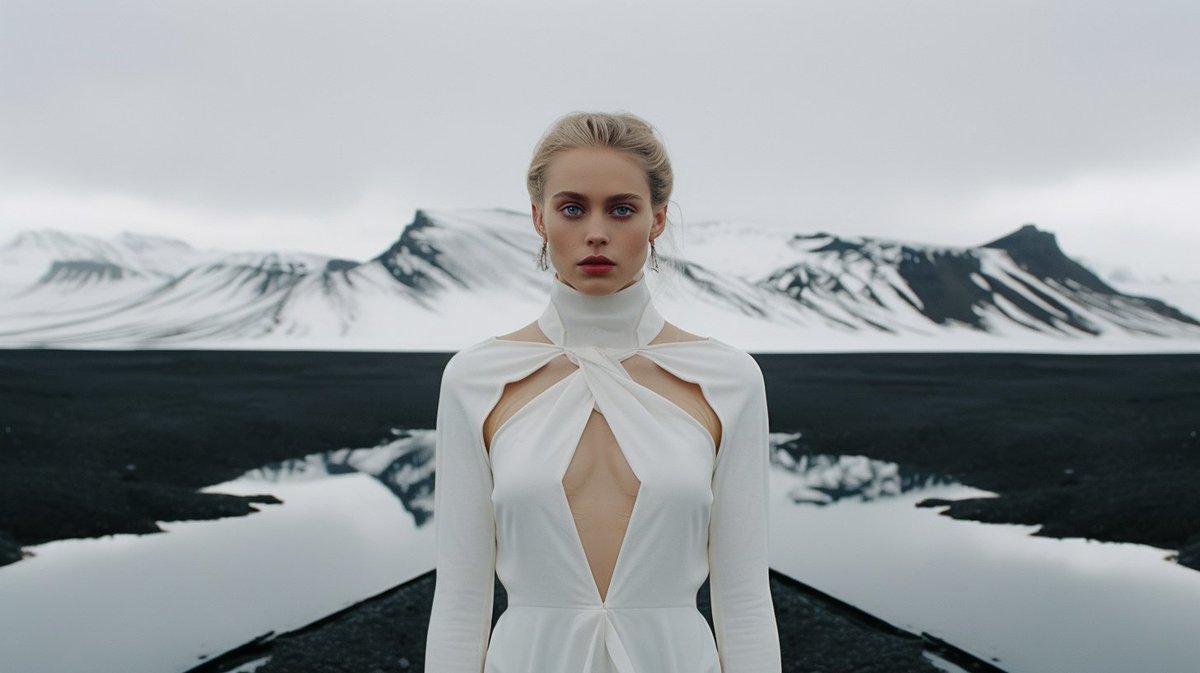
Next:
Removed "High" - from fashion.
The prompt now:
A fashion portrait shoot of a supermodel in Iceland, symmetrical --ar 16:9


Removed "High" - from fashion.
The prompt now:
A fashion portrait shoot of a supermodel in Iceland, symmetrical --ar 16:9
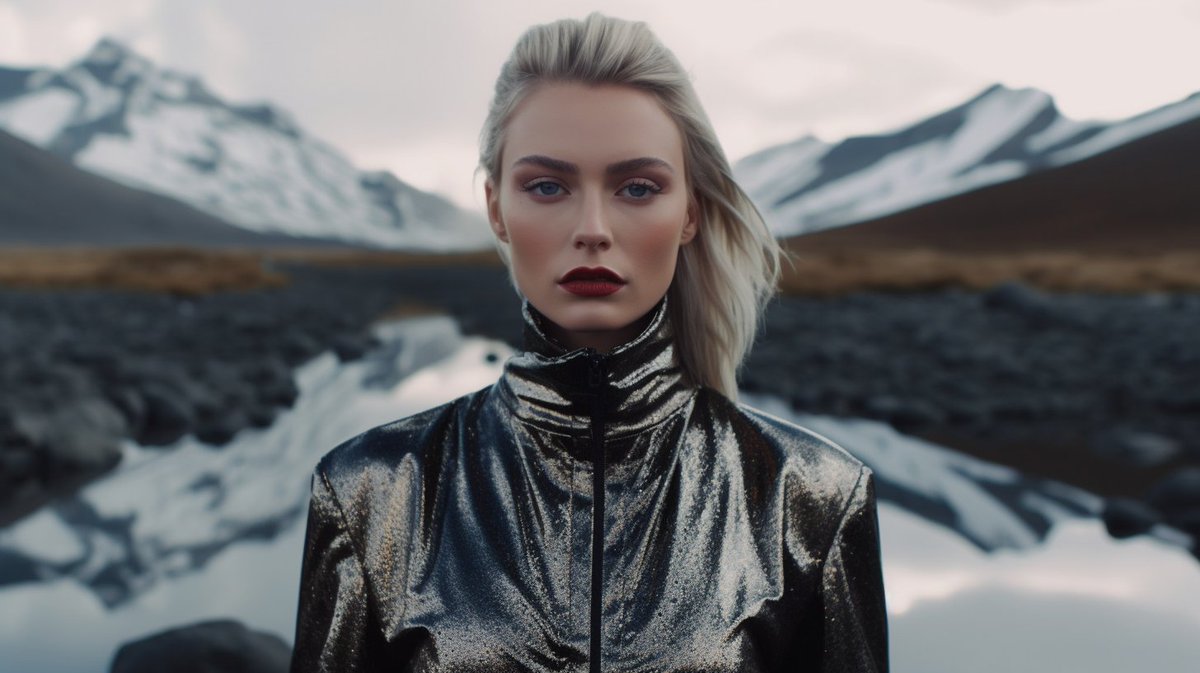
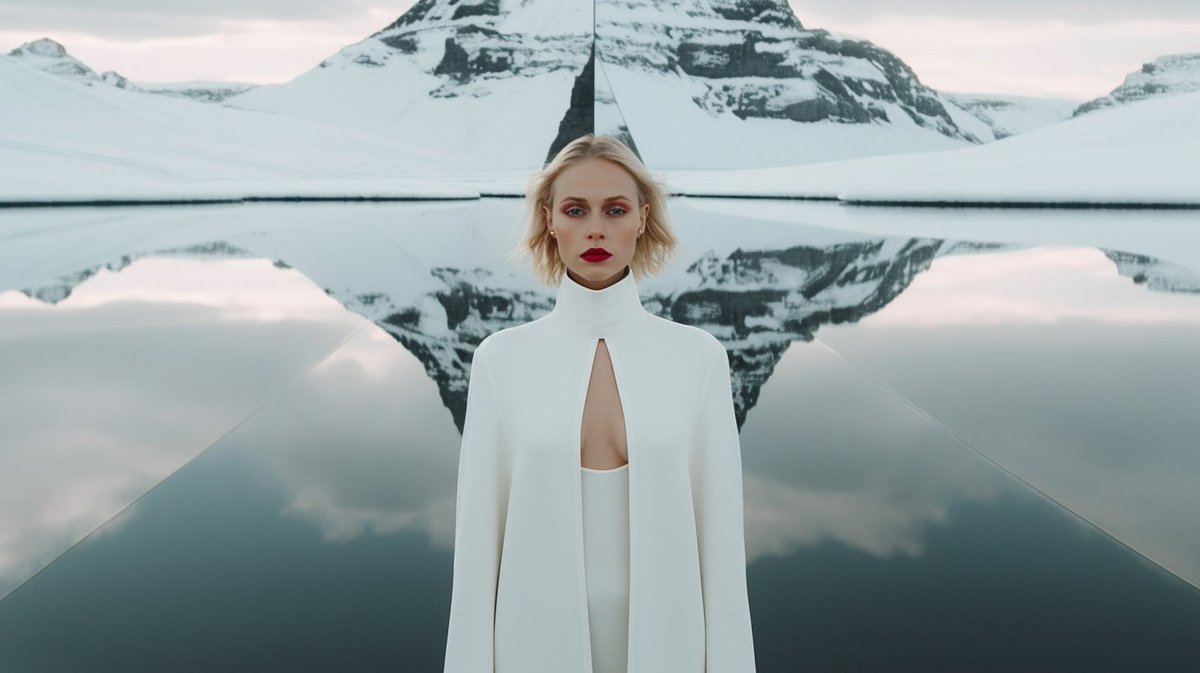


Then,
Removed "Fashion" too.
Prompt now:
A portrait shoot of a supermodel in Iceland, symmetrical --ar 16:9
While I peel these layers I pay attention to what differences I see (if any).
I really like the first image.


Removed "Fashion" too.
Prompt now:
A portrait shoot of a supermodel in Iceland, symmetrical --ar 16:9
While I peel these layers I pay attention to what differences I see (if any).
I really like the first image.


At this point, I wanted to see if changing the "shoot" to a "photo" would make a difference.
Note! If you do not add either - the results vary (often not photos).
Here are the results and the prompt.
a portrait photo of a supermodel in Iceland, symmetrical --ar 16:9


Note! If you do not add either - the results vary (often not photos).
Here are the results and the prompt.
a portrait photo of a supermodel in Iceland, symmetrical --ar 16:9


Note about "symmetry"
Symmetry seems to center the subject and, well, make the scene symmetrical.
If you remove symmetry, you get more "organic" images.
Using symmetry sometimes make a line in the middle.
Prompt:
a portrait photo of a supermodel in Iceland --ar 16:9


Symmetry seems to center the subject and, well, make the scene symmetrical.
If you remove symmetry, you get more "organic" images.
Using symmetry sometimes make a line in the middle.
Prompt:
a portrait photo of a supermodel in Iceland --ar 16:9


At this point, the prompt is just about as stripped as possible.
Now I can play with some other elements.


Now I can play with some other elements.


A few more variations.
If you take out "portrait" and insert something else - you get something completely different - more on that soon.
Also, the aspect ratio changes things. To keep things consistent, I used --ar 16:9 aspect ratio throughout.
Prompt in ALT.
#midjourneyv51


If you take out "portrait" and insert something else - you get something completely different - more on that soon.
Also, the aspect ratio changes things. To keep things consistent, I used --ar 16:9 aspect ratio throughout.
Prompt in ALT.
#midjourneyv51


This is an exploration.
It's not to say that this is the right way or the only way. This is simply a method I often use to help me observe what certain elements might be doing in a prompt and whether they are taken into consideration by Midjourney, and how, if at all.
It's not to say that this is the right way or the only way. This is simply a method I often use to help me observe what certain elements might be doing in a prompt and whether they are taken into consideration by Midjourney, and how, if at all.

• • •
Missing some Tweet in this thread? You can try to
force a refresh


