Ron Barbosa MD FACS Profile picture
Jun 20, 2023 10 tweets 5 min read Read on X
Short 🧵regarding the use of 'slip' knots to keep the tissues approximated when they are under tension, so that they stay in the right position when throwing the rest of your knots.

This is a very common technique, and I would say I use 'slip' knots in almost every case.

(1/ ) Image
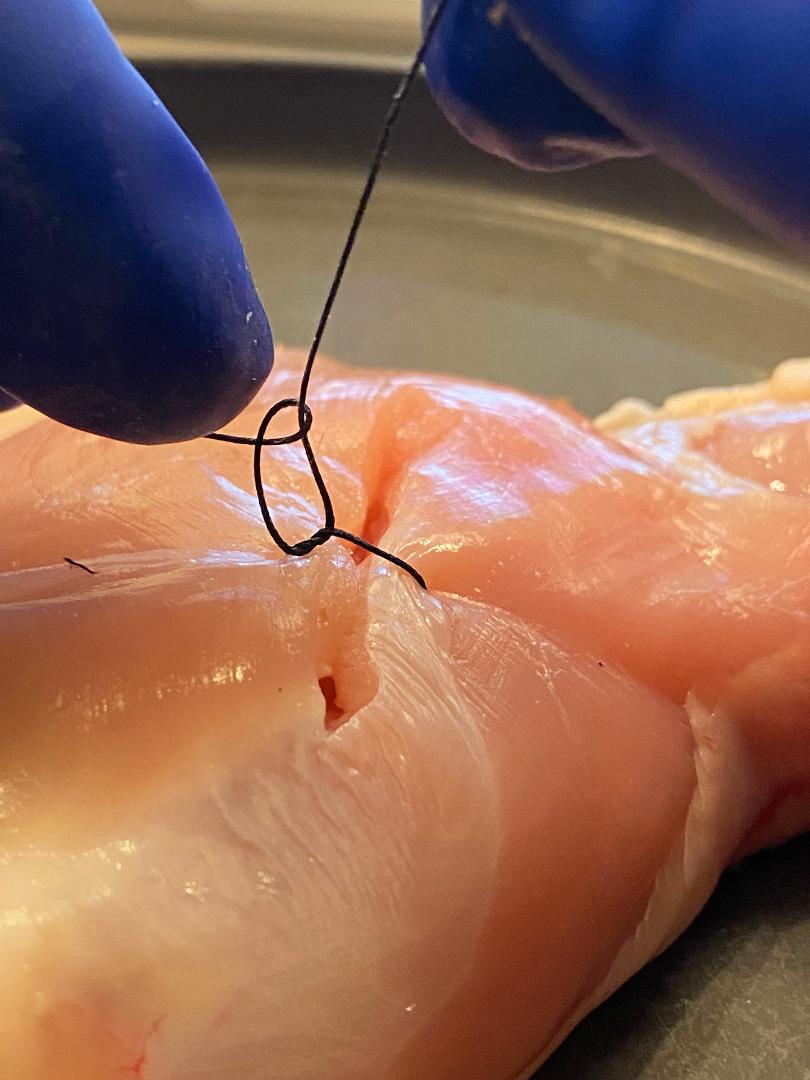
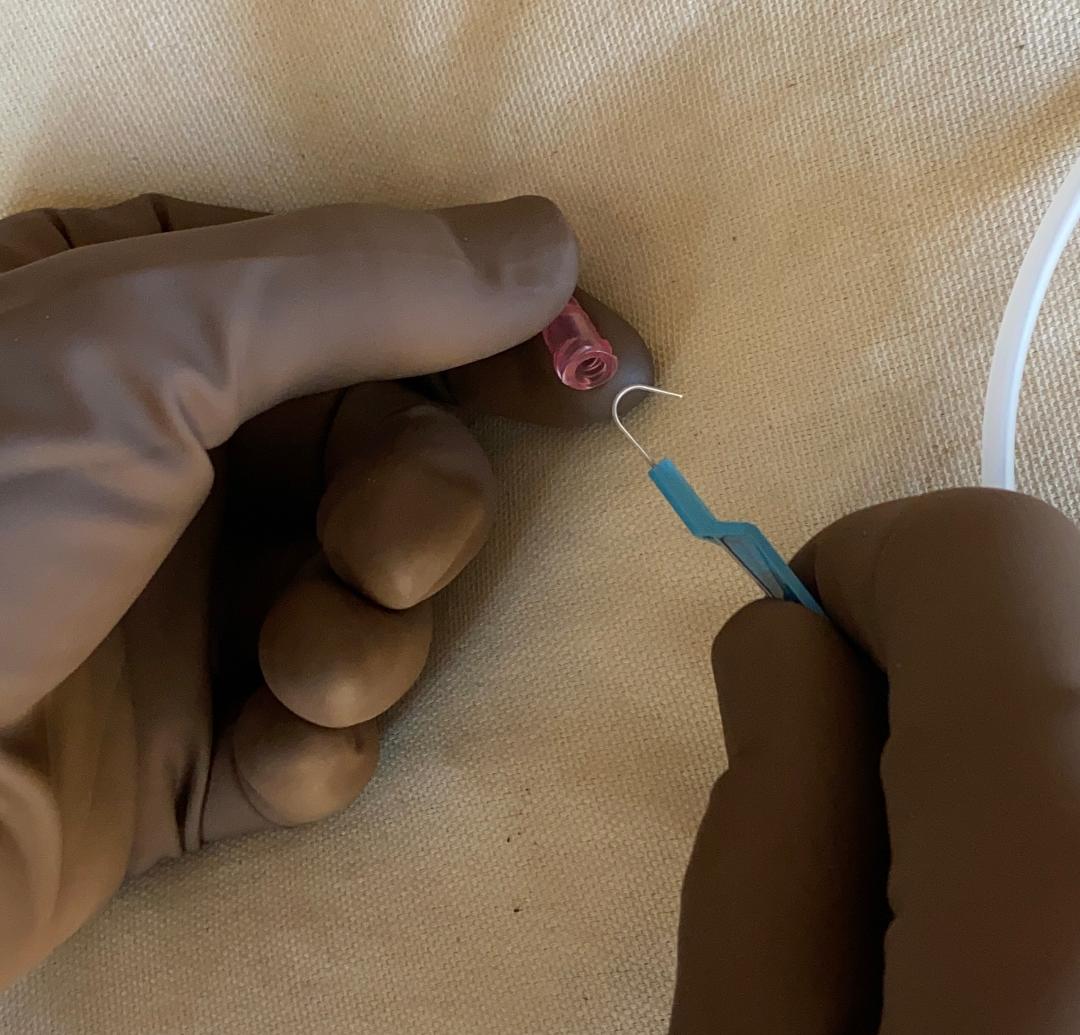
In the L picture, I am about to approximate the tissue with a square knot.

In the R picture, I have pulled on the strands to approximate the tissue. If the tissue stays there, that's great. The square knot can be completed. But the problem is that it tends to pull apart. ImageImage
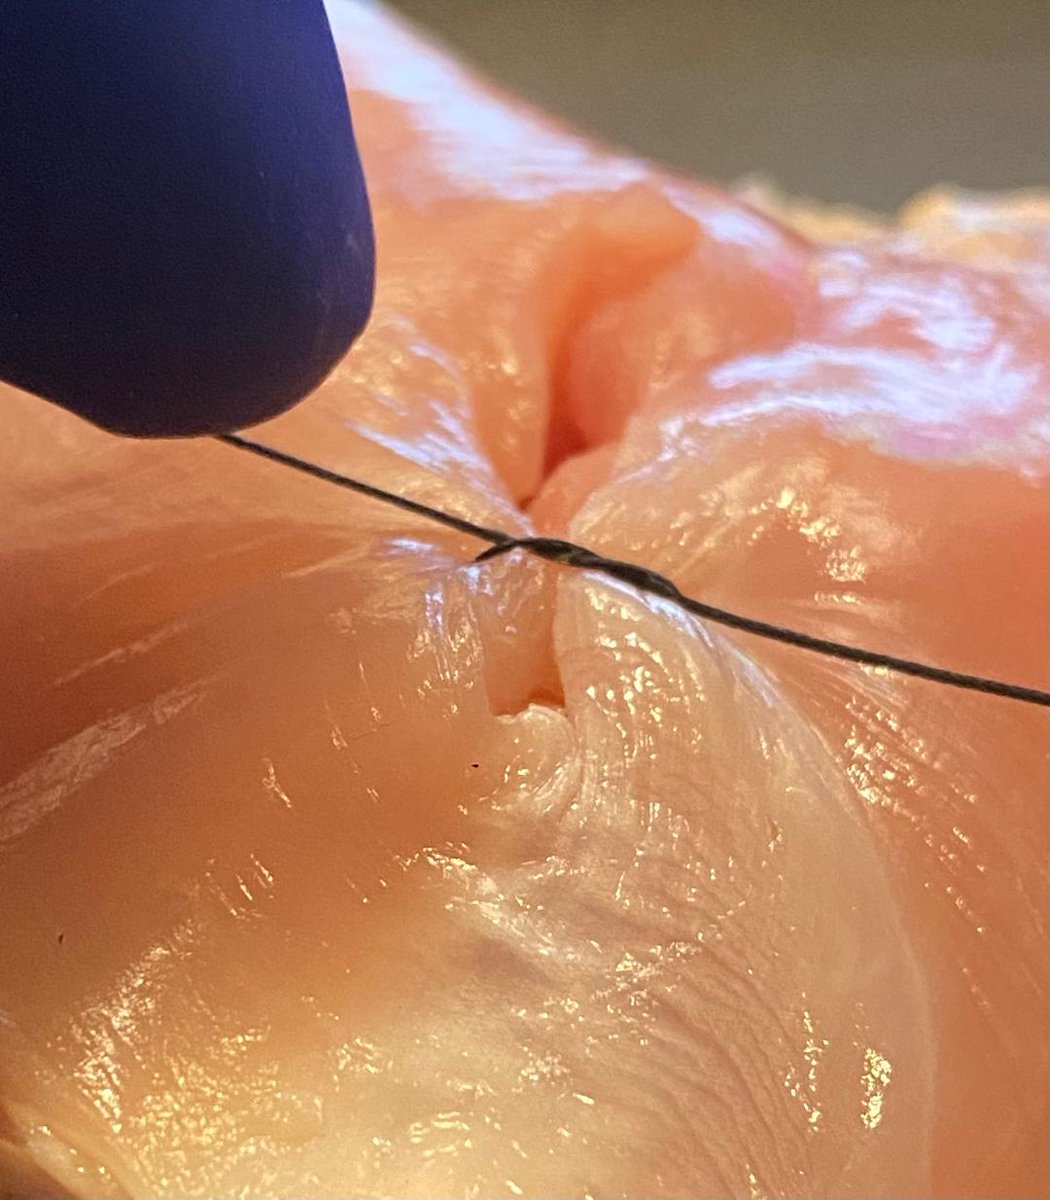
Very often, the tension on the tissues will cause the first throw to loosen a little bit (yellow arrow).

When I go to throw the second half of the square knot, it will usually 'lock' the knot in this position, leaving my suture loose. Image
Here is a video of this happening. I have tied the 2nd half of the square knot down when the tissue was loose. It has locked in place, and now the suture is too loose.

The tissues are not approximated well enough. There's no way to fix this, and it has to be cut out and redone.
Now let's try this again using the slip knot technique. Here I have thrown the first half of the square knot in the usual manner.

Instead of crossing my hands and doing the 2nd half of the square knot (like last time), I'm going to do the *same* throw again (on the next slide). Image
I have thrown the second knot using the same technique as the first throw, and also I'm keeping one strand up in the air (yellow arrow), while pushing down with my left hand (red arrow).

This creates a 'slip' knot, which usually will keep the tissue approximated. Image
Here I am tying down the slip knot, keeping one strand held up in the air and pushing the other one down.

Usually, this will be sturdy enough to keep the tissue together, even when it is under tension. However, I have not 'squared' the knot yet. This will come next.
Having approximated the tissue with the slip knot, I now need to complete the 'squaring' of the knot.

This means crossing my hands and using whichever part of the technique you use for the 'second' half of your square knots. The knot will now be secure. Image
This is a video of the same thing (the second half of the square knot).

As you can see, the slip knot has done its job -- it has held the tissue together, so that I now have time to complete the 2nd half of the square knot at my leisure, as the tissues remain approximated.
A secure square knot is now in place. The difference is that it took me 3 throws to do this, instead of 2. I am now ready to tie the rest of my knots (# depends on the suture material).

This technique at comes up all the time. I use it at some point in nearly every case.
⬛️ Image

• • •

Missing some Tweet in this thread? You can try to force a refresh
 

Keep Current with Ron Barbosa MD FACS

Ron Barbosa MD FACS Profile picture

Stay in touch and get notified when new unrolls are available from this author!

Read all threads

This Thread may be Removed Anytime!

PDF

Twitter may remove this content at anytime! Save it as PDF for later use!

Try unrolling a thread yourself!

how to unroll video
  1. Follow @ThreadReaderApp to mention us!

  2. From a Twitter thread mention us with a keyword "unroll"
@threadreaderapp unroll

Practice here first or read more on our help page!

More from @rbarbosa91

Jan 23
🧵regarding the Gigli saw:

A simple but effective tool for cutting bone. As usual, we'll go over its design, how to use it, and why such a basic device still exists in the surgical toolbox in 2026.

We'll also cover its history and the tragic fate of Leonardo Gigli.
(1/ ) Image
The main advantage of the Gigli saw is that it's simple. It's just a wire and 2 hooks.

It doesn't require any power or any other equipment and it can be used in austere environments. If you needed to, you could amputate a leg out in the wilderness with a Gigli saw. Image
The technique is simple. The saw blade is dragged back and forth to cut the bone. It helps if you keep the momentum going and try to minimize 'stopping'.

Also, try to use most of the length of the blade instead of just the middle part, or this part will overheat and break.
Read 17 tweets
Nov 16, 2025
🔥Surgical History Sunday UK🇬🇧 edition🔥

The more things change, the more they stay the same.

I found commentary from a 1967 edition of Look magazine that sounds...familiar.

First: junior doctor dissatisfaction and low pay, and UK physicians leaving for elsewhere:
(1/ ) Image
It has always been the case that though much of the conversation has to do with pay, that the true causes of discontent are more complex than that. Again, this was noted more than 50 years ago: Image
It was noted at the time (once again: 1967) that the practice of having doctors in training move around every few months was a problem. Which I'm gathering, remains an issue. Image
Read 5 tweets
Oct 11, 2025
Brief Saturday surgical history 🧵

Temporary shunts for vascular trauma have actually been around for >100 yr. The first widespread use likely began with Prof. Tuffier in France, who used them in wounded soldiers in WW1 (1914-18).

The strategy was different though...
(1/ ) Image
Image
Formal vascular repair had been described by Carrel, but was impractical in war conditions due to practically all wounds having massive contamination and delayed presentation, which made the vessels more friable and difficult to suture.

Bernheim had a famous quote on this: Image
Transport times were much longer then, and most of the wounded who were going to die by exsanguination had already done that.

So instead, the main problem of vascular injury at the time was probably thrombosis of the injured vessel with ischemia of the distal tissues. Image
Read 8 tweets
Aug 29, 2025
Redo🧵regarding 'straightening the wire' during central line placement.

There are a few of my 🧵worth repeating for each group of new interns; IMO this is definitely one of them.

If you do a lot of central lines, this technique will come in handy over and over again.
(1/ )
We are all familiar with the plastic guide (the 'thingy') for the wire. It is meant to help you feed the wire into the needle.

It's usually there for the first attempt...but very often, especially if there is more than one attempt, the 'guide' gets lost somewhere on the field. Image
Image
Now you are left trying to get this wire in.

Inevitably, people either:
- fumble around to find the guide again
or
- contort themselves to try to get the wire in when it's curled like this

BUT---there is a better way... Image
Read 11 tweets
Jul 2, 2025
🧵regarding the technique of 2-handed knot tying.
It's July again, so it's a good time to revisit this 🧵.

2-handed tying is becoming a lost art in surgery, but I believe it is worth learning. We'll start with just the basic steps. Advanced concepts will come later.
(1/) Image
If you want your first knot to be square, you generally *don't* want to start off with uncrossed threads (L picture).

Instead, it's better to cross the two threads first before you start tying the knot (R picture).

There are 2 ways to 'cross' the threads, which we'll see next. Image
Image
When I do my initial crossing of threads, you'll see it can be done in one of two ways:

Either the L strand can be on top, or the R stand can be on top.
I can pick either one, but the one I choose will dictate which 'half' of the 2-handed technique I'll need to do first. Image
Image
Read 23 tweets
May 4, 2025
With the ASGBI meeting taking place in Edinburgh, it is prudent to revisit my previous 🧵on the deaths in the movie 'Braveheart'.

As you may recall, the goal was to estimate how many deaths were preventable if trauma surgical care was available in Scotland at the time.
(1/) Image
Once again, we will make some assumptions here:

- rapid 'scoop and run' transport
- casualties present individually and do not overwhelm the system.
The geography of this area provides certain benefits in terms of casualty allocation, as we'll see. Image
Specifically...in Braveheart, most of the deaths occurred in the Battle of Stirling and the Battle of Falkirk (approximate locations shown here).

As you can see, most of the major trauma centers in Scotland are located close nearby, making the transport more straightforward. Image
Image
Read 18 tweets

Did Thread Reader help you today?

Support us! We are indie developers!


This site is made by just two indie developers on a laptop doing marketing, support and development! Read more about the story.

Become a Premium Member ($3/month or $30/year) and get exclusive features!

Become Premium

Don't want to be a Premium member but still want to support us?

Make a small donation by buying us coffee ($5) or help with server cost ($10)

Donate via Paypal

Or Donate anonymously using crypto!

Ethereum

0xfe58350B80634f60Fa6Dc149a72b4DFbc17D341E copy

Bitcoin

3ATGMxNzCUFzxpMCHL5sWSt4DVtS8UqXpi copy

Thank you for your support!

Follow Us!

:(