Short 🧵regarding the use of 'slip' knots to keep the tissues approximated when they are under tension, so that they stay in the right position when throwing the rest of your knots.
This is a very common technique, and I would say I use 'slip' knots in almost every case.
(1/ )
This is a very common technique, and I would say I use 'slip' knots in almost every case.
(1/ )
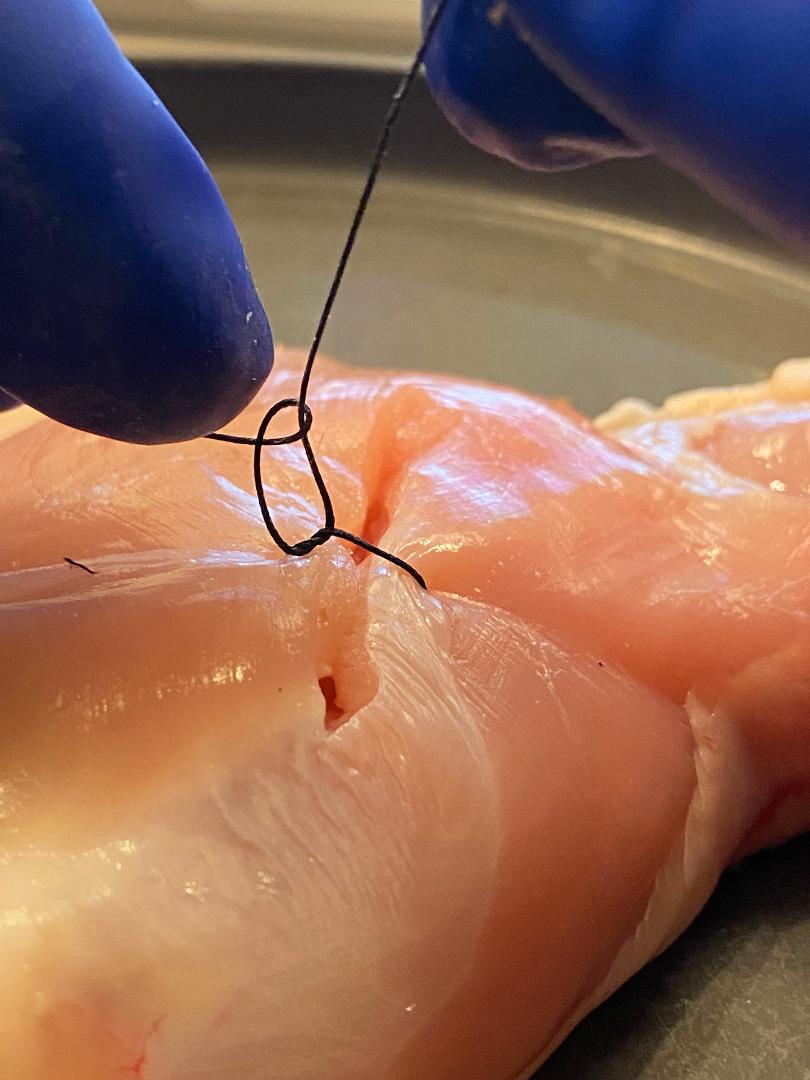
In the L picture, I am about to approximate the tissue with a square knot.
In the R picture, I have pulled on the strands to approximate the tissue. If the tissue stays there, that's great. The square knot can be completed. But the problem is that it tends to pull apart.

In the R picture, I have pulled on the strands to approximate the tissue. If the tissue stays there, that's great. The square knot can be completed. But the problem is that it tends to pull apart.

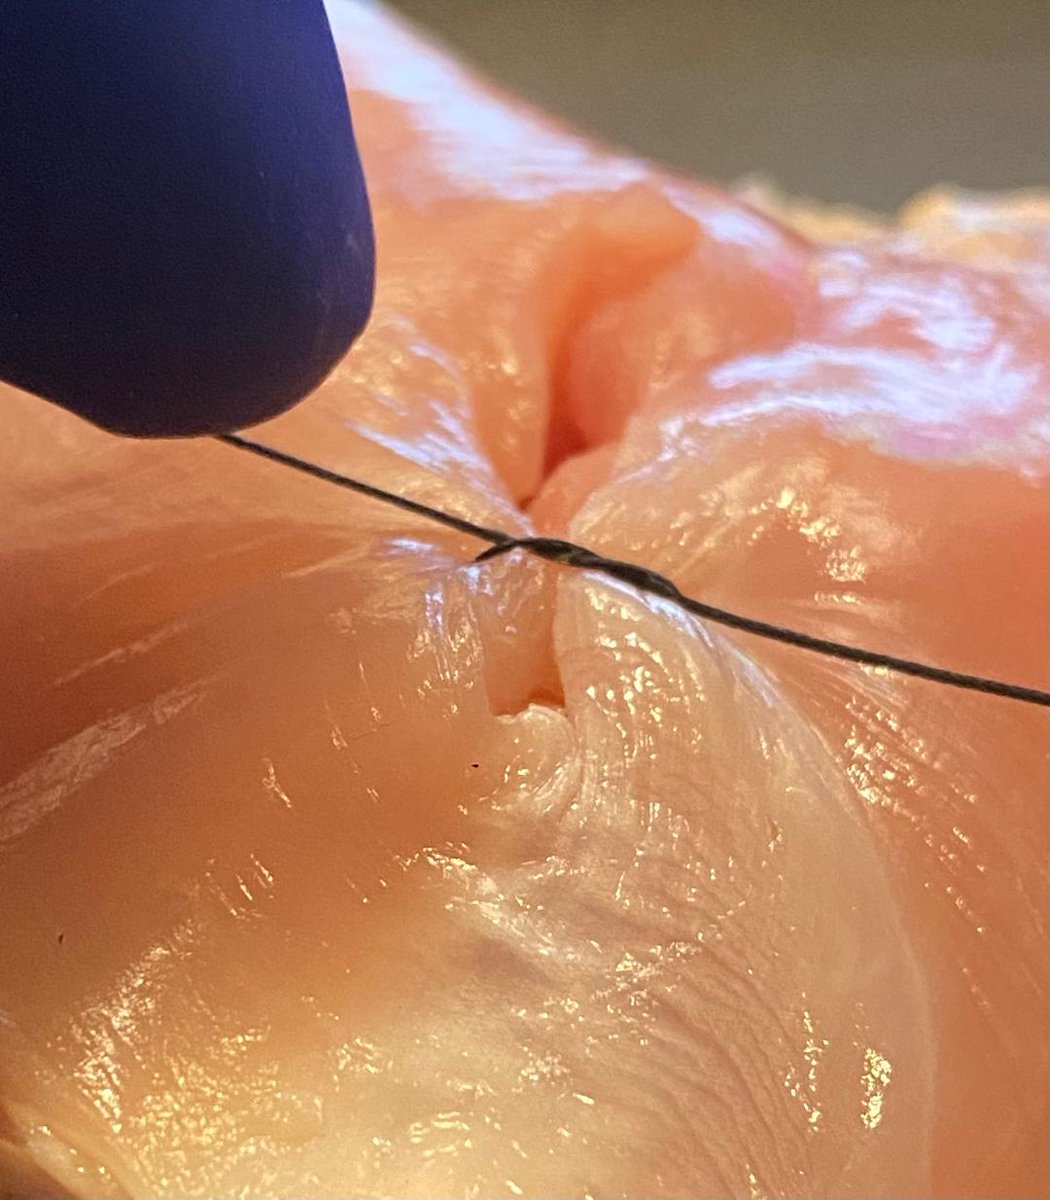
Very often, the tension on the tissues will cause the first throw to loosen a little bit (yellow arrow).
When I go to throw the second half of the square knot, it will usually 'lock' the knot in this position, leaving my suture loose.
When I go to throw the second half of the square knot, it will usually 'lock' the knot in this position, leaving my suture loose.

Here is a video of this happening. I have tied the 2nd half of the square knot down when the tissue was loose. It has locked in place, and now the suture is too loose.
The tissues are not approximated well enough. There's no way to fix this, and it has to be cut out and redone.
The tissues are not approximated well enough. There's no way to fix this, and it has to be cut out and redone.
Now let's try this again using the slip knot technique. Here I have thrown the first half of the square knot in the usual manner.
Instead of crossing my hands and doing the 2nd half of the square knot (like last time), I'm going to do the *same* throw again (on the next slide).
Instead of crossing my hands and doing the 2nd half of the square knot (like last time), I'm going to do the *same* throw again (on the next slide).

I have thrown the second knot using the same technique as the first throw, and also I'm keeping one strand up in the air (yellow arrow), while pushing down with my left hand (red arrow).
This creates a 'slip' knot, which usually will keep the tissue approximated.
This creates a 'slip' knot, which usually will keep the tissue approximated.

Here I am tying down the slip knot, keeping one strand held up in the air and pushing the other one down.
Usually, this will be sturdy enough to keep the tissue together, even when it is under tension. However, I have not 'squared' the knot yet. This will come next.
Usually, this will be sturdy enough to keep the tissue together, even when it is under tension. However, I have not 'squared' the knot yet. This will come next.
Having approximated the tissue with the slip knot, I now need to complete the 'squaring' of the knot.
This means crossing my hands and using whichever part of the technique you use for the 'second' half of your square knots. The knot will now be secure.
This means crossing my hands and using whichever part of the technique you use for the 'second' half of your square knots. The knot will now be secure.

This is a video of the same thing (the second half of the square knot).
As you can see, the slip knot has done its job -- it has held the tissue together, so that I now have time to complete the 2nd half of the square knot at my leisure, as the tissues remain approximated.
As you can see, the slip knot has done its job -- it has held the tissue together, so that I now have time to complete the 2nd half of the square knot at my leisure, as the tissues remain approximated.
A secure square knot is now in place. The difference is that it took me 3 throws to do this, instead of 2. I am now ready to tie the rest of my knots (# depends on the suture material).
This technique at comes up all the time. I use it at some point in nearly every case.
⬛️
This technique at comes up all the time. I use it at some point in nearly every case.
⬛️

• • •
Missing some Tweet in this thread? You can try to
force a refresh

 Read on Twitter


