We have been raising Cacao Theobroma (chocolate) trees in our lab (next to the water jet-it’s humid) for a few years. We learned to pollinate them, and they made pods! Now we need to learn how to ferment, dry, roast, shell, mill, and temper chocolate. If that sounds fun, read on!


First, I know a lot of people know a lot about all this, so I want to say: this project isn’t about pretentious choco-bullshit.
I’m not trying to be snotty. I wanted to see if I could start with a seed in dirt and end up with chocolate! That’s it! And learning has been fun!
I’m not trying to be snotty. I wanted to see if I could start with a seed in dirt and end up with chocolate! That’s it! And learning has been fun!

We had to learn a LOT. It’s nontrivial to grow Cacao indoors, and we ended up basically simulating equatorial conditions. Soil, nutrition, light.
Also, the (biting) insect that pollenates Cacao in nature is NOT PRESENT in our lab. So we learned to do it with q-tips and tweezers.
Also, the (biting) insect that pollenates Cacao in nature is NOT PRESENT in our lab. So we learned to do it with q-tips and tweezers.

Finally, after years of work raising the trees and recovering from screwups, we started to get viable pods. This was at first hugely exciting, and then massively daunting because we had zero clue how to go from this alien pod thing to the creamy delicious chocolate that we want.

OK! So, what do nerds do when confronted with the unknown? Read papers!
Turns out however that the research and instruction on “have cacao pods in lab how make yummy choco” is pretty thin.
But wait, it’s fermentation and roasting. I KNOW ABOUT THAT! Let’s go!
Turns out however that the research and instruction on “have cacao pods in lab how make yummy choco” is pretty thin.
But wait, it’s fermentation and roasting. I KNOW ABOUT THAT! Let’s go!

There are two sets of problems we need to learn how to solve: making “nibs” by fermenting, drying, and roasting the beans, and then converting the nibs into chocolate by grinding and tempering. So we decided to practice both in parallel, which is what’s happening starting today:


My history of fucking things up badly has taught me to carefully try *all the stuff you can BEFORE you do the important part.* So let’s start with the fermentation of the beans.
In order to taste like we expect, the raw cacao seeds need a lot of work. Let’s get started.
In order to taste like we expect, the raw cacao seeds need a lot of work. Let’s get started.

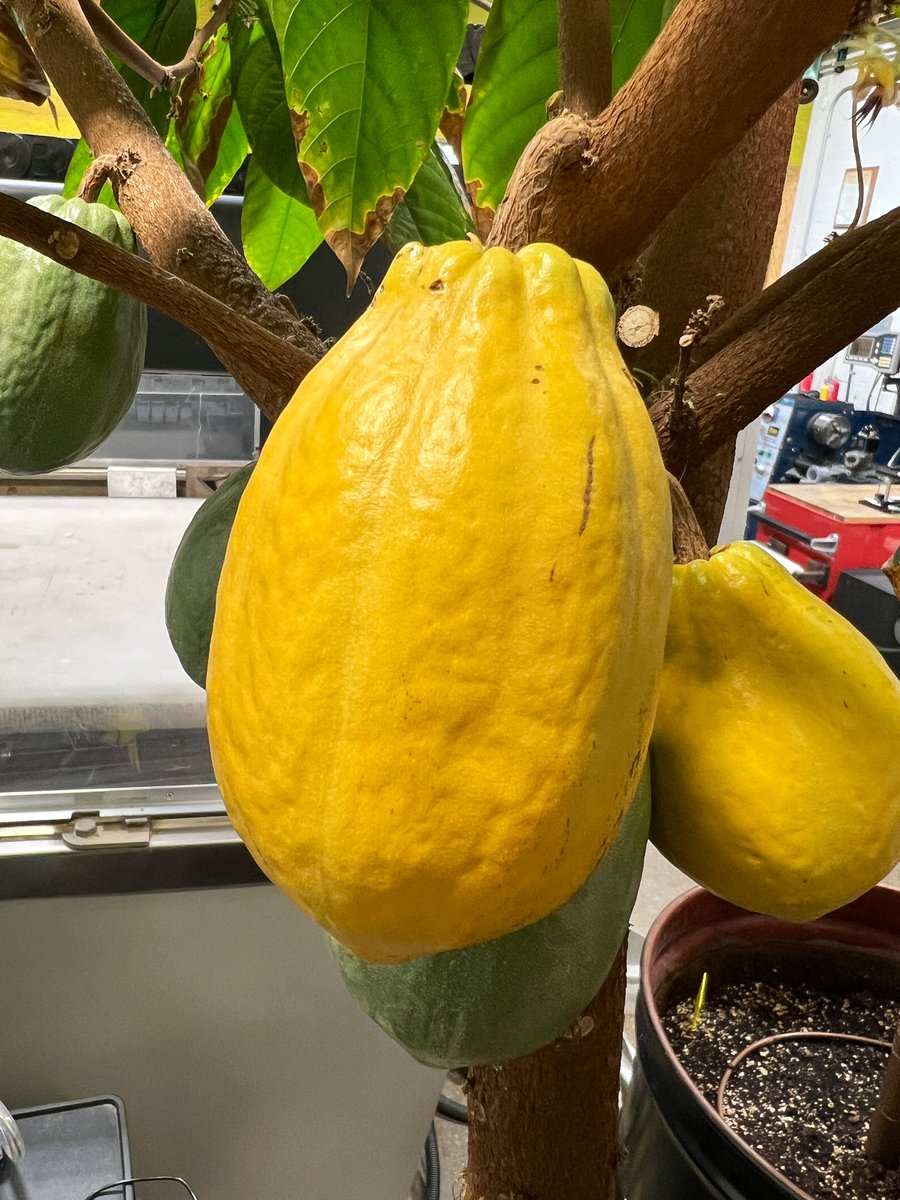
I ordered some lovely pods of the same variety as the ones our tree seems to produce: Frontero.
The idea is to try the process and get good at it before our trees produces enough pods that we are wasting them like assholes. We need to ferment, dry and roast. Ferment first…
The idea is to try the process and get good at it before our trees produces enough pods that we are wasting them like assholes. We need to ferment, dry and roast. Ferment first…

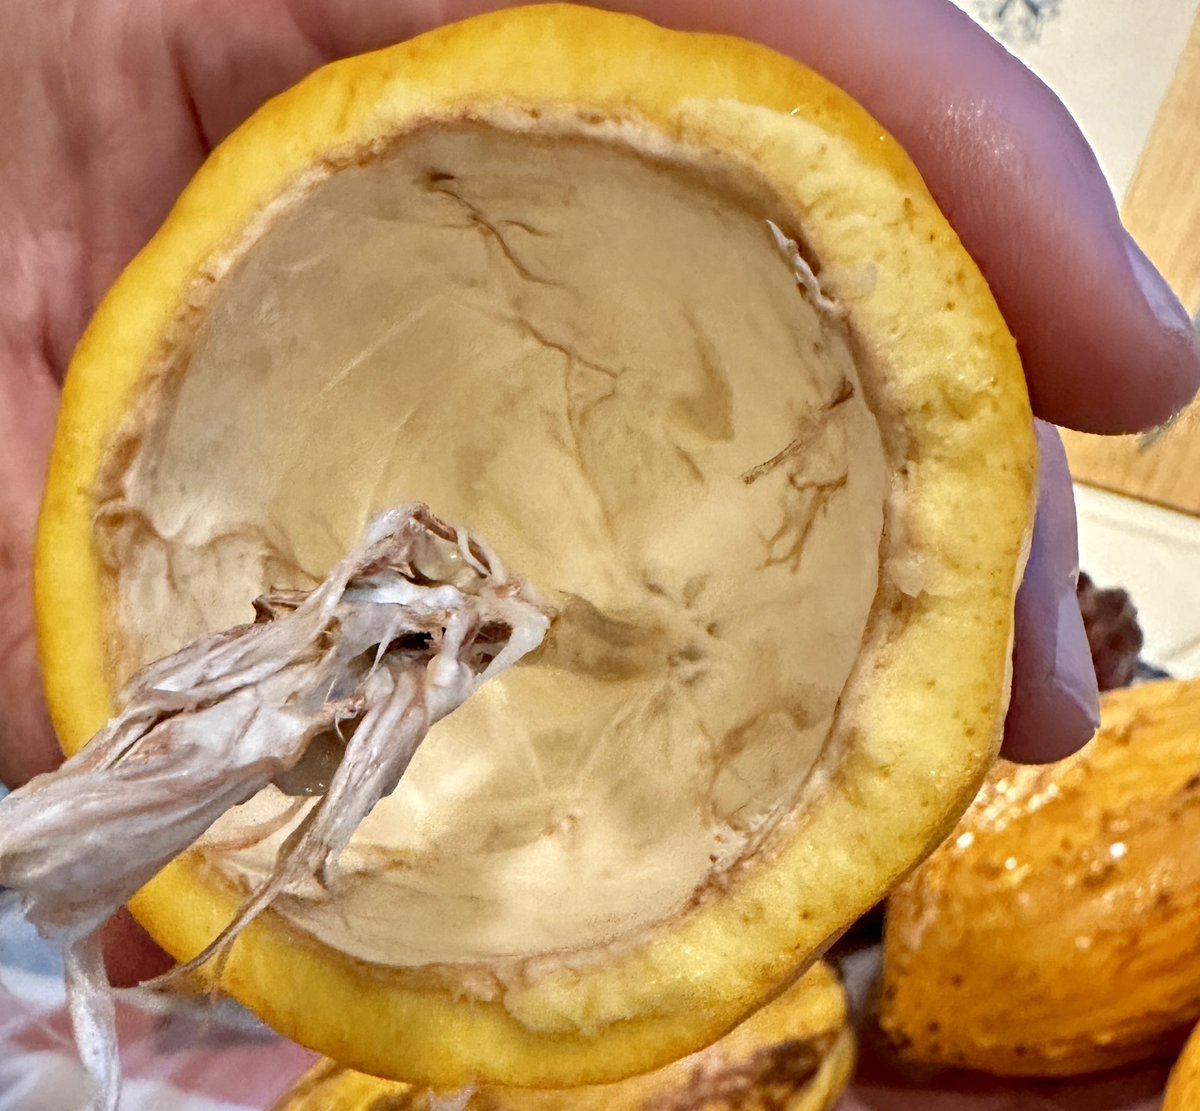
These are amazing plants for so many reasons. These seeds and their organization in the pods is super cool. They may look slimy or weird but they smell really good, and even taste sweet! We collect them all to make a mass for fermentation.


Researching cacao fermentation, there are several sets of organisms involved and they cause, together and individually, a delicious metamorphosis in the beans. The question is if a sufficient number came along with our pods to kickstart the process.

If the fermentation is successful, Frontero beans will heat up during about 5 days of fermentation as various organisms do various things. They’re in a nice fermenter at 30C minimum, covered and clumped with good liquor drainage. I’ll be aerating and taking temps as we go.


Because I am such an unbelievable nerd, this is very exciting to me. If the fermentation works I’ll be saving and freezing the culture and liquor (gross brown runoff) to kickstart our local beans.
I don’t know why I love this so much.
I’m any case, in parallel let’s do nibs:
I don’t know why I love this so much.
I’m any case, in parallel let’s do nibs:

If, unlike me, you know what you’re doing, after fermenting, drying and roasting the beans, you take the shells off and these bits are inside.
To make these into delicious chocolate turns out to also be a whole big deal that we need to learn by probably failing terribly:
To make these into delicious chocolate turns out to also be a whole big deal that we need to learn by probably failing terribly:

The nibs contain about 50% cacao fat (“butter”) and 50% “cocoa solids” which, because this is from a tree, are, well, woody. Delicious but woody. To make them smooth and velvety like we expect is not a subtle process. You stone grind them for A WHOLE DAY STRAIGHT.
And let’s be honest, when you first start the process, it’s not pretty. It’s a shaggy mess of weird oily brown bits. However…
…eventually things smooth out. In 4 hours I’ll add 375g sugar to bring this to about 70% bitterness. Then tomorrow, after 24 horrible straight hours of brutal, pulverizing abuse, we will have (untempered) chocolate!
Four hours later. I am discovering that, like baking with wild yeasts, the timing on chocolate is a bitch. Sugar is in. Good night. Cross your fingers for the challenges to come!

Morning Update!
Excited to see a clear temperature rise in the center of the coca bean mass.
Clearly it doesn’t take much to excite me.
This means that something exothermic is happening which is good. Yeasts lead here which is easy- we’ll pray for bacteria next week.
Excited to see a clear temperature rise in the center of the coca bean mass.
Clearly it doesn’t take much to excite me.
This means that something exothermic is happening which is good. Yeasts lead here which is easy- we’ll pray for bacteria next week.


On the nibs learning front things look smoother. That’s what 7 hours of relentless stone grinding gets you. In three hours we will loosen the grinding wheels up a bit to get some aeration, which will accelerate the evaporation of the volatiles we may not want in the final stuff.

[skip reading] a couple thoughts. This insane process we are going through is just one way to make chocolate foods. My silly goal is to make a western style chocolate bar from scratch, but don’t get the idea this is special or unique.
There’s a whole world of cool cacao food.
There’s a whole world of cool cacao food.
[skip] This gets me thinking of coffee:
Raise difficult plants. Harvest tiny fruit only when red. Throw away fruit and keep seed. Dry seed. Toast seed in specific, difficult way. Grind seed into specific powder. Boil ground toasted seed in water. DISCARD SEEDS.
Drink the water.
Raise difficult plants. Harvest tiny fruit only when red. Throw away fruit and keep seed. Dry seed. Toast seed in specific, difficult way. Grind seed into specific powder. Boil ground toasted seed in water. DISCARD SEEDS.
Drink the water.
OK back to chocolate. Updates later today.
Fermentation Update: small temperature rise, and I mixed the beans around and aerated them at the 24hr mark. Otherwise this is like a lot of fermentation experiments: no discernible change. This is why only extremely boring people such as me can handle it.


Nibs->bars update: We used sous-vide for tempering, hit the temperatures and times, got the type II crystal structure, nailed it! This is with no “seed chocolate” so this is 100% made by us!
Here is one of the bars. Victory!
Here is one of the bars. Victory!


Cacao bean fermentation update:
Last night and today saw an 8.5C increase in pile temperature (from microbial shenanigans) and this morning the beans looked like the pictures I’ve seen … and there was a distinct chocolate aroma! This is super neat-o.
Last night and today saw an 8.5C increase in pile temperature (from microbial shenanigans) and this morning the beans looked like the pictures I’ve seen … and there was a distinct chocolate aroma! This is super neat-o.


Here is what the beans looked like before we started fermentation, and this morning. It looks like it’s working.
Yes you are staring at what looks like dog vomit. I don’t know why you are here either. Sorry.
Yes you are staring at what looks like dog vomit. I don’t know why you are here either. Sorry.


Cacao Bean fermentation Update: Day 4
Color change to brown is definitely happening, notes of chocolate are stronger, as is an acid pungency which is great news as it means the acid-producing bacterial phase has started, with the associated temp drop to 35.2C
So far so good 🤞
Color change to brown is definitely happening, notes of chocolate are stronger, as is an acid pungency which is great news as it means the acid-producing bacterial phase has started, with the associated temp drop to 35.2C
So far so good 🤞


I have just realized that I actually wrote the words: “an acid pungency which is great news as it means the acid-producing bacterial phase has started” and put it on social media.
I am sorry and I promise that there will be pictures of chocolate later in the thread.
I am sorry and I promise that there will be pictures of chocolate later in the thread.

EXCITING FERMENTATION UPDATE:
Everything looks exactly the same but browner…
But the SMELL: unmistakable dark chocolate, with some yeast. Like pain au chocolat. This is fairly fucking amazing.
I’ll start drying tonight as temps are descending and fermentation is ending.
Everything looks exactly the same but browner…
But the SMELL: unmistakable dark chocolate, with some yeast. Like pain au chocolat. This is fairly fucking amazing.
I’ll start drying tonight as temps are descending and fermentation is ending.


Before: Subtle ripe Lychee
After: Pain au Chocolate
I am floored and humbled by this.
After: Pain au Chocolate
I am floored and humbled by this.


If we pull this off, what do we call it? In other words… how to best mock “bean to bar” chocolate hipsters?
OK. Fermentation over. Aroma amazing. We have .511kg of fermented beans. Saving (freezing) the runoff to potentially inoculate future batches. Into the dryer for 18 hours @ 30C.
What a trip!
What a trip!


“about as exciting as watching fermented cacao beans dry…”

From 511g of fermented cacao beans we now have 272g ready to roast. Where did the weight go? Straight to your thighs.
Roasting tomorrow, as long as California doesn’t float away.
Roasting tomorrow, as long as California doesn’t float away.


Roast day.
I’m using a progressive temperature strategy to induce the changes we want chemically. It starts at 400F and descends with mixing. Will it work?
I’m using a progressive temperature strategy to induce the changes we want chemically. It starts at 400F and descends with mixing. Will it work?


VICTORY

This is literally chocolate. I need to shell all these and then ferment/roast a bunch more and we can make some bars. Which we already know how to do from the other half of this thread!

(One aside: I now have this intuitive understanding of where the “chocolate” flavor comes from, and it’s a bit of a mindfuck.)
Well, it worked. I’m glad we made bars from Nibs earlier in the thread because it made it easy to tell when the roasting was correct. Now we need to do about 3x more and we can mill some bars! Whew. Wow. Thanks for riding along. There will be more!


• • •
Missing some Tweet in this thread? You can try to
force a refresh