🧵regarding the Aberdeen knot:
a surgical knot that may be used to secure a continuous suture. It is thought to be more secure than a square knot.
We will cover how to do it, what *not* to do, and also a little-known modification that may make it even more secure.
(1/ )
a surgical knot that may be used to secure a continuous suture. It is thought to be more secure than a square knot.
We will cover how to do it, what *not* to do, and also a little-known modification that may make it even more secure.
(1/ )

Again: an Aberdeen knot can be used at the end of a continuous (running) suture as an alternative to a square knot.
With a square knot, you have to tie one strand to the two other strands in the loop, either by hand (upper R) or with an instrument tie (lower R).
With a square knot, you have to tie one strand to the two other strands in the loop, either by hand (upper R) or with an instrument tie (lower R).


The Aberdeen knot is different. Instead of tying to the 2 strands, instead you'll use the single strand to go through the loop that is made by the other 2 strands.
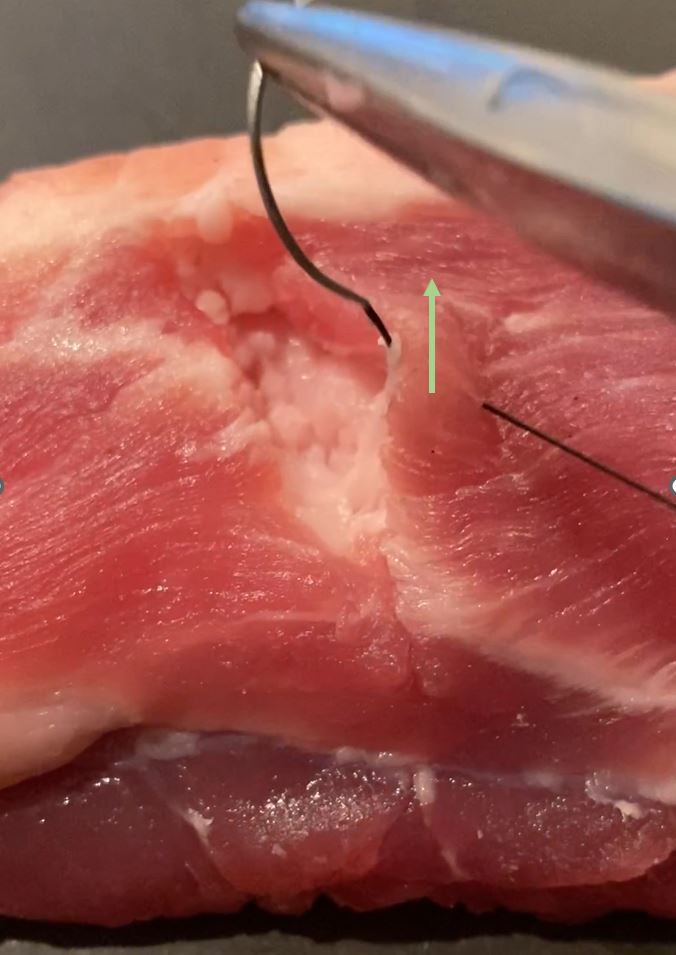
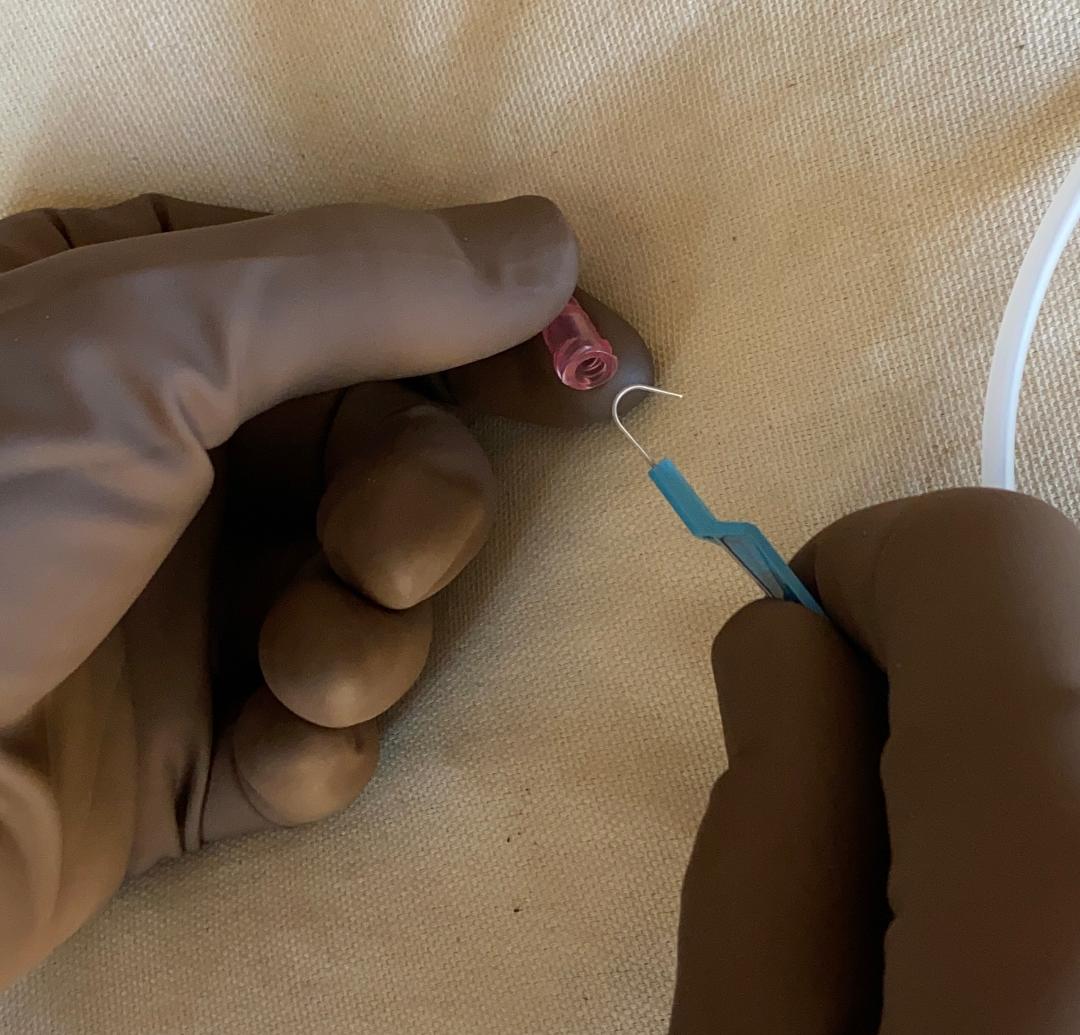
Here, I'm holding the loop open with my R hand and using one of my R fingers to grab the string.
Here, I'm holding the loop open with my R hand and using one of my R fingers to grab the string.


This short video shows the first 'throw' in an Aberdeen knot. Note that I have to pull on the lower string a few times to 'cinch' the throw down fully.
We'll look at this in more detail on the next slide.
We'll look at this in more detail on the next slide.
Note that in this first throw of an Aberdeen knot:
- the L hand holds *continuous* tension on the thread
- the R hand pulls on the lower strand (usually more than once) to cinch the throw down to the tissue).
- the L hand holds *continuous* tension on the thread
- the R hand pulls on the lower strand (usually more than once) to cinch the throw down to the tissue).

This is what things look like after the first throw. Its appearance here will become important later.
Additional throws will just repeat the same maneuver, as we'll see next.
Additional throws will just repeat the same maneuver, as we'll see next.

In this video, I'm doing additional 'throws' by repeating the same maneuver.
The ideal number of throws has been up for debate, with papers claiming that anywhere from 3-6 throws is the optimal number.
The ideal number of throws has been up for debate, with papers claiming that anywhere from 3-6 throws is the optimal number.
The L picture shows the situation after 4 throws. However...remember that the 4 throws are all essentially the same as the first initial throw.
Here's where I can make an error...if I pull the strand the wrong way, it will all unravel.
Here's where I can make an error...if I pull the strand the wrong way, it will all unravel.

Here's a short video showing what happens if I pull the strand through the wrong way.
As you can see, the whole thing immediately unravels, as though I never tied it at all.
As you can see, the whole thing immediately unravels, as though I never tied it at all.
The correct way to finish the knot is to pull the strand *through* the loop and then tighten it down.
We will see this in the next video.
We will see this in the next video.

This video clip shows the Aberdeen knot being completed.
Again, the strand (which may or may not still have a needle on it) is brought through the loop and pulled tight. The knot is now secure and cannot readily be undone.
Again, the strand (which may or may not still have a needle on it) is brought through the loop and pulled tight. The knot is now secure and cannot readily be undone.
Now for the little-known modification...
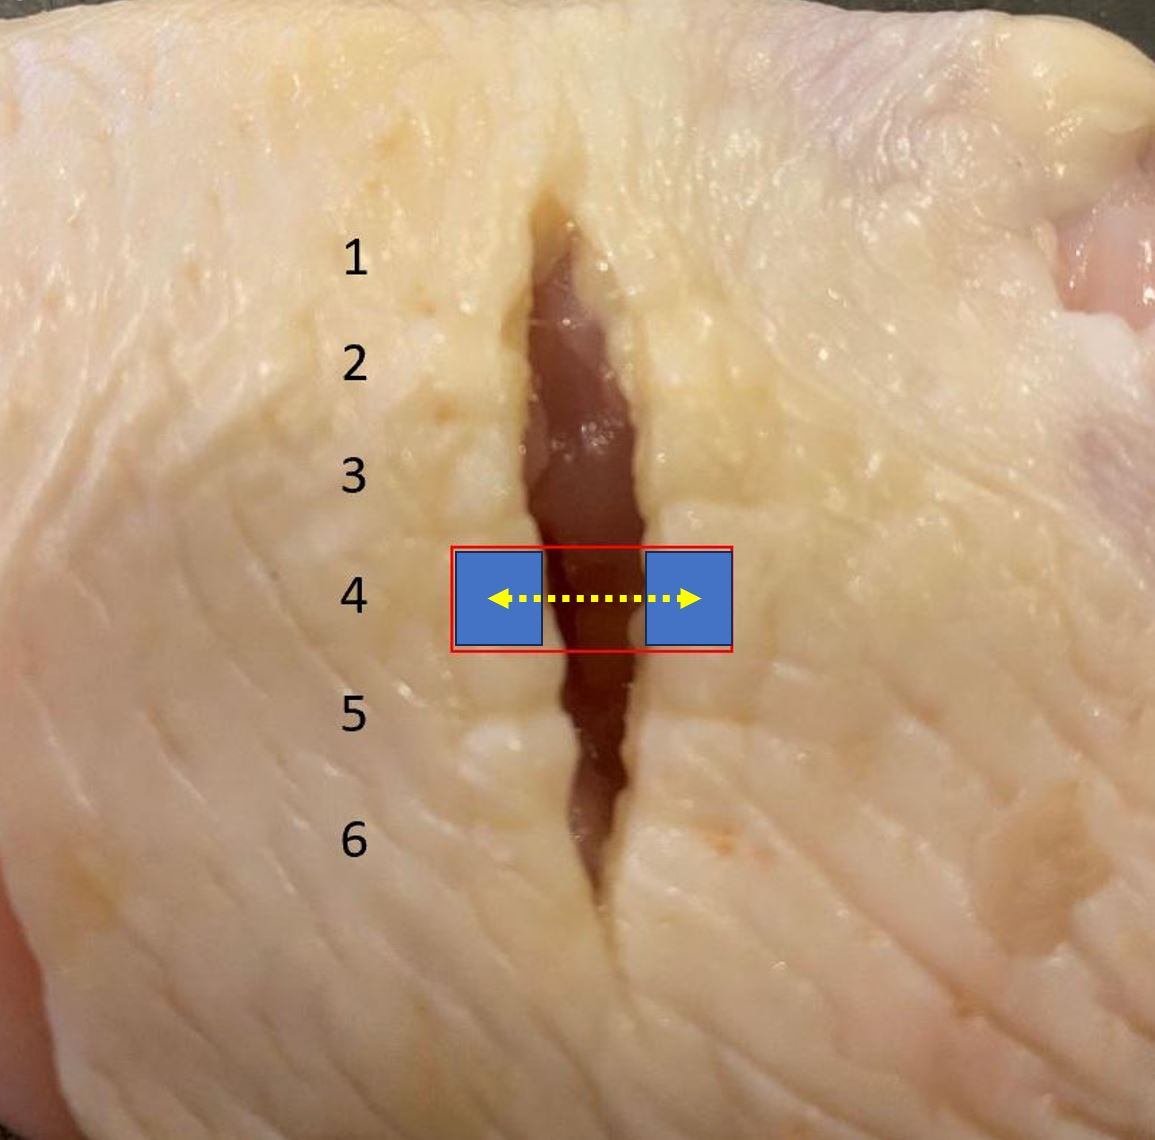
In 2007, Stott et al studied the Aberdeen knot, looking for the ideal number of 'throws'. They also describe the number of 'turns'.
The typical knot has 1 'turn' (L picture). The R picture shows one with 2 'turns'.
ncbi.nlm.nih.gov/pmc/articles/P…
In 2007, Stott et al studied the Aberdeen knot, looking for the ideal number of 'throws'. They also describe the number of 'turns'.
The typical knot has 1 'turn' (L picture). The R picture shows one with 2 'turns'.
ncbi.nlm.nih.gov/pmc/articles/P…


Stott's study concluded that the ideal Aberdeen knot has 3 'throws' and 2 'turns'.
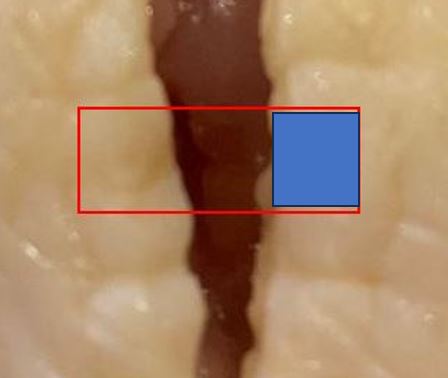
The issue with this is that it's somewhat awkward to generate the second 'turn'. Here, I am bringing the strand around to get the second 'turn', and as you can see, it's not that easy or fast.
The issue with this is that it's somewhat awkward to generate the second 'turn'. Here, I am bringing the strand around to get the second 'turn', and as you can see, it's not that easy or fast.
Stott pointed out in a diagram that the procedure of generating two 'turns' can also be done by wrapping the loop around the needle twice (L picture).
In the R picture, I've cleaned things up a bit (and you'll have to take my word for it)...but you do end up getting two 'turns'.
In the R picture, I've cleaned things up a bit (and you'll have to take my word for it)...but you do end up getting two 'turns'.


James Learmonth was a Professor of Surgery at the University of Aberdeen from 1932-1938 and is credited for the term "Aberdeen knot" He noted that it used less thread than a square knot.
The ultimate origin is unknown. It was known in the US by 1935 (R picture is Mont Reid).
The ultimate origin is unknown. It was known in the US by 1935 (R picture is Mont Reid).


In summary:
The Aberdeen knot may be used to 'finish' a continuous suture and is stronger and more secure than a square knot for this purpose.
The ideal configuration has been speculated to be 3 throws and 2 'turns', but most often, surgeons have done 4-6 throws and 1 turn.
⬛️
The Aberdeen knot may be used to 'finish' a continuous suture and is stronger and more secure than a square knot for this purpose.
The ideal configuration has been speculated to be 3 throws and 2 'turns', but most often, surgeons have done 4-6 throws and 1 turn.
⬛️


• • •
Missing some Tweet in this thread? You can try to
force a refresh