🧵regarding the 'oiling' of surgical sutures, which was once a common practice but one that is quite rare today.
Here I will explain the purpose of 'oiling' a braided suture, some of the history, and some of the properties of braided versus monofilament sutures in general.
(1/)
Here I will explain the purpose of 'oiling' a braided suture, some of the history, and some of the properties of braided versus monofilament sutures in general.
(1/)
By 'oiling' (or 'greasing') a braided suture, one hopes to make it behave in some ways more like a monofilament suture, but at the same time still retaining most of the advantages of braided sutures.
Let us look at some of these advantages and disadvantages to see how they work.
Let us look at some of these advantages and disadvantages to see how they work.

Monofilament sutures (like the PDS and Monocryl seen here) have less tissue reactivity and also much less friction when passing through tissues, as compared to braided sutures.
These are some of the reasons why they're used for anastomoses both in the bowel and elsewhere.
These are some of the reasons why they're used for anastomoses both in the bowel and elsewhere.

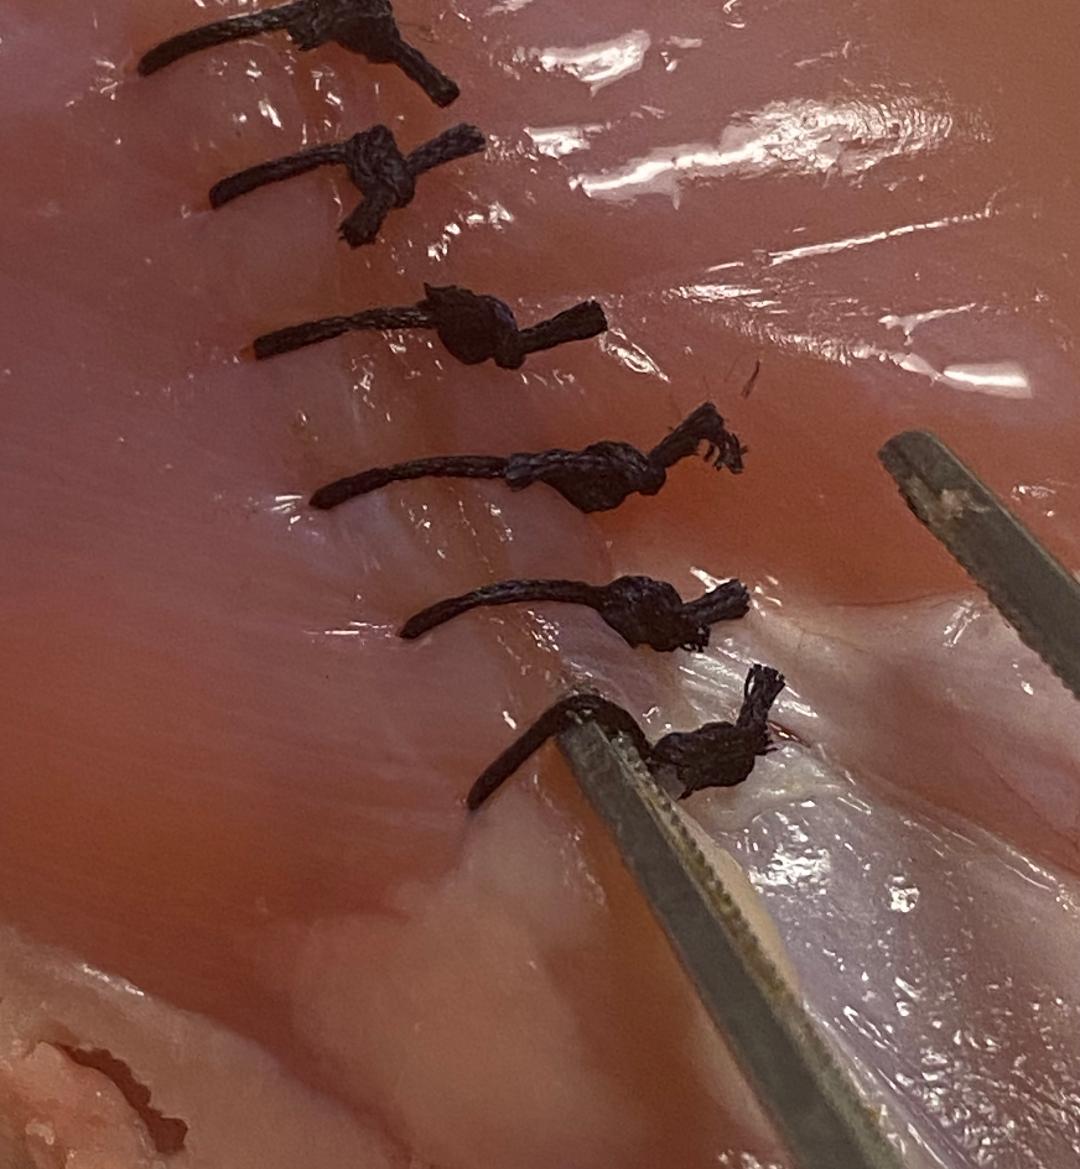
When used in a running suture line, monofilament sutures (like PDS) are easier to 'tighten up' than braided sutures due to the decreased friction.
You can see here that the sutures from the last couple of throws are loose, but I am able to easily pull them tight all at once.
You can see here that the sutures from the last couple of throws are loose, but I am able to easily pull them tight all at once.
This comes at a cost. The tradeoff of monofilament sutures is that they are noticeably stiffer than braided sutures.
PDS, silk, and Vicryl are shown here. When tying with PDS, you definitely have to apply more force on the suture to get a secure knot than you do with the others.
PDS, silk, and Vicryl are shown here. When tying with PDS, you definitely have to apply more force on the suture to get a secure knot than you do with the others.
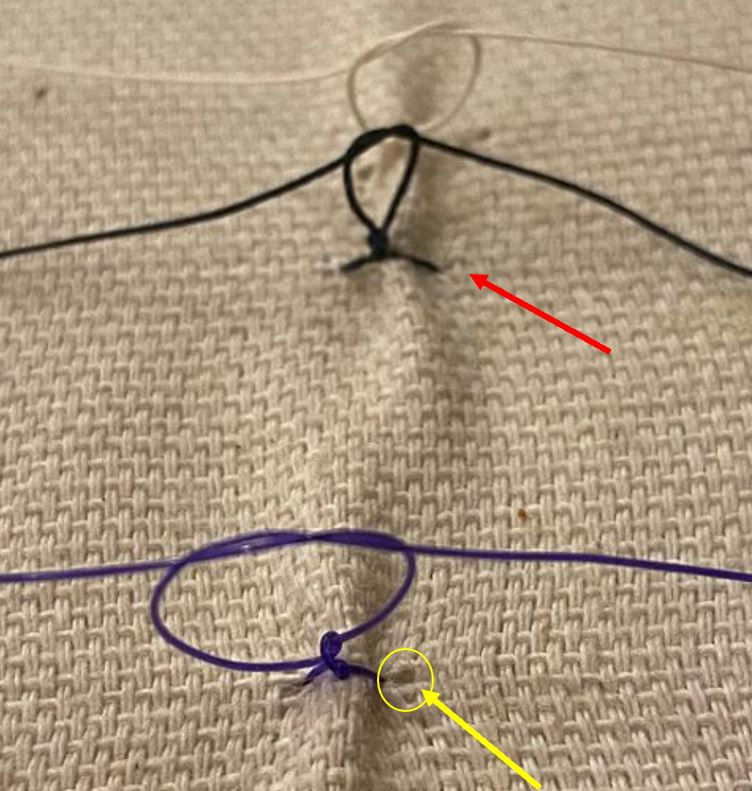
The fact that PDS requires more force to tie is not a trivial thing.
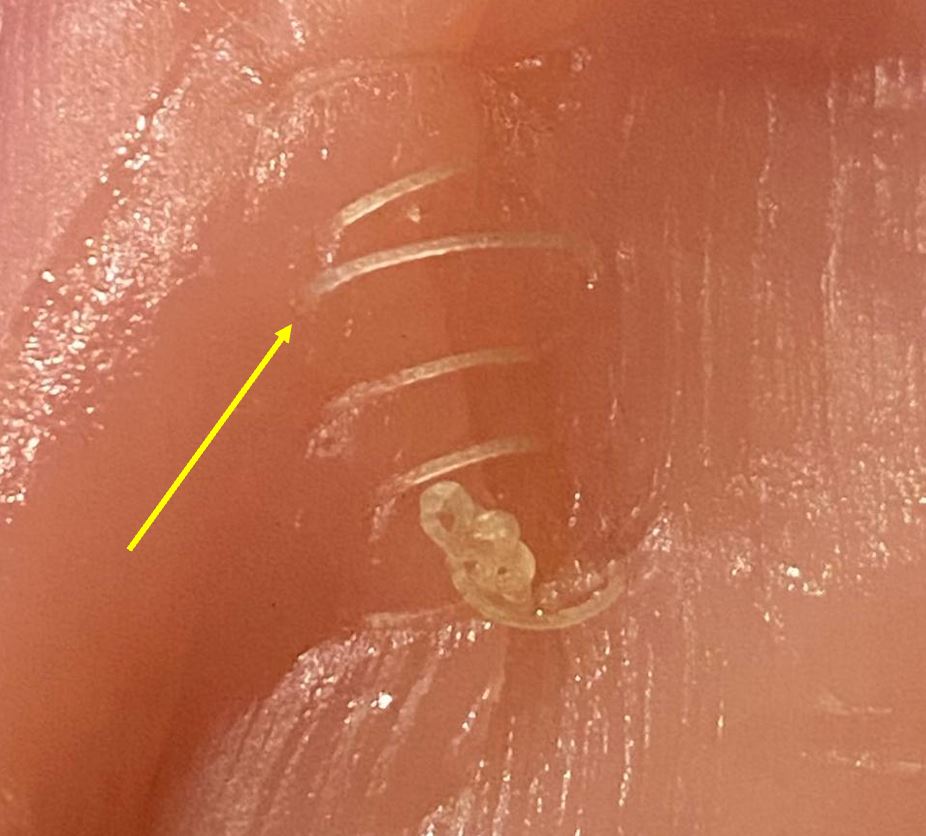
Here I have tied down different sutures into a pillow.
You can see that with the PDS suture, in order to get a secure knot started, I had to pull harder, which in turn pulls on the tissue harder (yellow arrow).
Here I have tied down different sutures into a pillow.
You can see that with the PDS suture, in order to get a secure knot started, I had to pull harder, which in turn pulls on the tissue harder (yellow arrow).
Braided sutures have more tissue reactivity and cause more 'sawing' of the tissue.
But they're *much* easier to tie. You don't have to pull as hard to tie the knots, and the knots are more secure.
This is a BIG advantage. It's hard to overstate how important this advantage is.
But they're *much* easier to tie. You don't have to pull as hard to tie the knots, and the knots are more secure.
This is a BIG advantage. It's hard to overstate how important this advantage is.
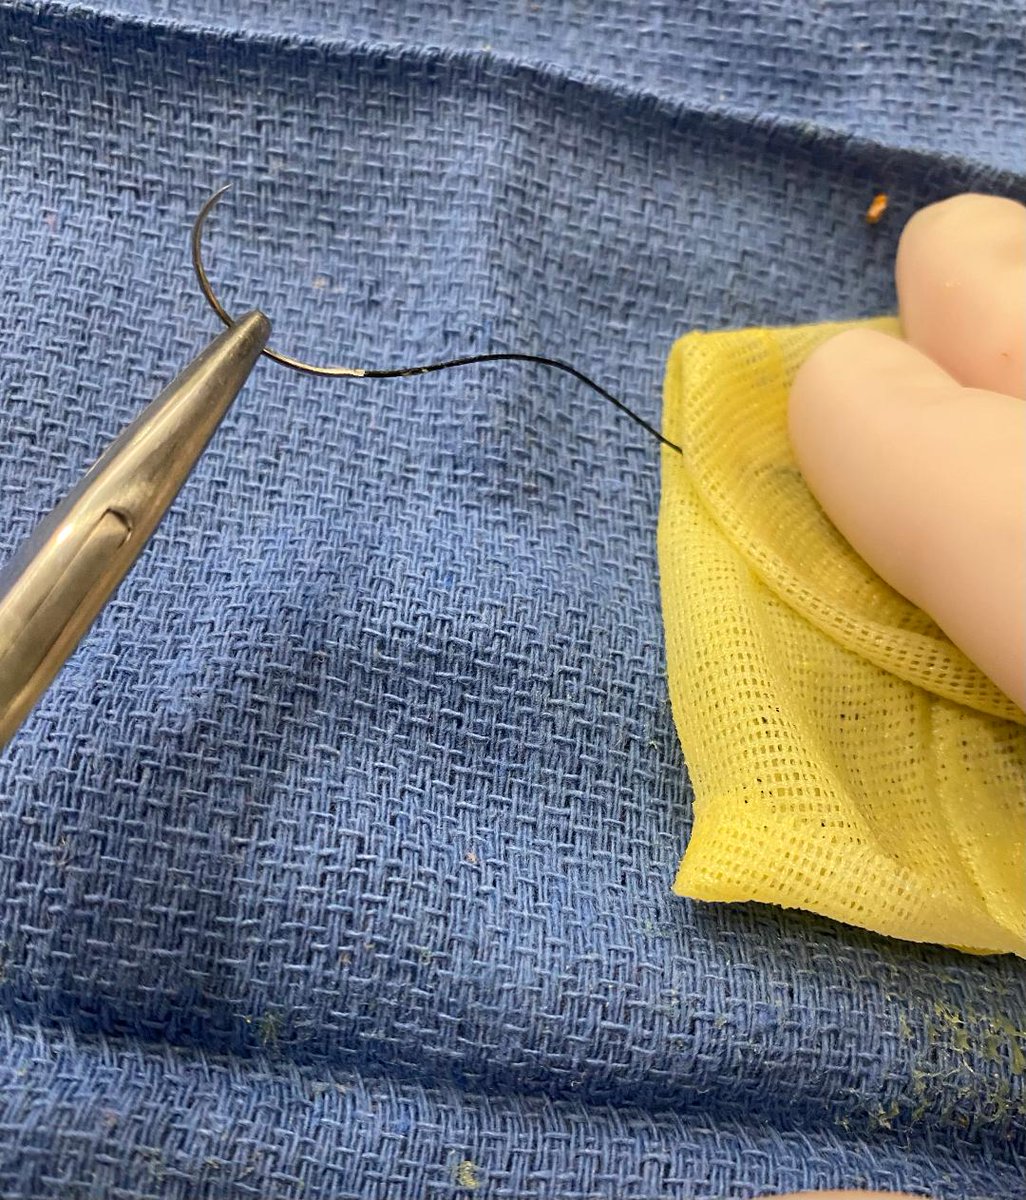
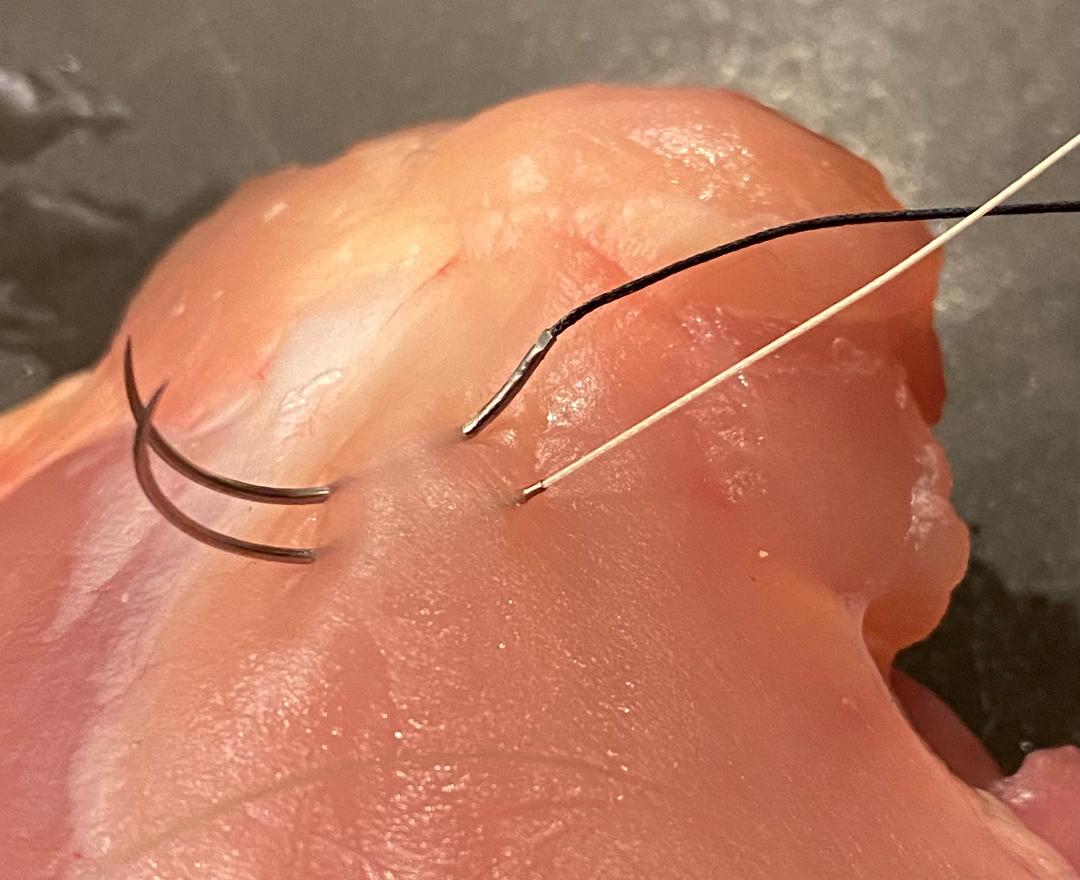
This is a closeup of silk, vicryl, and PDS (photo is the best my iPhone 11 can do).
Braided suture can have a 'sawing' effect on the tissues. The effect is pretty mild most of the time, but it can be more noticeable with running suture lines or when the tissues are fragile.
Braided suture can have a 'sawing' effect on the tissues. The effect is pretty mild most of the time, but it can be more noticeable with running suture lines or when the tissues are fragile.

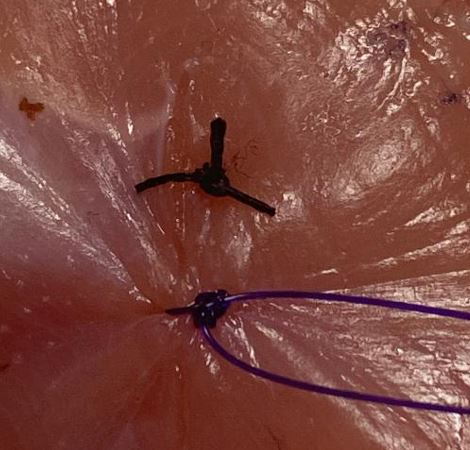
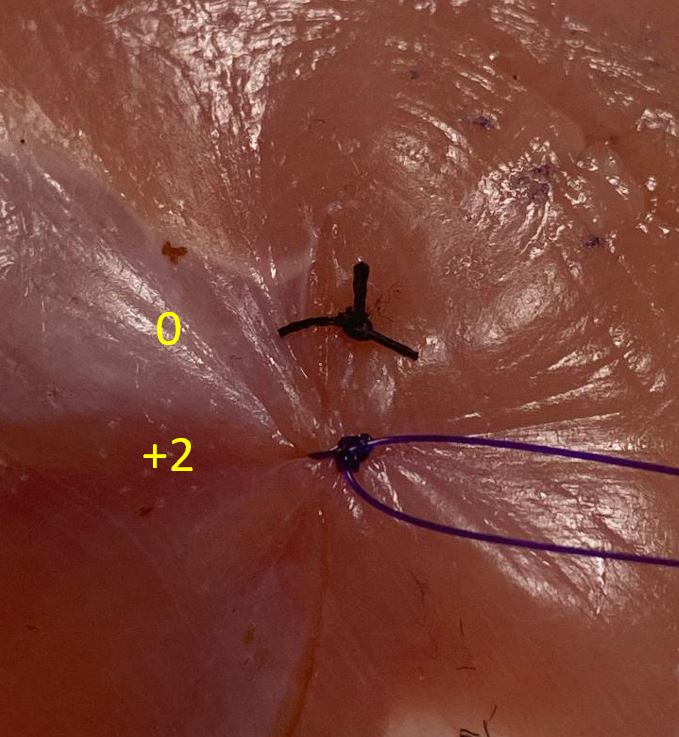
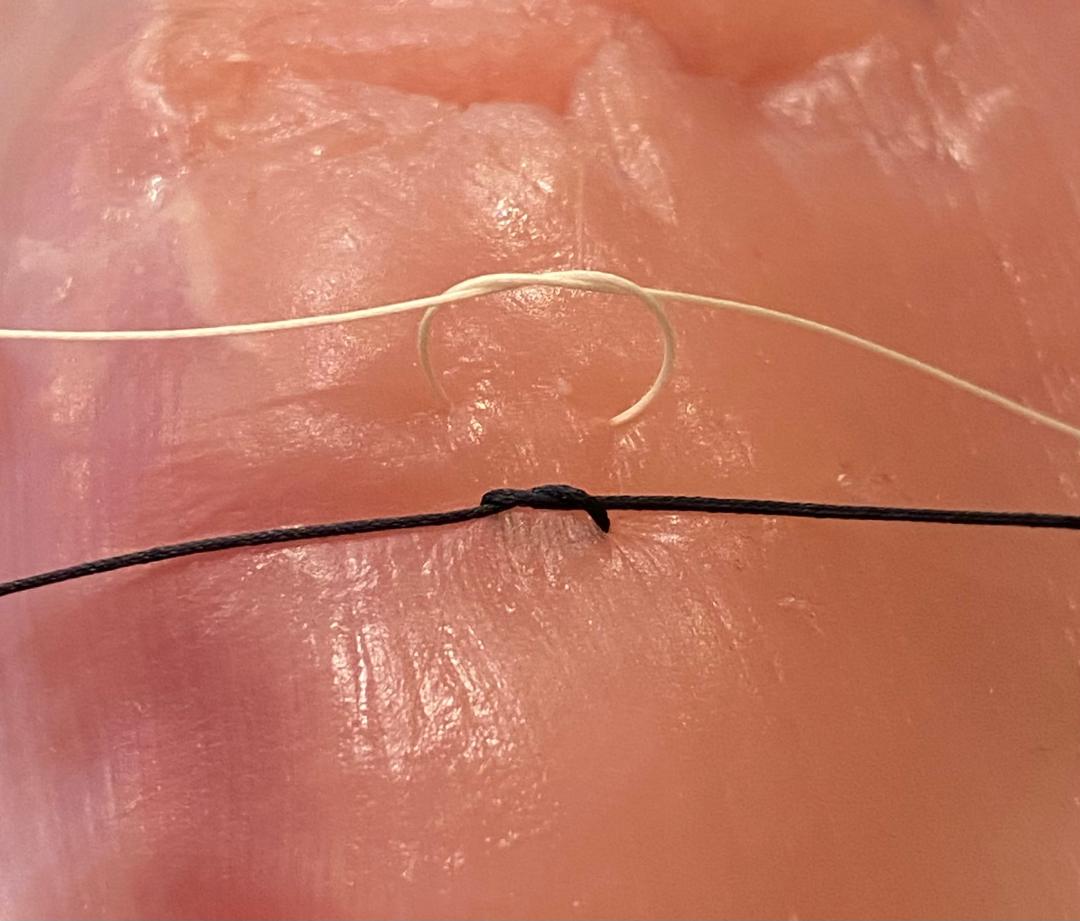
Look at what happens when I again try to tighten up a loose running suture line, but this time with Vicryl. It just doesn't work.
Vicryl is braided, and the increased friction means I can't pull on it as I could with PDS. One has to 'follow' the suture differently with Vicryl.
Vicryl is braided, and the increased friction means I can't pull on it as I could with PDS. One has to 'follow' the suture differently with Vicryl.
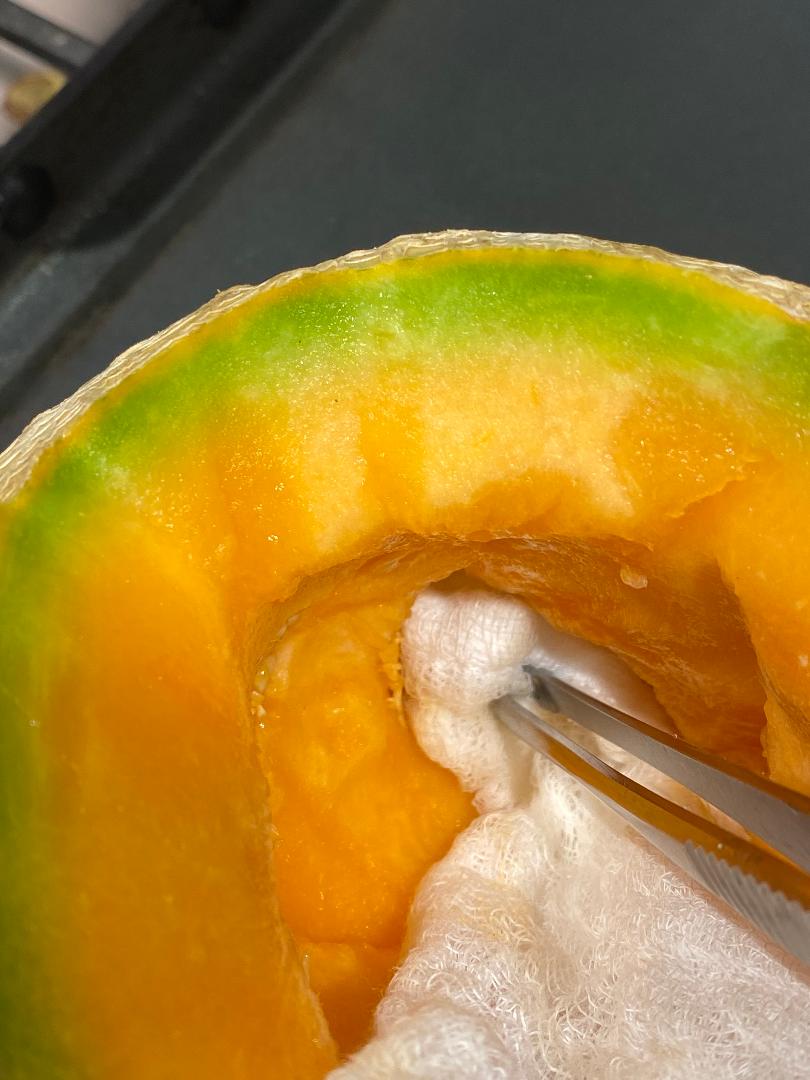
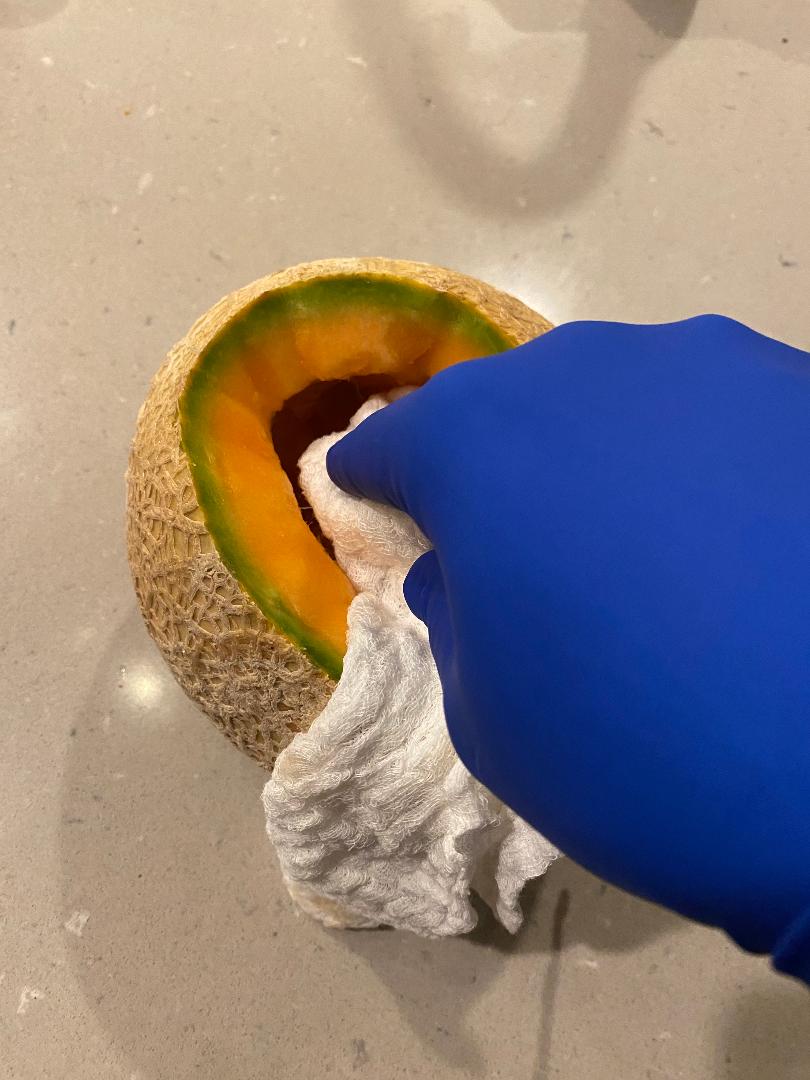
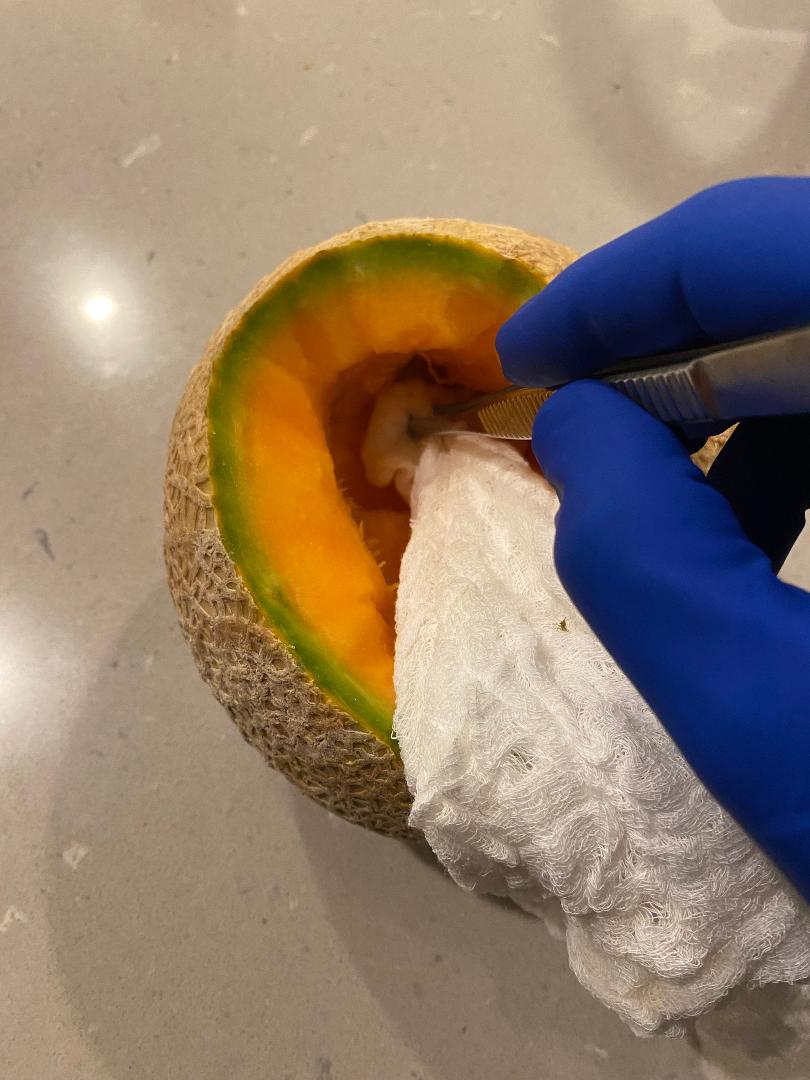
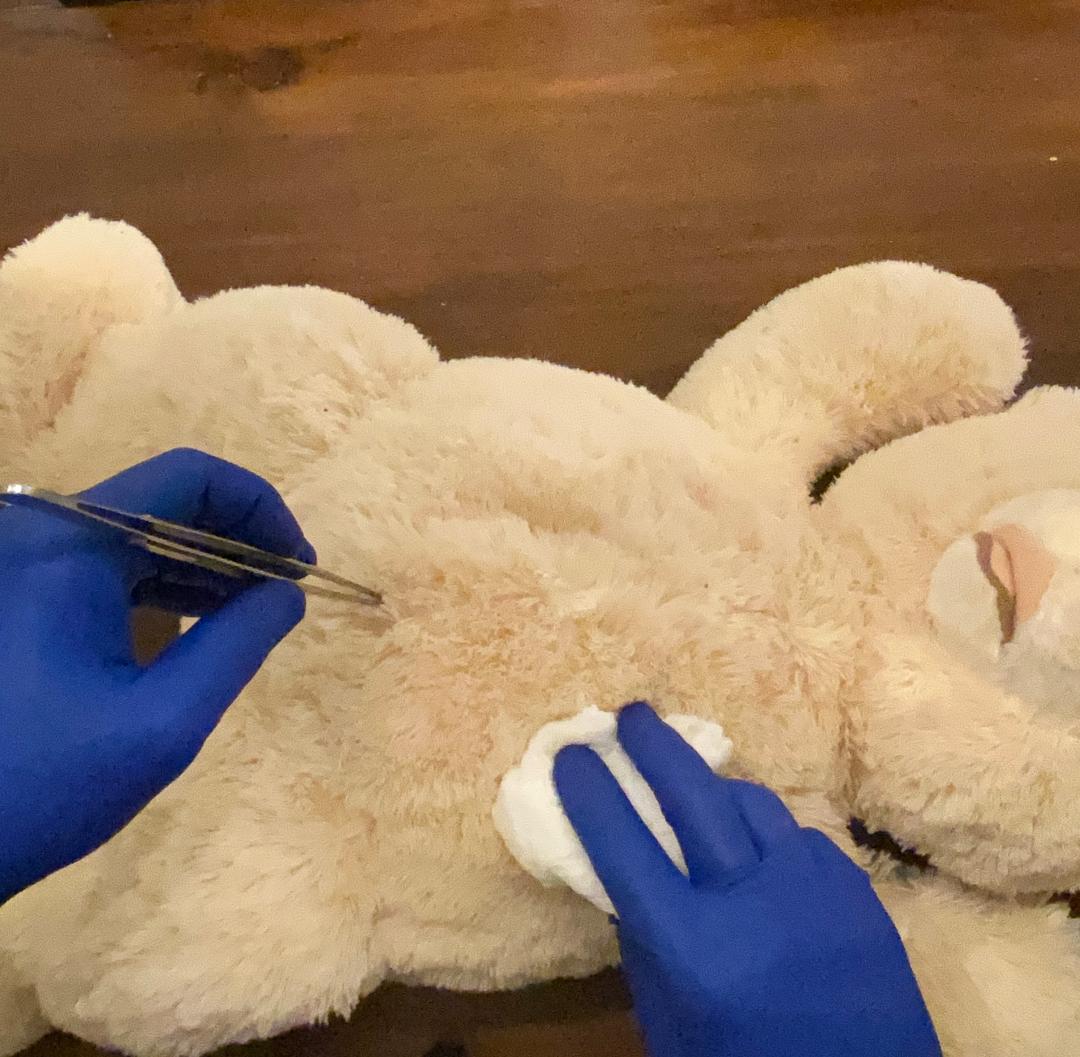
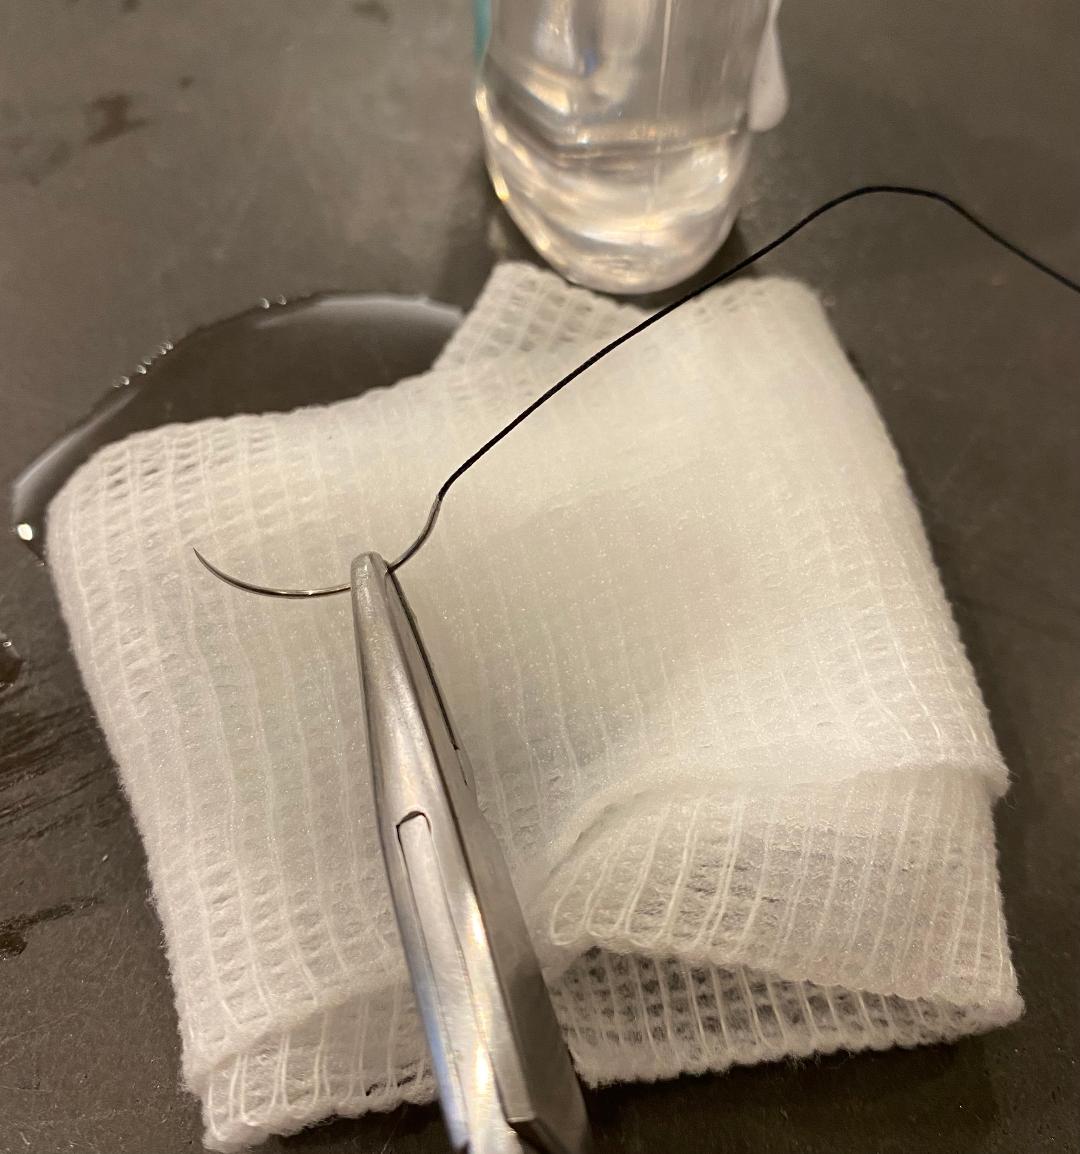
Now for the part about 'oiling' or 'greasing' the suture.
Here I am doing it by pulling the suture though some Xeroform gauze.
By doing this, I am hoping to retain the easy knot-tying ability of the silk while decreasing the friction that its 'braided-ness' would normally cause.
Here I am doing it by pulling the suture though some Xeroform gauze.
By doing this, I am hoping to retain the easy knot-tying ability of the silk while decreasing the friction that its 'braided-ness' would normally cause.

Petrolatum gauze is not the only agent that may be used to lubricate the suture (though most of the original descriptions from a century ago were with Vaseline).
Mineral oil or other lubricants, or even lidocaine jelly, have been used for this purpose.
Mineral oil or other lubricants, or even lidocaine jelly, have been used for this purpose.

So does 'oiling' the suture actually have much of an effect?
I can't easily show this on a video, but when I pull on a 'normal' Vicryl suture, and then pull on one that has been coated with Vaseline, indeed I am able to tell that there is less friction with the latter one.
I can't easily show this on a video, but when I pull on a 'normal' Vicryl suture, and then pull on one that has been coated with Vaseline, indeed I am able to tell that there is less friction with the latter one.
When one pulls on an 'oiled' Vicryl that has been used in a running suture line, it tightens the nearby loose strings better than normal Vicryl does.
However, I would say that it still does not perform quite the same as PDS does. You can see here that it is still a bit loose.
However, I would say that it still does not perform quite the same as PDS does. You can see here that it is still a bit loose.
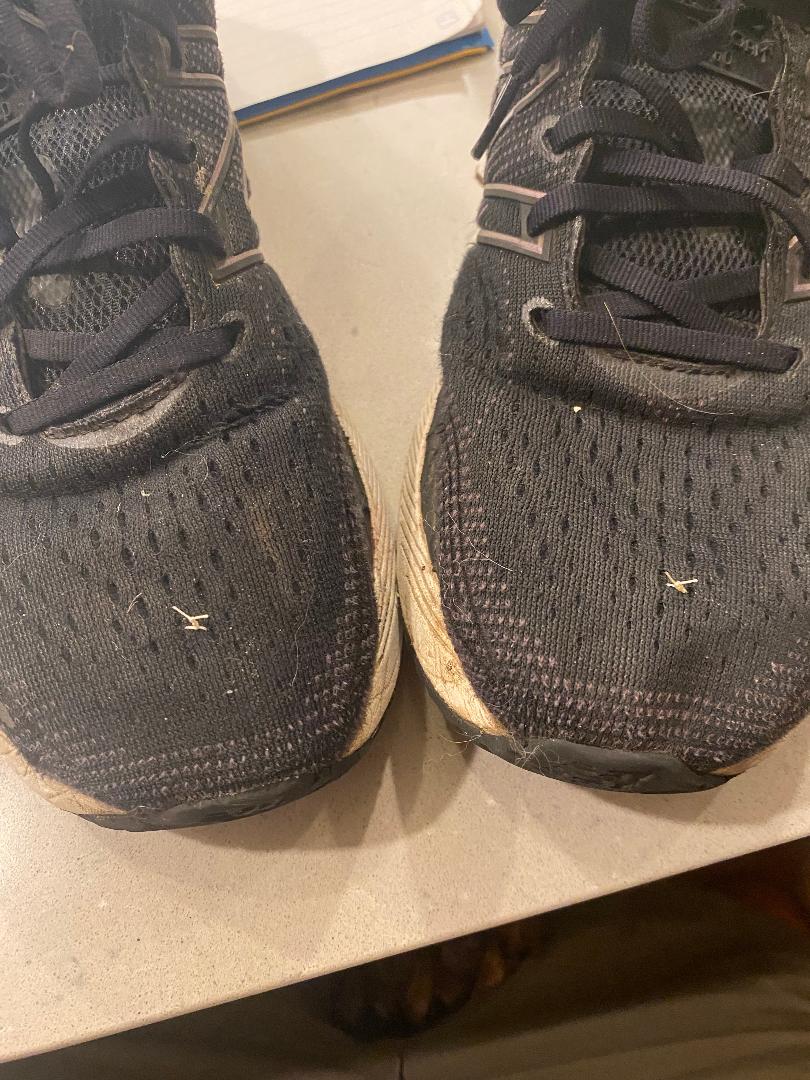
Will 'oiling' the suture compromise the integrity of the knots?
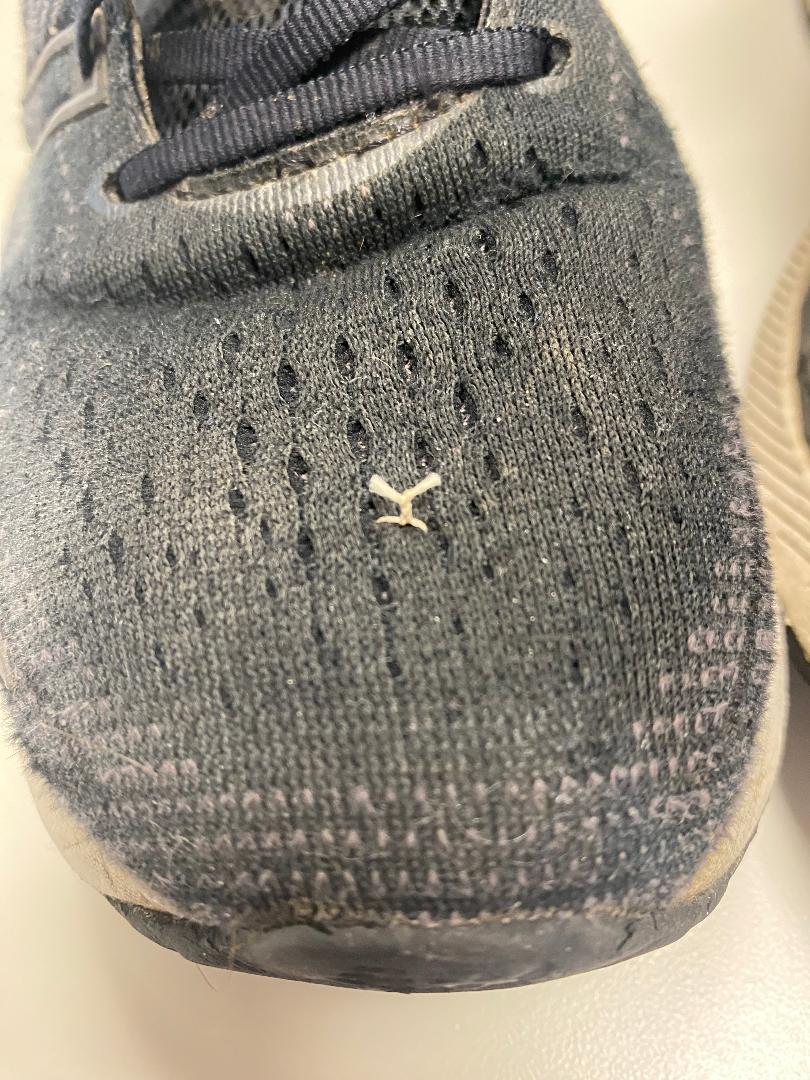
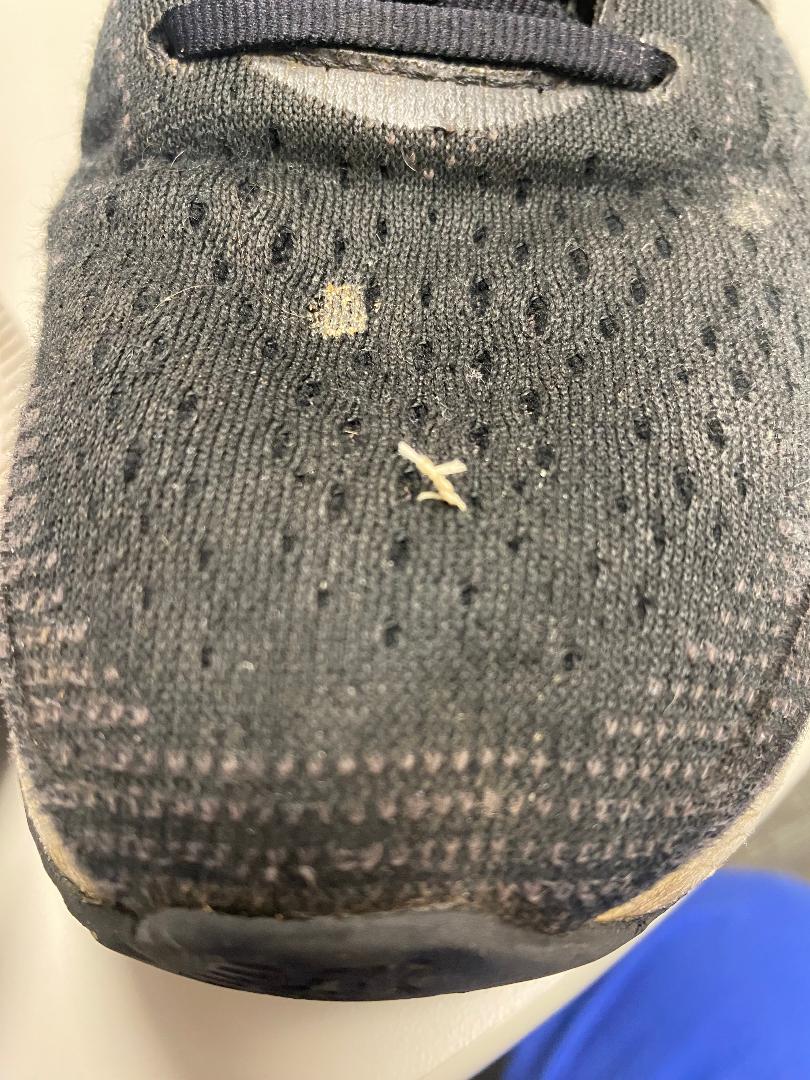
Here, I tied down a 3-0 Vicryl to my R shoe and an 'oiled' one to my L shoe, and then walked in them for 4 days.
After 4 days' time, neither the oiled nor the un-oiled sutures showed any signs of unraveling.
Here, I tied down a 3-0 Vicryl to my R shoe and an 'oiled' one to my L shoe, and then walked in them for 4 days.
After 4 days' time, neither the oiled nor the un-oiled sutures showed any signs of unraveling.
Historically, silk suture was often 'oiled' or coated with Vaseline. A number of references to this are shown in the photos below, and they are described in many different specialties.
Use of 'oiled' silk is described both in Carrell's experiments and in Halsted's operations.
Use of 'oiled' silk is described both in Carrell's experiments and in Halsted's operations.

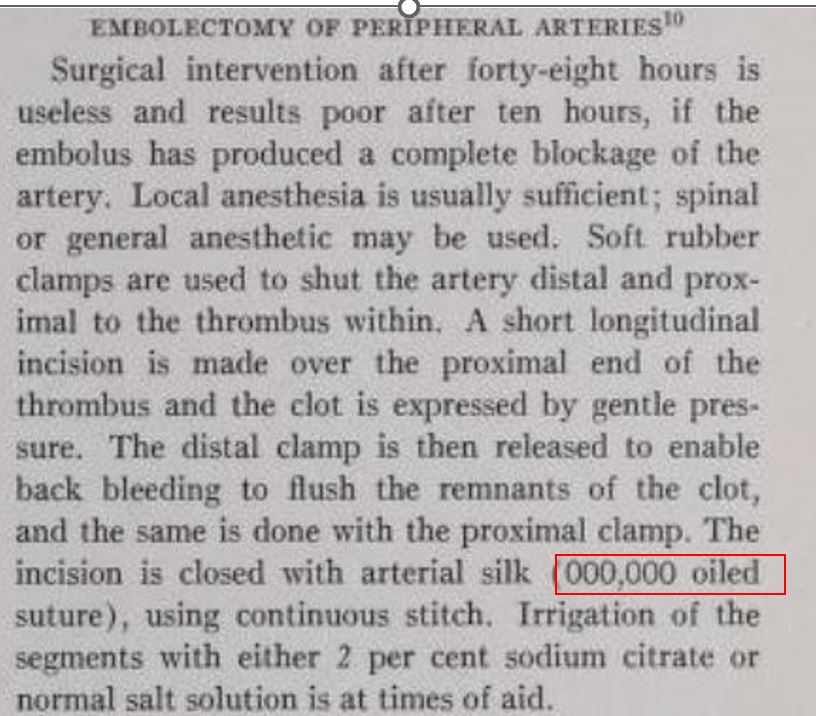


It should be noted that silk sutures now have a wax coating added to them, whereas the silk sutures in Halsted's day did not have this. So 'oiling' may not be as consequential as it was in those days.
Nonetheless, oiling sutures is still occasionally done, even to this day.
⬛️
Nonetheless, oiling sutures is still occasionally done, even to this day.
⬛️
Addendum:
🧵inspired by a recent post from @DrsPenaBischoff , which reminded me of when I had seen the technique on one of my pediatric surgery rotations.
🧵inspired by a recent post from @DrsPenaBischoff , which reminded me of when I had seen the technique on one of my pediatric surgery rotations.
https://x.com/DrsPenaBischoff/status/1719867375212765646?s=20
• • •
Missing some Tweet in this thread? You can try to
force a refresh