I developed a workflow that allows you to render ANY 3D scene in ANY style with AI!
You can create different prompts for all the elements in your scene allowing for full flexibility.
Here is how it works 👇
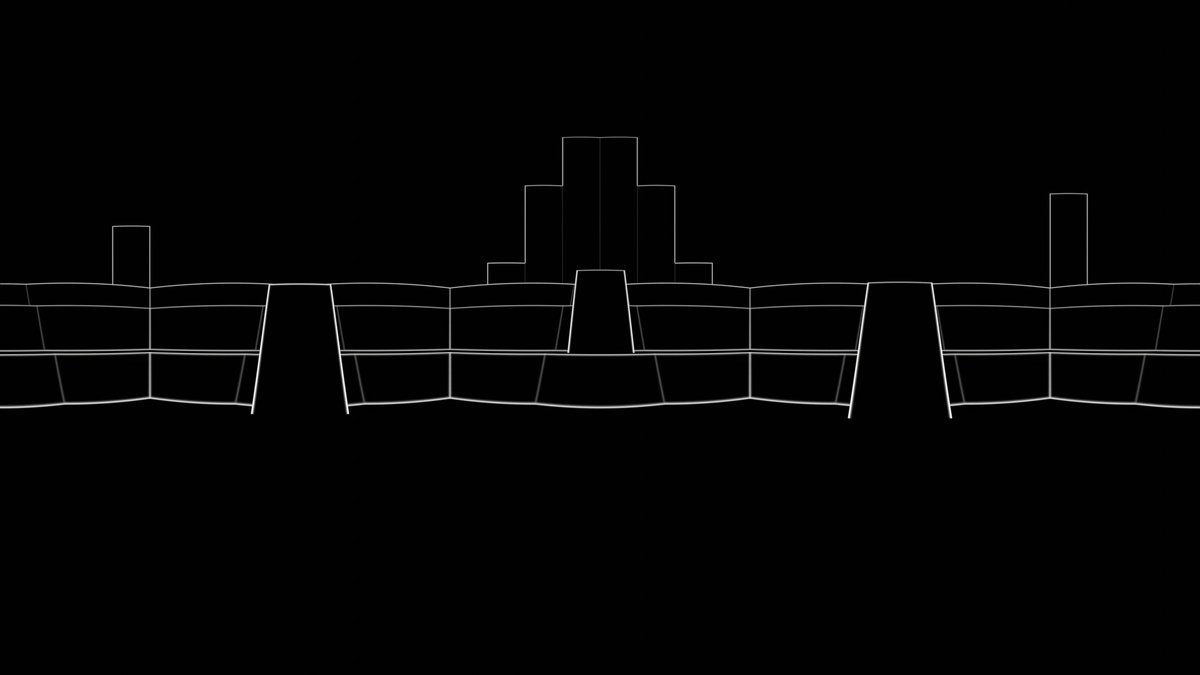
First we need to render a mask pass. This allows us to assign an individual prompt to each color, giving full flexibility. I simply created this pass by assigning emission shaders to all the objects I wanted to create separate prompts for.
Next, I exported these two rendering passes: Depth and Outline. I can then use a Depth control net at full strength and a Canny control net at low strength to guide the generated image or sequence.
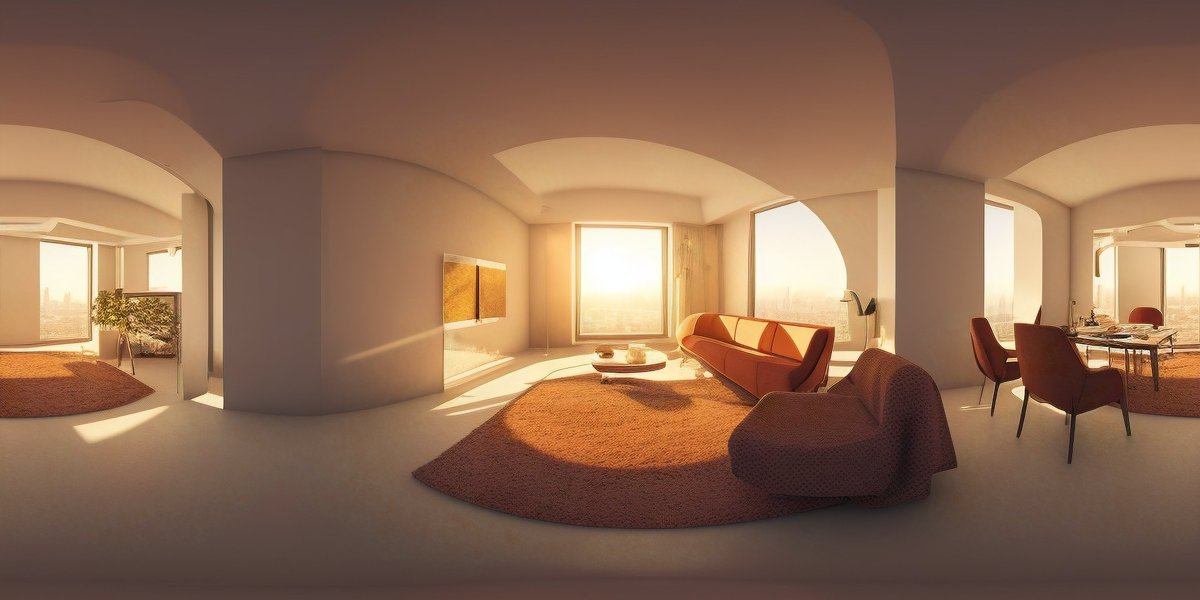
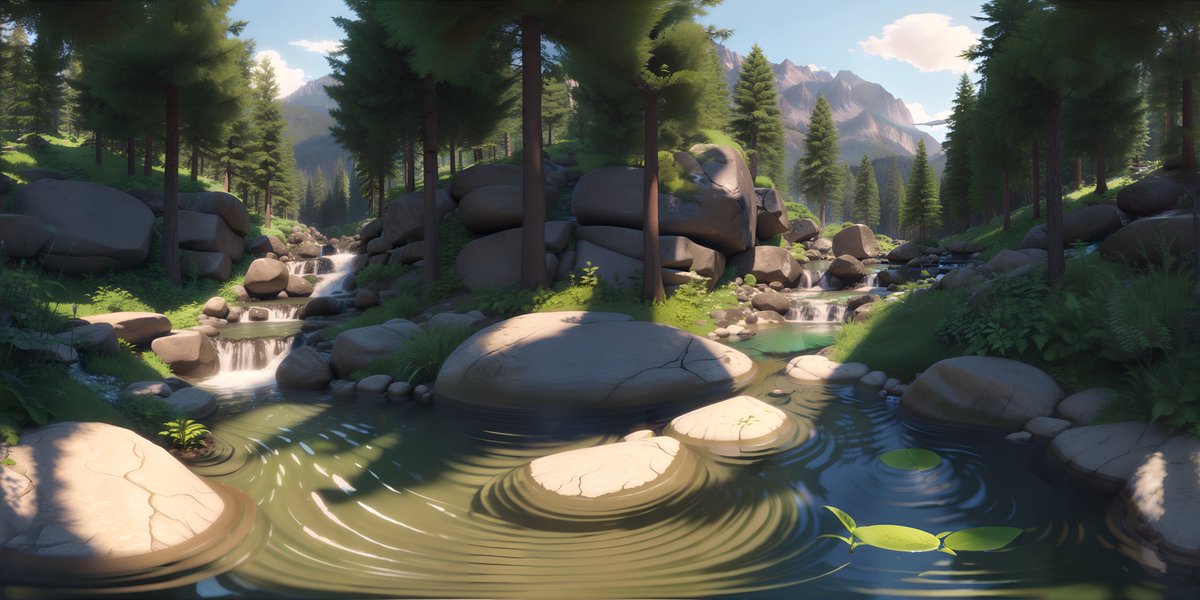
Here I've re-rendered a scene from my AI-generated Pixar movie. I'm impressed with how much it was able to enhance the scene and turn it into something that actually looks a bit like a Pixar movie (+ lots of AI weirdness...).
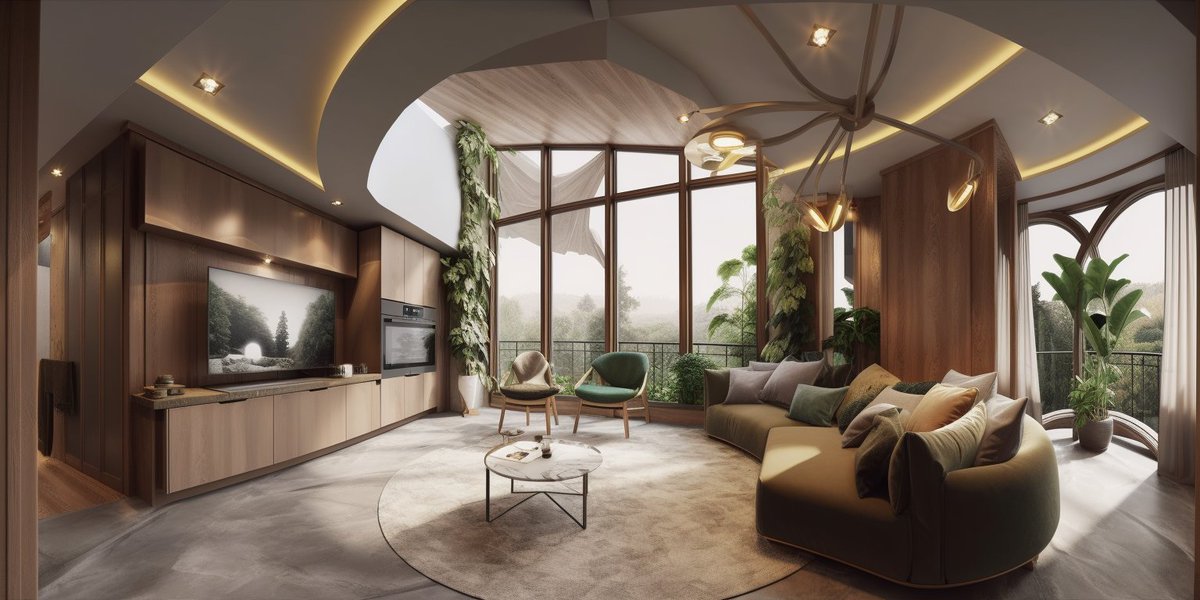
With ipAdapter, you can also add a color, beauty pass or a final rendering to the AI workflow. In this case, it becomes more of a filter.
But I prefer the prompt based workflow because it gives us complete flexibility. Should this kitchen be made of aluminum or wood? Maybe the scene should be set in a forest at night. Or maybe we want to create an anime instead!
For the in depth explanation and free workflow files, check out my YouTube video about this topic!
• • •
Missing some Tweet in this thread? You can try to
force a refresh
For my real-life Toy Story short film, I built a workflow to control AI characters using puppets, paper cutouts, or animated previz!
And yeah I know… @CorridorDigital recently had a very similar idea. But they used a different technique!
Let’s compare👇
My workflow is based on Time-to-Move, which works with diffusion-based video models like Wan 2.2. You give it a reference video and a mask for your character. It animates the character, keeps the background intact, and removes the stick or wire or whatever was holding them.
This also works for other types of reference videos, you don't need to use puppets. here is the same concept but with a 3D layout:
I'll show you how to create a simple 360° scene in Blender and turn it into stunning 3D worlds using FLUX, SDXL and even AnimateDiff!
Learn how to do it for FREE below! 👇
I’ll start by creating a simple scene using primitive shapes in blender. No need to go wild with details—AI will handle that! Add a sky sphere, set up a panoramic camera, and you’re ready to export render passes.
These passes will guide the AI in generating highly detailed textures that fit your 3D models perfectly.
I will use ComfyUI to generate my images, but you can use any AI tool that supports ControlNets.
Did you know ChatGPT can model and even create full 3D scenes in blender!? 🤯
Here I asked it to create a donut with three point lighting and a rotating camera.
More crazy examples of full 3D scenes I generated & workflow below. 👇
This is made possible by chatGPT's Python capabilities, which allow us to generate and import complex scenes into Blender as code. Prompt: “Create a sci-fi city with complex materials as a python script for the 3D software blender.”
Simply copy the python script generated by ChatGPT into the scripting workspace in Blender and press the play button.
Check out this AI-supercharged virtual production workflow. 👇
🧵 1/10
First, you need to generate a 360 degree image as a base for the 3D environment. You can use Skybox by @BlockadeLabs , @midjourney , ControlNet for Stable Diffusion, or @nvidia Canvas (...to name a few).
🧵 2/10
Use ControlNet for Stable Diffusion to create a depth map based on your 360-degree image. Import your image and set the aspect ratio to values that match 2:1, select "Depth" as the preprocessor and the appropriate depth model, and enable “tiling”!
How to create cinematic 3D animations like this 👇 from your AI-generated characters!
🧵 1/6 🔊
While generating your images, think about framing, camera movement, composition, lighting, and possible focus shifts. How do you want your shot to unfold?