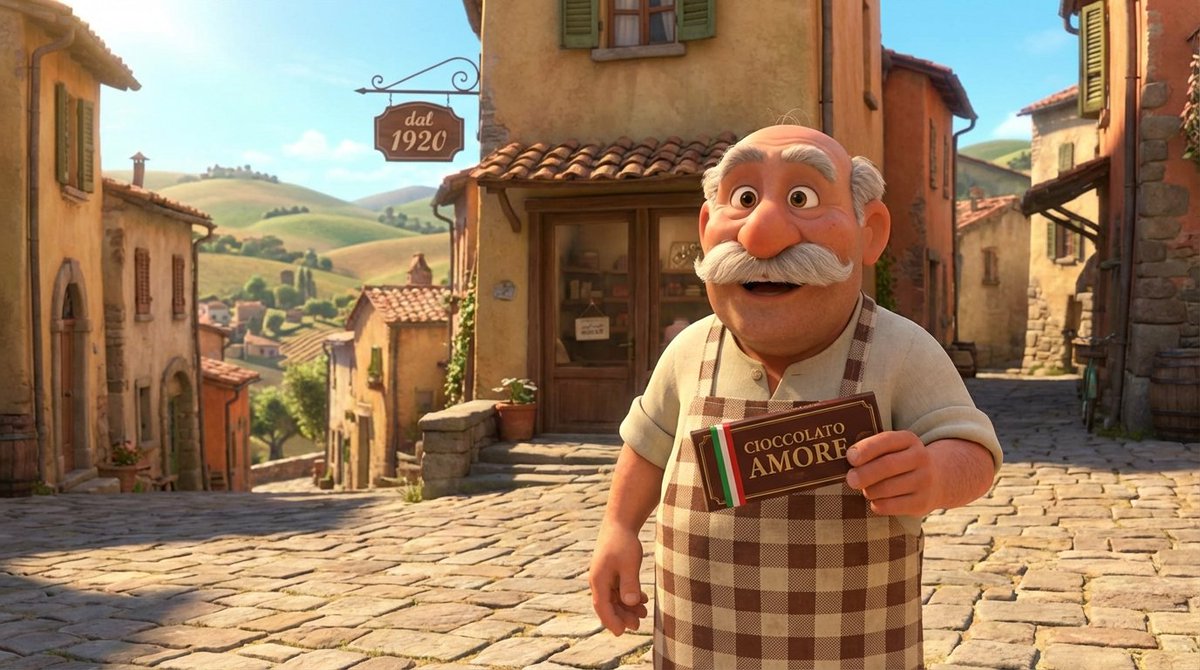
"Wrapped Love" 🇫🇷🥖
A short AI cartoon created with Midjourney Video and Flux Kontext.
Time spent: 5 hours 13 mins
Tutorial below 👇
A short AI cartoon created with Midjourney Video and Flux Kontext.
Time spent: 5 hours 13 mins
Tutorial below 👇
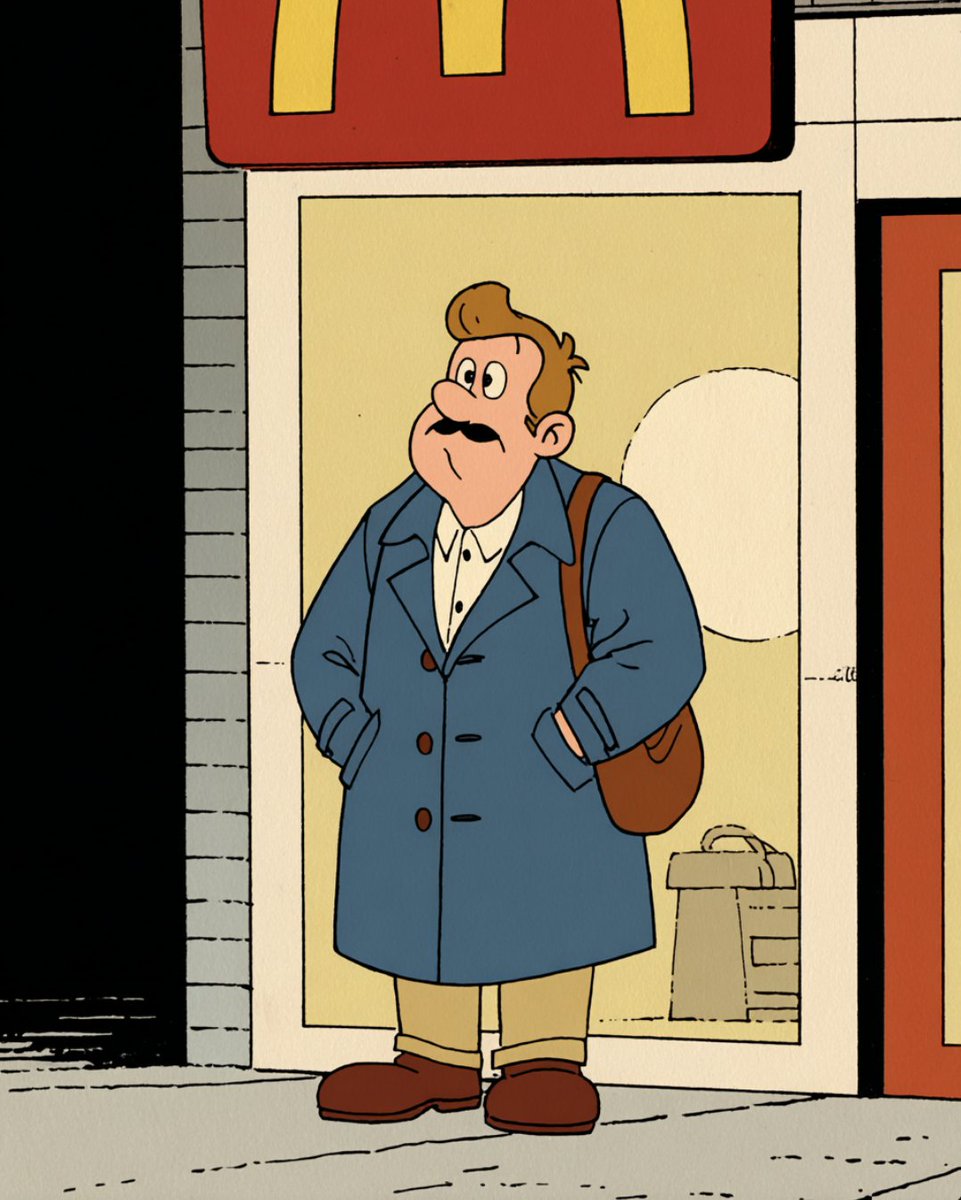
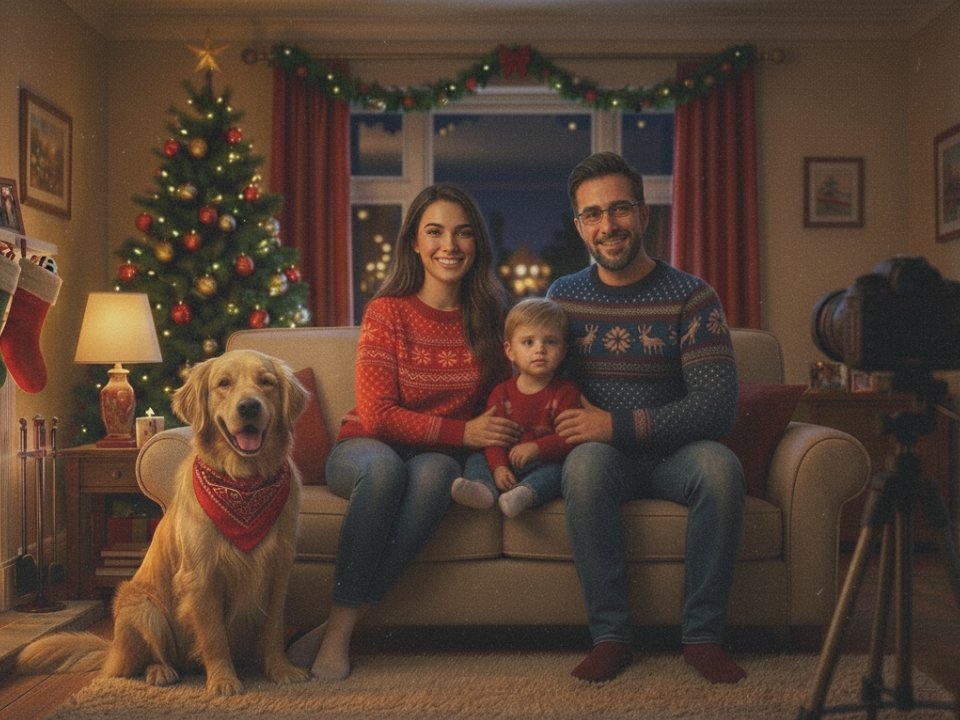
1. As always let's start with source image.
Source image sets the:
a) style
b) environment
c) a character/s of your cartoon.
It’s also an image you feed into the AI to generate all the other shots for your story.
Generate it with AI or grab one from MJ Explore page.
Source image sets the:
a) style
b) environment
c) a character/s of your cartoon.
It’s also an image you feed into the AI to generate all the other shots for your story.
Generate it with AI or grab one from MJ Explore page.

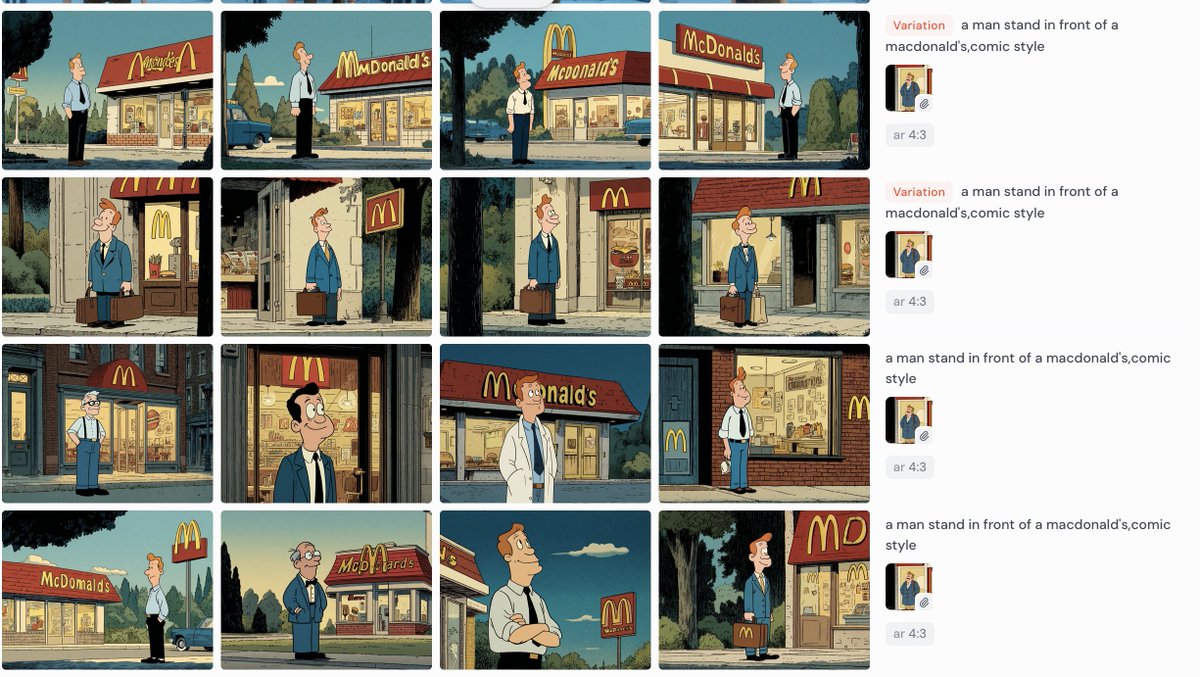
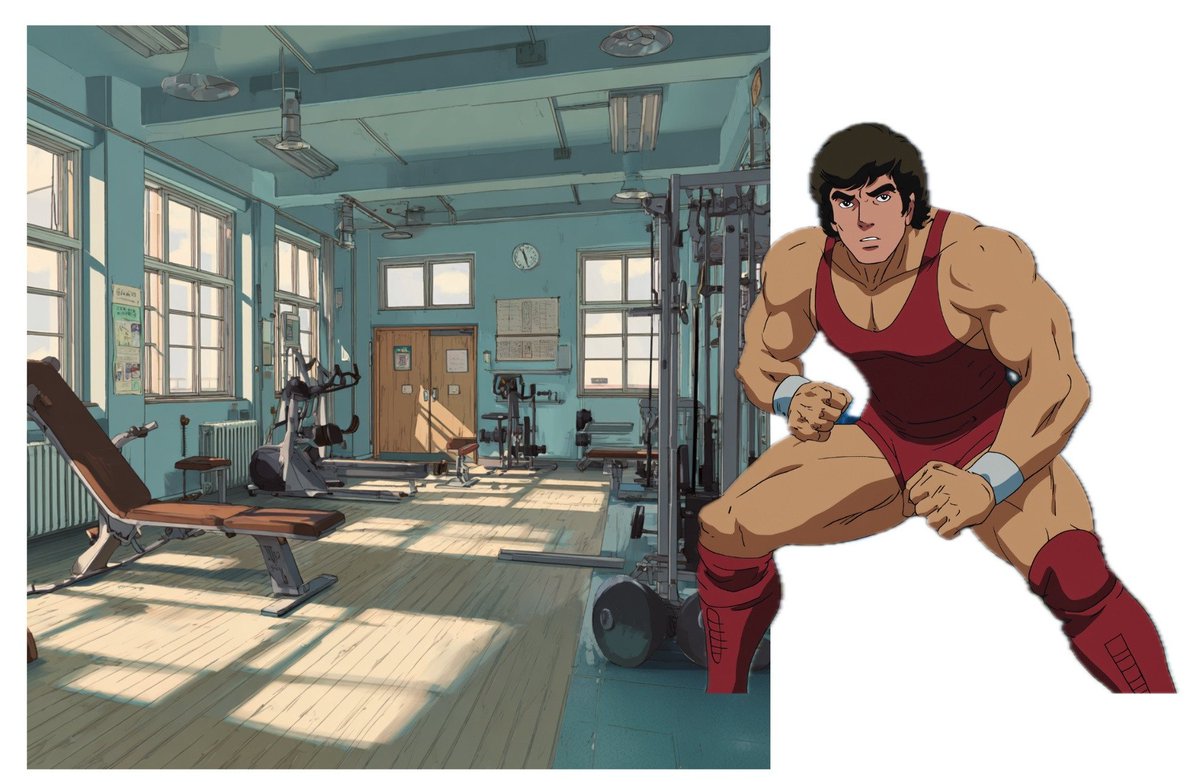
2. Using source image, generate different scenes for your cartoon.
These scenes can be:
1.New camera angles of your input image
2.Jump cuts, where you place the character in a different environment (e.g., from train station to inside the train)
To do that, use the Runway References tool (as shown in the tutorial) or the Flux Kontext model — available on Morphic Studios, LTX Studio, or Freepik

3. Then, using , create a storyboard with your scenes.
A storyboard helps you visualize how the scenes will flow, organize pacing, and spot consistency or story issues early — saving time, money, and confusion during production. Canva.com
A storyboard helps you visualize how the scenes will flow, organize pacing, and spot consistency or story issues early — saving time, money, and confusion during production. Canva.com

4. Time to animate.
Head to Midjourney, and turn each static scene to video one by one.
Head to Midjourney, and turn each static scene to video one by one.

5. Almost done!
Now assemble all these scenes into one video using CapCut
Add some sound effects from @elevenlabsio and music
Upscale to 2K quality using @DomoAI_
Now assemble all these scenes into one video using CapCut
Add some sound effects from @elevenlabsio and music
Upscale to 2K quality using @DomoAI_
This is the end of tutorial!
I borrowed your attention for a second, and I hope what I gave back made it count.
If yes - give me a follow at @0xFramer where I do my best to come up with plenty of valuable tutorials and insights on AI cartoons.
See you in the next one!
I borrowed your attention for a second, and I hope what I gave back made it count.
If yes - give me a follow at @0xFramer where I do my best to come up with plenty of valuable tutorials and insights on AI cartoons.
See you in the next one!
• • •
Missing some Tweet in this thread? You can try to
force a refresh