
uv in Python, clearly explained (with code):
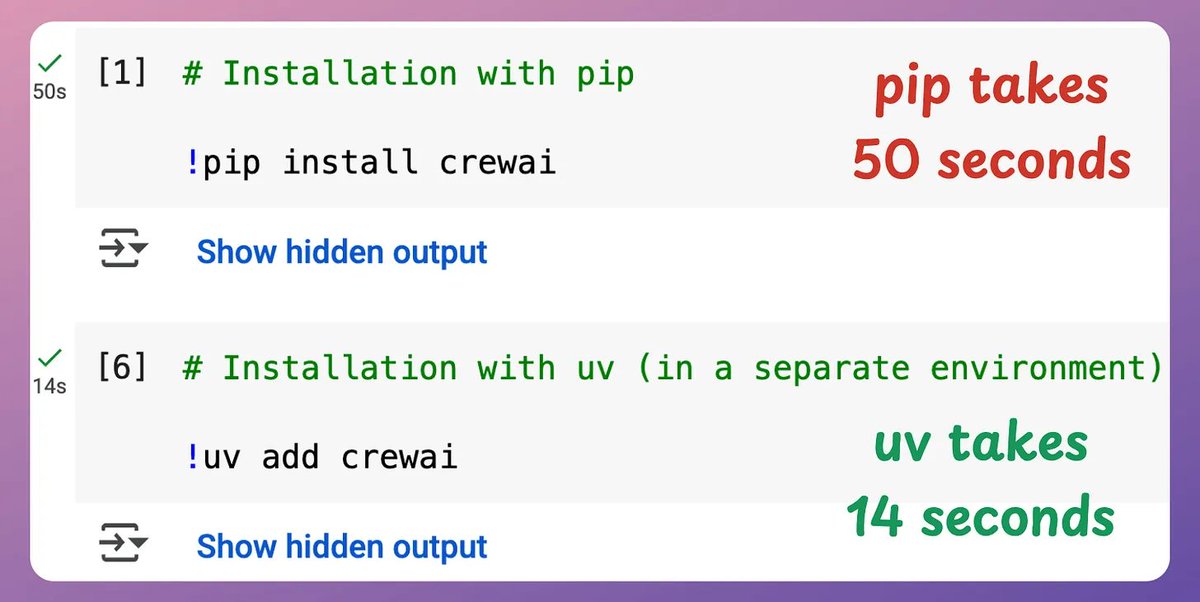
uv is incredibly fast.
- Creating virtual envs. using uv is ~80x faster than python -m venv.
- Package installation is 4–12x faster without caching, and ~100x with caching
Today, let's understand how to use uv for Python package management.
Let's dive in!
- Creating virtual envs. using uv is ~80x faster than python -m venv.
- Package installation is 4–12x faster without caching, and ~100x with caching
Today, let's understand how to use uv for Python package management.
Let's dive in!
uv is a Rust-based Python package manager built to be fast and reliable.
It replaces not just pip but also pip-tools, virtualenv, pipx, poetry, and pyenv, all with a single standalone binary.
Here's a uv cheatsheet for Python devs👇
Let's look at the code next!
It replaces not just pip but also pip-tools, virtualenv, pipx, poetry, and pyenv, all with a single standalone binary.
Here's a uv cheatsheet for Python devs👇
Let's look at the code next!
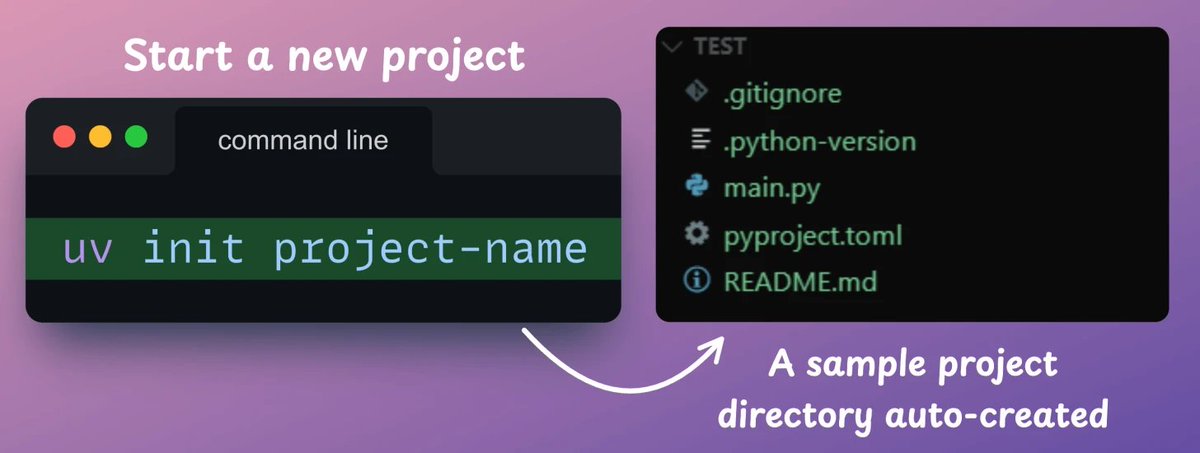
1️⃣ Create a new project
To set up a new Python project, run: uv init project-name.
This creates a directory structure, a TOML file, a sample script, and a README.
Check this 👇
To set up a new Python project, run: uv init project-name.
This creates a directory structure, a TOML file, a sample script, and a README.
Check this 👇
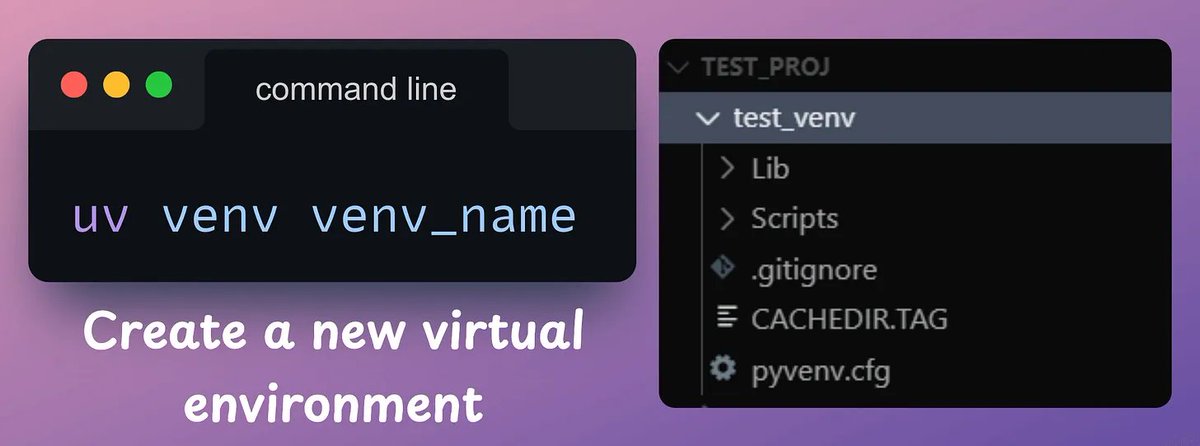
2️⃣ Initialize an env.
Although uv automatically initializes a virtual env. in a project, you can explicitly create a virtual env. with `uv venv` command.
Activate it as follows:
- MacOS/Linux: source .venv/bin/activate
- Windows: .venv\Scripts\activate
Check this 👇
Although uv automatically initializes a virtual env. in a project, you can explicitly create a virtual env. with `uv venv` command.
Activate it as follows:
- MacOS/Linux: source .venv/bin/activate
- Windows: .venv\Scripts\activate
Check this 👇
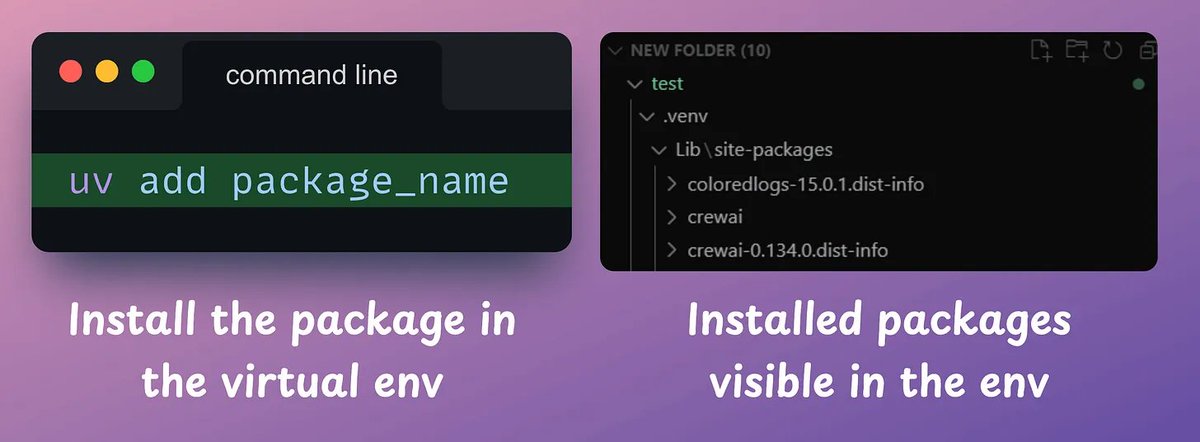
3️⃣ Install packages
Next, you can add dependencies using `uv add <library-name>` command.
When you add packages, uv updates the toml file and resolves the full dependency tree, generating a lockfile.
Check this 👇
Next, you can add dependencies using `uv add <library-name>` command.
When you add packages, uv updates the toml file and resolves the full dependency tree, generating a lockfile.
Check this 👇
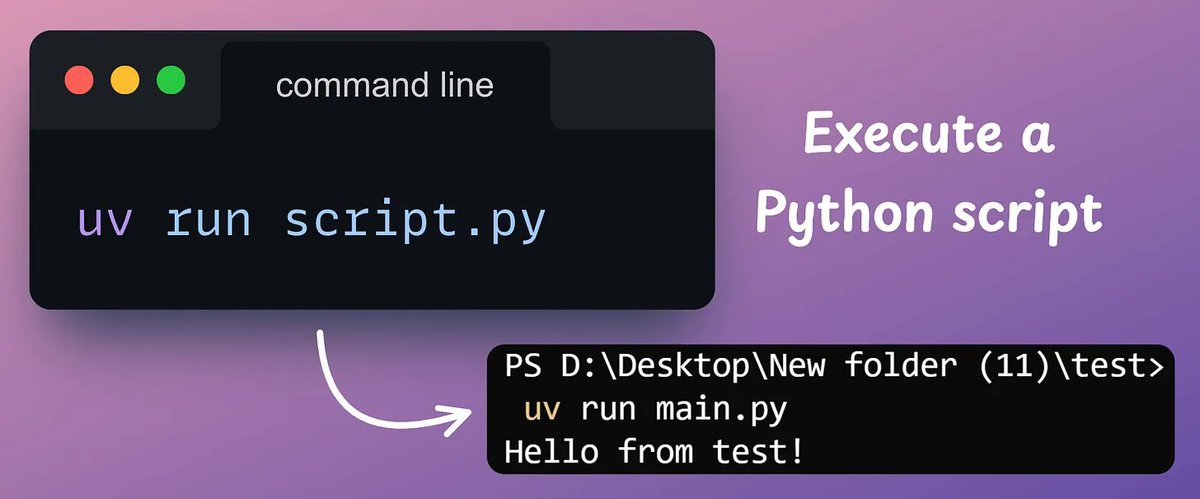
4️⃣ Execute a script
To run a script, use `uv run script[.]py` command.
If a package is not available in your environment but it is used in the script, uv will install it when you run the script, provided the dependency is specified in the toml file.
Check this 👇
To run a script, use `uv run script[.]py` command.
If a package is not available in your environment but it is used in the script, uv will install it when you run the script, provided the dependency is specified in the toml file.
Check this 👇
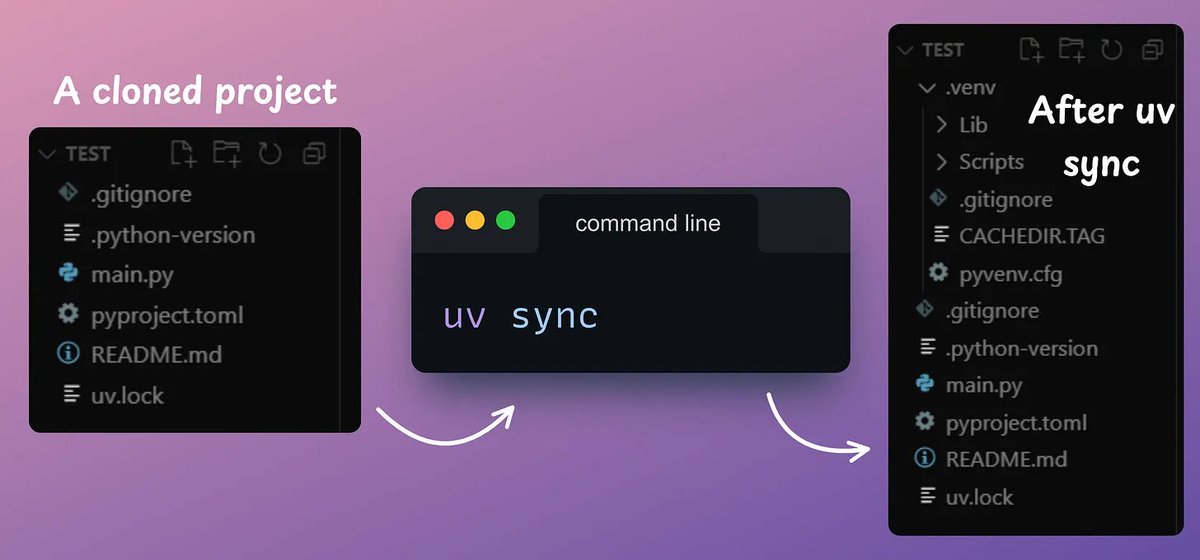
5️⃣ Reproduce an env.
Finally, uv gives 100% reproducible installs.
Say you cloned a project that used uv. You can run `uv sync` to precisely match the project.
This works across OS, and even if the project you cloned used a different Python version.
Check this 👇
Finally, uv gives 100% reproducible installs.
Say you cloned a project that used uv. You can run `uv sync` to precisely match the project.
This works across OS, and even if the project you cloned used a different Python version.
Check this 👇
And that is how you can start using uv.
Note: When you push your project to GitHub, DO NOT add the uv[.]lock file to your gitignore file. This helps uv reproduce the environment when others use your project.
Here is the cheatsheet again for your reference 👇
Note: When you push your project to GitHub, DO NOT add the uv[.]lock file to your gitignore file. This helps uv reproduce the environment when others use your project.
Here is the cheatsheet again for your reference 👇
If you found it insightful, reshare with your network.
Find me → @akshay_pachaar ✔️
For more insights and tutorials on LLMs, AI Agents, and Machine Learning!
Find me → @akshay_pachaar ✔️
For more insights and tutorials on LLMs, AI Agents, and Machine Learning!
https://twitter.com/703601972/status/1951990401847750889
• • •
Missing some Tweet in this thread? You can try to
force a refresh


