1/38
🌱📝@SeedSigner - Assembly, Usage, & Review.
SS is the new cool kid on the block when it comes to #Bitcoin DIY HWW.
Highlights:
- QR seeds
- non-persistent
- ONLY personal entropy
- general-purpose HW
- cheap
🧵Thread👇
🌱📝@SeedSigner - Assembly, Usage, & Review.
SS is the new cool kid on the block when it comes to #Bitcoin DIY HWW.
Highlights:
- QR seeds
- non-persistent
- ONLY personal entropy
- general-purpose HW
- cheap
🧵Thread👇
2/38
✅PREP
Part list:
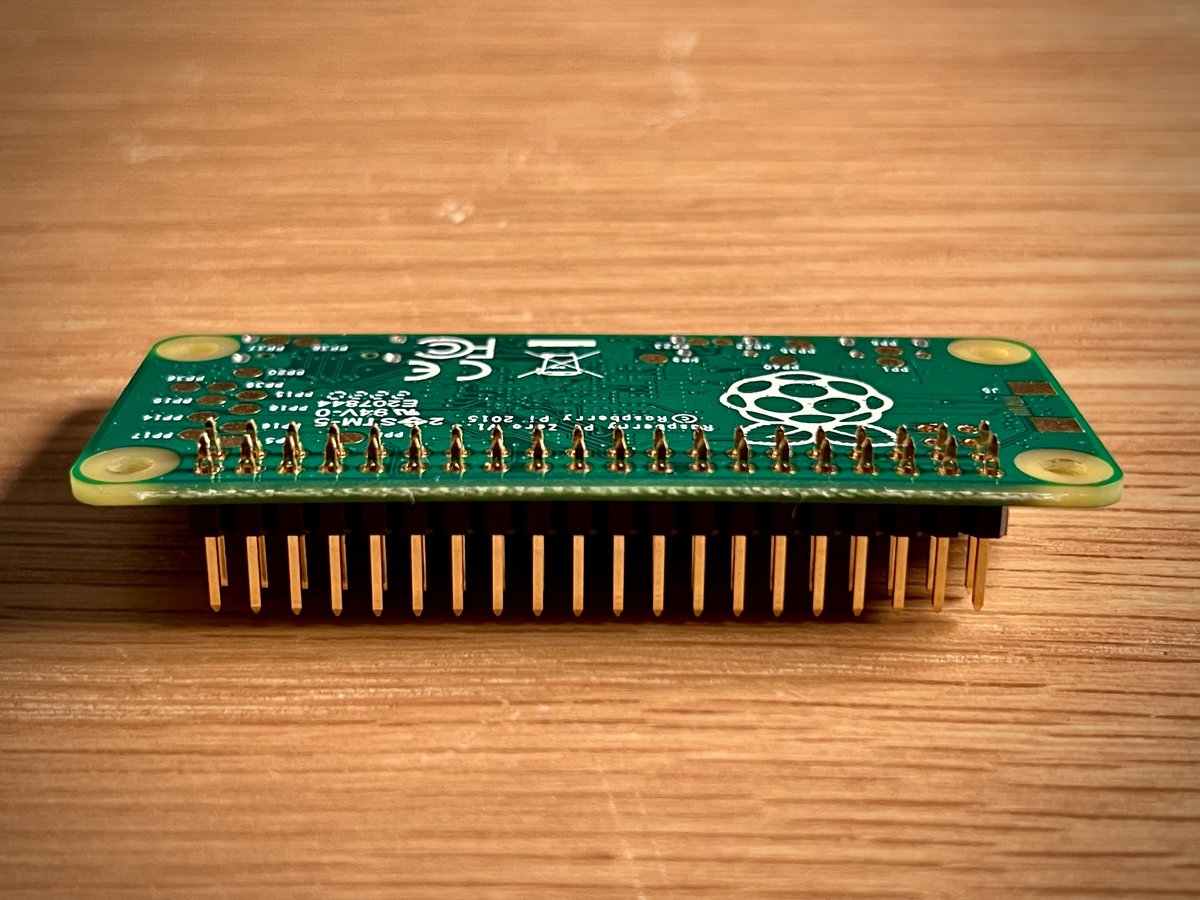
- Raspberry pi zero(no Wifi)
- SD card
- Waveshare 1.3" LCD
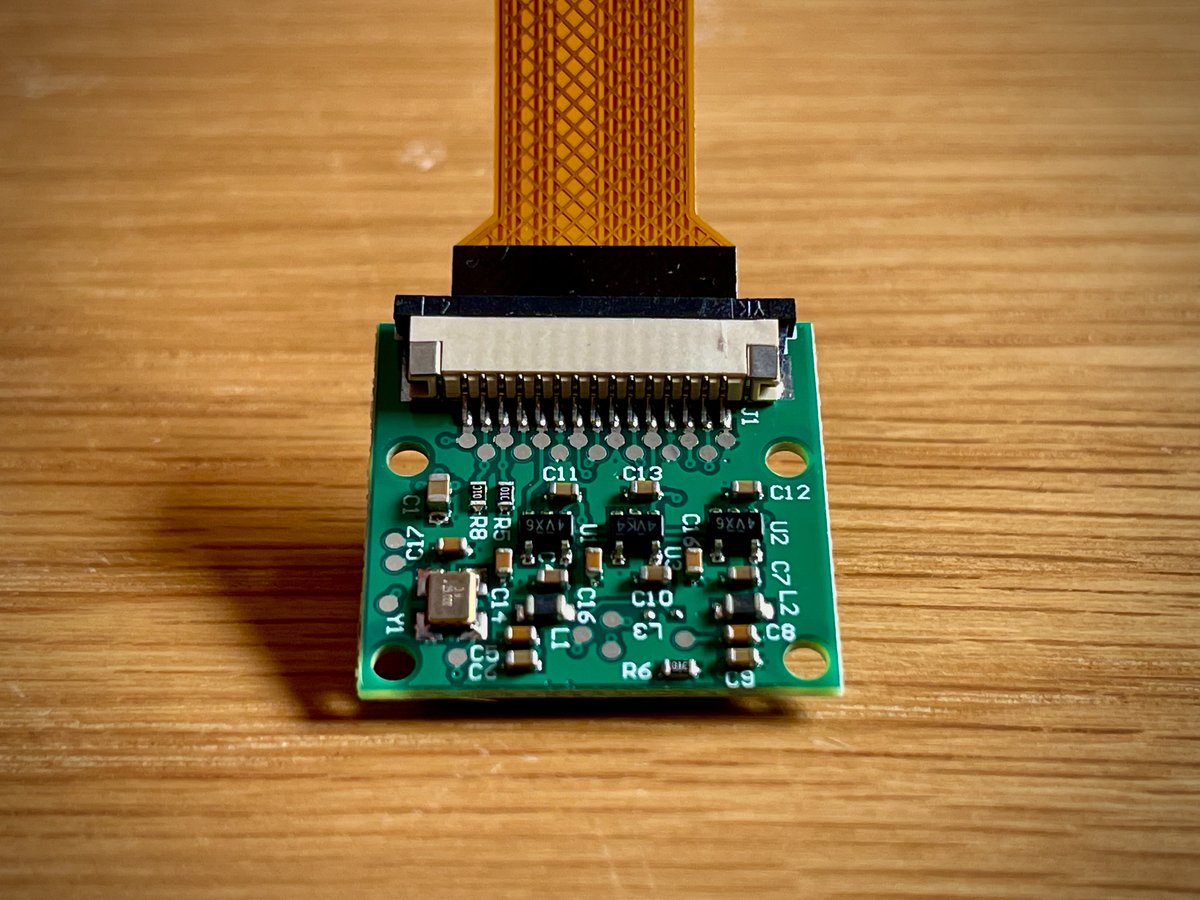
- AuviPal 5MP camera with OV5647 Sensor
- MakerHawk ribbon cable
- GPIO Hammer Header Male
- 4 x (F-F M2.5 spacers 10mm; M2.5 pan head screws 6mm; M2.5 pan head screws 12mm )
- case + buttons
✅PREP
Part list:
- Raspberry pi zero(no Wifi)
- SD card
- Waveshare 1.3" LCD
- AuviPal 5MP camera with OV5647 Sensor
- MakerHawk ribbon cable
- GPIO Hammer Header Male
- 4 x (F-F M2.5 spacers 10mm; M2.5 pan head screws 6mm; M2.5 pan head screws 12mm )
- case + buttons

3/38
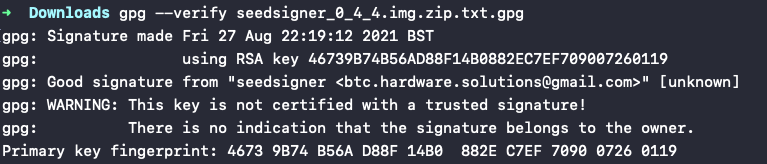
1st get the .img file that contains the OS from
github.com/SeedSigner/see…
Before writing it to the SD card verifies the signature to make sure it's authentic.
(sig is in @seedsigners bio)
Also, print this template, it will make things easier later on
github.com/SeedSigner/see…
1st get the .img file that contains the OS from
github.com/SeedSigner/see…
Before writing it to the SD card verifies the signature to make sure it's authentic.
(sig is in @seedsigners bio)
Also, print this template, it will make things easier later on
github.com/SeedSigner/see…
4/38
🪛ASSEMBLY
Insert the solder-less Hammer Header in the GPIO pins.
Apply pressure until they are in.
Because fuck you soldering iron!
🪛ASSEMBLY
Insert the solder-less Hammer Header in the GPIO pins.
Apply pressure until they are in.
Because fuck you soldering iron!
5/38
Insert the wide side of the ribbon cable(the one shaped like a trapezoid) into the AuviPal 5MP camera.
Make sure the shiny contacts face the green circuit board.
Insert the wide side of the ribbon cable(the one shaped like a trapezoid) into the AuviPal 5MP camera.
Make sure the shiny contacts face the green circuit board.
6/38
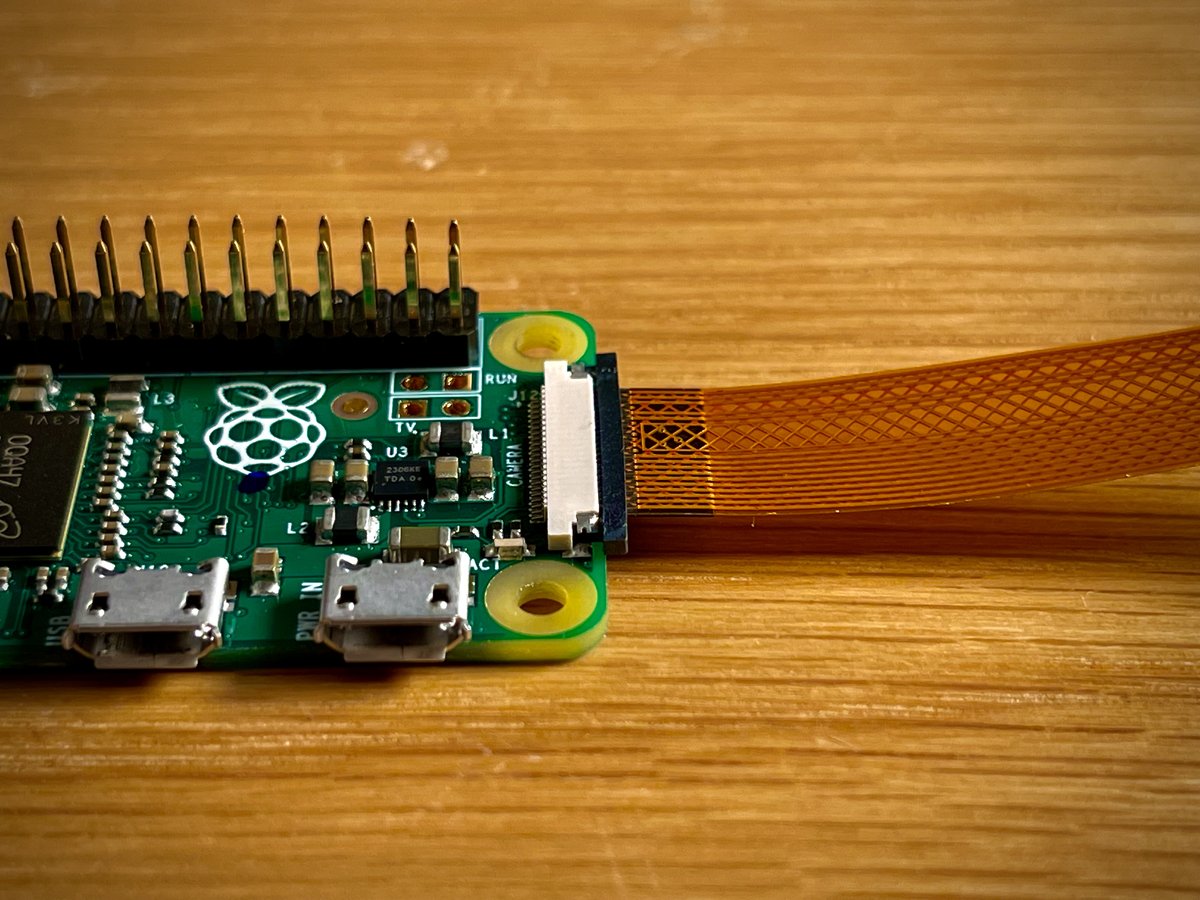
Take the narrower part of the ribbon cable and attach it to the Raspberry Pi zero.
Sam thing, shinny contacts need to face the green circuit board.
Take the narrower part of the ribbon cable and attach it to the Raspberry Pi zero.
Sam thing, shinny contacts need to face the green circuit board.
7/38
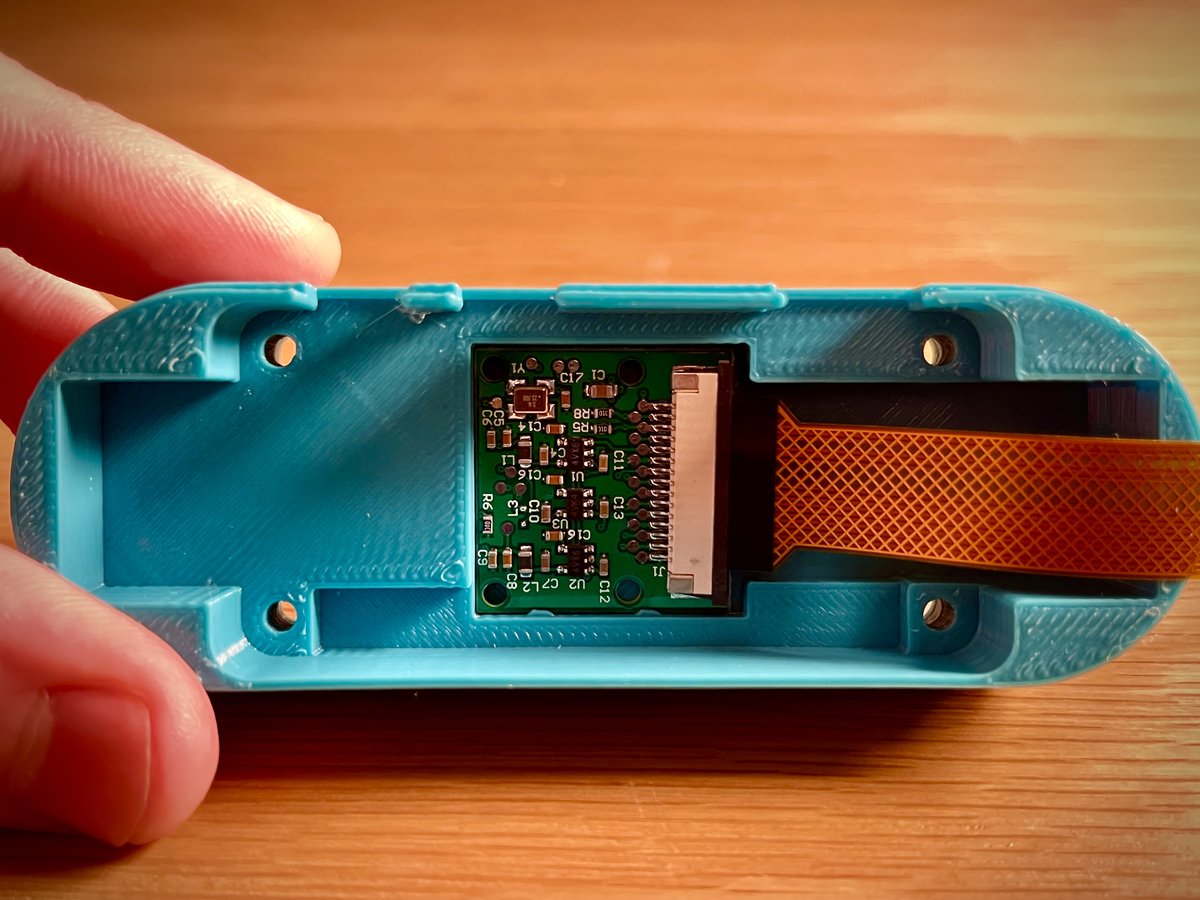
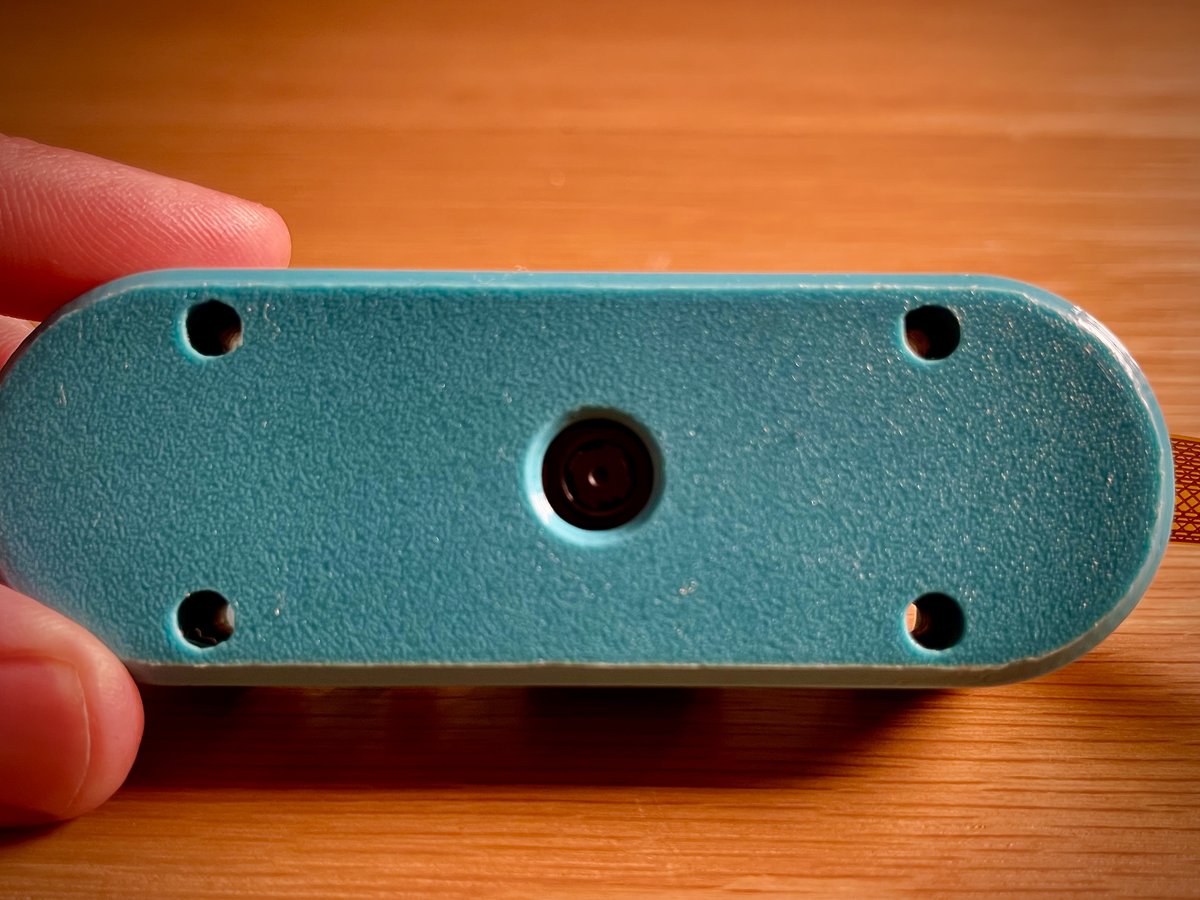
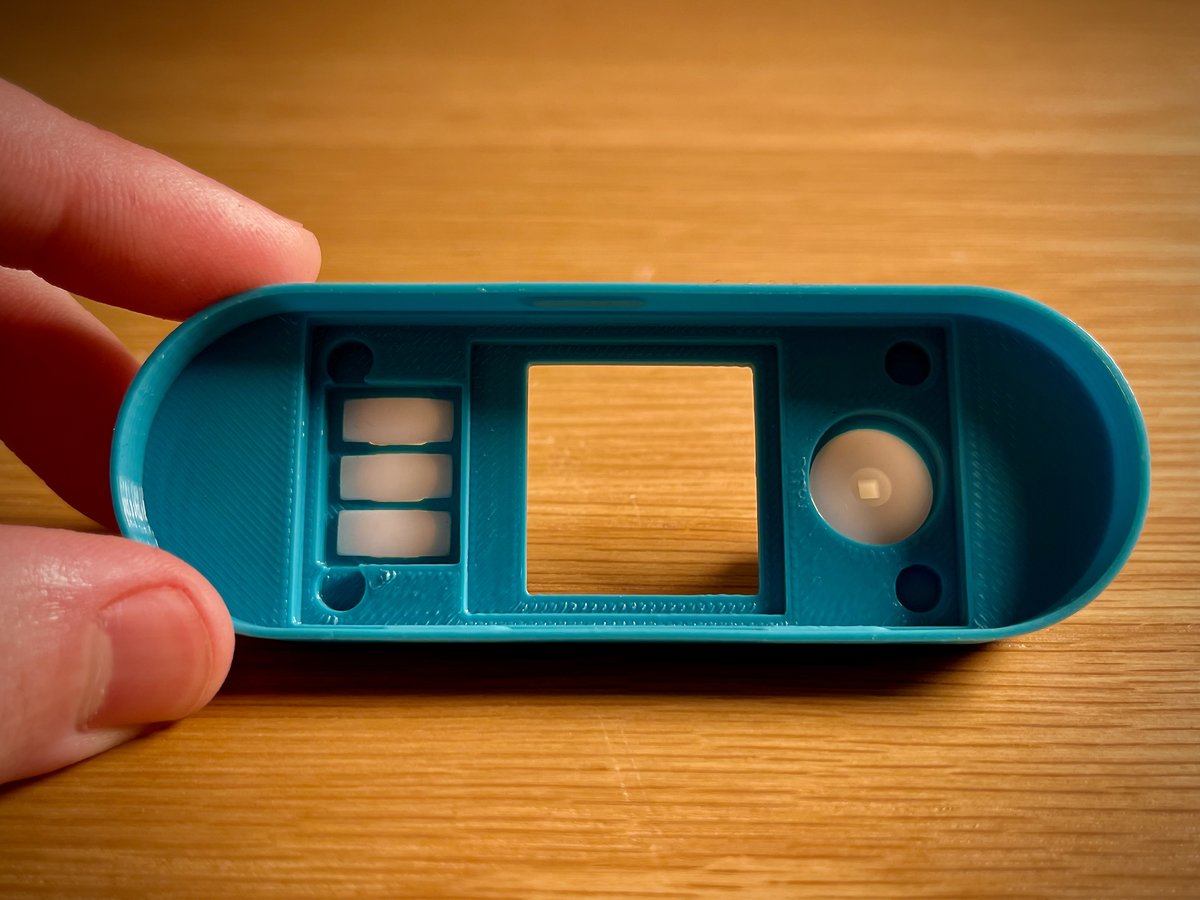
Take the bottom part of the case and fit the camera in the camera holder.
Use a bit of pressure until you hear a click.
(The case ocean turquoise case in the picture was printed by @surfacePlasmon, cheers for that)
Take the bottom part of the case and fit the camera in the camera holder.
Use a bit of pressure until you hear a click.
(The case ocean turquoise case in the picture was printed by @surfacePlasmon, cheers for that)
8/38
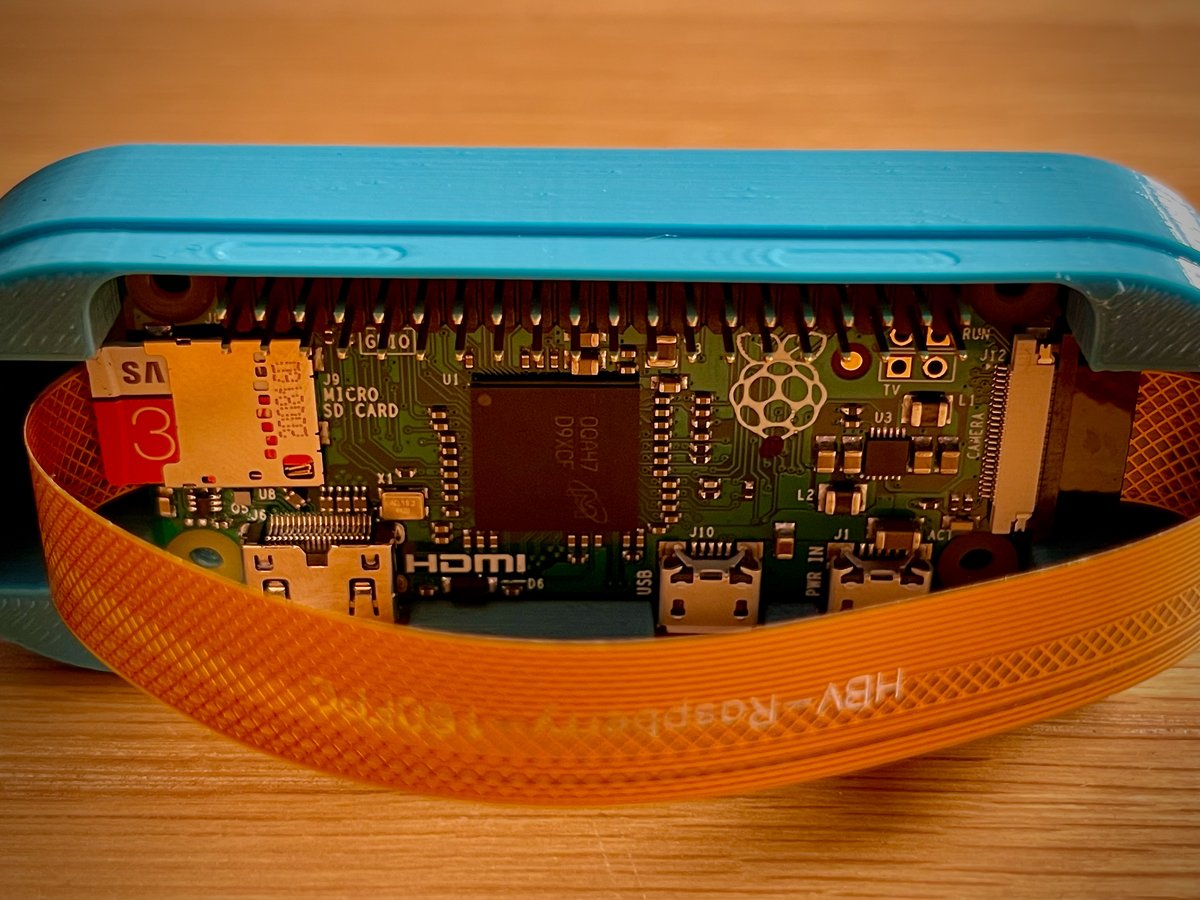
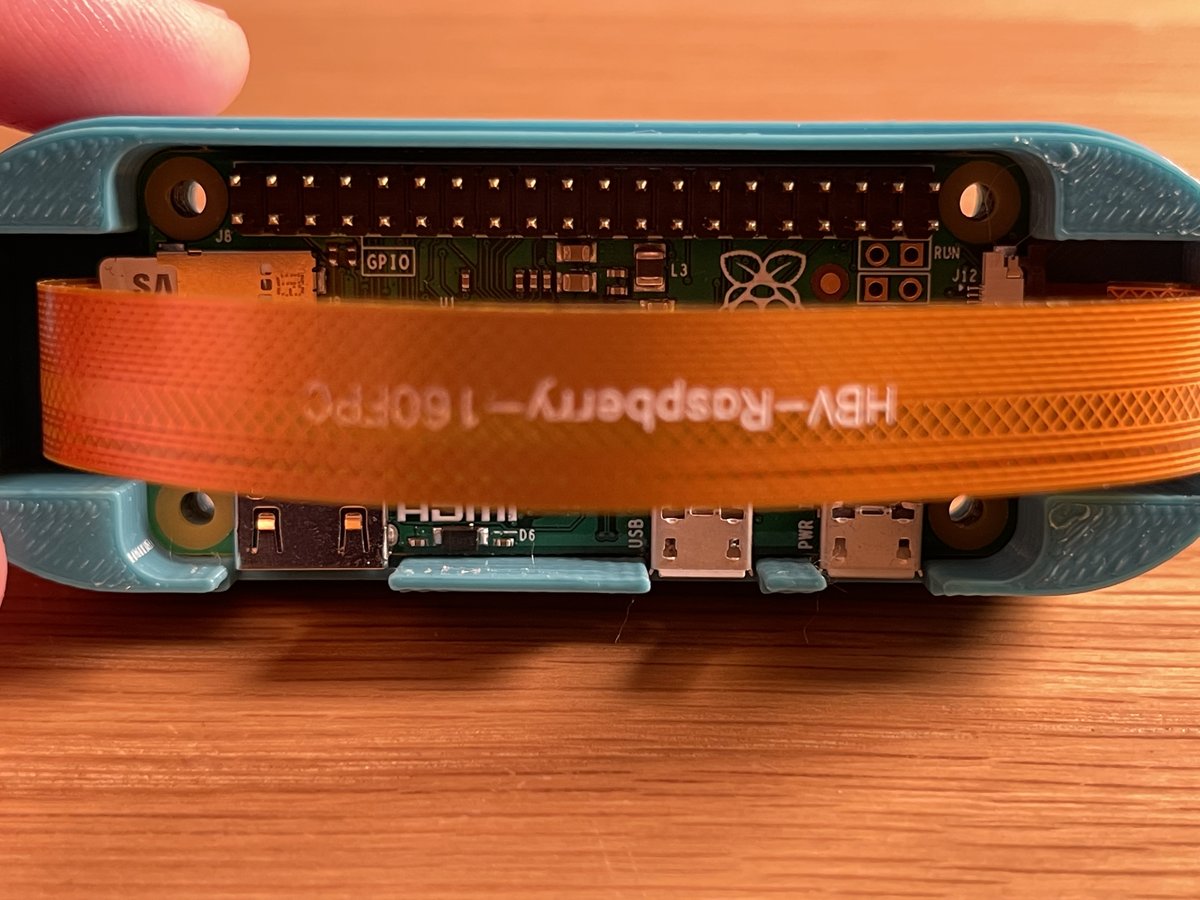
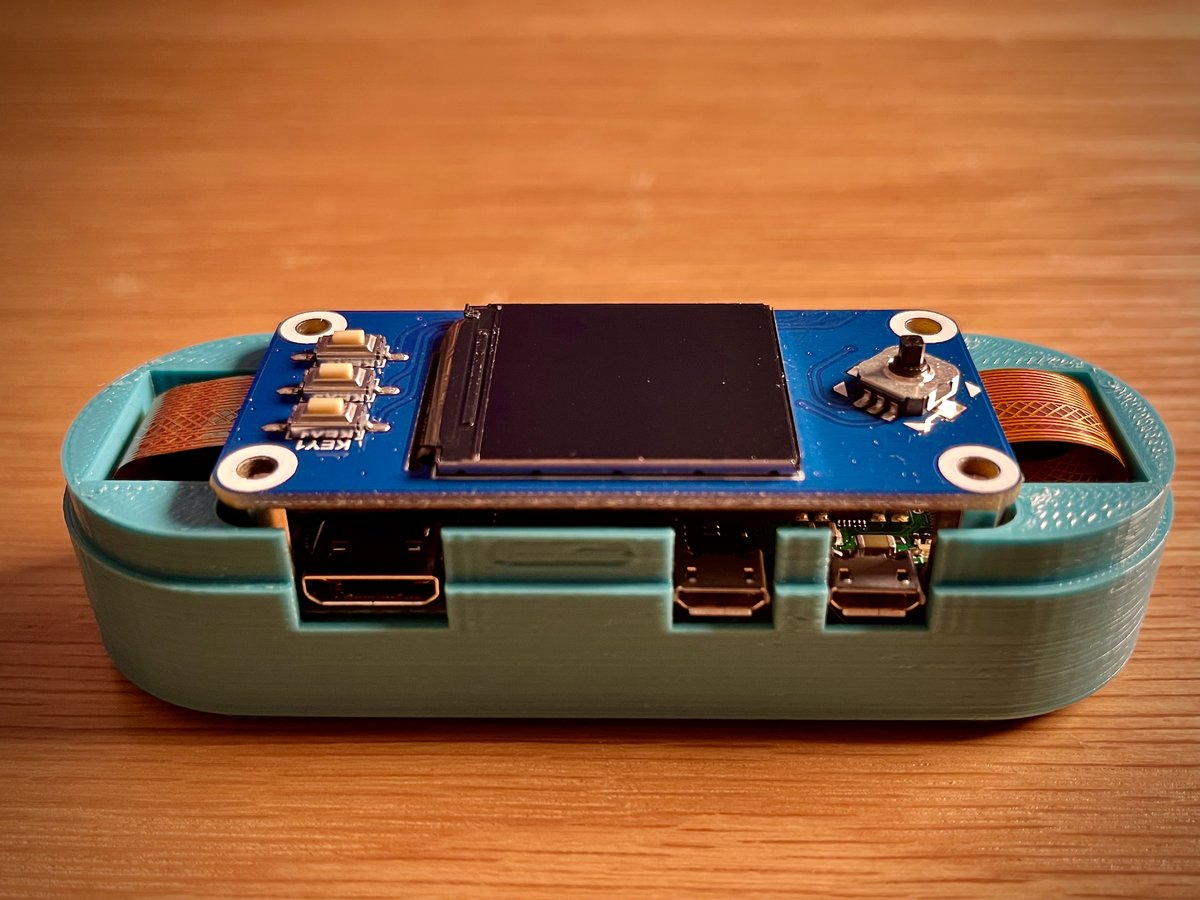
Insert the SD card in the Pi.
Gently place the Pi over the camera.
Make sure the ports are orientated the right way.
Insert the SD card in the Pi.
Gently place the Pi over the camera.
Make sure the ports are orientated the right way.
9/38
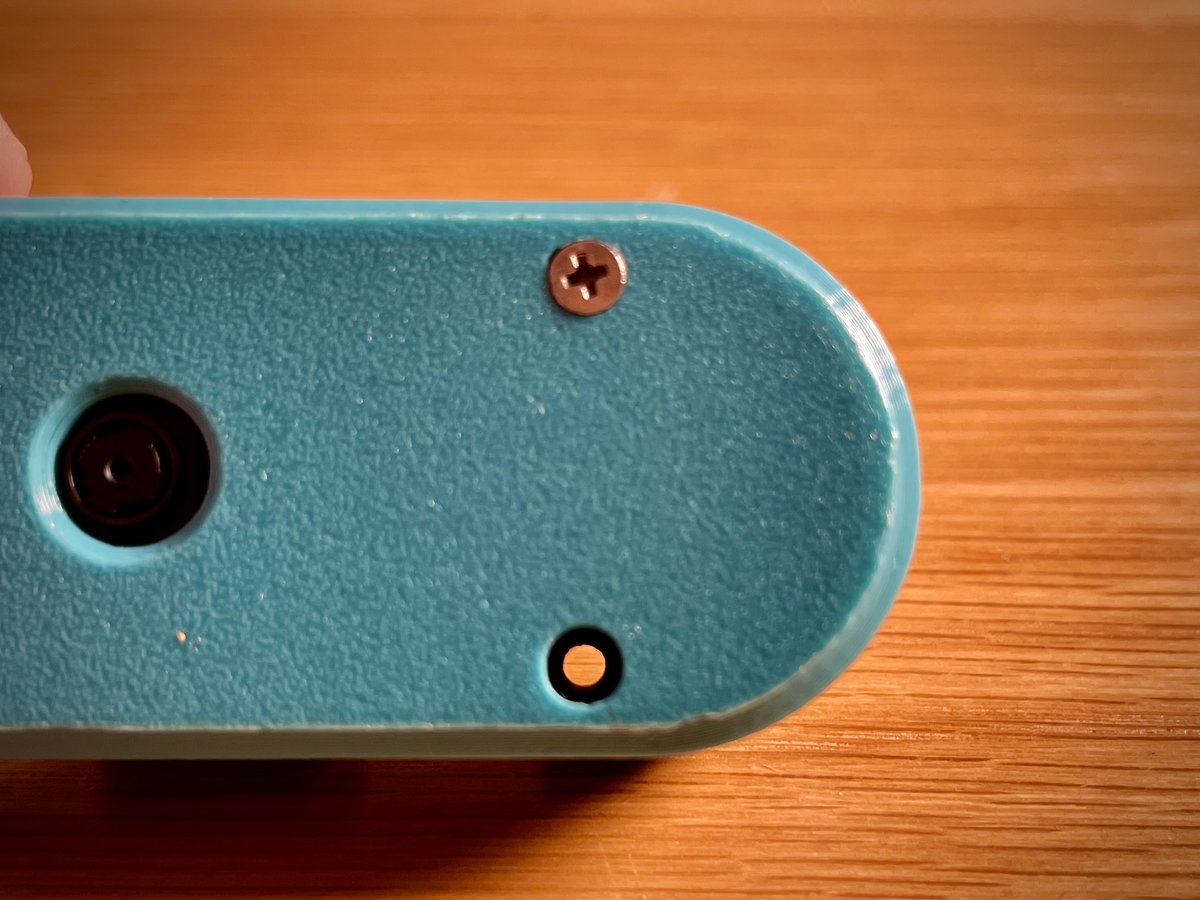
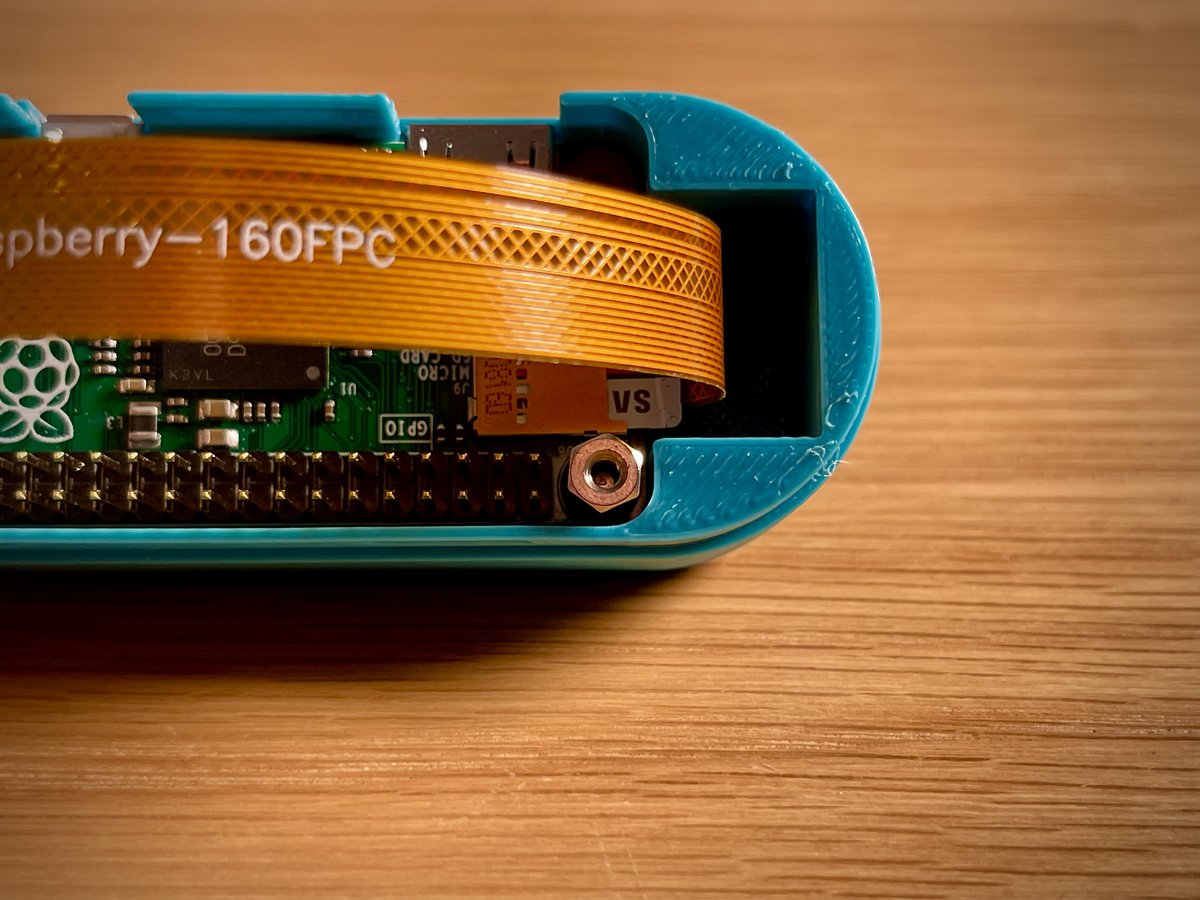
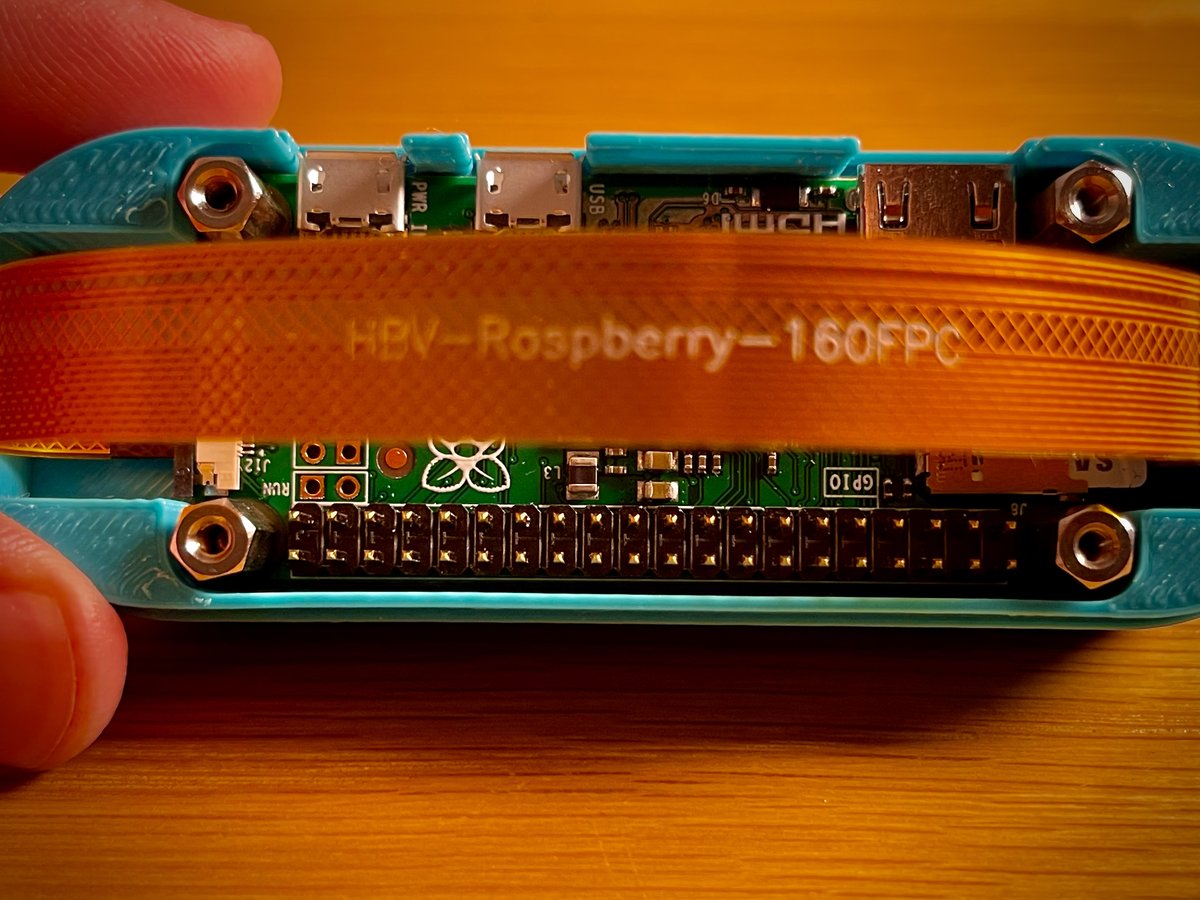
Place the 10mm F-F M2.5 spacer over the holes in the front.
Insert and tighten the 12mm M2.5 pan head screws from behind.
Repeat for all 4 holes.
Place the 10mm F-F M2.5 spacer over the holes in the front.
Insert and tighten the 12mm M2.5 pan head screws from behind.
Repeat for all 4 holes.
10/38
Insert the Waveshare 1.3inch IPS LCD display into the GPIO pins.
The process should be very easy and straightforward as there is the same number of holes in the display as the are pins.
Insert the Waveshare 1.3inch IPS LCD display into the GPIO pins.
The process should be very easy and straightforward as there is the same number of holes in the display as the are pins.
11/38
Using the 4 remaining 6mm M2.5 pan head screws secure the display by screwing in the 10mm F-F M2.5 spacers.
Using the 4 remaining 6mm M2.5 pan head screws secure the display by screwing in the 10mm F-F M2.5 spacers.

12/38
Place the joystick and the 3 plastic buttons in the right holes.
Snap the bottom and upper part together.
Place the joystick and the 3 plastic buttons in the right holes.
Snap the bottom and upper part together.

13/38
And we are done with the assembly.
And we are done with the assembly.
14/38
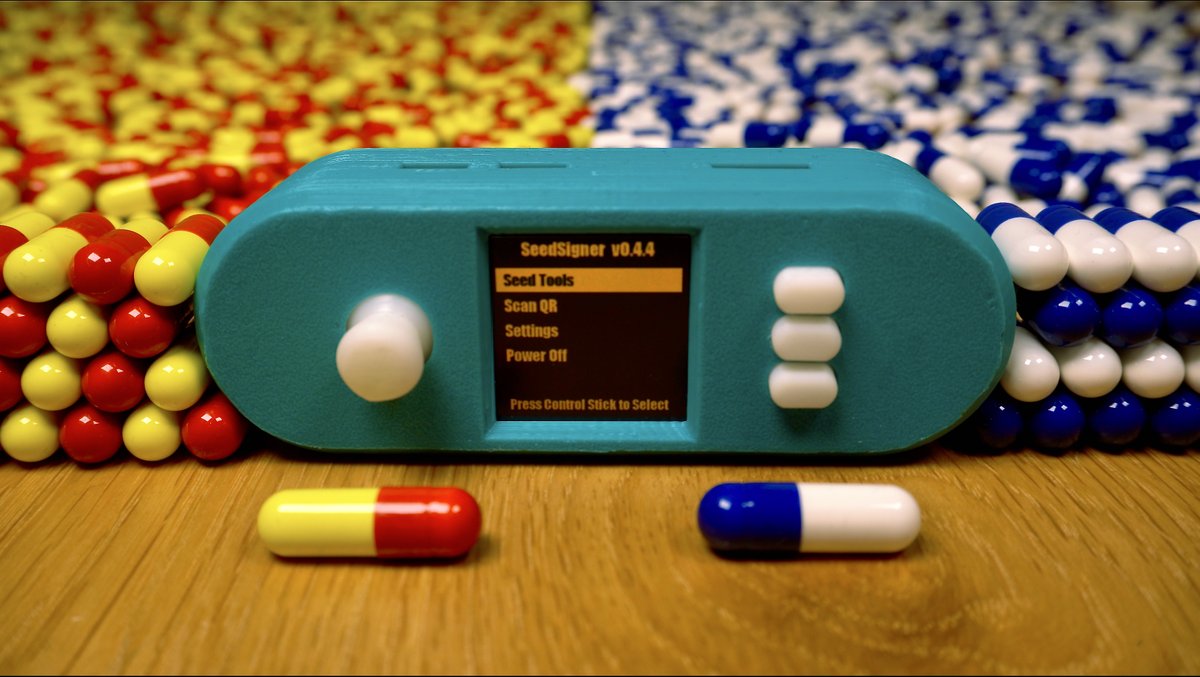
🧑💻USING
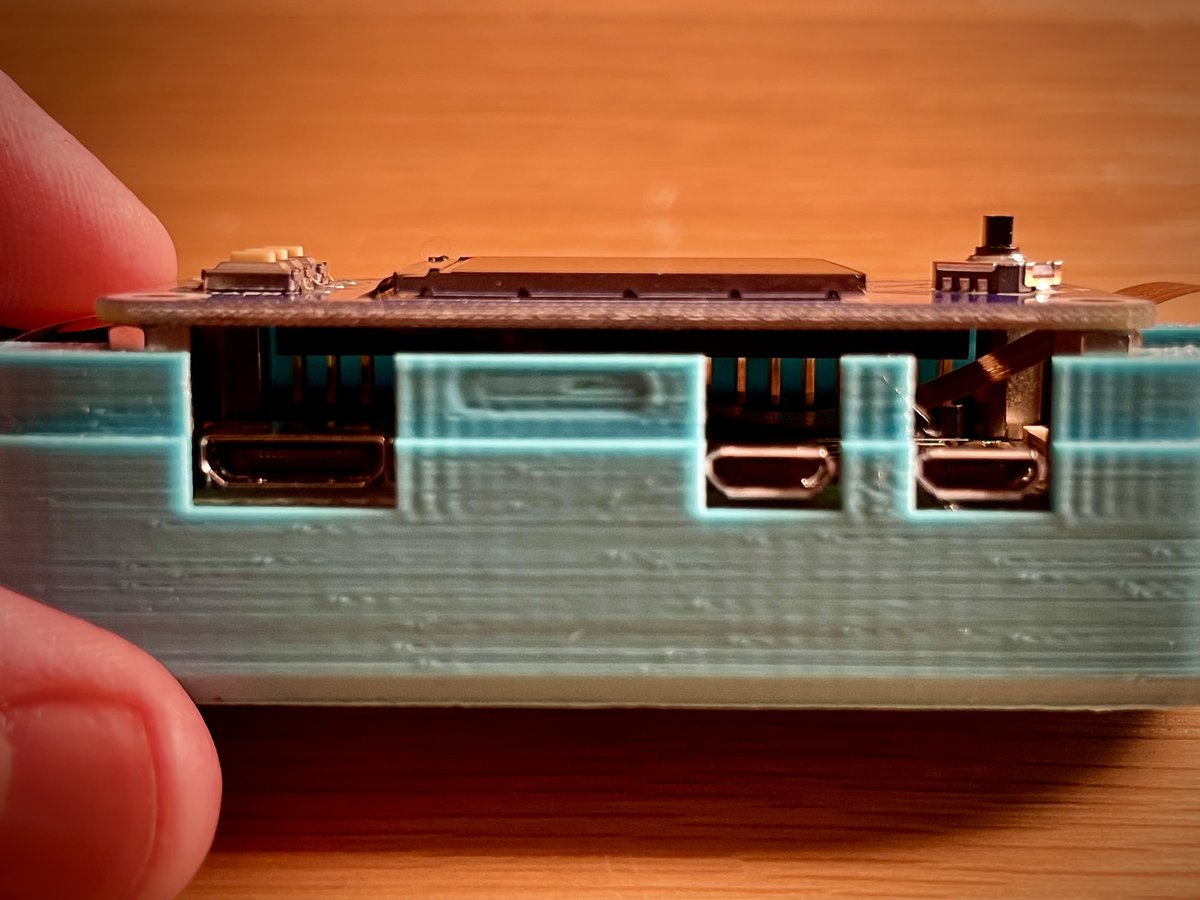
Plug the SS into a power outlet via the mini-USB port.
You can use your computer’s USB, if you use the left port, as this one does NOT allow for data transfer, so it keeps the devices air-gapped.
Wait for the device to boot up.
It can take up to 45 seconds.
🧑💻USING
Plug the SS into a power outlet via the mini-USB port.
You can use your computer’s USB, if you use the left port, as this one does NOT allow for data transfer, so it keeps the devices air-gapped.
Wait for the device to boot up.
It can take up to 45 seconds.
15/38
We have 2 options available to generate a BIP39 seed:
- Dice
- Picture
Both of the methods provide a good personal source of entropy and don't rely on any hardware.
This combined with the fact that the Pi is a general-purpose computer makes the process even better.
We have 2 options available to generate a BIP39 seed:
- Dice
- Picture
Both of the methods provide a good personal source of entropy and don't rely on any hardware.
This combined with the fact that the Pi is a general-purpose computer makes the process even better.
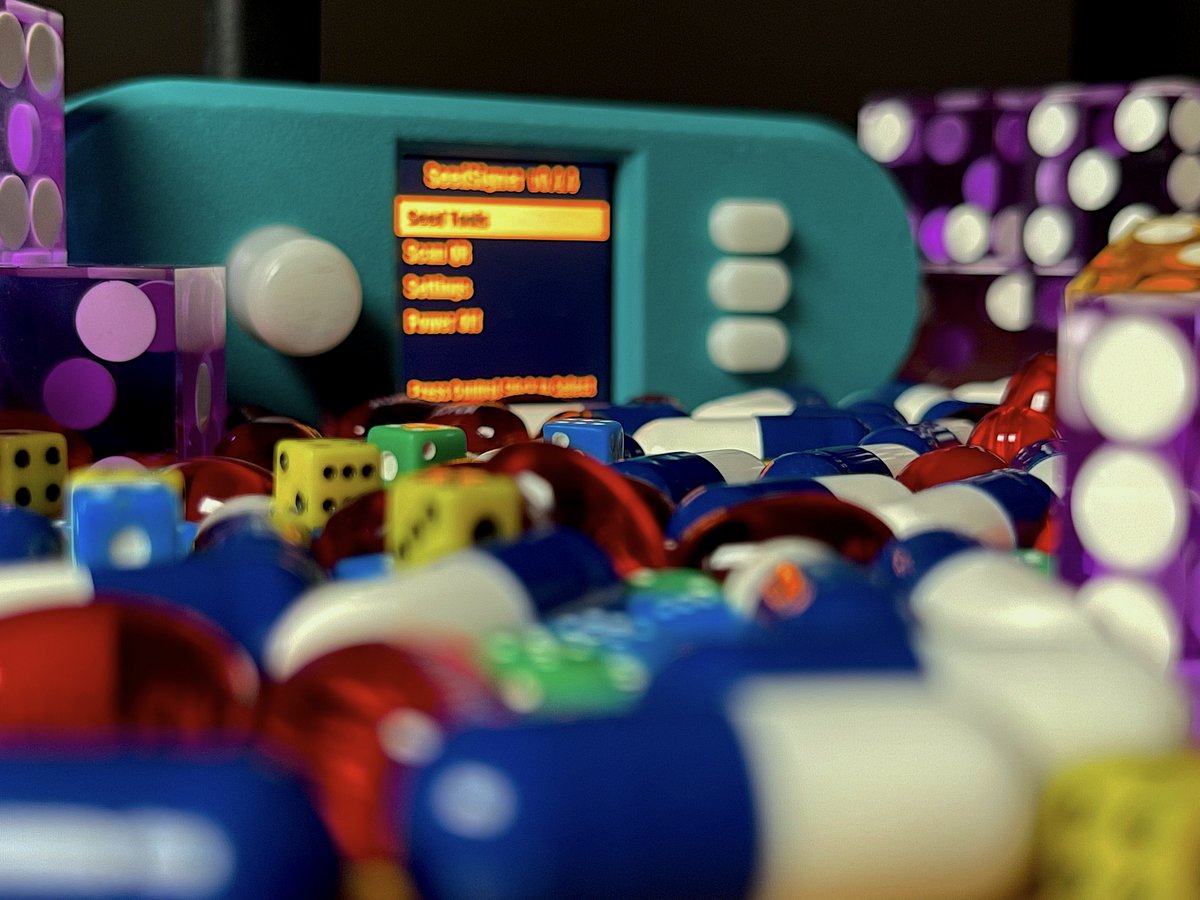
16/38
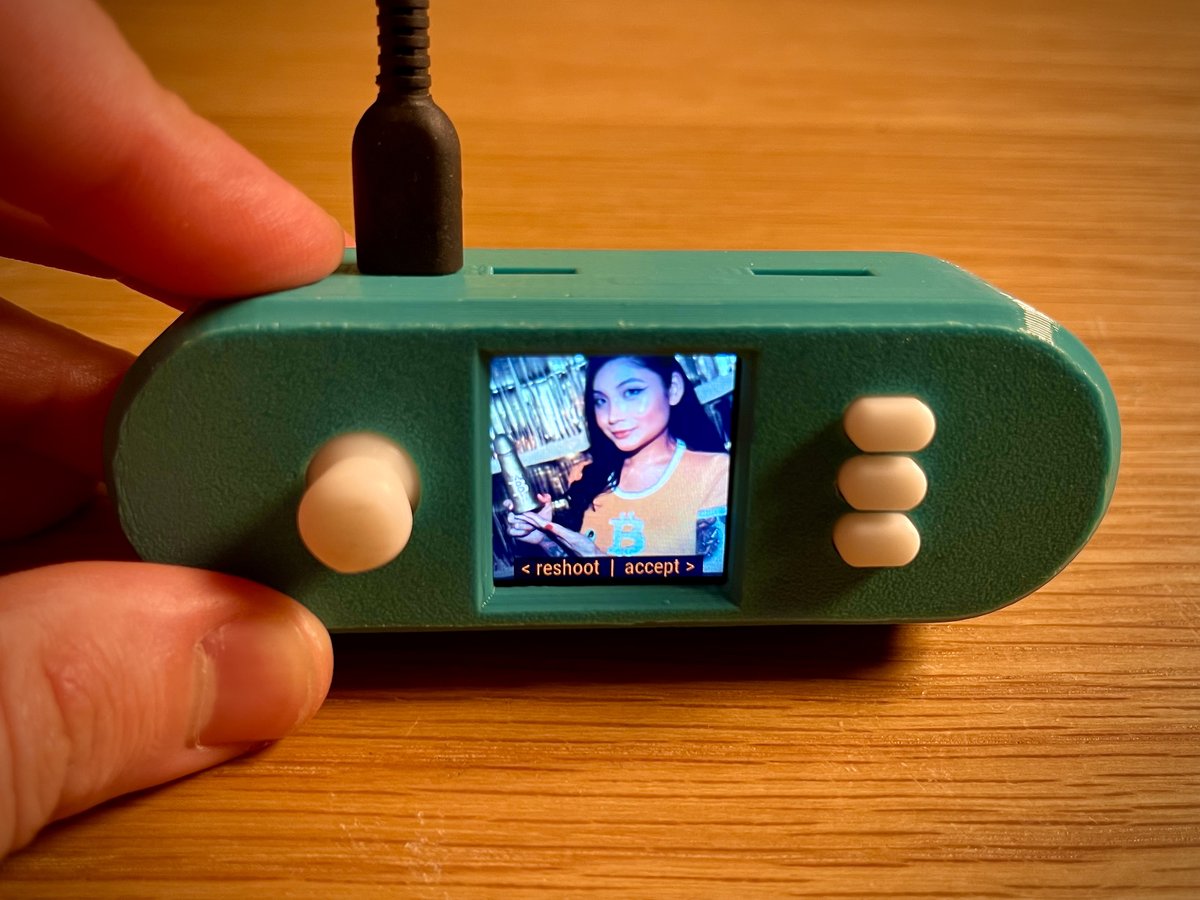
We will be using the picture mode as it's quite easy to do and takes less amount of time.
Seed Tools->Generate seed with Image
Point the camera at something and if happy click accept.
We will be using the picture mode as it's quite easy to do and takes less amount of time.
Seed Tools->Generate seed with Image
Point the camera at something and if happy click accept.
17/38
Now take the template and write down the BIP39 words.
✏️Pencil is preferred as it withstands the test of time better.
(scroll right with the joystick to advance)
Now comes the interesting part.
Now take the template and write down the BIP39 words.
✏️Pencil is preferred as it withstands the test of time better.
(scroll right with the joystick to advance)
Now comes the interesting part.

18/38
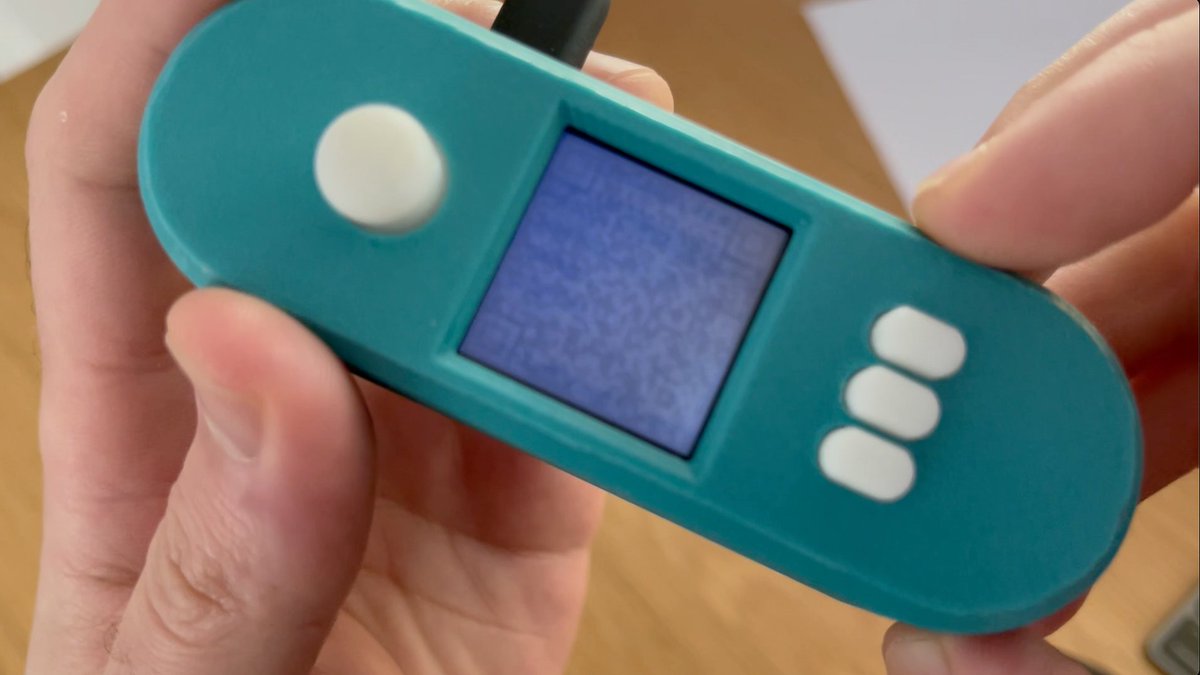
You will see a QR code on the screen. This encodes the words in a more compact way.
Even though not tangible for humans, it's a great way to transfer information between devices.
Also has error correction.
You transfer the EXACT amount of information you want.
You will see a QR code on the screen. This encodes the words in a more compact way.
Even though not tangible for humans, it's a great way to transfer information between devices.
Also has error correction.
You transfer the EXACT amount of information you want.
19/38
By clicking down on the joystick you will be taken into zoom mode.
Here you can use the joystick to navigate, the X&Y coordinates help you identify where you are on the QRcode.
By clicking down on the joystick you will be taken into zoom mode.
Here you can use the joystick to navigate, the X&Y coordinates help you identify where you are on the QRcode.
20/38
Notice that this is the same as the QR present on the template.
You will start from position A1, that's the upper-most left corner.
I suggest using a pencil as graphite is resistant to ultraviolet radiation, moisture and other chemicals making great for long term storage
Notice that this is the same as the QR present on the template.
You will start from position A1, that's the upper-most left corner.
I suggest using a pencil as graphite is resistant to ultraviolet radiation, moisture and other chemicals making great for long term storage
21/38
When done click Save Seed.
As the SS is completely non-persistent, meaning it does NOT store any information, you will need to import your seed every time you want to make a transaction.
You can store the seed temporarily, but it will be wiped once the device reboots.
When done click Save Seed.
As the SS is completely non-persistent, meaning it does NOT store any information, you will need to import your seed every time you want to make a transaction.
You can store the seed temporarily, but it will be wiped once the device reboots.
22/38
Next, we need to import the xPub on our computer.
This will give us access to all the addresses to receive funds in the future and check the stash.
We can generate any addresses we want in the future so we can receive funds, while the seed remains safe on the paper.
Next, we need to import the xPub on our computer.
This will give us access to all the addresses to receive funds in the future and check the stash.
We can generate any addresses we want in the future so we can receive funds, while the seed remains safe on the paper.
23/38
We will set up the wallet for single-sig use.
Settings->Script Policy->Single Sig Native Segwit
Return to the main menu.
Seed Tools -> xPub from Seed
Use the saved Seed.
Check if the words match with the backup
And pick @SparrowWallet
We will set up the wallet for single-sig use.
Settings->Script Policy->Single Sig Native Segwit
Return to the main menu.
Seed Tools -> xPub from Seed
Use the saved Seed.
Check if the words match with the backup
And pick @SparrowWallet
24/38
In @SparrowWallet create a new Airgapped Hardware Wallet.
Click the Scan button that's for the SeedSigner.
Present the QR from the SS to your camera.
When the QR is recognized the details will be filled in.
Set a password, and we can receive some coins.
In @SparrowWallet create a new Airgapped Hardware Wallet.
Click the Scan button that's for the SeedSigner.
Present the QR from the SS to your camera.
When the QR is recognized the details will be filled in.
Set a password, and we can receive some coins.
25/38
We can get a new address by clicking Get Next Address.
Or select 1 from the Addresses tab.
Now we are going to receive 0.0001 BTC in our new SeedSigner offline wallet.
We can get a new address by clicking Get Next Address.
Or select 1 from the Addresses tab.
Now we are going to receive 0.0001 BTC in our new SeedSigner offline wallet.
26/38
Here we are sending the coins back.
After we create the transaction with the Sparrow wallet, we need to get it to the SS to signed it.
As you notice this is an animate QR code, as the TX is bigger than the seed.
Here we are sending the coins back.
After we create the transaction with the Sparrow wallet, we need to get it to the SS to signed it.
As you notice this is an animate QR code, as the TX is bigger than the seed.
27/38
After the SS signs the TX we need to broadcast it, so we use again another animated QR code, generated by the SS.
This is the exact same process you use on the ColdCard, except QRs are used instead of the SDcard for sending information between devices.
After the SS signs the TX we need to broadcast it, so we use again another animated QR code, generated by the SS.
This is the exact same process you use on the ColdCard, except QRs are used instead of the SDcard for sending information between devices.
28/38
👍👎REVIEW
I can't stress enough how BIG of a plus is the fact that the SS uses a general-purpose computer.
This almost nullifies the chance of targeted attacks(which are a major weakness of HWWs)
Also reduces the chance of some backdoor that targets crypto(graphy) things
👍👎REVIEW
I can't stress enough how BIG of a plus is the fact that the SS uses a general-purpose computer.
This almost nullifies the chance of targeted attacks(which are a major weakness of HWWs)
Also reduces the chance of some backdoor that targets crypto(graphy) things
29/38
I also can't stress out how big of a plus is the fact that they only accept user's entropy.
50% of making the private keys private is the entropy, and by not trusting any onboard RNGs this is a great trustless solution.
I also can't stress out how big of a plus is the fact that they only accept user's entropy.
50% of making the private keys private is the entropy, and by not trusting any onboard RNGs this is a great trustless solution.
30/38
I dont like that it runs a full OS, Debian, which increases the attack surface, or things that could go wrong and increases boot time 45s🙄(can improve).
However all the crypto operations dont use any OS functions and being air-gapped, the attacks, are kinda nullified.
I dont like that it runs a full OS, Debian, which increases the attack surface, or things that could go wrong and increases boot time 45s🙄(can improve).
However all the crypto operations dont use any OS functions and being air-gapped, the attacks, are kinda nullified.
31/38
The navigation is a bit clunky, and I would like to use the buttons on the right.
Also -> & <- navigation in all menus.
This is a very easy fix.
New UI is in the worx.
The navigation is a bit clunky, and I would like to use the buttons on the right.
Also -> & <- navigation in all menus.
This is a very easy fix.
New UI is in the worx.
https://twitter.com/KeithMukai/status/1449485824379269127
32/38
Even though this is a security product UX is crucial, as no matter who you are you always weigh the trade-offs.
The QR transcribing took 1 hour.
And to me, it seems a solution for a problem that should not exist in the 1st place.
Even though this is a security product UX is crucial, as no matter who you are you always weigh the trade-offs.
The QR transcribing took 1 hour.
And to me, it seems a solution for a problem that should not exist in the 1st place.
33/38
The SS does not have any secure memory to save the seed, except the SDcard used.
This is of course a limitation of the Pi, but am curious if some peripherals can solve this?
Even a bad electronic backup is still safer than a plain paper backup.
The SS does not have any secure memory to save the seed, except the SDcard used.
This is of course a limitation of the Pi, but am curious if some peripherals can solve this?
Even a bad electronic backup is still safer than a plain paper backup.
34/38
And all in all, I want things to feel nice.
I personally prefer 3-2-1 backup method.
- 3 backups
- 2 mediums
- 1 off-site
And all in all, I want things to feel nice.
I personally prefer 3-2-1 backup method.
- 3 backups
- 2 mediums
- 1 off-site
35/38
I found this weird thing where the QR is visible during boot on the screen if you unplug the cable.
(this is not recommended way to shut down the device, btw)
I sent it to the telegram group and turns out it's a known issue and there is a fix for it.
(Screen saver)
I found this weird thing where the QR is visible during boot on the screen if you unplug the cable.
(this is not recommended way to shut down the device, btw)
I sent it to the telegram group and turns out it's a known issue and there is a fix for it.
(Screen saver)
36/38
Even though I had some criticism for the SS, I think the device is really cool and offers a really GOOD set of trade-offs.
For a multi-sig setup is ideal, as the whole point is to have different risk profiles.
Even though I had some criticism for the SS, I think the device is really cool and offers a really GOOD set of trade-offs.
For a multi-sig setup is ideal, as the whole point is to have different risk profiles.
37/38
Looking at how the project evolved, looks like a good trajectory🚀
Also, all my interactions with the people working on the project were good and all my questions were always answered.
This matters a LOT for me.
Looking at how the project evolved, looks like a good trajectory🚀
Also, all my interactions with the people working on the project were good and all my questions were always answered.
This matters a LOT for me.
38/38
Please let me know if you agree with my review, and if you have any questions, feel free to ask.
And here you can find a list of other Threads I've made.
Please let me know if you agree with my review, and if you have any questions, feel free to ask.
And here you can find a list of other Threads I've made.
https://twitter.com/raw_avocado/status/1376597174893547520
• • •
Missing some Tweet in this thread? You can try to
force a refresh