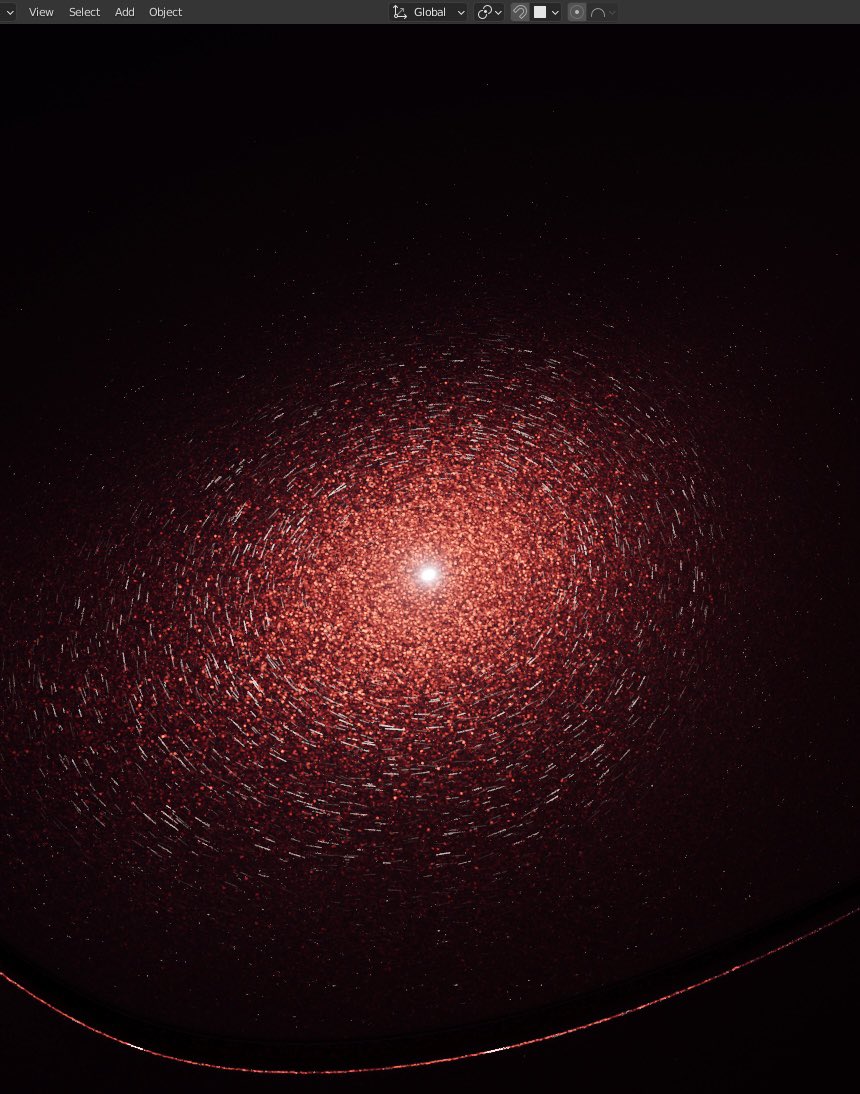
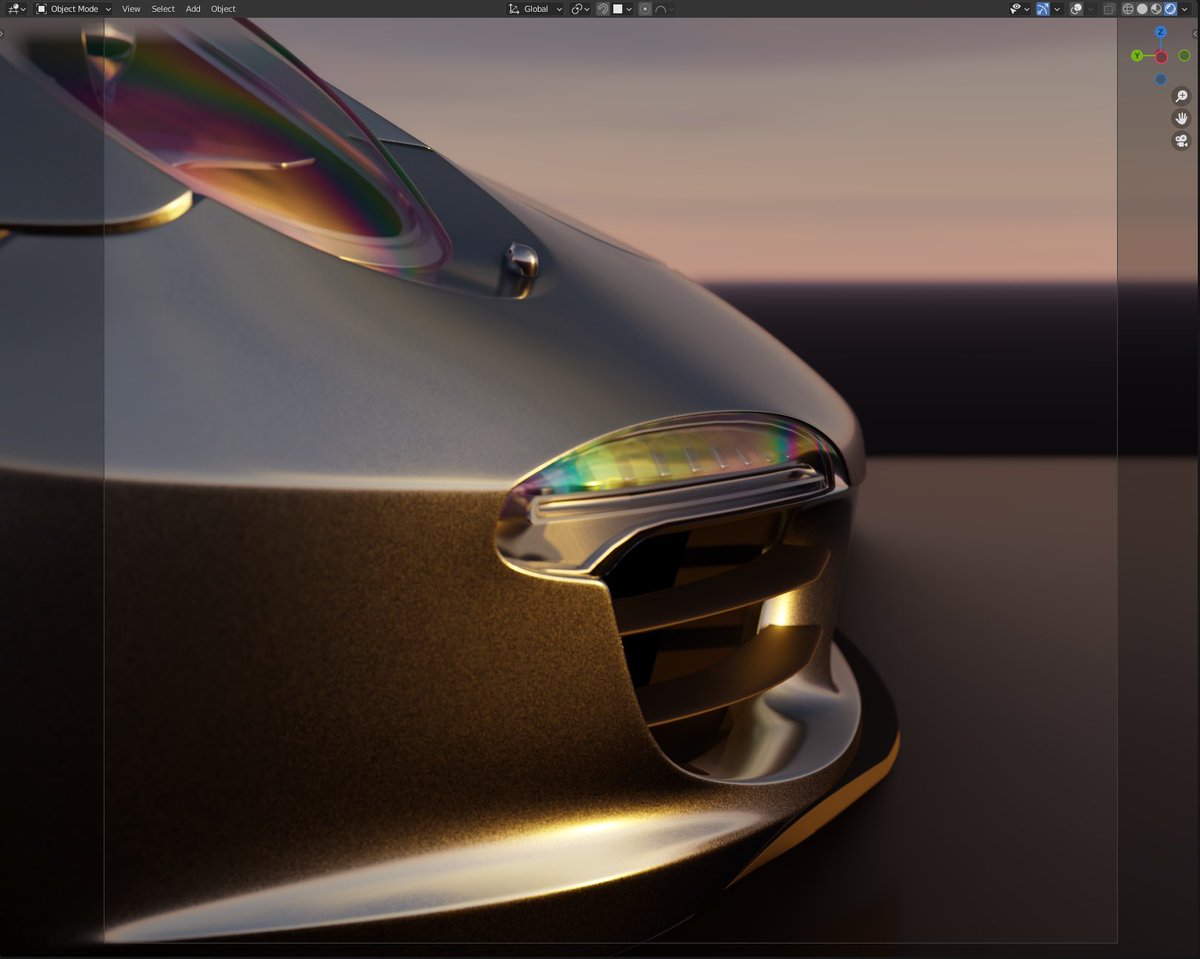
I'm now hooked on developing physical automotive materials in Eevee #Blender3d

This time - suede (Alcantara) with varying fiber direction and fingerprint-y anodized aluminum.
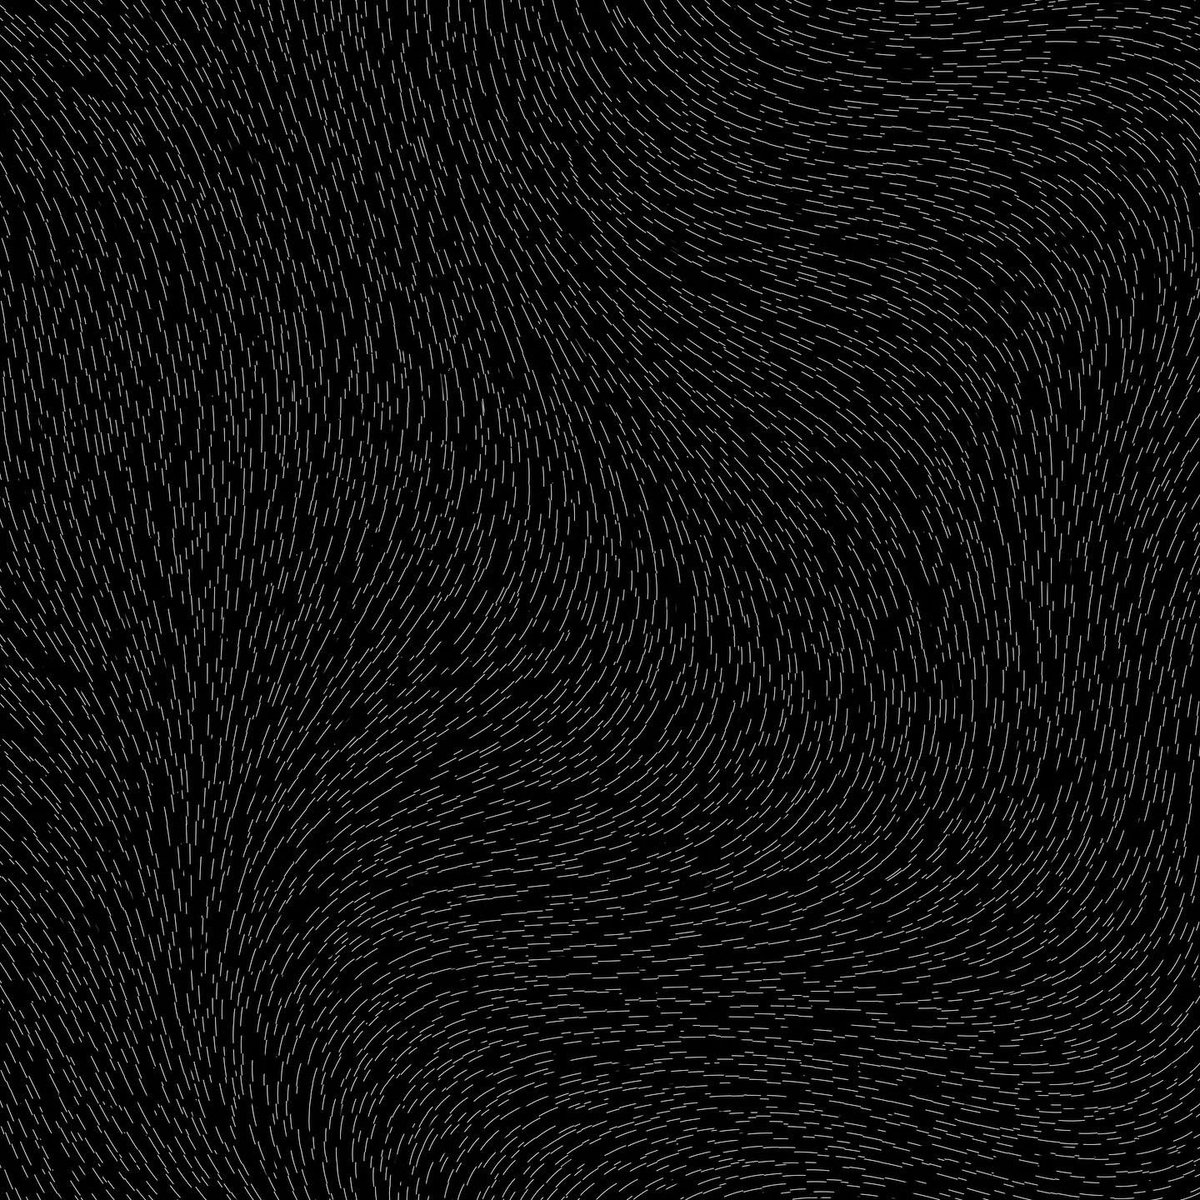
The suede material is fully procedural (using Blender built-in Noise) It will look even nicer with real Alcantara surface texture. Fiber flow is again a larger noise color texture, converted to a normal map. ImageImageImage
steering wheel 3D model by Gurdeep Panesar
artstation.com/swedgedesign
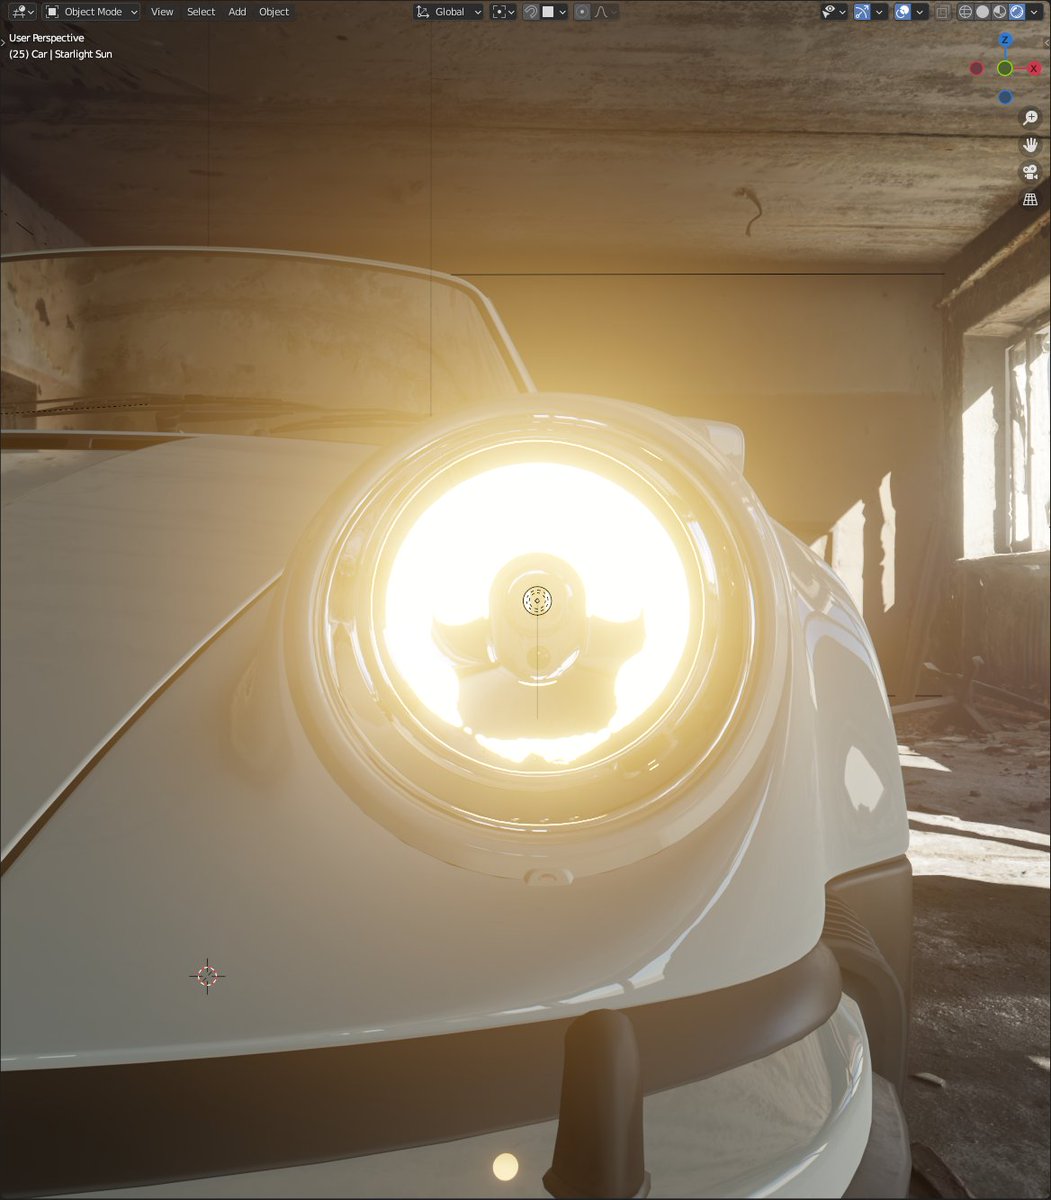
Some more lighting shots. ImageImageImage
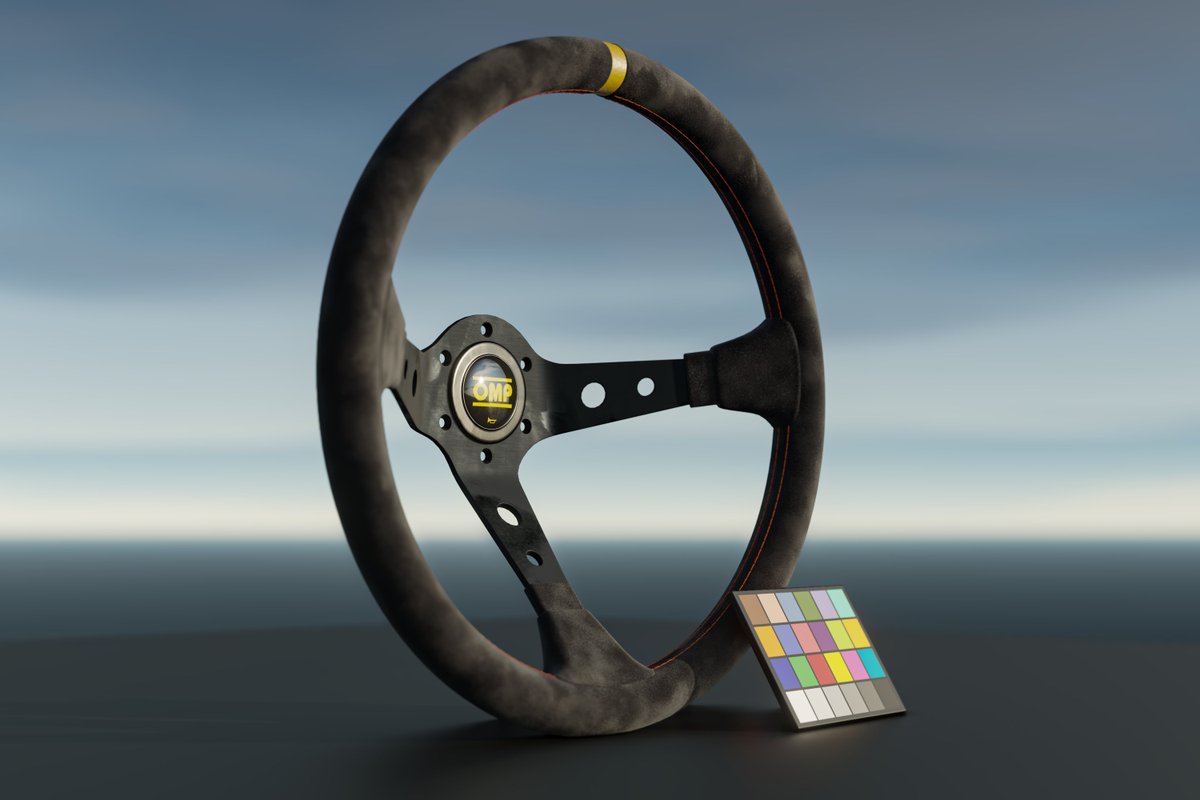
For suede material reference I used a real Porsche GT3 Alcantara steering wheel replica I use for sim-racing. ImageImage
Breakdown of the material.

1 - diffuse only

Suede is a really absorbent material - fibres absorb the light even more than a flat material. So the albedo color is close to black, those speckles are meant to be dust or skin flakes. The "suede" effect secret is in reflected light. Image
2 - specular light only

Here is just specular light with a roughness map. Base roughness is close to 1.0. And fingerprints leave grease. I know, I overdid the effect, but it delivers the message.
Overall material feel - fine rubber. Image
3 - specular only + roughness + normal map

Normal map modulates and adds irregularities in the surface.
Now it feels more like rough leather. Image
4 - sheen only

This is the magic ingredient.
Without anything else, pure sheen looks like velvet. Image
5 - sheen + normal map

There. This one alone, without diffuse and specular, sells the "suede" effect.

Suede is basically short fur.

Anisotropic reflections would make the effect even more convincing, but it does not work in Eevee, so a normal map alone is fine. Image

• • •

Missing some Tweet in this thread? You can try to force a refresh
 

Keep Current with Mārtiņš Upītis

Mārtiņš Upītis Profile picture

Stay in touch and get notified when new unrolls are available from this author!

Read all threads

This Thread may be Removed Anytime!

PDF

Twitter may remove this content at anytime! Save it as PDF for later use!

Try unrolling a thread yourself!

how to unroll video
  1. Follow @ThreadReaderApp to mention us!

  2. From a Twitter thread mention us with a keyword "unroll"
@threadreaderapp unroll

Practice here first or read more on our help page!

More from @_martinsh

Feb 9
exercise - real anisotropic reflections in Eevee render in #blender.

In theory it means that surface has ‘controlled’ scratches going in same general direction.

My first tests turned out quite pretty, although requires multiple render samples unlike the analytic approach. ImageImageImageImage
With Voronoi texture you can make quite convincing scratching. Each cell gives you ‘position’ data that you can shape into a line and rotate via any data value - texture or vector.

Here is a regular voronoi grid, lines are scaled by a photo and rotated by Perlin noise. Image
goal for this experiment is again automotive shader related - I want to achieve realistic microscratching on shiny surfaces.

This is my first test. I am not entirely satisfied, but I am getting there eventually. Image
Read 8 tweets
Jan 14
Let’s consider the previous thread a ‘teaser’ for this tweet sized introduction into retroreflectivity in CG.

I’ll explain what it is and how to do it yourself in #blender

As before - I will divide it in ‘Theory’ and ‘Praxis’ parts.

So here we go..
🧵
Just a disclaimer. This will be no science class.
In my side job as a Blender teacher in art college, I convert concepts that are difficult to grasp to simpler analogies and I leave out the hardcore stuff (So I don’t scare away my ‘kids’)

That’s a job for universities.
Theory is simple:

Retroreflectors reflect majority of received light directly back to its source.

How does it differ from specular reflection?

Specular reflection directs only a small portion of light that bounces back from the surface normal facing the source. Image
Read 23 tweets
Dec 23, 2021
Last day before I take my time off work and I spent it tinkering with car headlights again!
This time I am exploring polarised light and thin-film interference on a transparent body in Blender.

Thank you @KarolMiklas for car model! Beautiful work as always 🙏

Follow the 🧵👇 ImageImageImageImage
Polarised light and Thin-film interference are not the same in terms of physics. One is caused by injection moulding of the plastic, other - by a very thin layer of material on the surface of another material.
Both offer similar looks, so I use the same technique to model it. Image
Here are two real-world examples. ‘Colorisation’ on the headlights are caused by polarisation while on windshield - by a defrosting coating. Most people, including me, mixes these, so for an artist like me, a single approach to tackle both problems, is working just fine! 👌 ImageImage
Read 19 tweets
Dec 10, 2021
Physically-based car headlights in Blender. This method is made for Eevee because refraction and reflections in a single material do not interact nicely.
Here is a breakdown of the classic reflector/refractor headlights. If you want to know more, follow the🧵
#b3d
Let's start with the reflector - the shiny chrome part behind the glass.
Modelling it accurately is rather important, especially if you plan to have the headlight turned on. @KarolMiklas has done sublime work on those! Even for a low-poly car, the normals are silky smooth!
And here's why an accurate model with a nice topology is important. I put a 50-watt "bulb" where it should be in reality. Viewed off-axis, the headlight barely is shining, but once I look head-on, the light is very concentrated. Really cool to see it work in Blender so well!
Read 9 tweets
Sep 24, 2021
This little detail goes a long way. Let’s see if you can spot it!
Another water rendering related thread below.
#b3d
‘Contact line’ or ‘meniscus’ as some of you wrote (I just did not know how to call it) is again the same effect I discussed previously about the bent edge of water surface due physics. In this case the border is now touching a half-submerged object not the lens. Image
Quite often in games we see contact ‘foam’ to show when object is touching water. It works best for stylised water, or larger objects in stormy sea, but smaller objects in still water requires something more subtle. ImageImage
Read 8 tweets
Sep 12, 2021
Now, let me tell you one of the secrets for a fine looking water surface. And it has nothing to do with the water itself! It’s the environment.
From visual aspect, water is a reflection and refraction of surrounding objects, so a good looking sky is where you should start. #b3d
(This is my attempt for clickbaity advertisement)
So you want skies like image above? Buy ‘Physical Starlight and Atmosphere’ addon for Blender and support two brothers, entrepreneurs @_karlisup and me. We call ourselves @PhysicalAddons.
more info:
blendermarket.com/products/physi…
This is going to be another rant about water rendering.
Topic - water surface shading.
Not about geometry and not underwater ‘volume’. Just the thin border separating the two worlds.
Read 12 tweets

Did Thread Reader help you today?

Support us! We are indie developers!


This site is made by just two indie developers on a laptop doing marketing, support and development! Read more about the story.

Become a Premium Member ($3/month or $30/year) and get exclusive features!

Become Premium

Don't want to be a Premium member but still want to support us?

Make a small donation by buying us coffee ($5) or help with server cost ($10)

Donate via Paypal

Or Donate anonymously using crypto!

Ethereum

0xfe58350B80634f60Fa6Dc149a72b4DFbc17D341E copy

Bitcoin

3ATGMxNzCUFzxpMCHL5sWSt4DVtS8UqXpi copy

Thank you for your support!

Follow Us on Twitter!

:(