
GPose Guide: Dark-skinned characters
I got some questions about how to work with dark-skinned characters - and also heard some comments on how hard it is to gpose them. So here's a compilation of use cases, some techniques, and setups!
#ffxiv #gpose #gposeguide #gposers
I got some questions about how to work with dark-skinned characters - and also heard some comments on how hard it is to gpose them. So here's a compilation of use cases, some techniques, and setups!
#ffxiv #gpose #gposeguide #gposers

1 - Posing in dark settings
This is where dark-skinned characters shine, pun intended. Point lights give a lot of flexibility, and character/environment lights are great tools to give volume and detach characters from the background.
This is where dark-skinned characters shine, pun intended. Point lights give a lot of flexibility, and character/environment lights are great tools to give volume and detach characters from the background.

In this example, 3 point sources are used to provide volume to the characters, without relying on character brightness at all. The Neneko Nikuman preset gives great brightness, contrast, and depth of field (DoF) options.

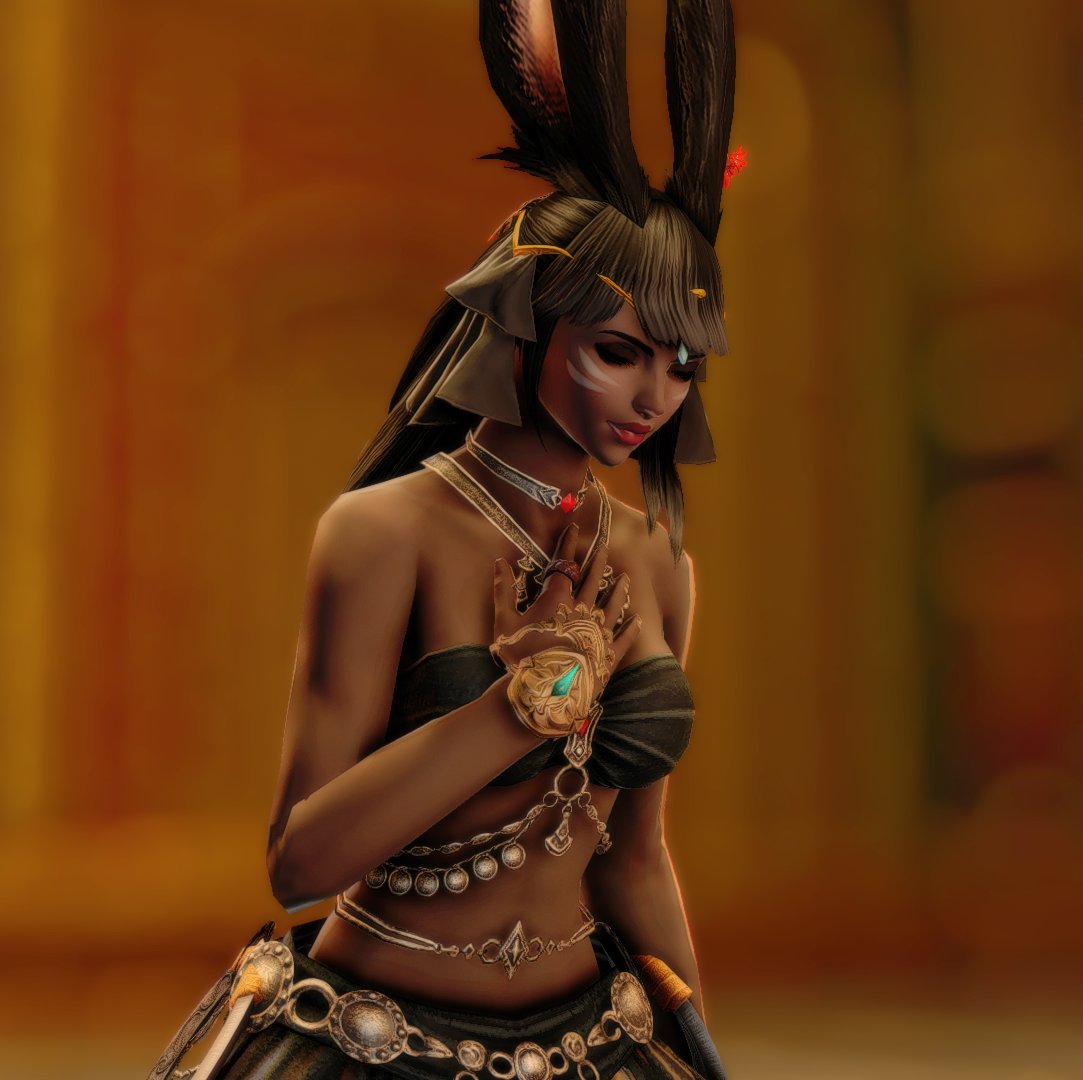
2 - Posing in bright settings
Contrast is a powerful tool, and dark-skinned (and dark-clad) characters can use that to their great advantage.
Contrast is a powerful tool, and dark-skinned (and dark-clad) characters can use that to their great advantage.

In this first example, a hard white light is positioned to create a strong rim light for volume, with a support gold source for tone and a light purple point to bring up the character's face. The Neneko Cocktail preset gives rich metal tones and excellent contrast.


The second example is about color. The same preset (Neneko Cocktail) is used, with ADOF+BOKEH and ADOF+BLUR enabled to give a dreamy quality to the background. Light sources emulate the sky.


3 - Colorful/Pastel clothing/scenario
You may have heard that dark-skinned characters don't go well with certain colors, like pink or white. That is not true: Dark skin palettes have as much width as pale ones, just in a different range - and light sources can bring them up.
You may have heard that dark-skinned characters don't go well with certain colors, like pink or white. That is not true: Dark skin palettes have as much width as pale ones, just in a different range - and light sources can bring them up.

The first example uses a very colorful background, with Neneko Lux driving the hue and brightness up. Instead of fighting it, we use the scenario colors to our advantage by projecting them around the character.


The second example is a portrait where we again use the scenario to provide hints for the light sources. Neneko Melonpan gives a nice, smooth pastel treatment. From the original state to the final result, let's see the step-by-step.


The first light is placed to emulate a cyan reflection from the water.

The second emulates the bluish reflection from the sky.

The third is pretty near and creates a sunny rim light.

With everything in place, we can enable the preset - and play around with DoF to decide how much we want to detach it from the scenario, taking away attention from the background and popping the character.

4 - Posing together with fair-skinned characters
We can borrow some practices from real-life photography. The most important: center light sources around the dark-skinned character. This will give you enough contrast to play with, and lessen the amount that reaches the other.
We can borrow some practices from real-life photography. The most important: center light sources around the dark-skinned character. This will give you enough contrast to play with, and lessen the amount that reaches the other.

Here we can see placement and tone:

5 - The default in-game lighting leaves much to be desired
True to an extent. The in-game settings are apparently tuned towards a common denominator between wildly different form factors (i.e. PC, Playstation 3-5), so a muted palette is used.
True to an extent. The in-game settings are apparently tuned towards a common denominator between wildly different form factors (i.e. PC, Playstation 3-5), so a muted palette is used.

This results in ashen colors and small gradient differences between dark tones in certain situations; keep that in mind if you're looking for locations. Again, lighting can be used to remediate - but not eliminate - these limitations.

6 - Composition (Extreme)
Compositions with lots of glow elements make it hard to pop the character features: since armor and weapons don't emit real light, everything needs to be compensated with the three point lights, plus character and manual scene brightness.
Compositions with lots of glow elements make it hard to pop the character features: since armor and weapons don't emit real light, everything needs to be compensated with the three point lights, plus character and manual scene brightness.

In this case, I positioned the character in such a way as to hide frontal reflections while still bringing his expression out a bit with well-defined rim lights.
(please, please ignore the Evil Hair Clipping of DoomTM)
(please, please ignore the Evil Hair Clipping of DoomTM)


And here's the light setup:

7 - Final(?) Thoughts
This isn't, by any means, a comprehensive guide. Dark-skinned characters come in a glorious amount of shades and tones, so I tried to keep it simple and discuss some basic aspects.
This isn't, by any means, a comprehensive guide. Dark-skinned characters come in a glorious amount of shades and tones, so I tried to keep it simple and discuss some basic aspects.


If you have any questions, feel free to ask! It'll help others that may stumble over this thread.
And thank you for your patience!
And thank you for your patience!
• • •
Missing some Tweet in this thread? You can try to
force a refresh


