RetroTech Chris Profile picture
Dec 19, 2022 14 tweets 8 min read Read on X
Did you know that you can print to most modern networked laser printers from Windows 3.11 for Workgroups? Let's explore!
First of all, if you haven't set up your Windows 3.11 for Workgroups to connect to the network, here's an example of how this can be done! . You can find TCP32B.EXE here archive.org/details/window…. You'll also need network drivers for your network card.
For TCP32B.exe, you will just want to "run" the file on your retro PC, and it will unzip the files. I suggest putting it in a "new" directory first!
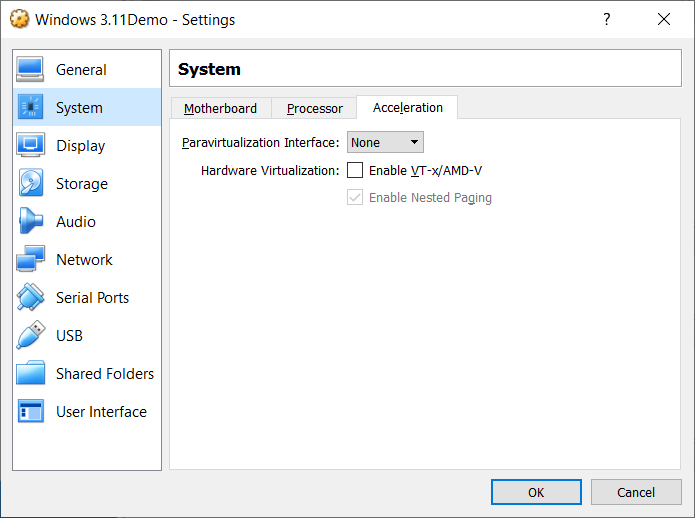
Now, if you want to try this in virtualization, some tips: 1) bridge your network adapter to a "real" network adapter in your computer. 2) Use VirtualBox 5.2.44 3) in VirtualBox 5.2.44, set "Paravirtualization Interface" to "None" and disable all "Hardware Virtualization"
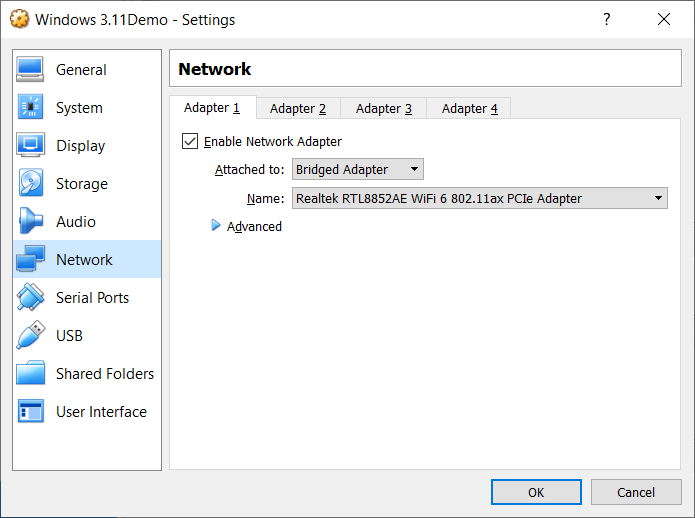
Also, if trying this in virtualization, you can use the AMD PCNET III network drivers here: github.com/cml37/dos-util…
Next up, download the Windows LPR Spooler. This is getting harder to find, so I made it available here: github.com/cml37/dos-util…
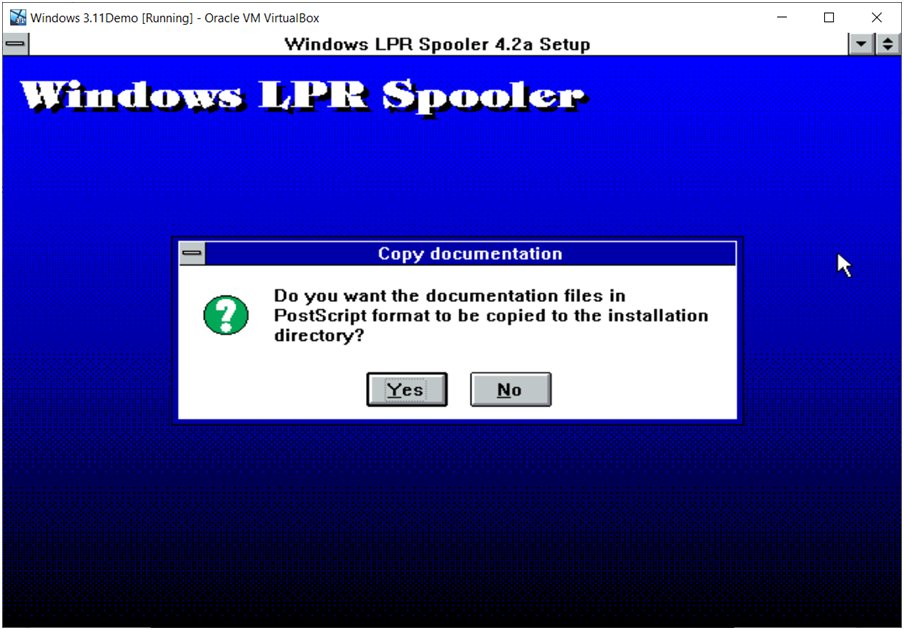
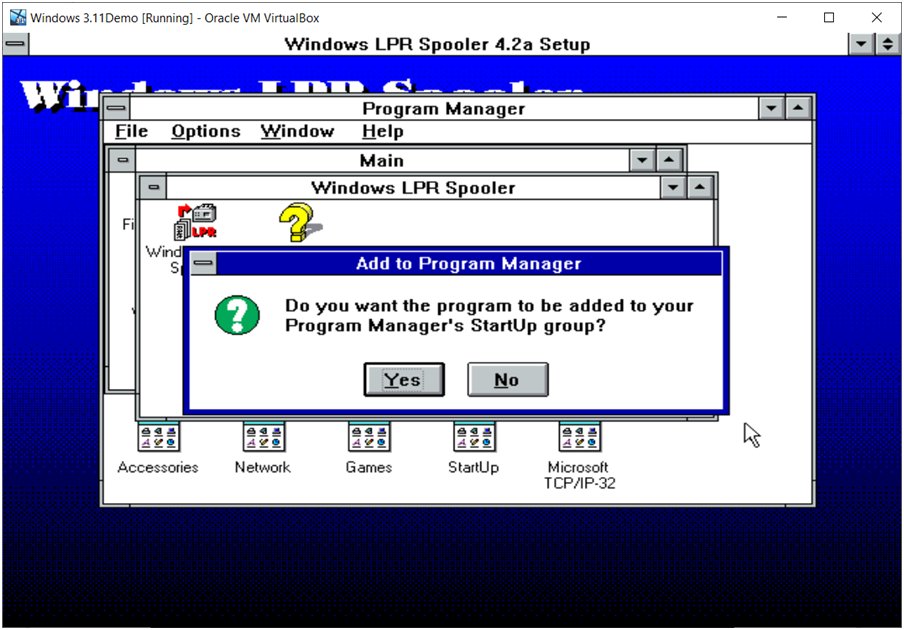
Start installation for the Windows LPR Spooler. Most defaults are fine. You can choose to install the PostScript and ASCII docs if you like. You do want to add the LPR Spooler to the Startup group when asked
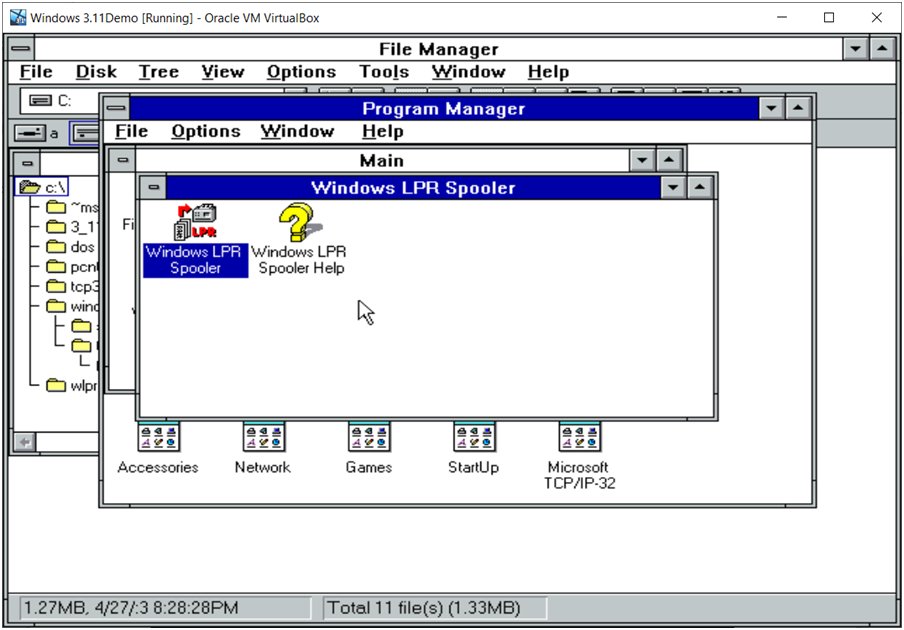
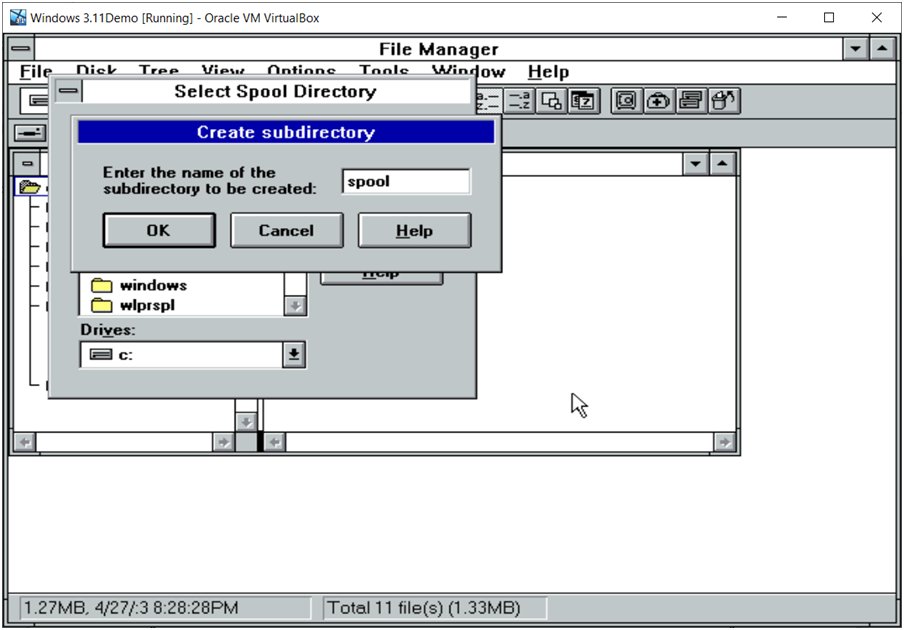
One installed, go ahead and launch Windows LPR Spooler. You'll be prompted to specify a "spool" directory. Select "new dir...", create a directory called "spool"
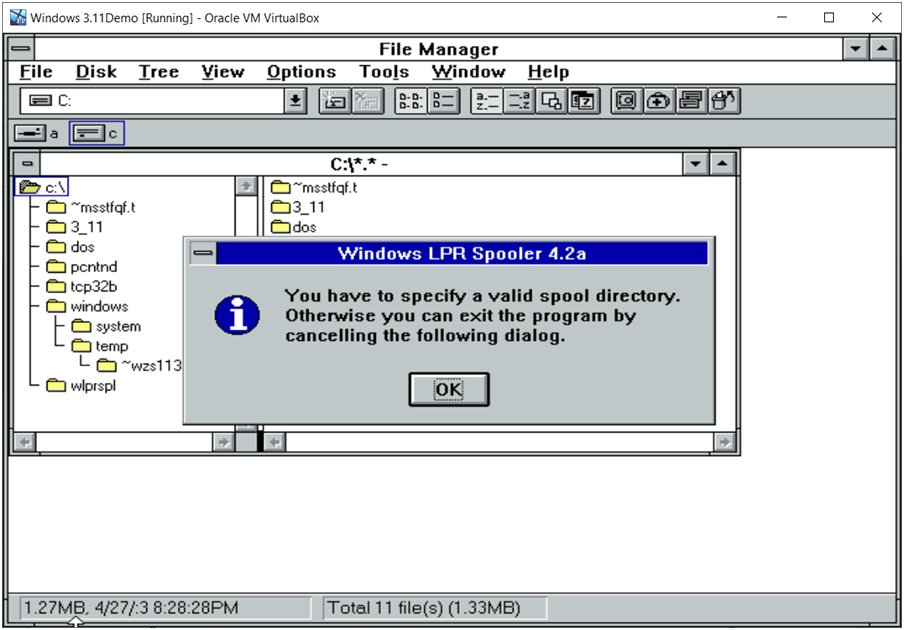
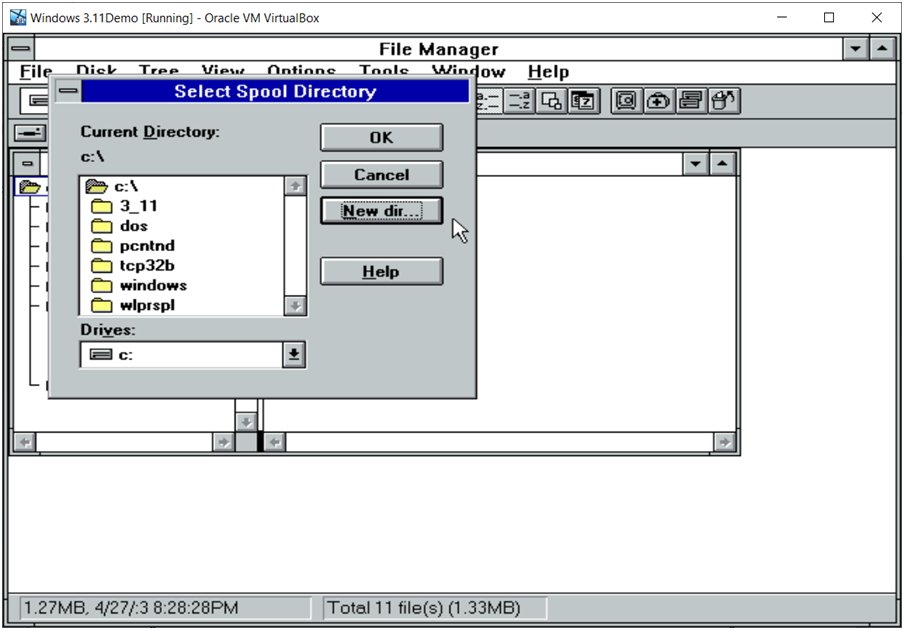
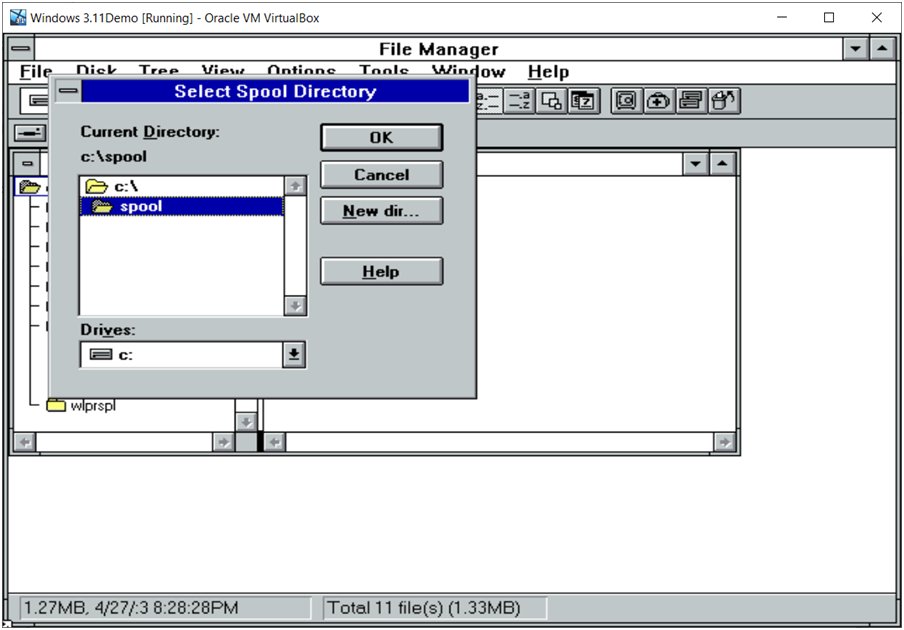
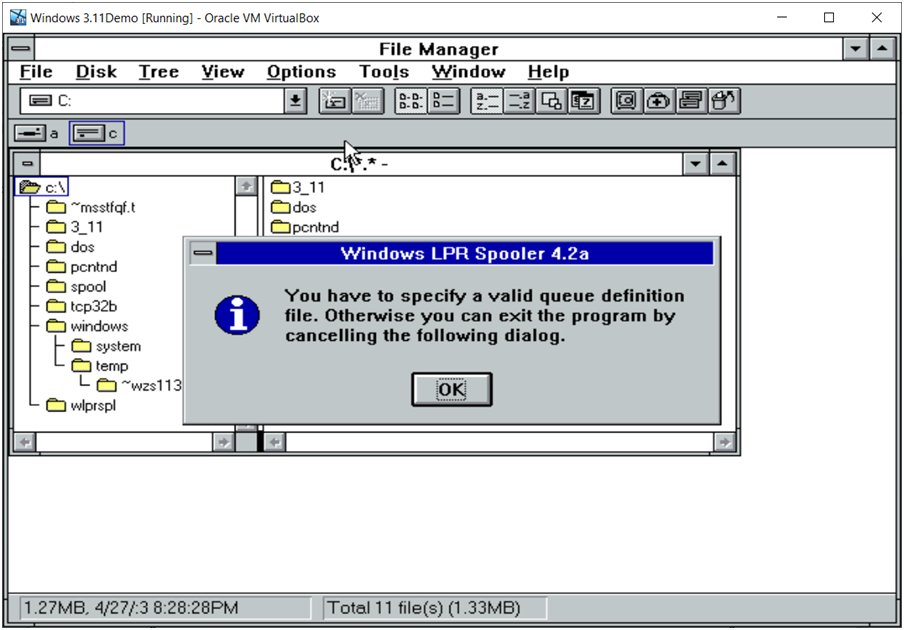
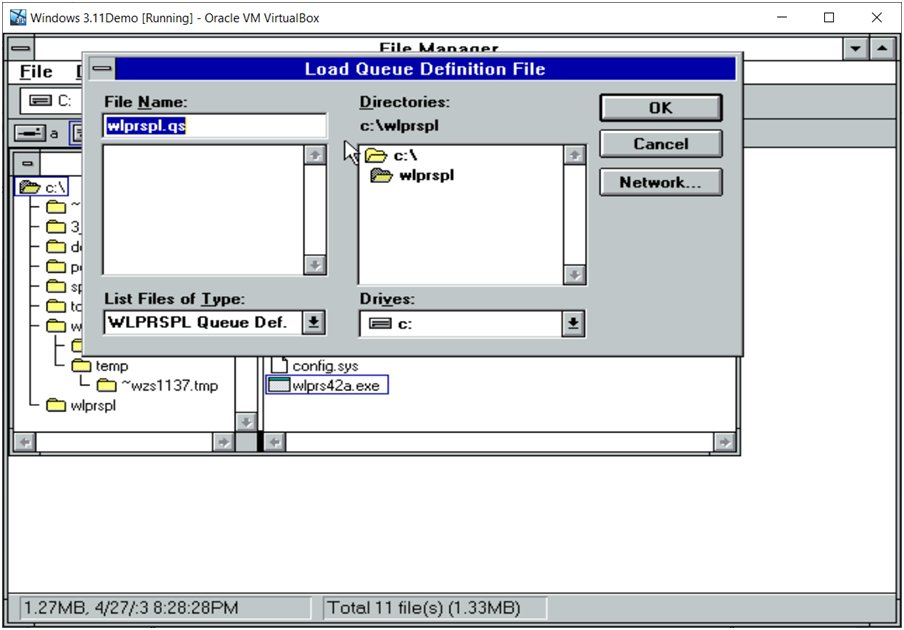
Once created, select the directory (gee, sure would be nice if that were automatic!). Then from there you have to select a valid queue definition file. Select as indicated below in the screenshot.
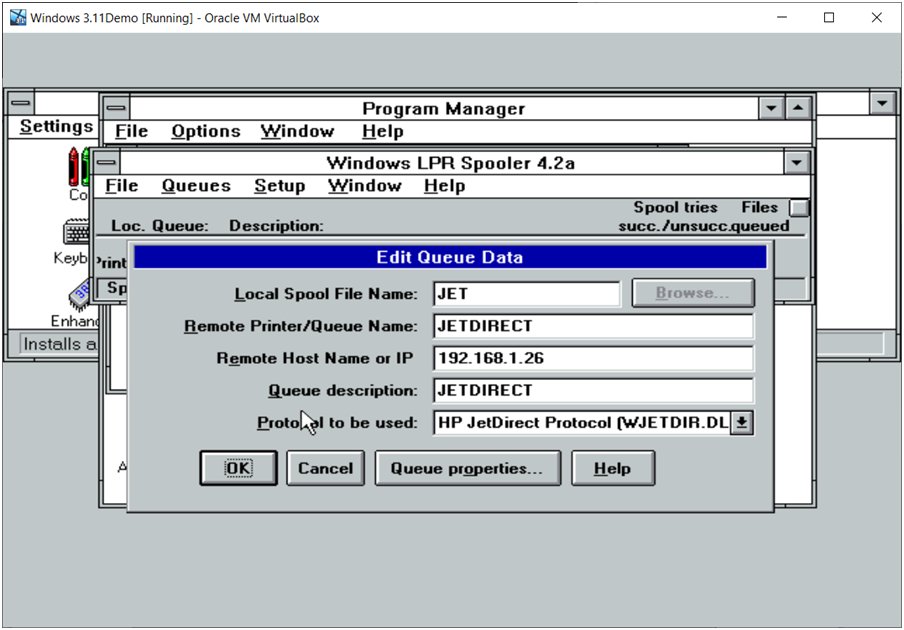
Okay, now we get to define a new queue! Fill in as shown, but specify the IP address of your printer! Once complete, at this point, I suggest closing the Windows LPR Spooler so that it prompts you to save these settings, then re-open it again.
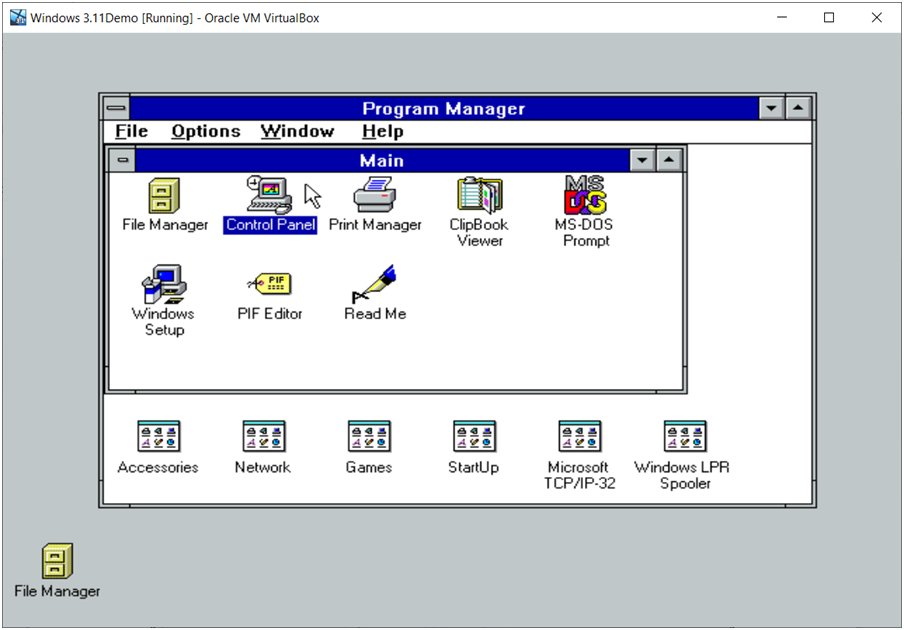
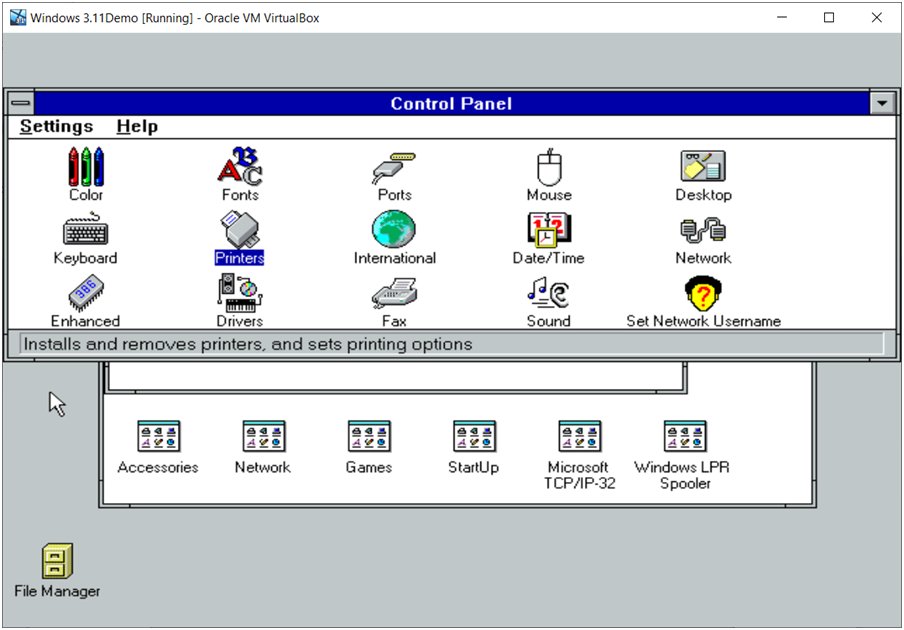
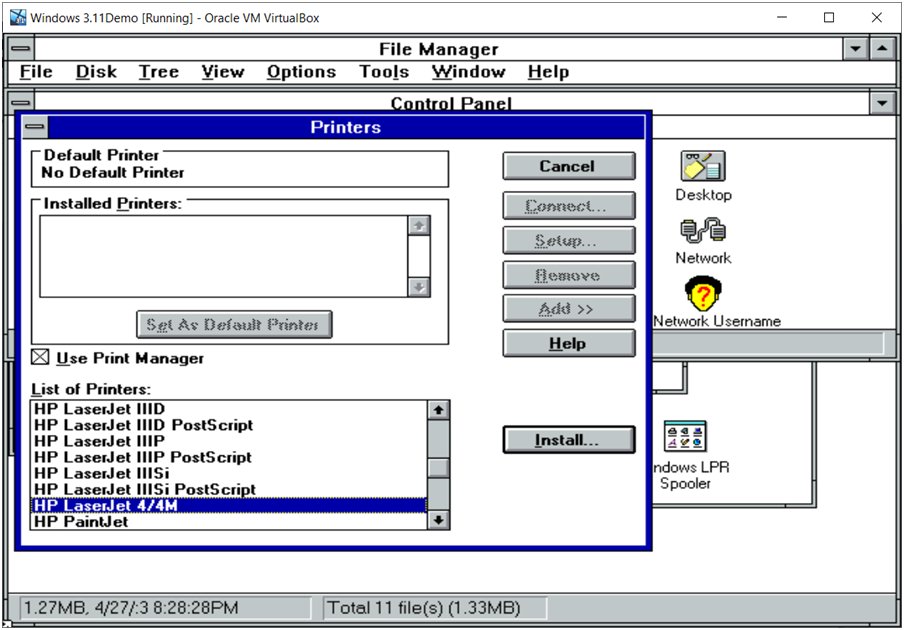
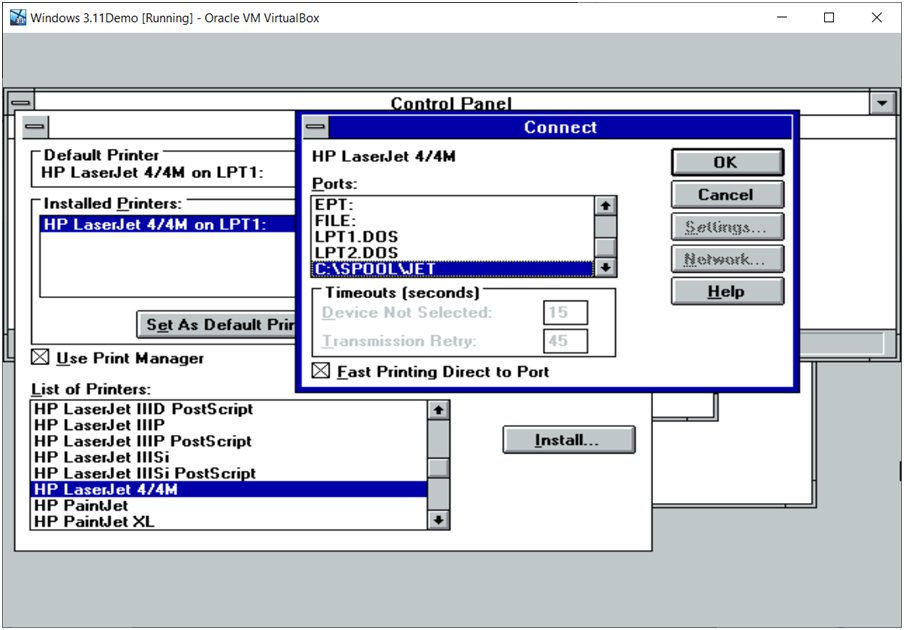
Now, let's go to Control Panel and define a printer. Under the list of printers, choose HP LaserJet 4/4M and click "Install..." Once installed, click "Connect..." and navigate to the bottom of the list and choose "C:\SPOOL\JET". Then close out Control Panel!
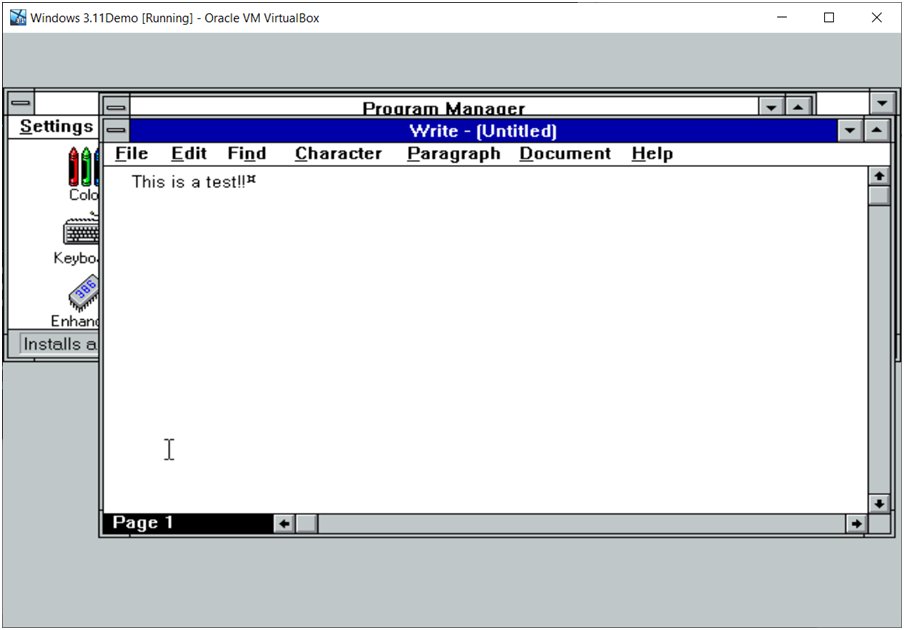
Now it's time for a test! I launched Write and typed a few words. From there, I chose "Print" and you can see the selections there, and they look good!
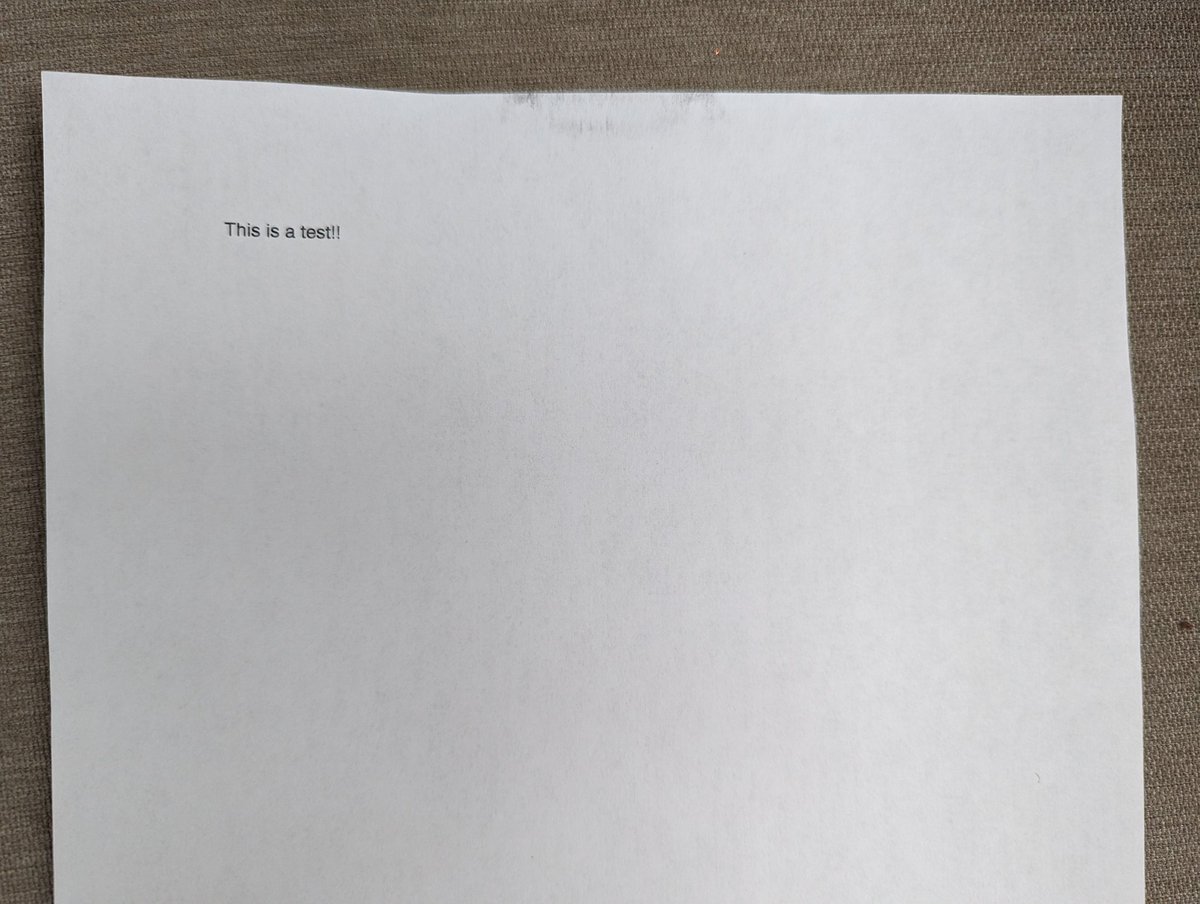
That's it! A short time later, my Samsung ML-1865W produced this. That's all for now. Have fun and happy printing!!
This procedure should work for laser printers that support PCL5. Perhaps you can make it work with an inkjet or some other networked printer too! I haven't been so lucky with my ink jet OfficeJet printers sadly though.

• • •

Missing some Tweet in this thread? You can try to force a refresh
 

Keep Current with RetroTech Chris

RetroTech Chris Profile picture

Stay in touch and get notified when new unrolls are available from this author!

Read all threads

This Thread may be Removed Anytime!

PDF

Twitter may remove this content at anytime! Save it as PDF for later use!

Try unrolling a thread yourself!

how to unroll video
  1. Follow @ThreadReaderApp to mention us!

  2. From a Twitter thread mention us with a keyword "unroll"
@threadreaderapp unroll

Practice here first or read more on our help page!

More from @RetroTechChris

Sep 13
Oh my, what do we have here? An ultra-budget eMachines T1100 from the early 2000s? Why.. yes! And it's even in nice shape! Let's explore it a bit, and see if we can make it do something useful. Time for a 🧵 Image
On the front of the machine, we can see that it proudly proclaims its model number. And its previous owner proudly updated the specs after a memory upgrade 😂. CD-RW, AGP graphics, 56K modem, 256MB memory, 20GB HDD, and.. a 1.0 GHz Celeron, really, what more do you need? 😂 Image
Image
Image
I'll tell you what more we need... ALL OF THE DOCS! Clearly this WAS a proud owner. What a time capsule! Image
Image
Image
Image
Read 18 tweets
Sep 13
I have one more ISA sound card that I have been meaning to test, and it's kindof neat! Let's get it tested, time for a 🧵! Image
Image
First, here's the card. It's a Labway Labsound A00 card, with a Yamaha YMF719 (OPL3-SA3) chip! Now THAT's neat. Image
Image
Before I got to installing and configuring the card, I wanted to check the base address of my network card. It's set to 280h, to hopefully avoid any resource conflicts. Image
Read 10 tweets
Sep 8
Last week, I started some ISA sound card testing. Being the retro masochist I am, I picked up an IBM MWave-based sound card at our local swap meet a few weeks back. During our last testing session, I couldn't get this to work. Will we succeed today? Let's find out! 🧵 time! Image
Image
So, first, let's say this much: the MWave concept was cool with its use of a DSP. I benefitted from this back in the day when I upgraded my Dad's Thinkpad 755CX modem from 14.4 to 28.8 with a software upgrade! It knocked out sound when the modem was in use, but, well... ok 😂 Image
Image
Image
Alright, enough of that. So, first thing I had to do was move my NE2000 compatible network card to a new IOBASE of 0x280. That freed up 0x300 for the MWave card's MIDI. Image
Image
Read 12 tweets
Sep 8
I picked up four hard drives from the free table at our Northern Virginia meetup today. I am sure they are ALL going to work perfectly (foreshadowing). Let's talk about it briefly in a 🧵 here! Image
First, let's go with the Western Digital Caviar drive. I popped it in the Kehtron desktop PC I had. Funny enough, that system already has a Caviar 22500, so on bootup, we see "twins" 😂 Image
Image
So, yeah, okay, I tried formatting the drive. And things didn't go so well. I was going to grab my SpinRite 6.1 disk for fun, but recalled that it doesn't run on a 486. Oh well, this drive is toast anyway. Pour one out for it.
Image
Read 6 tweets
Sep 7
I did a component swap on the Enlight siblings today. I also went down a rabbit hole that I would never have anticipated doing, but it turned out well. Let's compare these cases, look at the components swapped, and the diversion I took, in a 🧵 here! Image
Image
First, let's compare the front panels. Pretty similar, except the USB headers on the new one. Image
Image
Next, we have the 5.25" drive install mechanism. The "new" case is toolless, and the "old" case requires rails. Which... well, people tend to lose. The toolless install is a LITTLE rough around the edges, but it works! Image
Image
Image
Image
Read 18 tweets
Sep 6
I've gotten a few items in the mail over the past few days. Let's test them out, and also improve the aesthetics of the re-enlightened PC. Time for a 🧵 Image
Image
Image
First, we have this Sony CDU701 32X IDE drive. I put it in the retr0brite bin in the wee hours of the morning, and when I checked it out when I woke up, it looked great! Since it tests out good, it is going in this PC for good! Image
Image
Image
Next we have this Acer 650P-047 50X drive. Unfortunately, it is flaky... it even opens and closes the drive door incorrectly when I try to open it. This was an eBay purchase, so back it goes! Image
Image
Image
Image
Read 7 tweets

Did Thread Reader help you today?

Support us! We are indie developers!


This site is made by just two indie developers on a laptop doing marketing, support and development! Read more about the story.

Become a Premium Member ($3/month or $30/year) and get exclusive features!

Become Premium

Don't want to be a Premium member but still want to support us?

Make a small donation by buying us coffee ($5) or help with server cost ($10)

Donate via Paypal

Or Donate anonymously using crypto!

Ethereum

0xfe58350B80634f60Fa6Dc149a72b4DFbc17D341E copy

Bitcoin

3ATGMxNzCUFzxpMCHL5sWSt4DVtS8UqXpi copy

Thank you for your support!

Follow Us!

:(