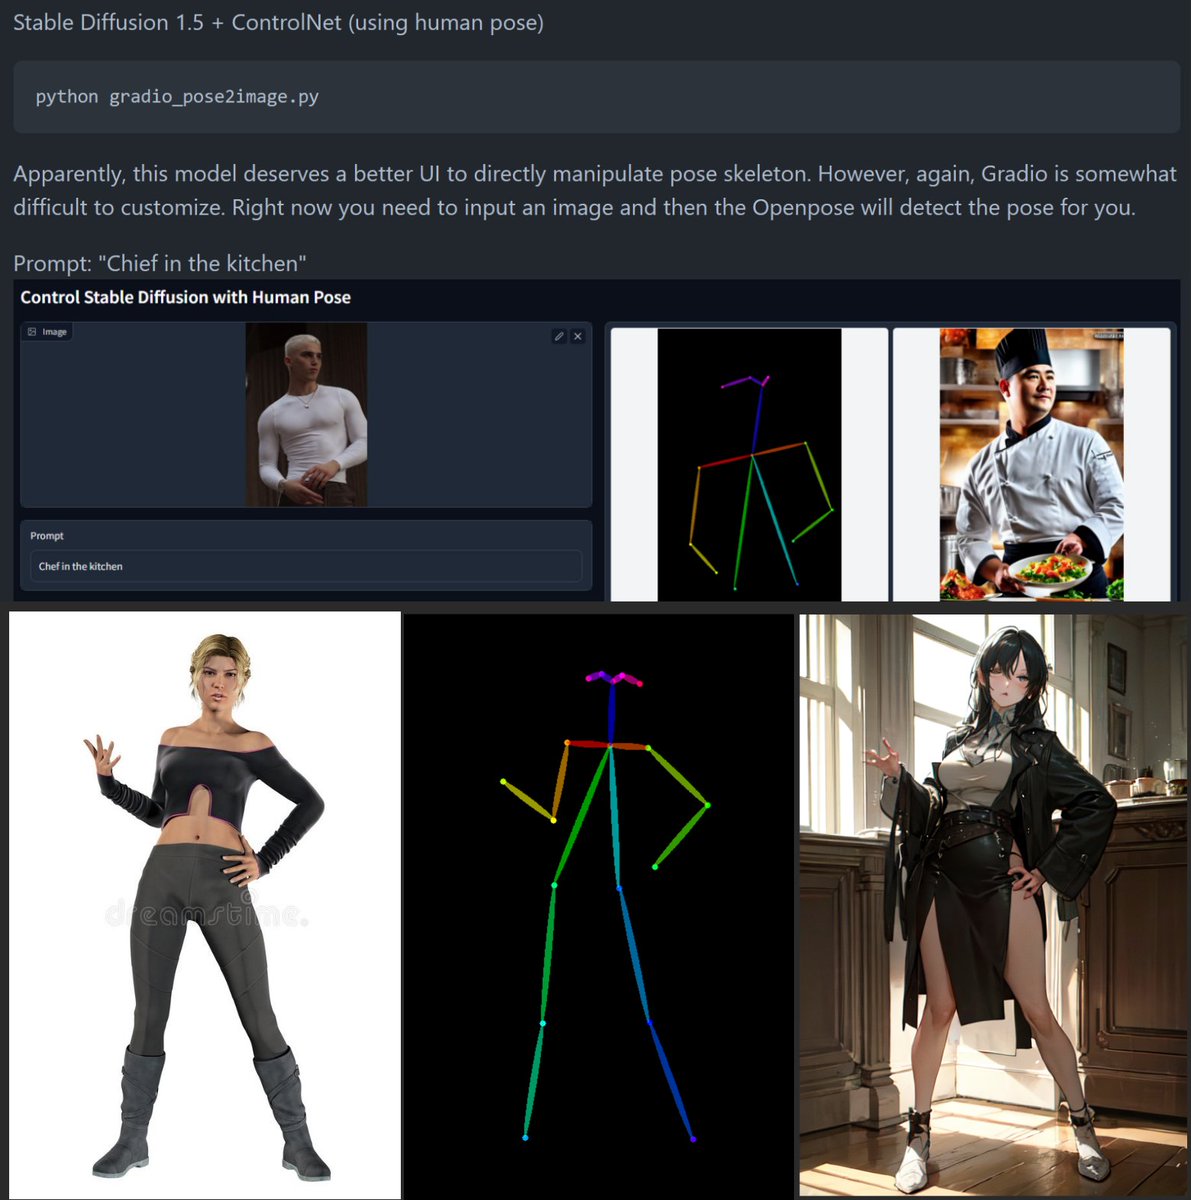
#01_ ControlNet Mocap2Image Workflow Quick Tutorial
https://twitter.com/toyxyz3/status/1625903636235841536
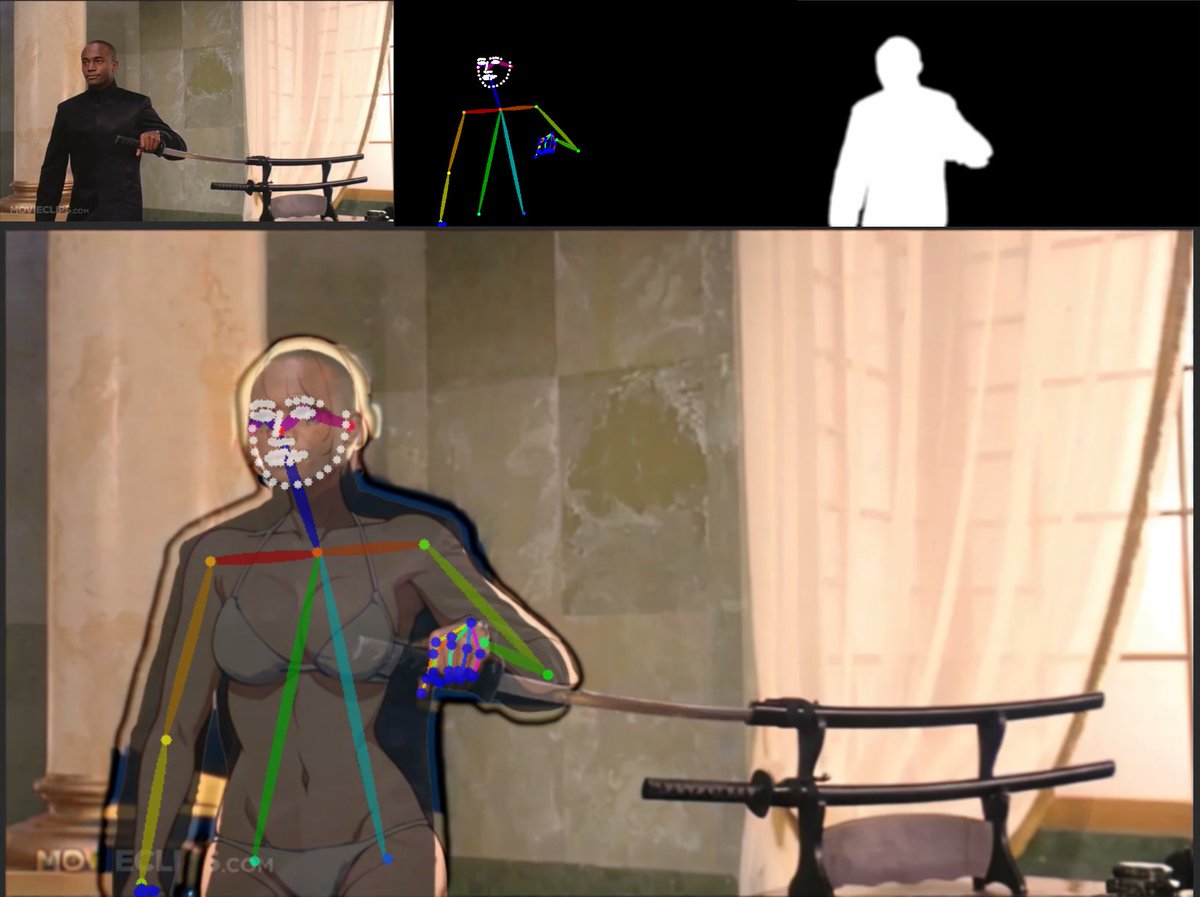
#02_ The only image the Openpose model needs is an openpose skeleton. The use of images of real people is due to the Gradio UI, according to the developer's comments. 
#03_ So I used Blender to create a simple character that looks like an Openpose skeleton. You can download it for free here. :toyxyz.gumroad.com/l/ciojz
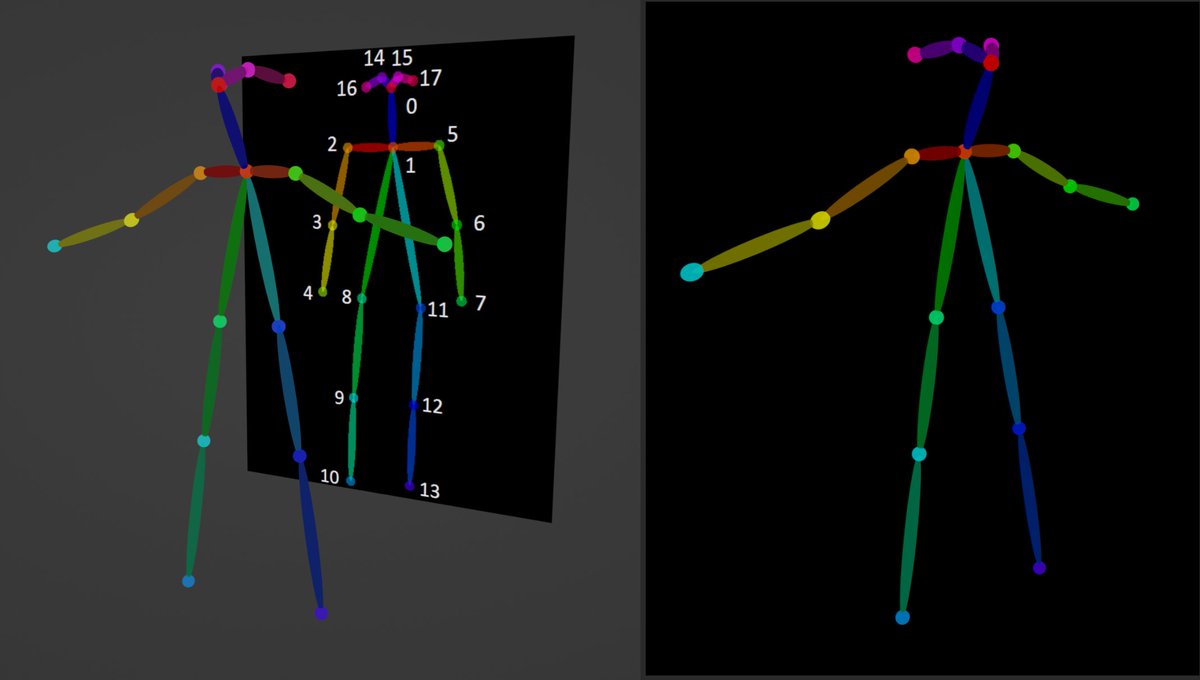
#04_ The important thing is the color and the number of joints. The background needs to be completely black. If it is a different color, the probability of pose recognition failure increases.

#05_ Then, you can directly input the created image into ControlNet Openpose. The preprocessor should be set to none because there is no need to create a pose skeleton image.

#06_ And of course, these openpose-like bones can also be retargeted to Mocap. I used Autorig-pro. mixamo.com/#/?page=2&quer…
#07_ And render the image sequence >BatchImg2Img. To run BatchImg2Img using ControlNet, you must enable "Do not append detectmap to output" in settings.


#08_ Now, you can create a video by combining the image sequences. I used After Effects.
#09_ However, when Controlnet is used for Img2Img, it is affected by the color of the input image differently from Txt2Img. Therefore, the background tends to come out dark. Add 'Black background' to the negative prompt.

#10_ The pose recognition of the Openpose model is accurate, but it is often confused whether it is front or back. In that case, it is good to specify the direction the character is looking at in the prompt.

#11_ I used this extension. github.com/Mikubill/sd-we…
• • •
Missing some Tweet in this thread? You can try to
force a refresh