How to Find BEST Inversion / BPR setups + Use this model properly
Study carefully, there will be a quiz at the end of this thread 💎 #ICT
Study carefully, there will be a quiz at the end of this thread 💎 #ICT
If you have not already, please read my thread about how I use inverses to give me an extremely high win rate
This will go over basics of the model
This will go over basics of the model
https://twitter.com/dodgysdd/status/1689012702507585536
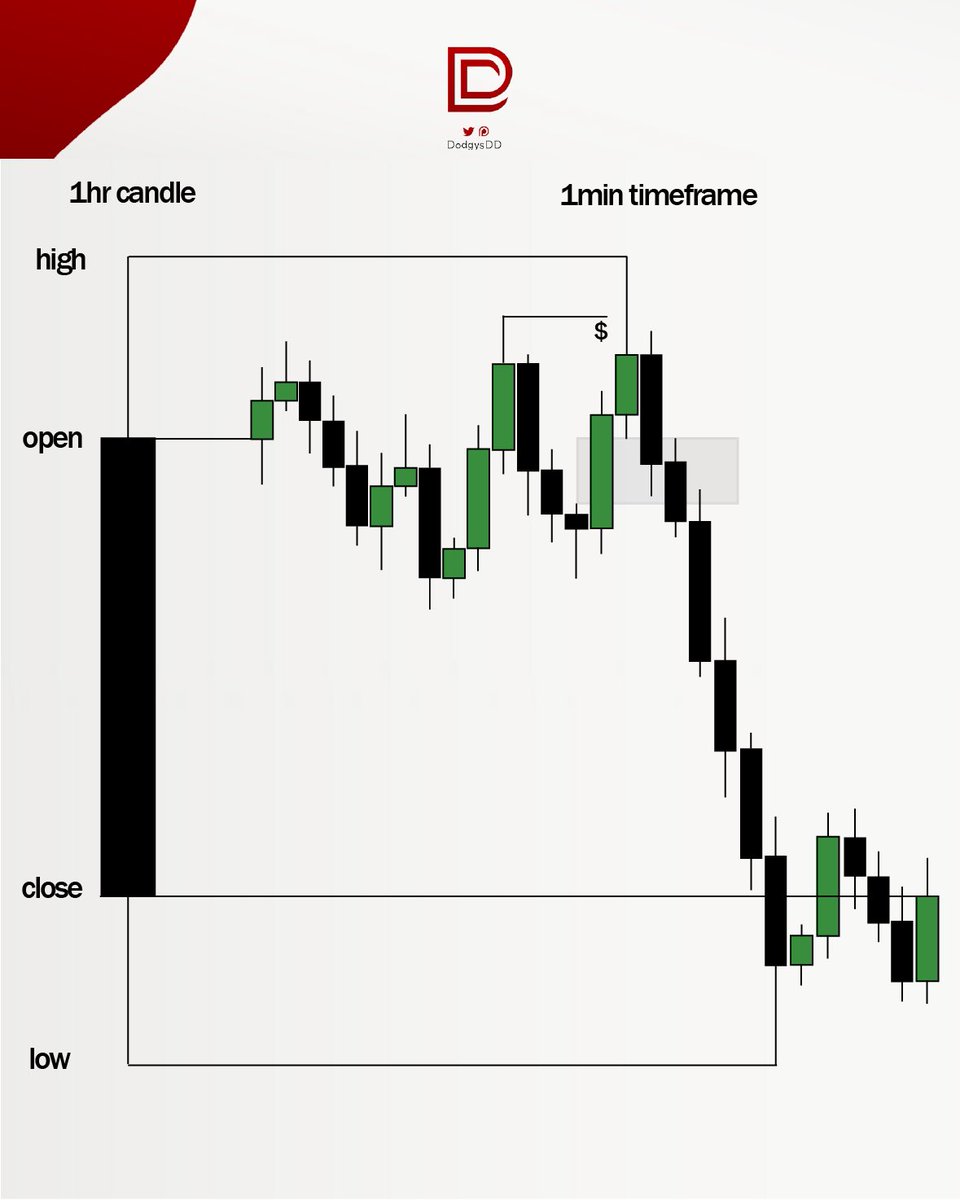
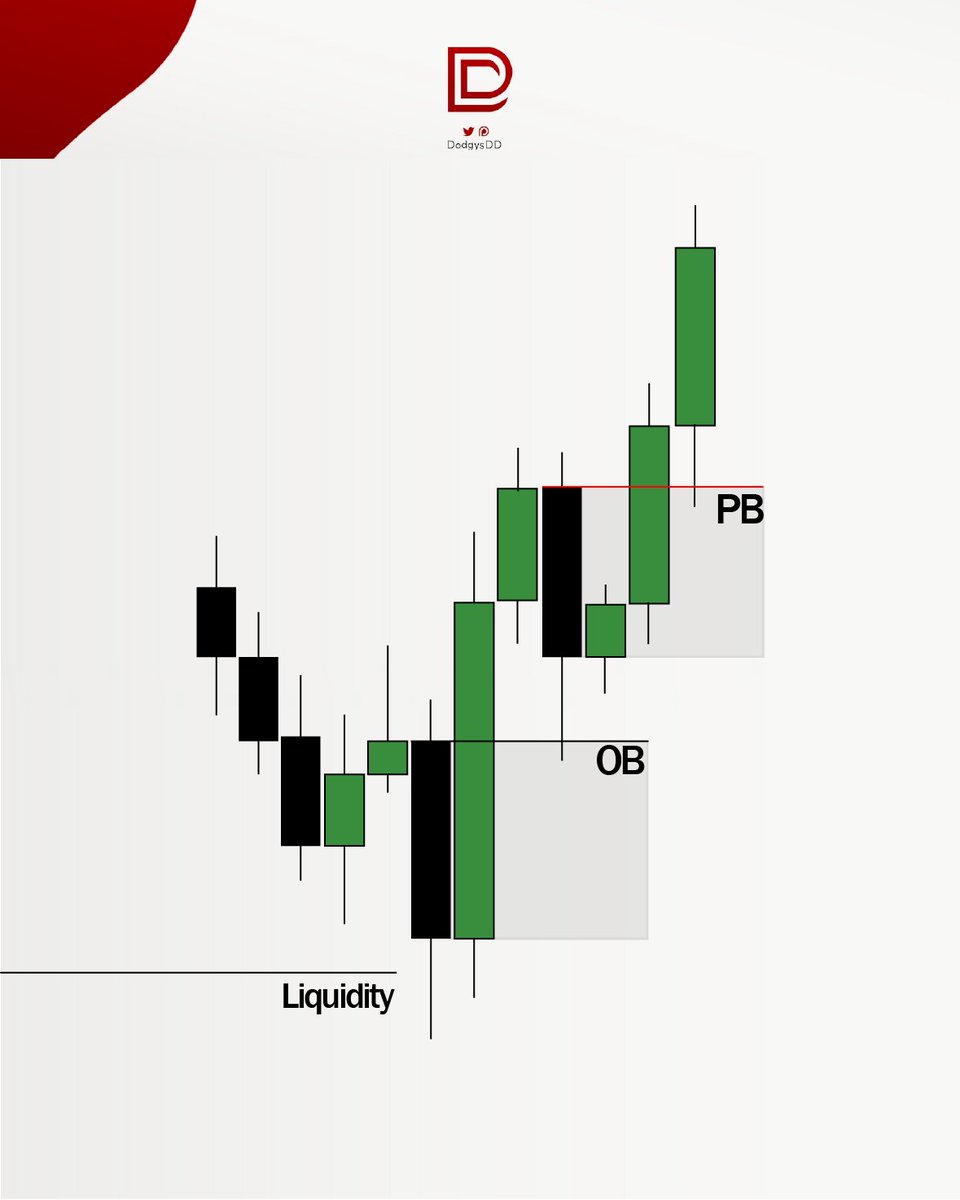
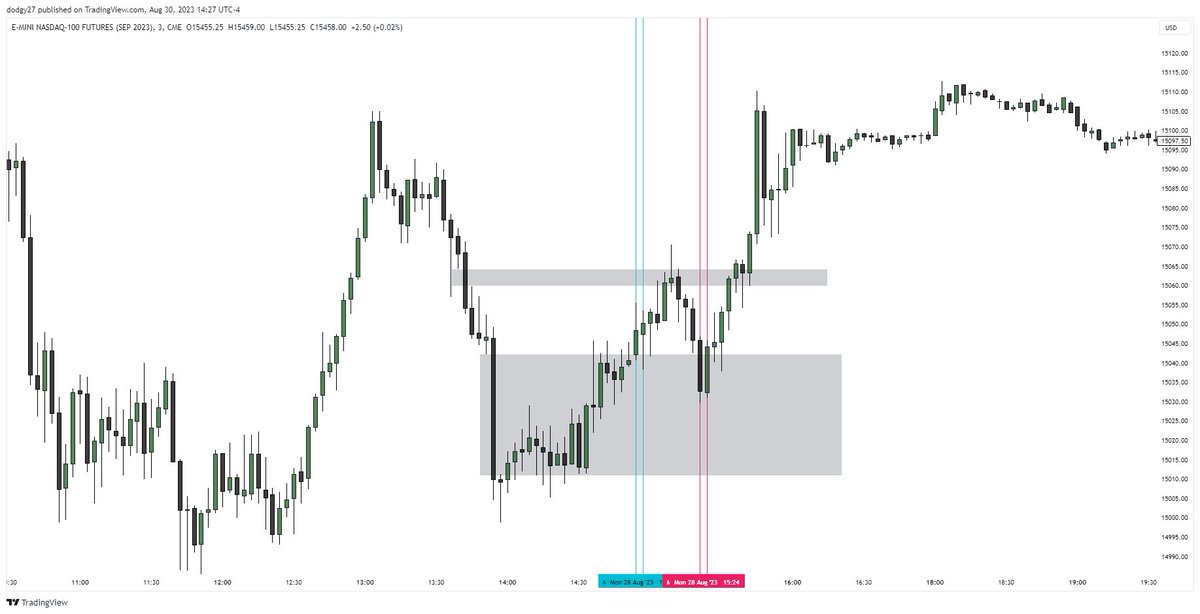
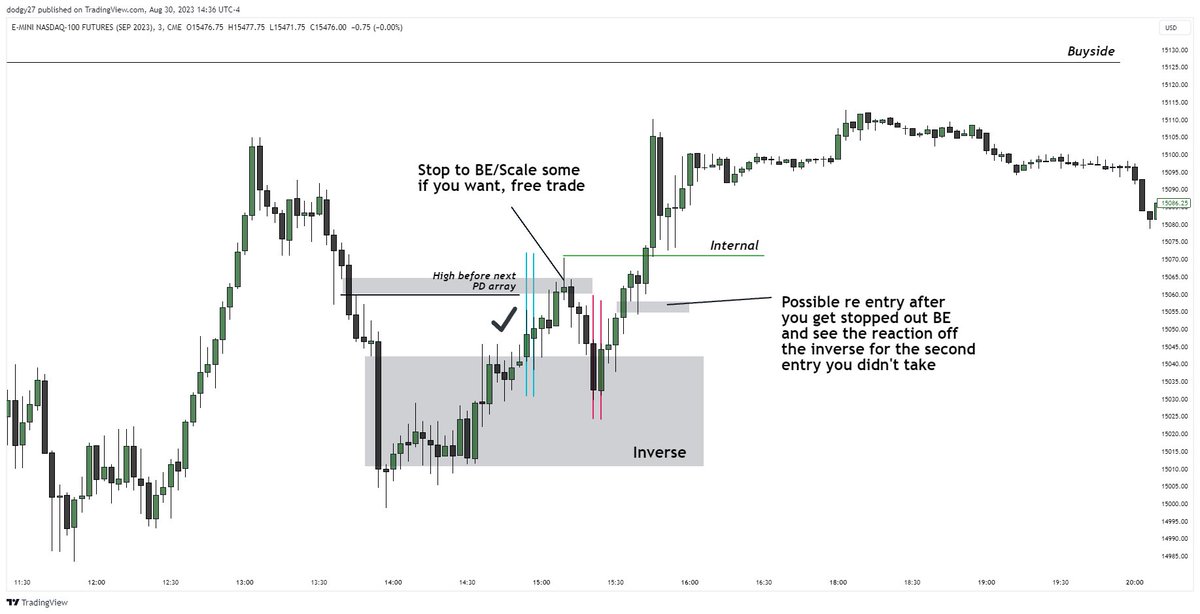
Let’s start with a basic example of the best possible inverse you can take no matter if you know the bias or not:
This is the inverse where we have NOT hit internal liquidity and we KNOW the market has to go to the next internal liquidity (high in this case) even if bias iswrong
This is the inverse where we have NOT hit internal liquidity and we KNOW the market has to go to the next internal liquidity (high in this case) even if bias iswrong

If we have THIS, and your bias is wrong, there’s no guarantee you can even get a free trade because no internal liquidity HAS hit for you to even move your stop to BE because it was already taken out
In this example, let’s assume we know the HTF bias is bullish, we get the entry and we enter because we haven’t hit the internal liquidity
Even if the bias is wrong, this is a good entry because the ITH did not hit yet so you can move stop up when it does
Even if the bias is wrong, this is a good entry because the ITH did not hit yet so you can move stop up when it does
Not every example where you move your stop up to BE will just completely run to your objective without stopping you at BE first, but I feel like 60-70% of the time I get stopped at BE we just dump to original SL anyways so the probability is pretty good and you lose less
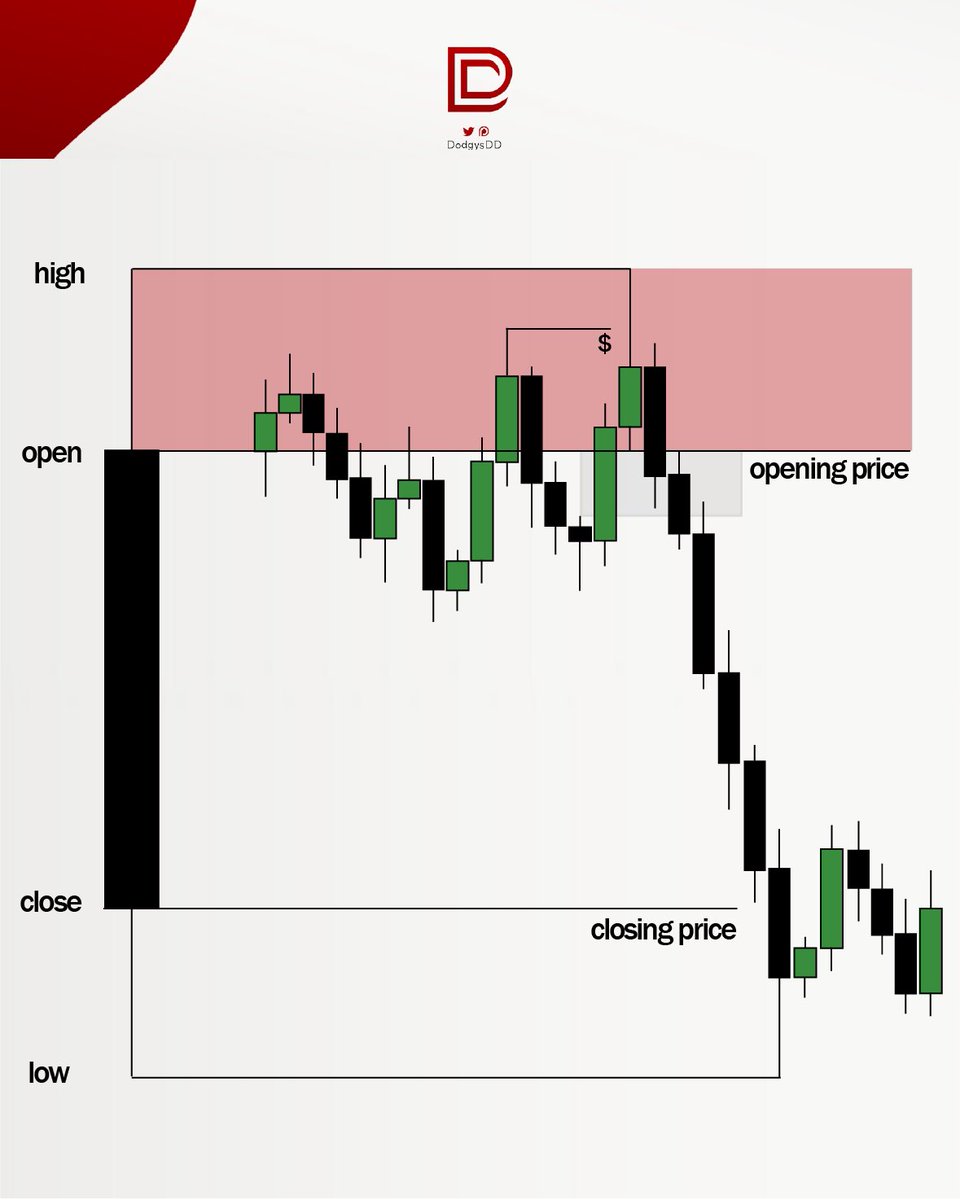
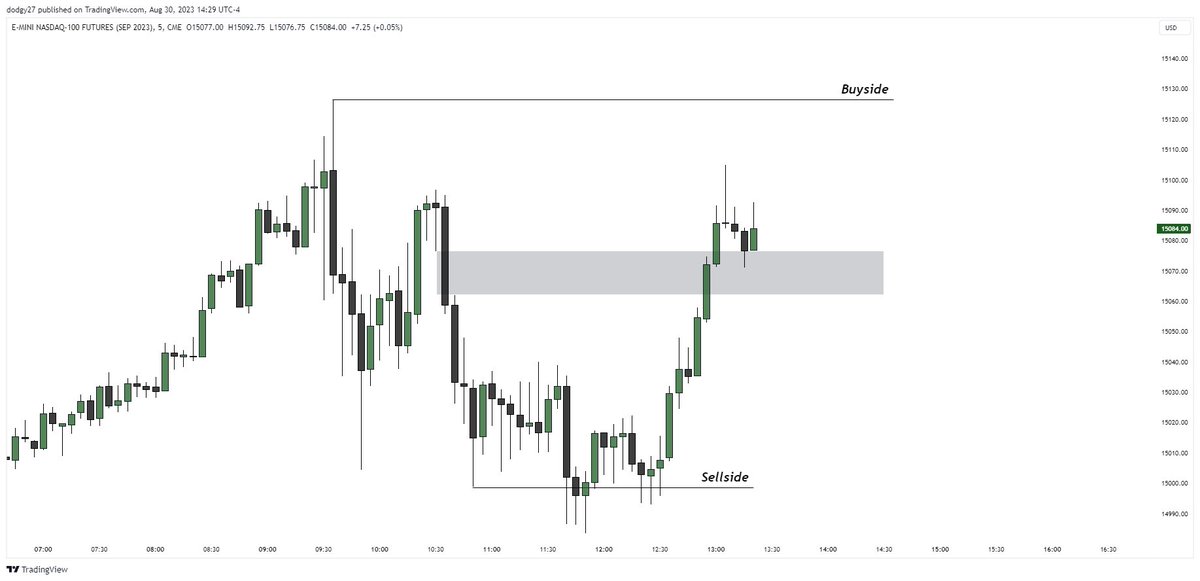
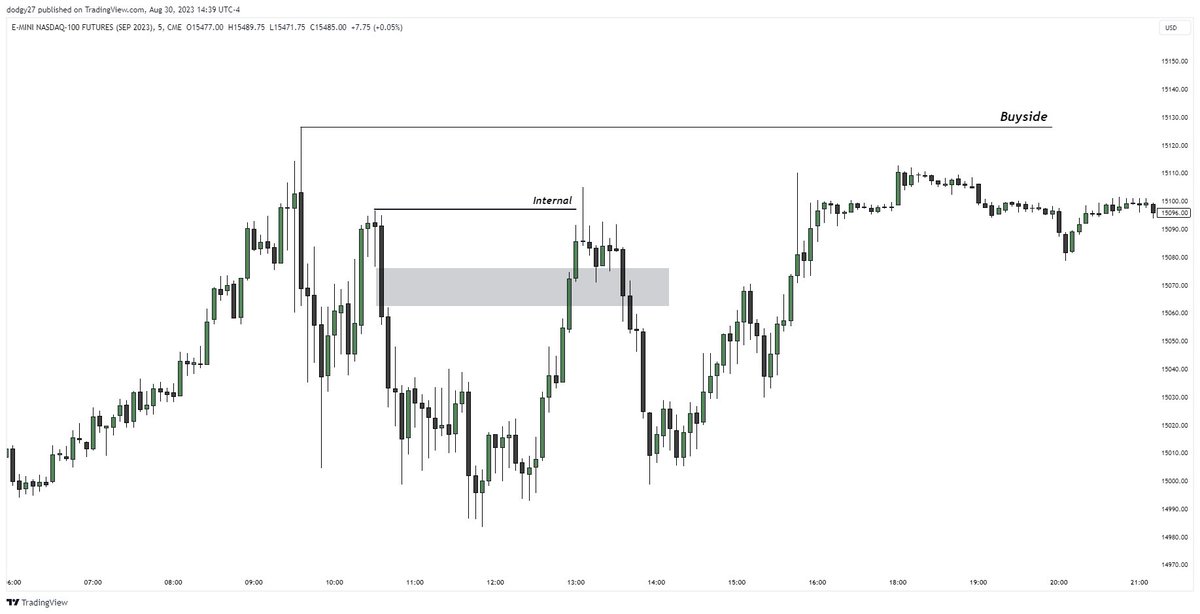
Now look at this example, this is not a good inverse longs because we are DELIVERING from a bearish FVG
Even though we took out a HTF sellside and retraced back up, you never wanna long if we are delivering from a bearish PD array to the left, it’s too 50/50
Even though we took out a HTF sellside and retraced back up, you never wanna long if we are delivering from a bearish PD array to the left, it’s too 50/50
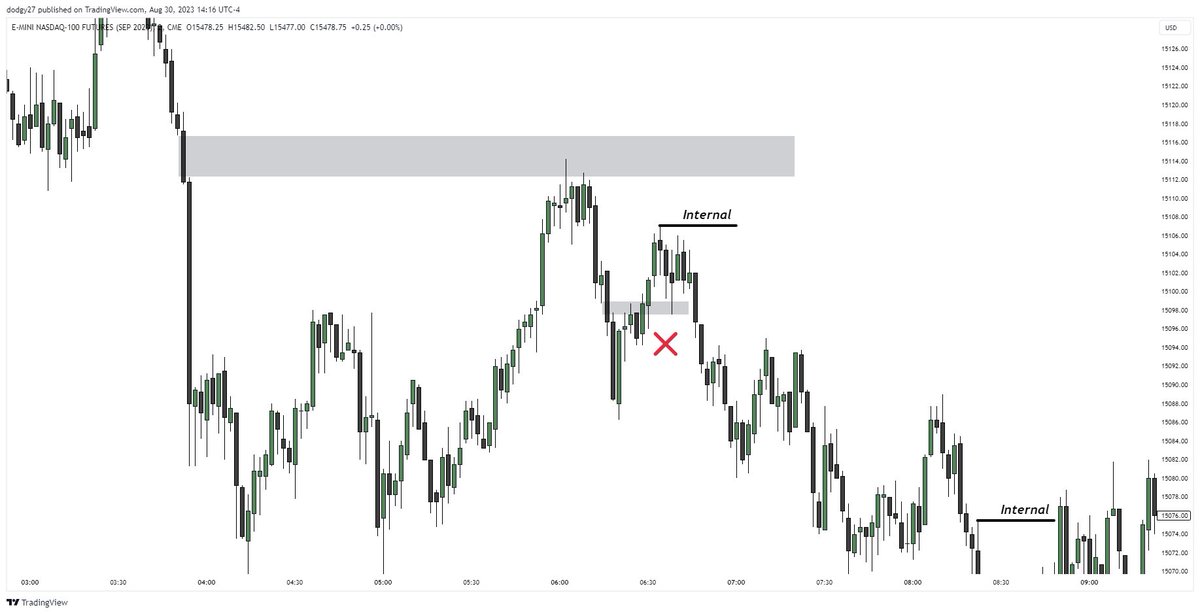
In this example see how we deliver from a 2 min bearish FVG and have. SINGULAR 3 min bullish FVG (🔑)
So we know not to long this and this isn’t good 2022 model because of where we are delivering from, and it makes for a good inverse instead to short to sellside
So we know not to long this and this isn’t good 2022 model because of where we are delivering from, and it makes for a good inverse instead to short to sellside

Ok, so after reading those examples above and the thread I linked above, I am going to give a 4 questions quiz. Answer honestly and the answers will be at end of thread.
A. What is the better long, longing the inverse at the blue lines or red lines?
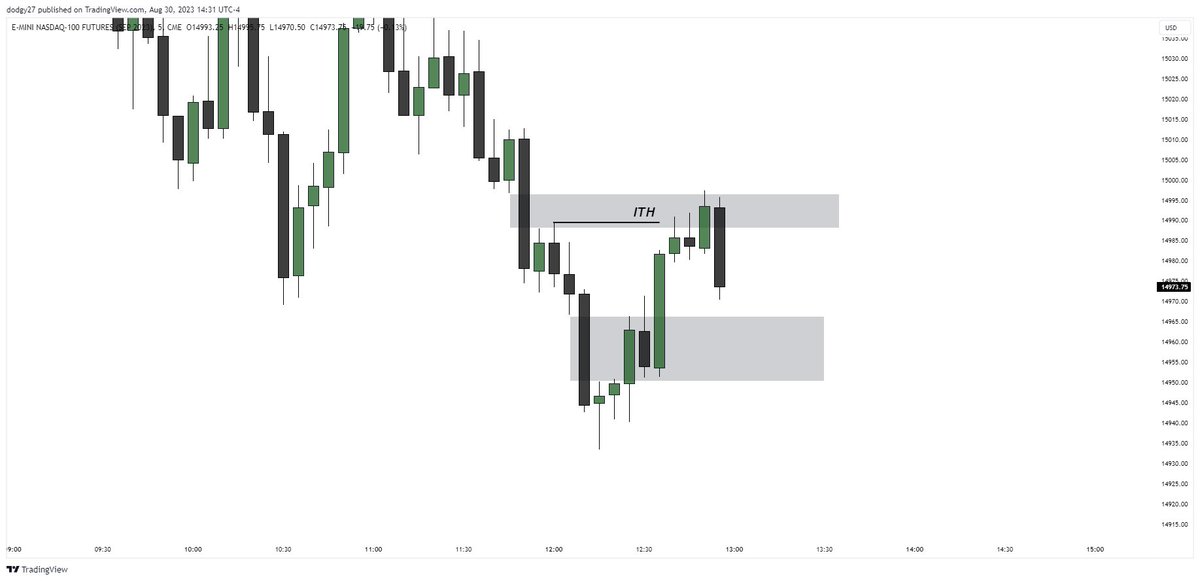
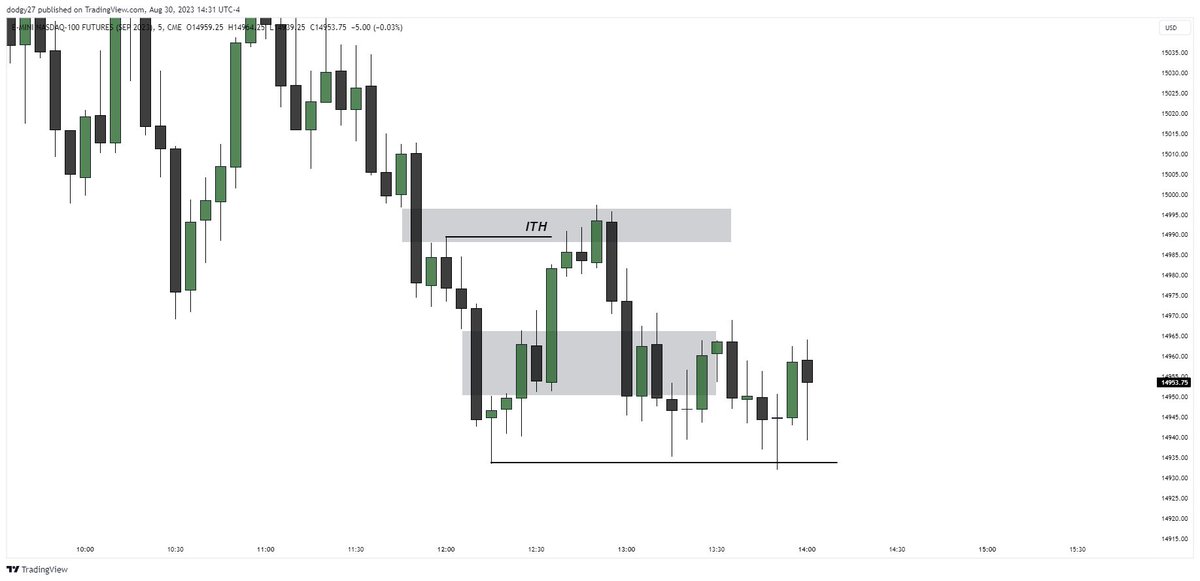
B. Is this a good long?
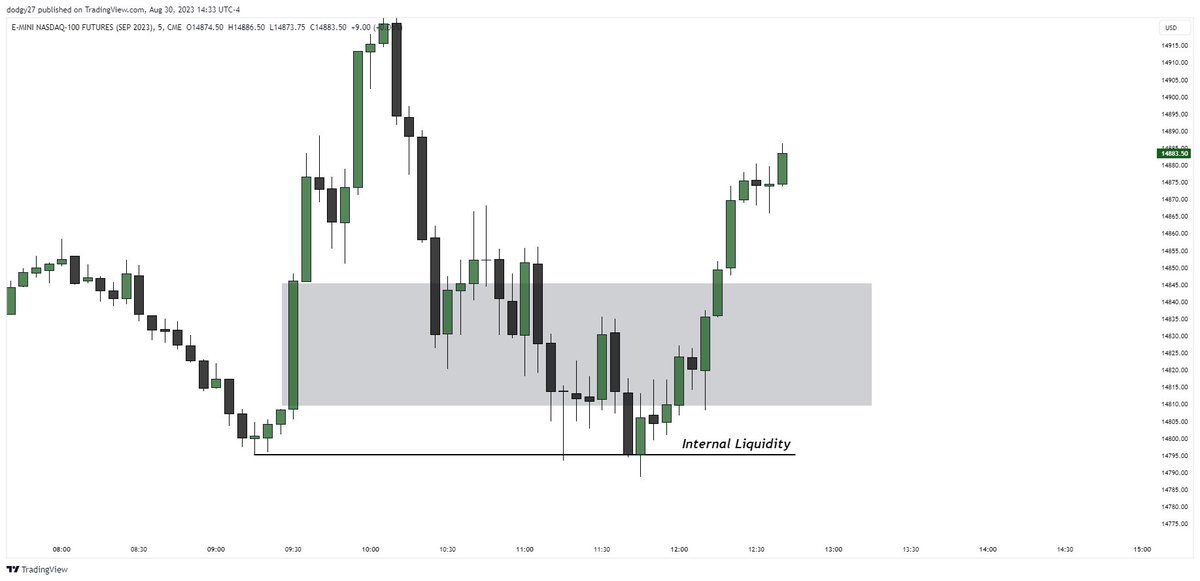
C. Is this a good long?
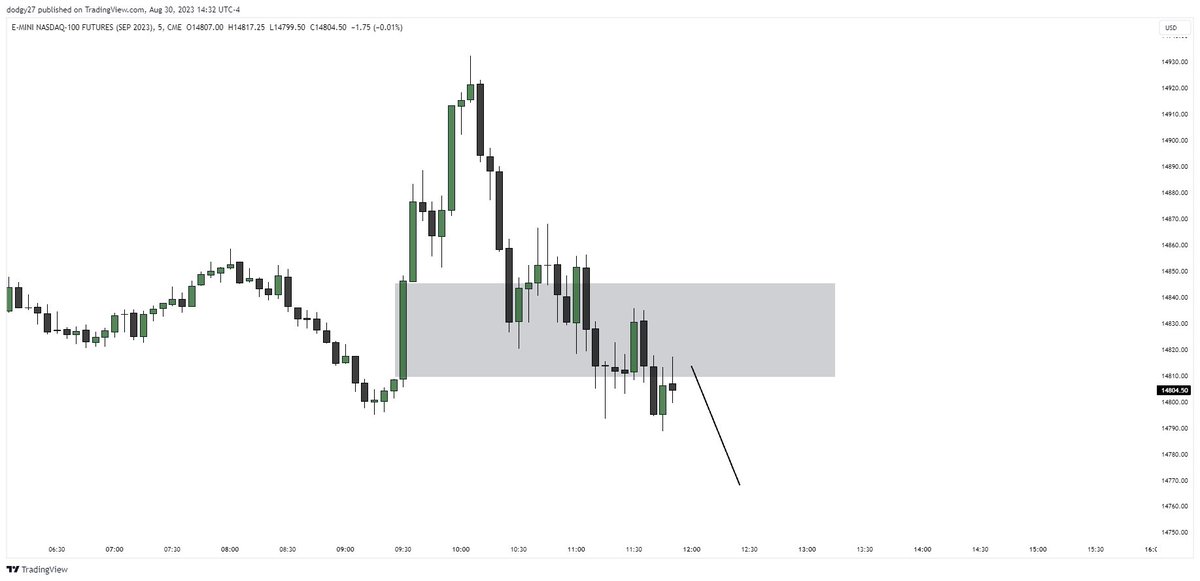
D. Is this a good short?
ANSWERS👇👇👇👇👇
A. The blue lines are best because we haven’t hit and aren’t delivering from a bearish PD array (the bearish FVG) in this situation you would move stop to BE and scale a bit after we closed above (can buy the retest or market buy close) and would probably get stopped at BE for

is one even though your bias is right, that’s just how it’s gonna be though if you trade like this, but most of the time it will save me
It then gives another continuation entry after you see the REACTION telling you the market is probably gonna go back to internal high
It then gives another continuation entry after you see the REACTION telling you the market is probably gonna go back to internal high

Even though you didn’t relong the dump in the inversion it’s giving you another opportunity before we hit internal liquidity which then allowed you to hold some of position to HOD without getting stopped out
B. Nope, we hit major internal liquidity. If you can see that high 20 feet away from your screen, it’s likely important enough liquidity not to long after we hit it, even if your bias is eventually right
C. Nope, we already hit internal liquidity so if the bias is wrong we know it would be a bad play + we are delivering from bearish FVG
D. No, we already hit major internal liquidity
See how the candle closes beneath AND hits the major liquidity at the same time? Don’t mess with those setups
See how the candle closes beneath AND hits the major liquidity at the same time? Don’t mess with those setups
I don’t care if you join that, bc alerts won’t save you, (but my live education might) but I make FREE daily youtube videos and i have a discord with a free section as well where I do Sunday night classes for free every Sunday night :)
YouTube: discord.gg/pQn7MtjM7W
YouTube: discord.gg/pQn7MtjM7W
• • •
Missing some Tweet in this thread? You can try to
force a refresh