
The Warp Core Fandelier Maxx Build Thread is here!
Just cleaned it, upgraded the filter and took pics the whole way. So follow along here if you want to know how to build a ~200+ CADR HEPA and VOC filter that’s quiet, powerful, effective, unique and special looking to boot.
Just cleaned it, upgraded the filter and took pics the whole way. So follow along here if you want to know how to build a ~200+ CADR HEPA and VOC filter that’s quiet, powerful, effective, unique and special looking to boot.
Here’s the parts list and an Amazon shopping list you can use to find everything.
https://twitter.com/TheFandelier/status/1712205631778963803
Amazon list. Includes both filter styles and car vs wall vs USBC power options so pay attention given your needs 👀
amazon.com/hz/wishlist/ls…
amazon.com/hz/wishlist/ls…
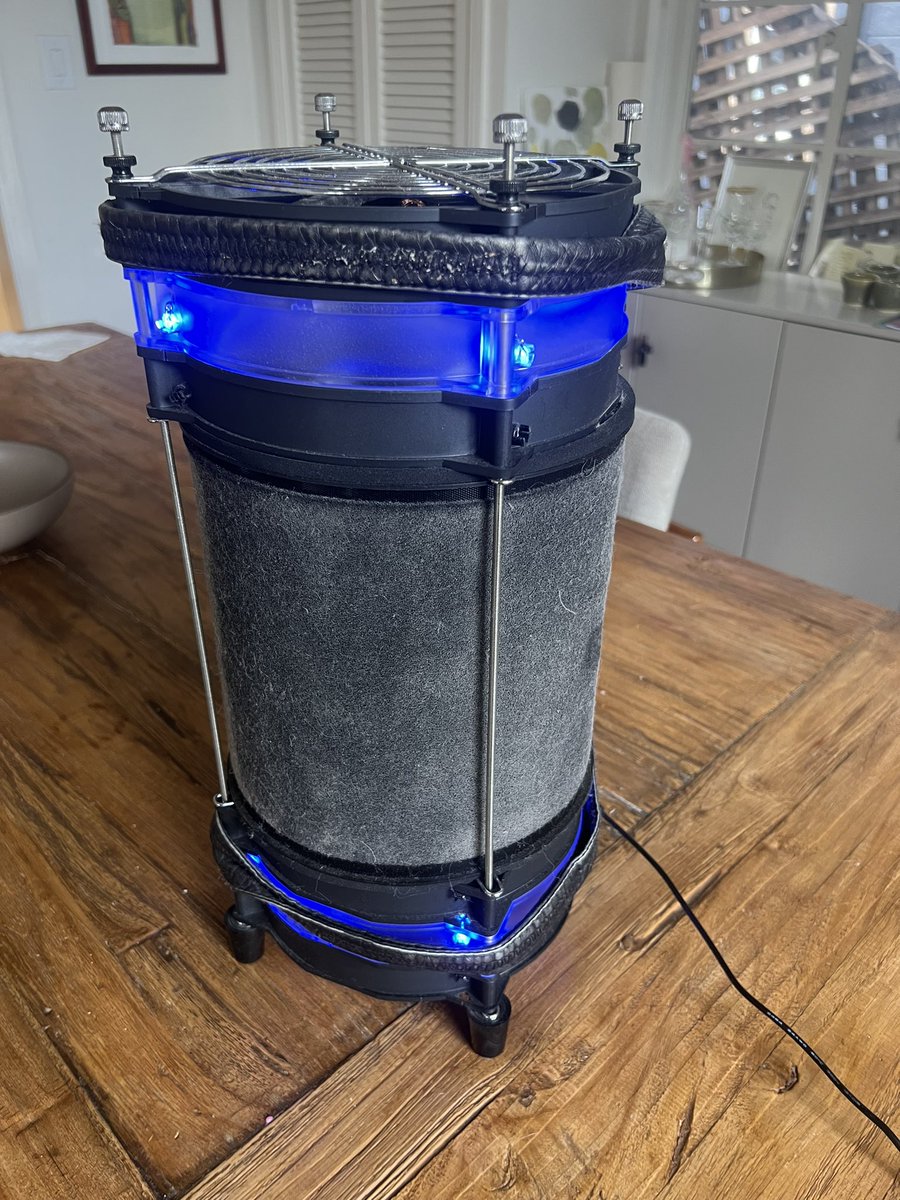
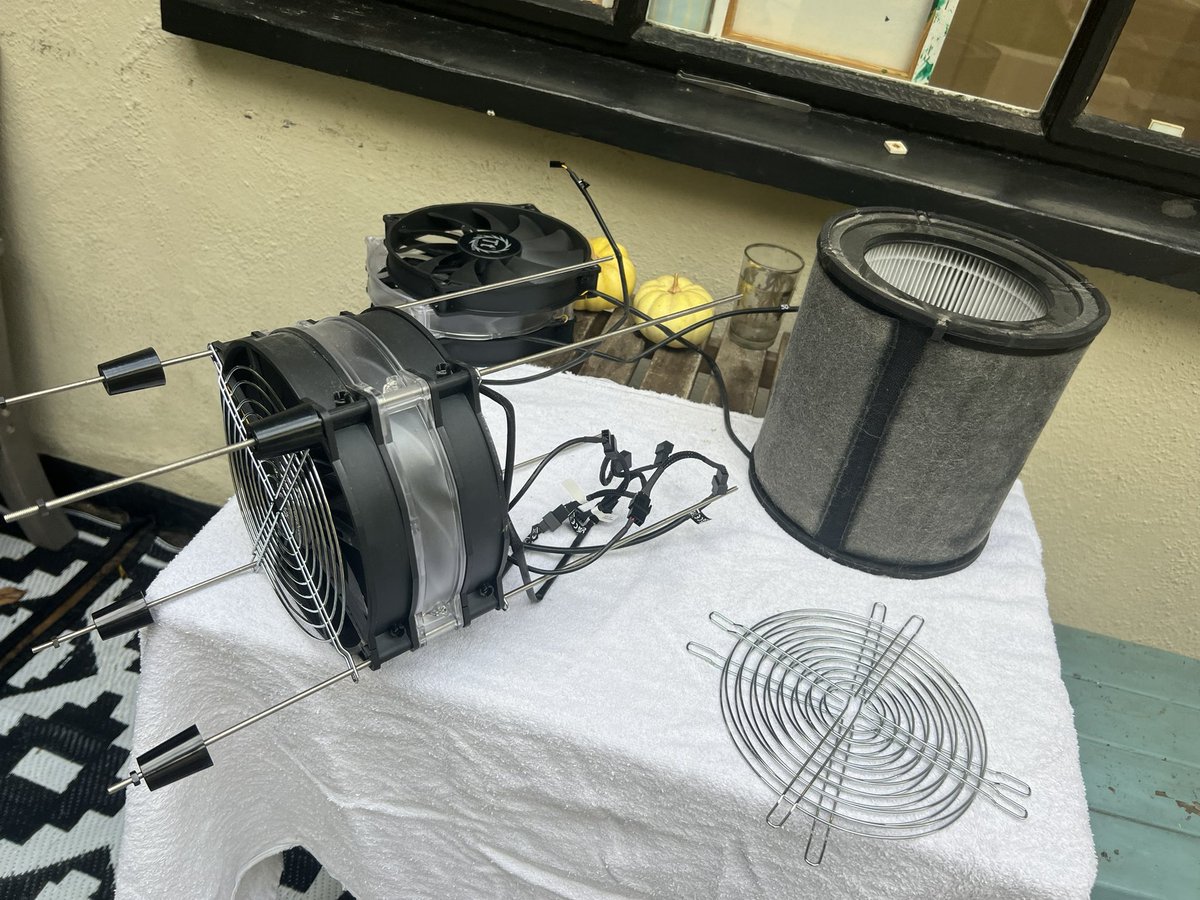
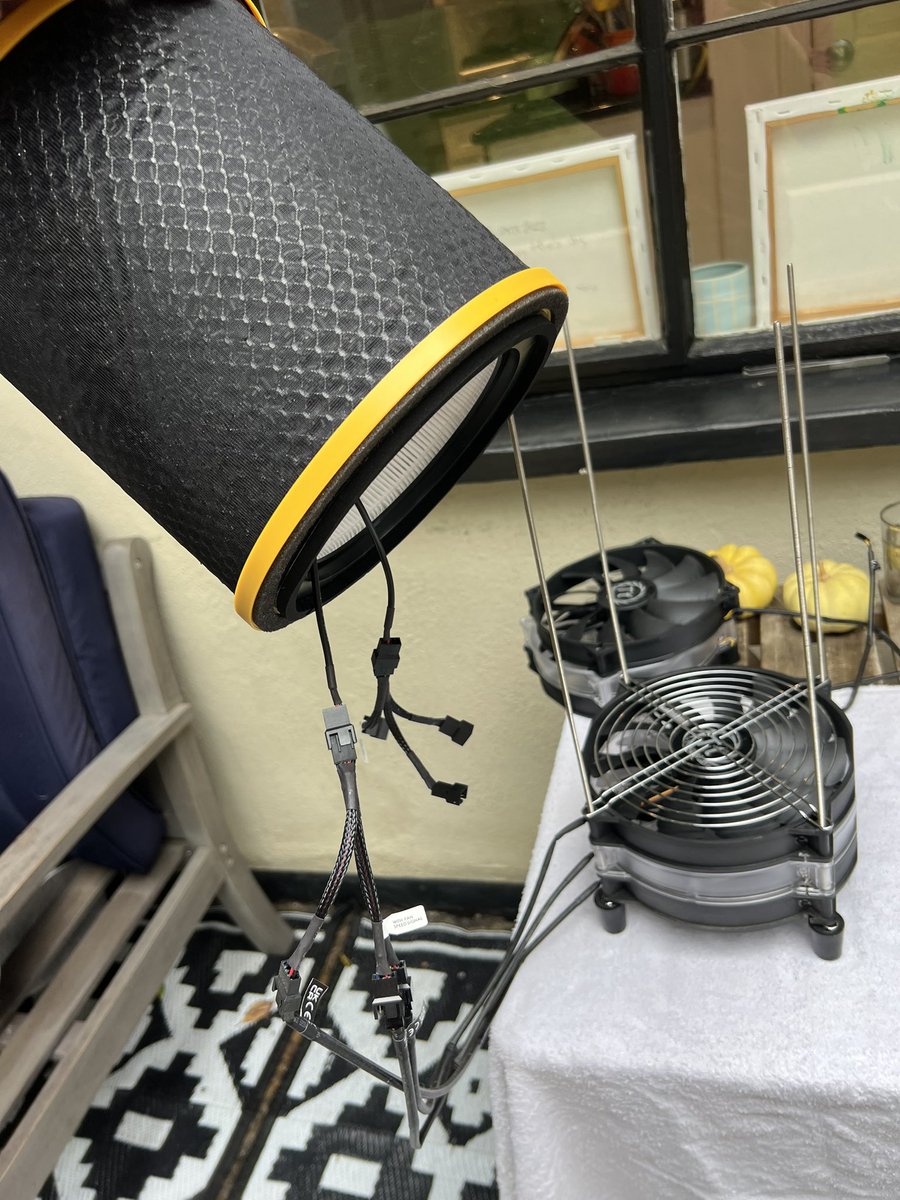
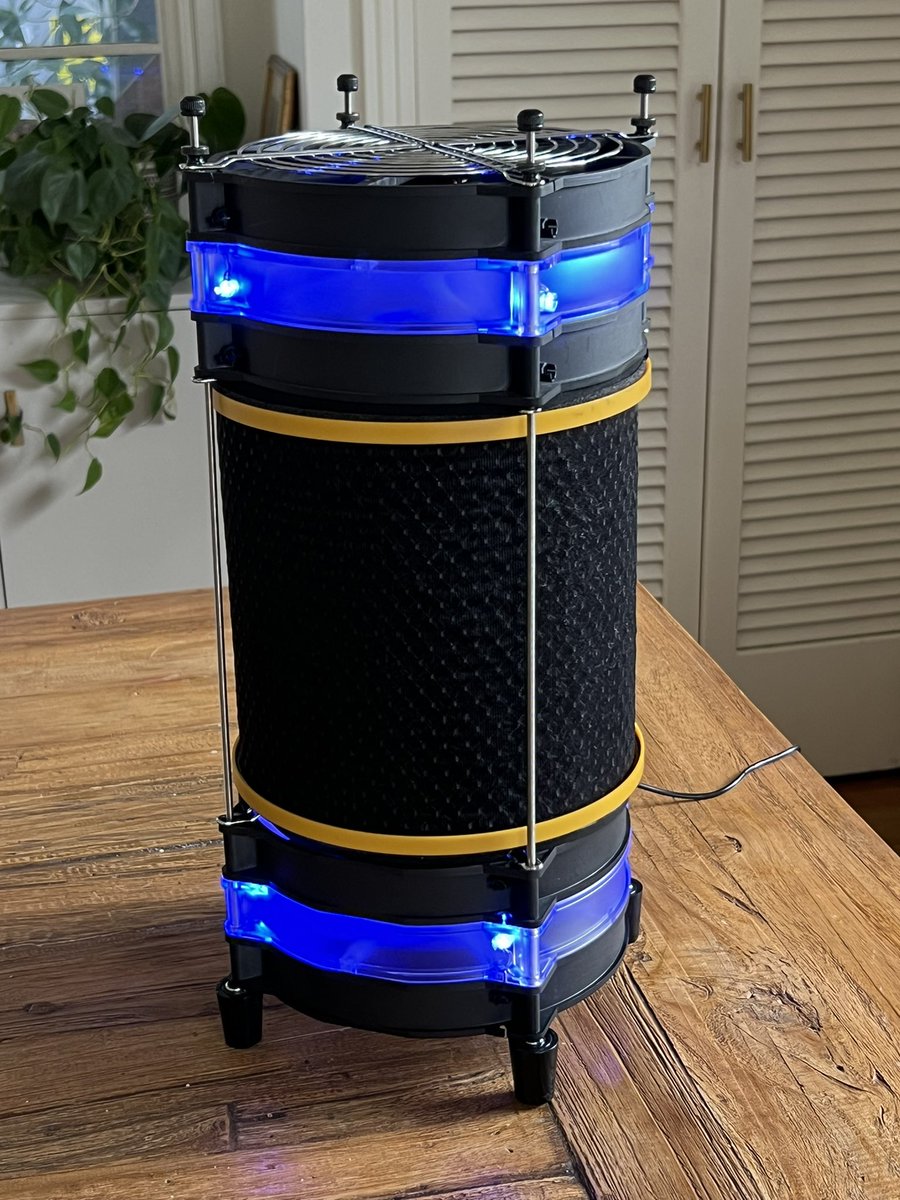
Here it is in all its beauty. You have the parts, it’s time to build. It’s simple: everything is stacked on the supporting rods and the wires are hidden in the middle. Let’s gooo… 

Decided to use pics not vid for this. Build and rebuild are the same, so here it is dirty. Dust accumulates regardless so blow everything out. Get an electronic blower, gamechanger for this. Top fan gets dirtiest slicing through falling particles. Has been on hi 24/7 for 3 months


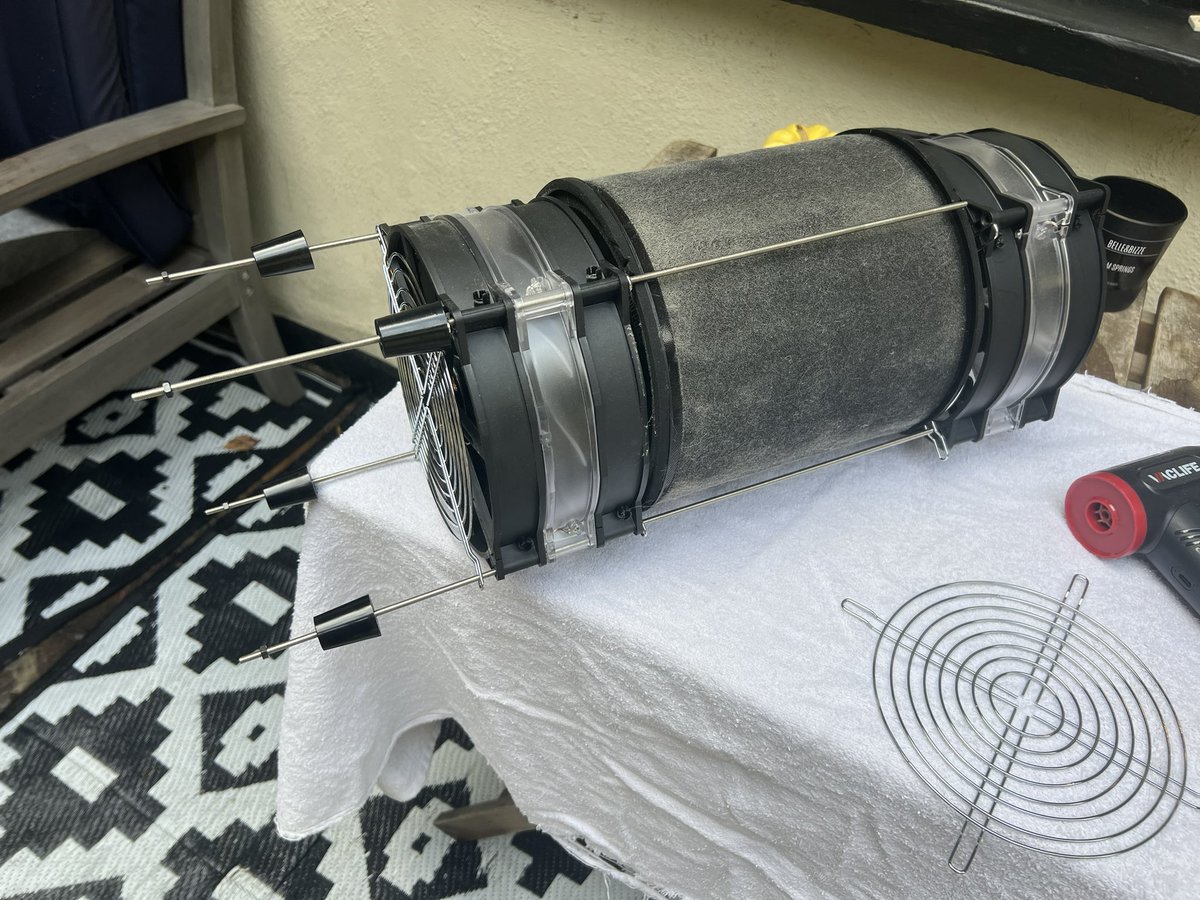
More dirty disassembling. You can see the 3 fan stack w finger guards on both sides. There’s 2 of those stacks. Filter is really loaded, and any tiny gaps will allow dust over time. I need to seal it better w glue
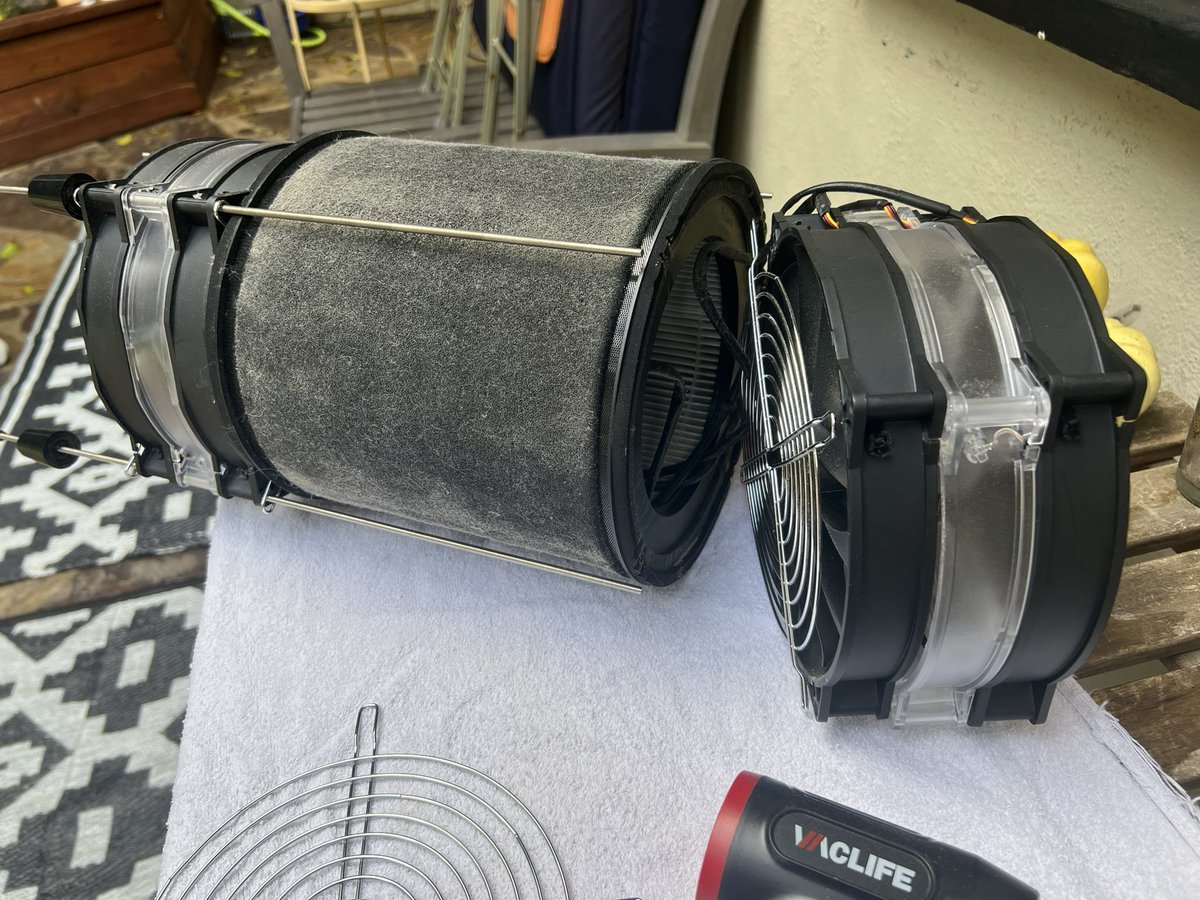
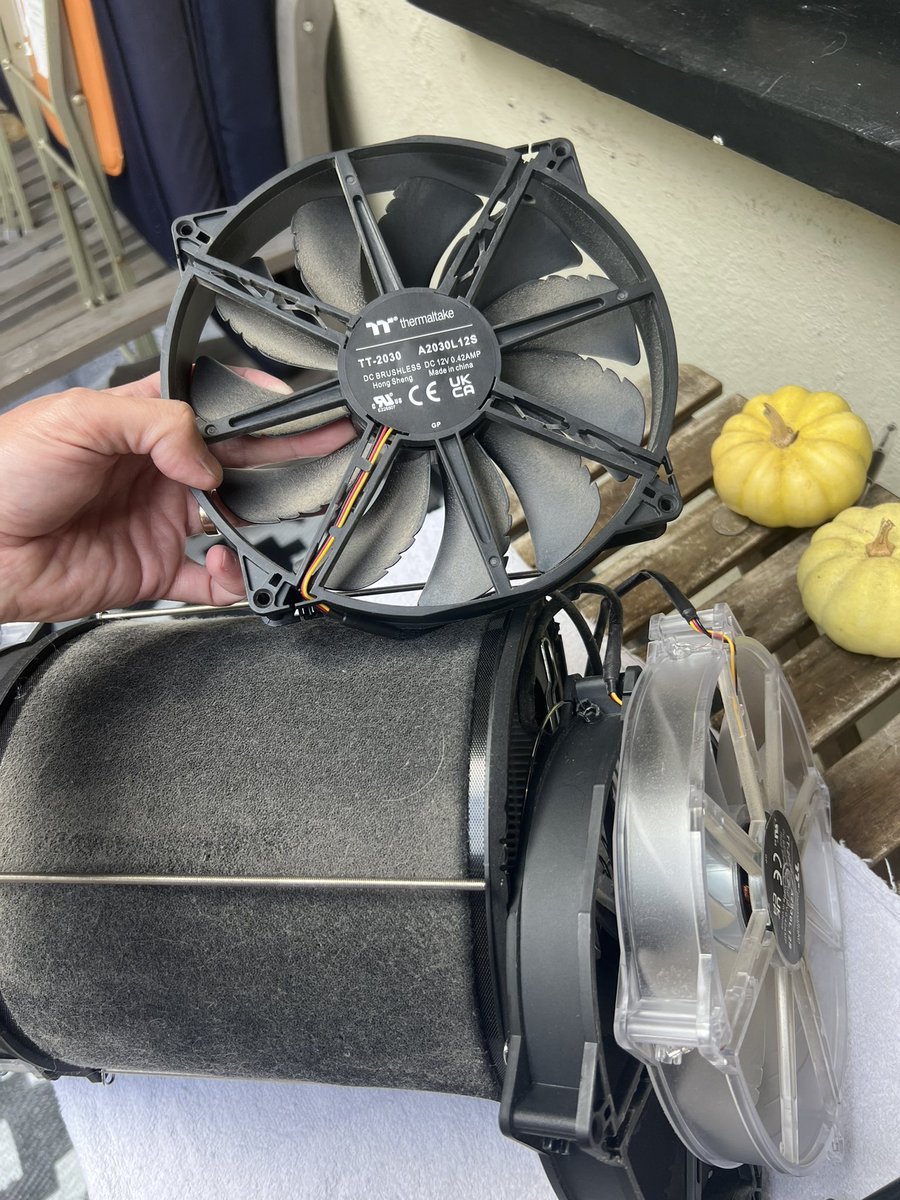

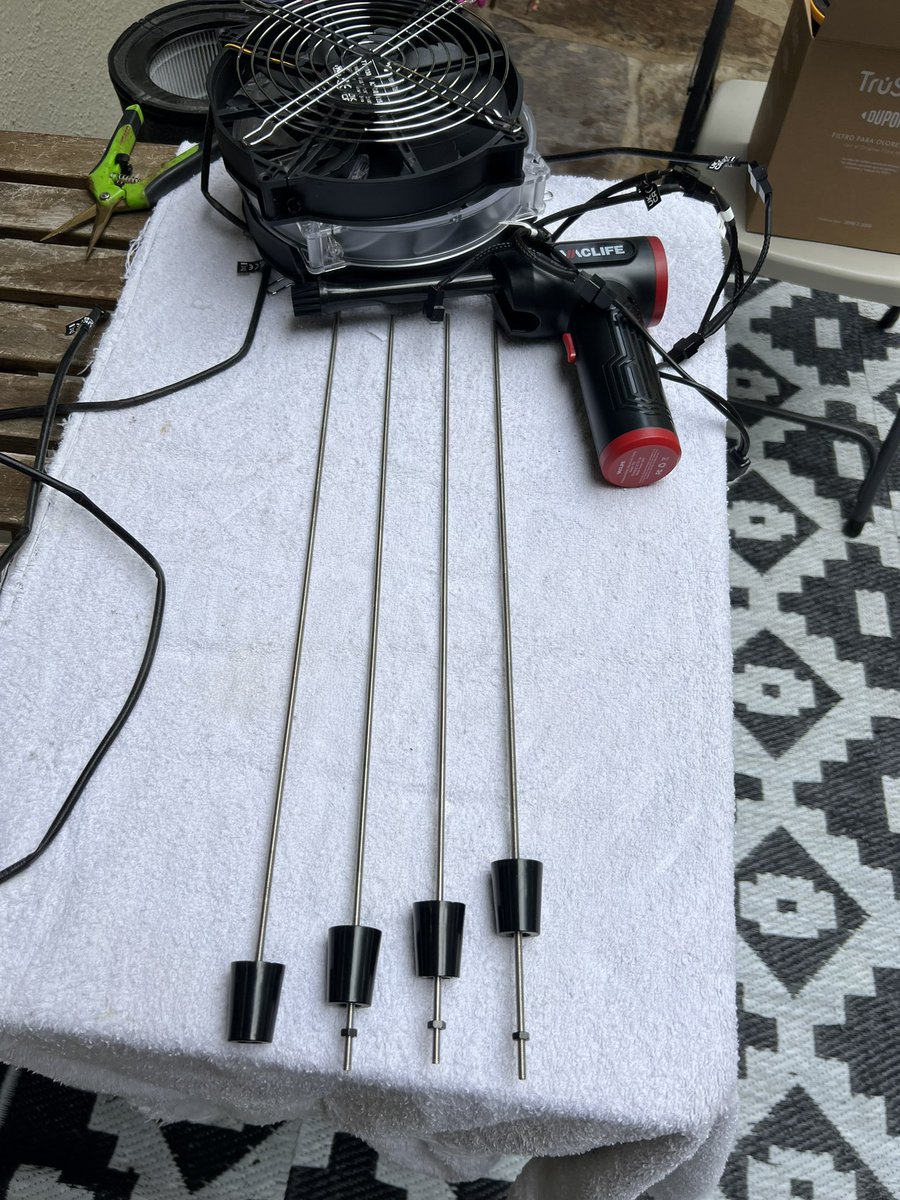
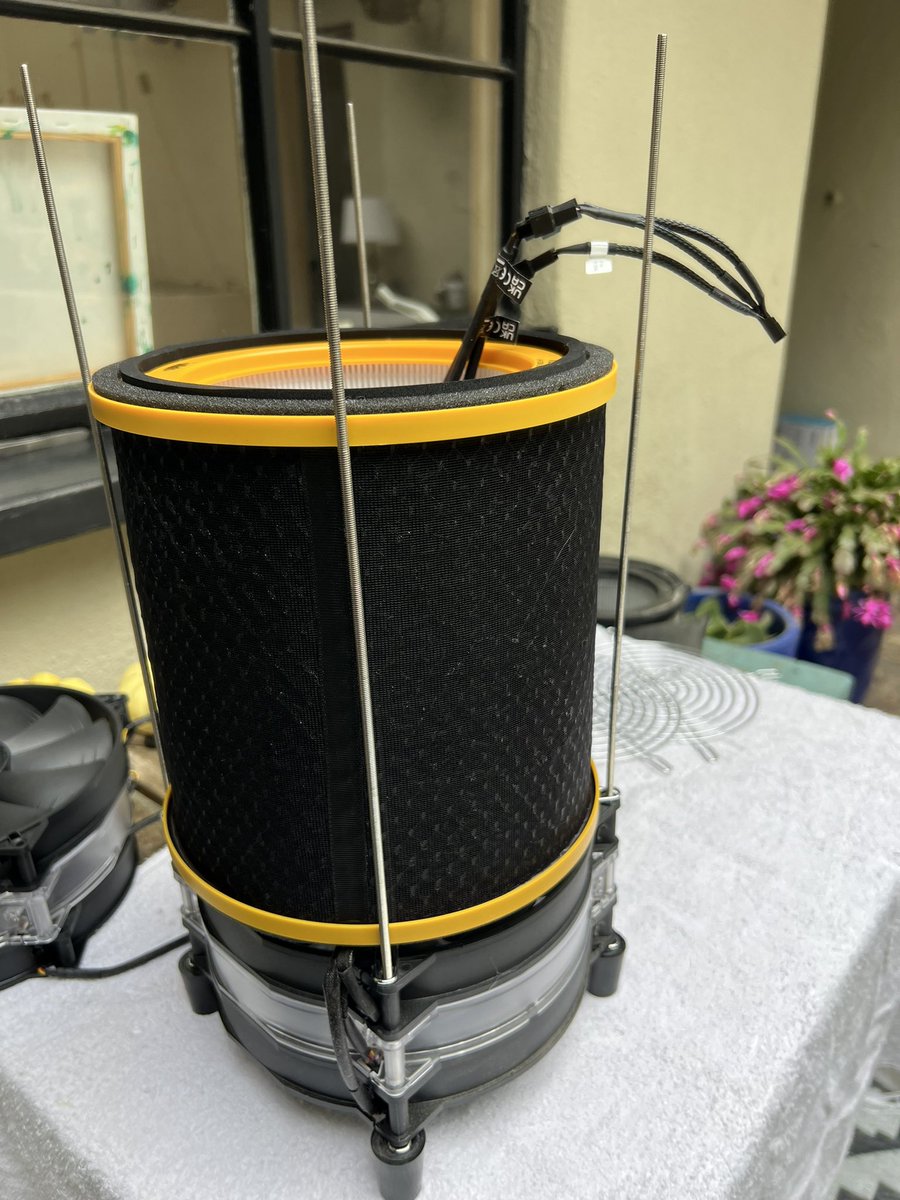
Blow out all fans until they look new. They get cleaner as you go down the stack (gravity). Then prepare the new filter by ringing it with 1/4”x1/4” weatherstripping. Ring should be OUTER edge, I messed up at first, double not nec. Leave a notch for wires.


Stacking time!
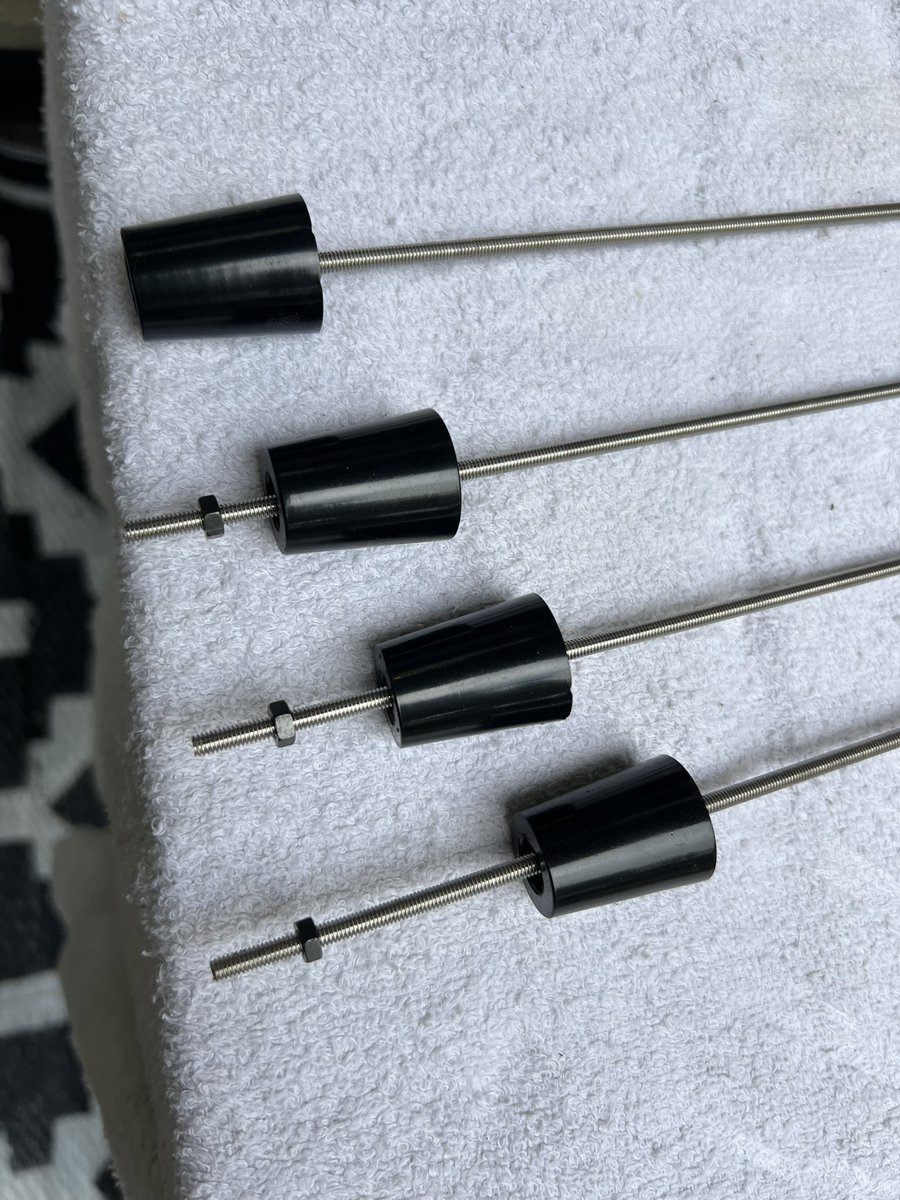
Prepare the rods with screws and feet. Screw location will help even out the tops of the rods at the end but start with same level. Make a 3 stack, making sure to align fan direction and wires. Drop finger guard onto feet as shown, guard ALWAYS flares AWAY frm fan
Prepare the rods with screws and feet. Screw location will help even out the tops of the rods at the end but start with same level. Make a 3 stack, making sure to align fan direction and wires. Drop finger guard onto feet as shown, guard ALWAYS flares AWAY frm fan
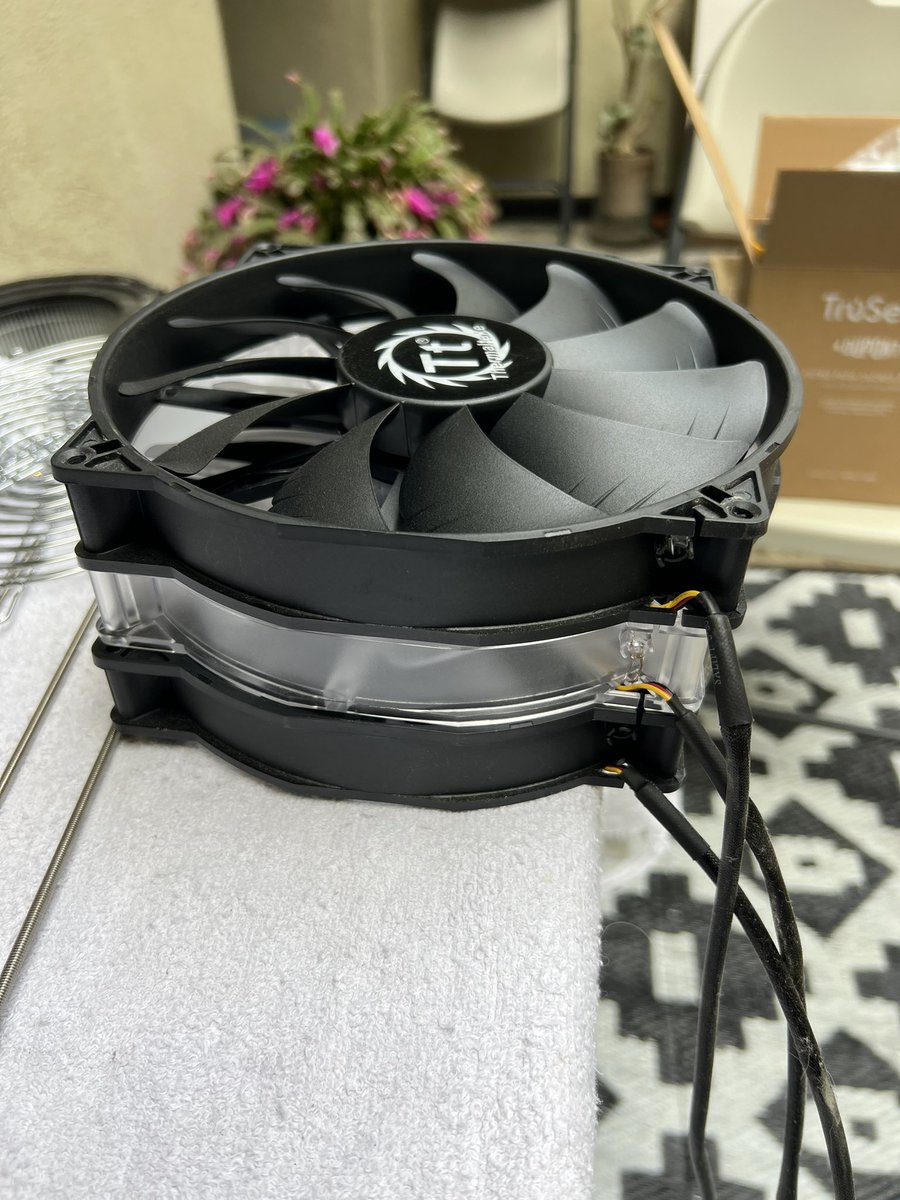
Make the first 3 fan stack. Guard, fan, fan, fan, guard. Shimmy each down carefully and slowly. If you bend the rods they can be straightened but avoid. Always be sure wires and orientation are right; these fans blow downwards. Wires connect to 3 way splitter and 2 way power

Feed the power wires into the bottom of the filter and place the filter between the rods, pulling the wire through. Connect the 3 way to the power, and feed the barrel connector back out the bottom of the filter where other wires enter (next post)

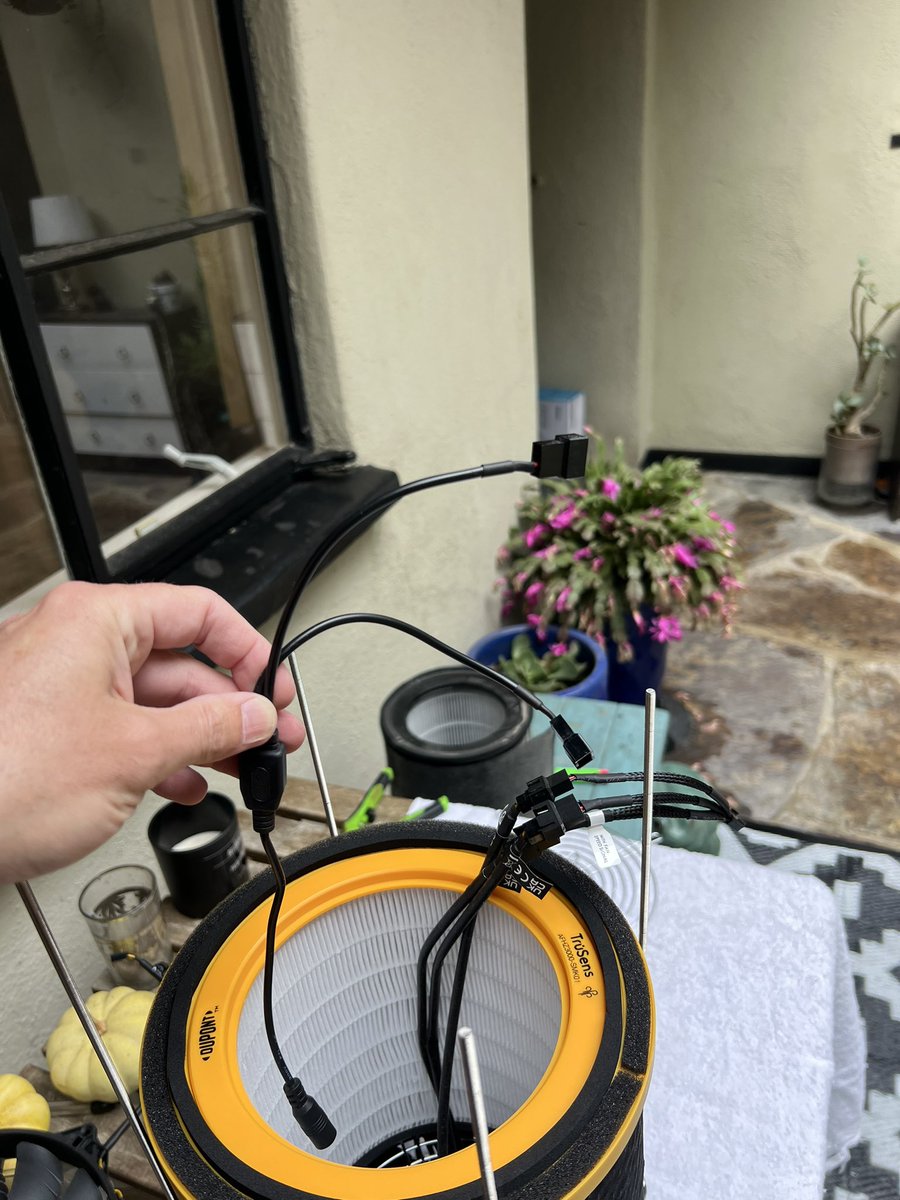
Barrel tail should come out the bottom and 2nd 3-way fan splitter wire connects to barrel wire and sticks out of finger guard, on R of rod (I did L in pic sorry). Goal is all wires together inline in stack, for clean look. Almost done


Drop last fan, connect wires, and lift stack to tuck wires into filter cavity. Guards help keep wires out of fans but still need wires smushed towards center of column. Avoiding/addressing fan scrape comes at startup

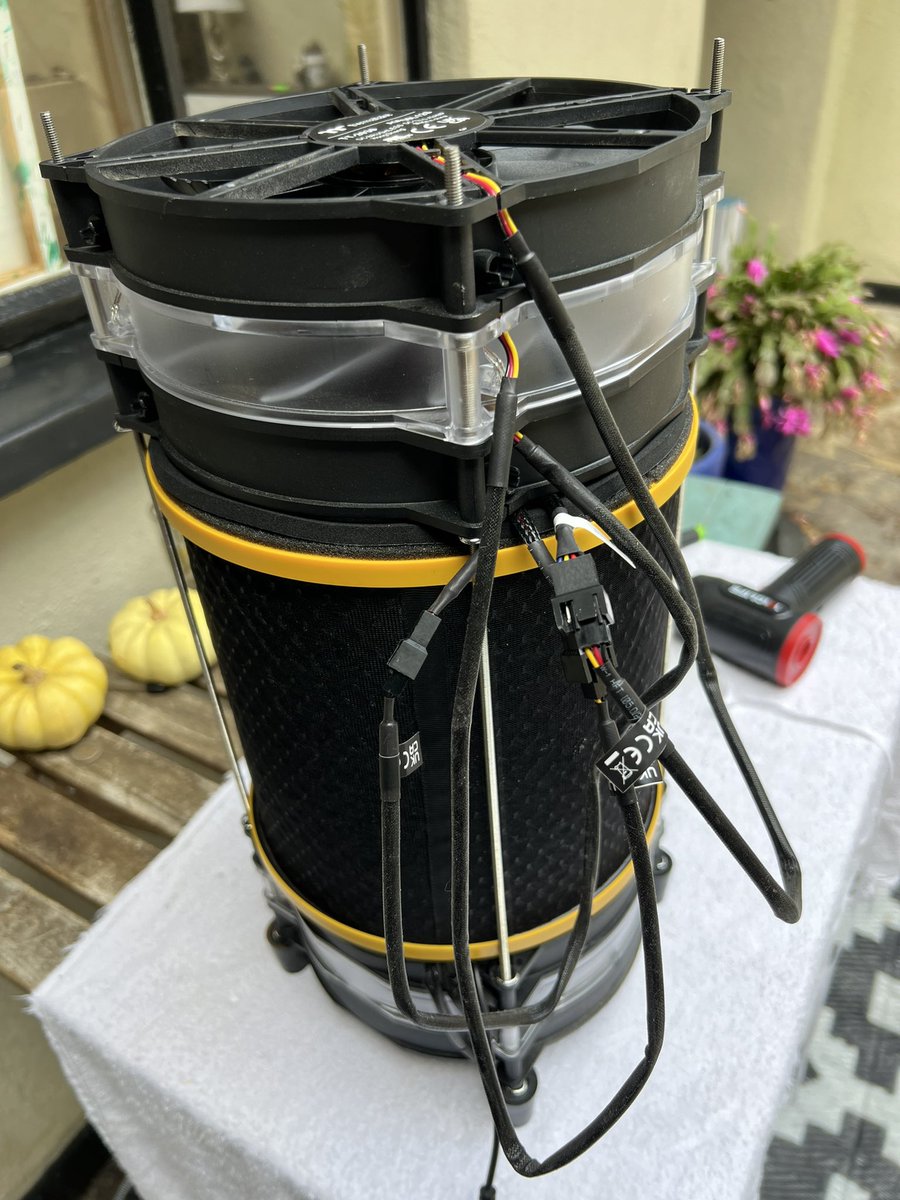


Last guard goes on n thumbscrews tightened WITH Fan low POWER so you can catch fan scraping and fix it (move wires around) before it is a prob. Tighten it down hard on all sides so gaps squeeze out. Use more weatherstripping in small gaps if need. Adjust bottom nut if rods uneven


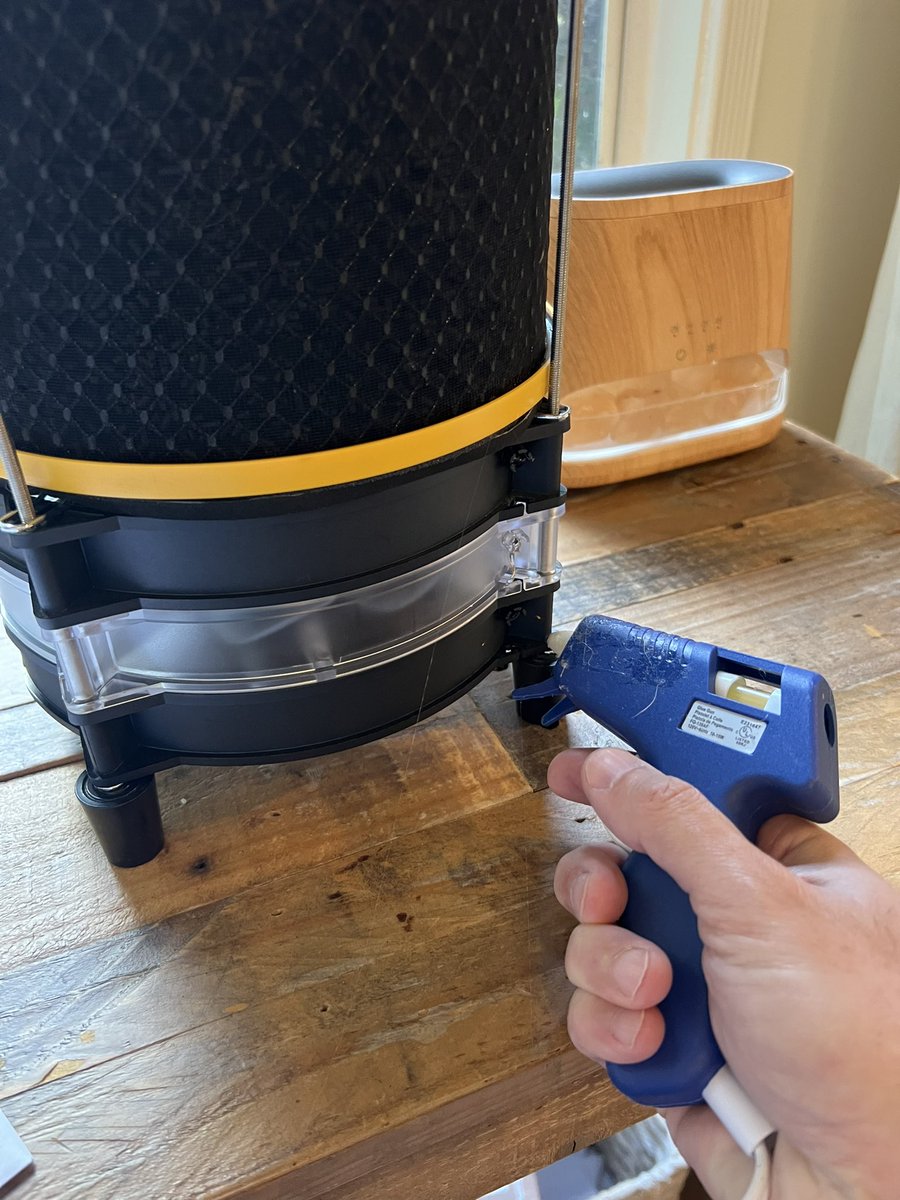
Closing the LED holes on the black fans with some glue should help with dust, and just generally a good idea. Thanks for following along and I hope you enjoy your WARP CORE FANDELIER MAXX!
This thread explains my choice of filter, the Trusens Odor / VOC Large. The best filter I’ve been able to find for the task. It’s why this works so well once it’s running.
https://twitter.com/TheFandelier/status/1741165379102319064
Here’s what the Warp Core Maxx sounds like at 200 cfm versus the smallest filter Trusense with ~50 cfm. Same size, but no comparison
https://twitter.com/TheFandelier/status/1715862337717154220
Forgot to say this upper stack airflow point UP, but you already knew that. Opposite of bottom stack orientation.
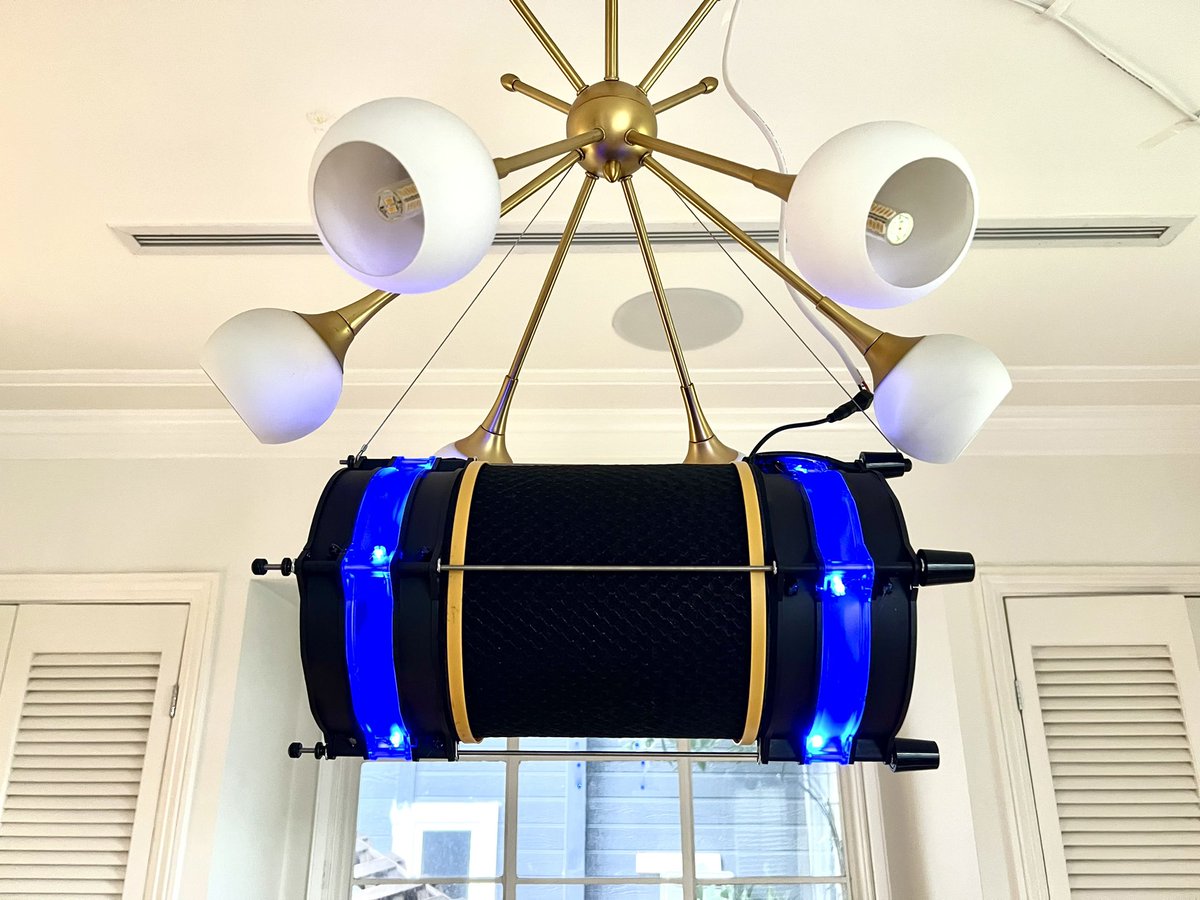
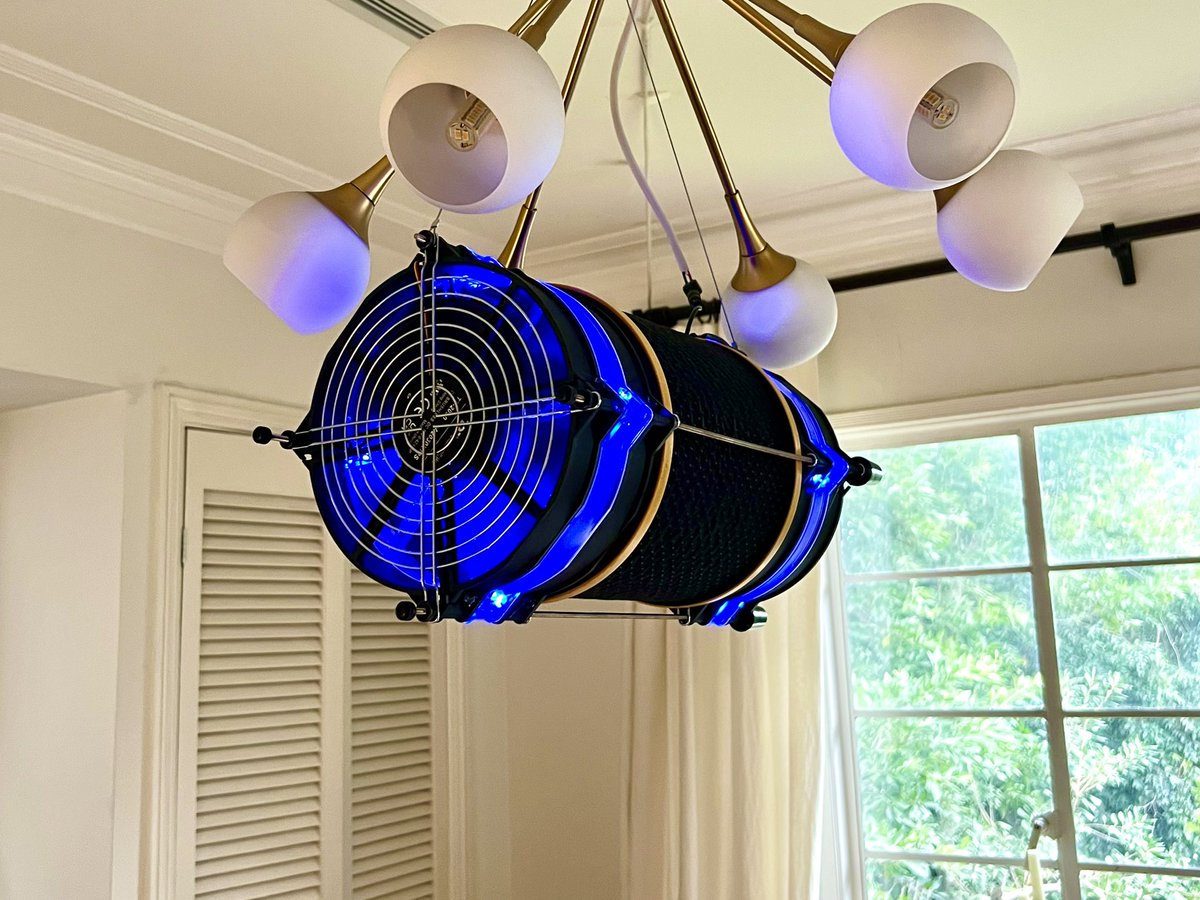
Here it is in #fandelier configuration, hanging by a single wire attached to either end of one rod. Serious air cleaning power for safer dinners with friends. (After testing and with windows/doors open too natch)


Trusens sells Odor/VOC bundles with 1 HEPA internal ring and 4 replacement Carbon outer rings, reflects probable faster utilization of the carbon layer in use
trusens.com/p/air-purifier…
trusens.com/p/air-purifier…
They claim 3-4 months for carbon and 12-15 months for hepa but now way. I’d say 3 months on hi 24/7 and it’ll be time for replacing both layers. I’ll report back if carbon quits first.
For $ compare:
Trusens Z3500 is their largest model n it uses this same filter. It’s $279, more than my parts list. It’s MUCH LOUDER (check out the sound video above from their smaller unit) n much bigger for same 200 CADR
Z3500: 10x10x28” 60db
Warp Core Maxx: 8x8x18” 46db
Trusens Z3500 is their largest model n it uses this same filter. It’s $279, more than my parts list. It’s MUCH LOUDER (check out the sound video above from their smaller unit) n much bigger for same 200 CADR
Z3500: 10x10x28” 60db
Warp Core Maxx: 8x8x18” 46db
https://twitter.com/TheFandelier/status/1741940849121075361
So vs DuPont-made Z3500:
Warp Core Maxx is
$40 cheaper
100x quieter
60% smaller
Same 200cfm CADR
Easy to build yourself
Far cooler looking
Warp Core Maxx is
$40 cheaper
100x quieter
60% smaller
Same 200cfm CADR
Easy to build yourself
Far cooler looking
I don’t get paid at all for this fyi but I will note that currently there is a 24% off sale for the specific filter I recommend. A few months ago it was 60% off on Black Friday, so they do run decent sales
trusens.com/p/air-purifier…
trusens.com/p/air-purifier…
Just checked latest Amazon prices for the items on my list to make the 120v design and it’s $240 with the standard HEPA or $280 with the extra carbon Odor/VOC filter. ($279 Z3500 price is w standard HEPA)
• • •
Missing some Tweet in this thread? You can try to
force a refresh


