Here are the components I pulled out of the Gateway! I do have a future plan for the ones we don't use today, we'll talk about that here in a minute!
Zip 100 drive is in the slot. Now I just need to find some screws. Luckily I have a few 🤣
And I did pop out two slot covers. I labeled them for future safekeeping and ease of pairing with this PC!
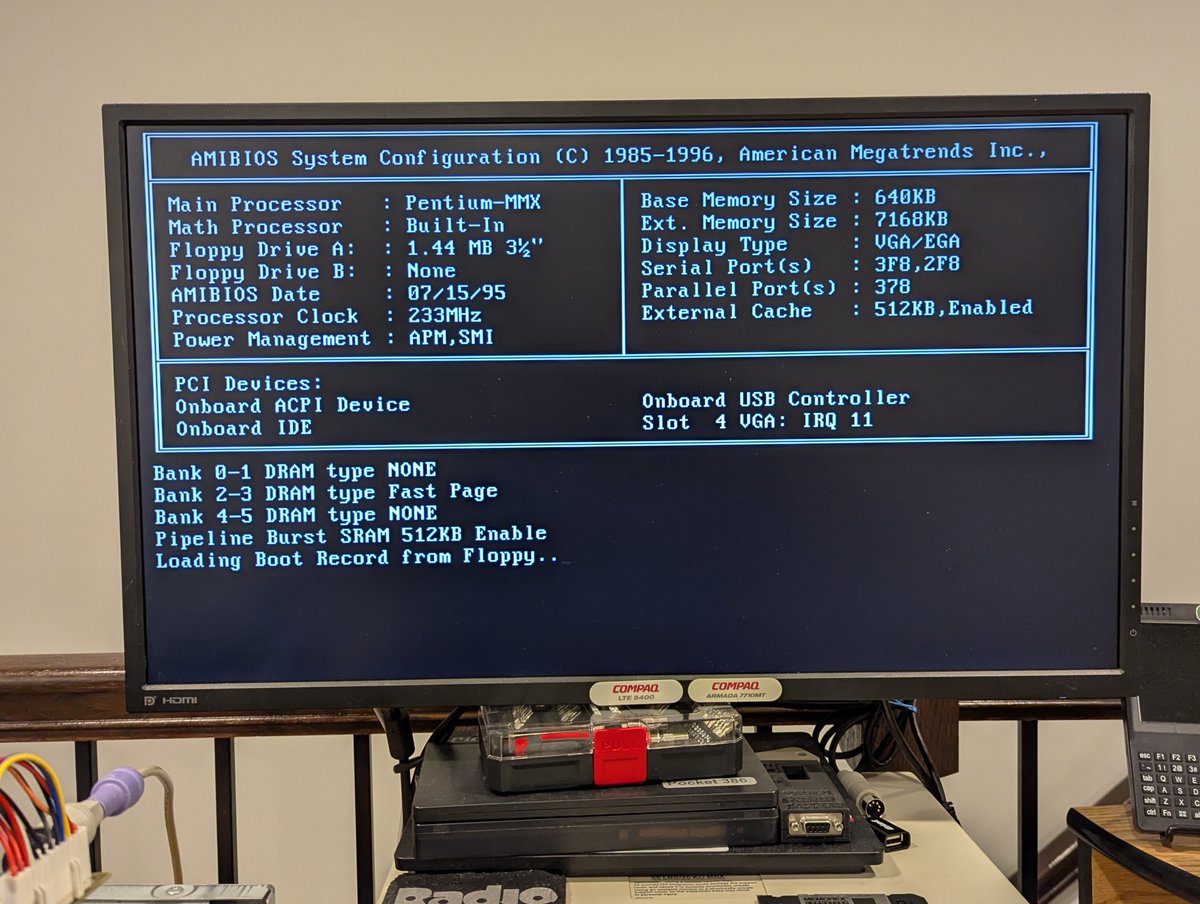
With all devices installed, I powered up and went into BIOS. OOPS, for the second time today, I have a jumper issue. I took out the CD-ROM drive and jumpered it to be the slave device. That took care of it. Also, my boot manager detects the two hard drives and Zip 100 drive!
The sound card that I pulled out of the Gateway is a CT5806, a Sound Blaster 128 PCI Digital. I like this card because it works in DOS... and that is why I am keeping it for now! The drivers for that are here: easymamecab.mameworld.info/html/snddosdr.…
And the final card I pulled out is this FutureTel PrimeView NS 320 MPEG capture card. I had three or four of these at one point! I was able to locate drivers for it and use it in the past! I documented it in an old video of mine.
I need to see if I can find the system requirements for the MPEG card! The web page for this card is on the Wayback Machine, which is where I found the drivers too! Wonder if it will work in my Pentium Pro. Anyway, thx for following along as always!
@threadreaderapp unroll
• • •
Missing some Tweet in this thread? You can try to
force a refresh
Since people have been asking forever, I finally decided to give ReactOS a try! Let's...see...how...it...went. Buckle up, things are about to get a little chaotic. Time for a looong 🧵
So, first of all, I decided to go with the nightly debug version, so take that for what it is worth! Second, I promise I am not being critical, what has been done here represents a lot of great work, and the software is still considered to be alpha.
Okay! So, step 1, after downloading the debug ISO, I burned a CD. As we can see, this is version 0.4.17-dev.
Over the years, I've been a huge fan of XTIDE and the capabilities it has brought to retro PCs. Let's have a look at some of the XTIDE related hardware I have in my collection, and what I have done with the XTIDE Universal BIOS as well. Time for a 🧵
First, I imagine that many retro enthusiasts are familiar with it, but the XTIDE Universal BIOS is actively developed and offered at no cost to the retro community. If you haven't seen it before, you can read more about it here: xtideuniversalbios.org
Okay, time to explore. First, I am going to start with my Tandy 1000 HX. This system benefits from the development of a 3-in-1 and 4-in-1 card that have XTIDE, as well as other capabilities. These card brought storage, serial, parallel, and extra memory to the 1000 HX/EX.
I've been playing around with my SCSI emulators, in particular, the wireless networking on them a bit. I think we have done this before, but it's been a hot minute, so let's talk about it anyway 😂. Time for a 🧵
So, first of all, these SCSI emulators (BlueSCSI V2 and ZuluSCSI Blaster) were predominantly designed for Macintosh systems, which also tended to use DayaPort SCSI network cards like this one here.
As such, when I first got my BlueSCSI V2, there wasn't any DOS support for its DaynaPort emulation. I wrote a very basic and crude DOS Packet driver, and Mike Brutman greatly improved it! If you ever need it, you can find it here: github.com/mbbrutman/dayn…
No need to adjust your television set, I promise you are not seeing double! But the error message on the screen is a "clue" as to why I now have two IBM PS/2 Model 30 286 systems. Let's talk about what I did this time... I guess we need to do a 🧵
Well, first, let's clean up the new one. Oh boy, it is ever dirty!! Here's a before an after... I failed at getting a clear after picture. Sorry, no refunds 🤣
Let's test out the HDD. Woah!! It WORKS!! It does have a bad sector or two, but that's pretty incredible.
Let's do a factory restore on this Packard Bell Multimedia 601. It's a Pentium 233MMX system. I've got some things on the table to help us out with the process. Let's explore a bit. Time for a 🧵
First and foremost, we're going to need a Master CD. Which one? Well, recently I found an eBay listing with some "System Credentials" that match my PC. And I saved them off for this very reason! We can grab 175710-05 from the Internet Archive and get this going!
We're also going to need to make a floppy disk. Fortunately, the contents of it are also on the CD. Great! I wrote that out to a disk image, and also burned a CD for our usage.
I've got one of my Tandy 1000 SX systems on the desk, let's check out some of the PicoMEM 2 capabilities on it! Time to get it installed. Let's explore together in a 🧵 here!
First, we'll see that we're doing a good job of using up the expansion slots in this beast 😂. Oh, and before I forget, when installing any PicoMEM in a Tandy 1000, you do have to update the configuration and add Tandy to it!
Alight, first stop is going to be checking out that NE2000 compatible wireless networking. And I am happy to report that it works just fine, I'm using MS LAN Manager here!