Time for another "Operating System" install on the PS/2 Model 70 386 (with 16MB memory and a 486 upgrade). This time, we went with DESQview/X, which actually isn't an OS since it runs on top of DOS. But it has some cool features! Let's talk about it in a 🧵 here!
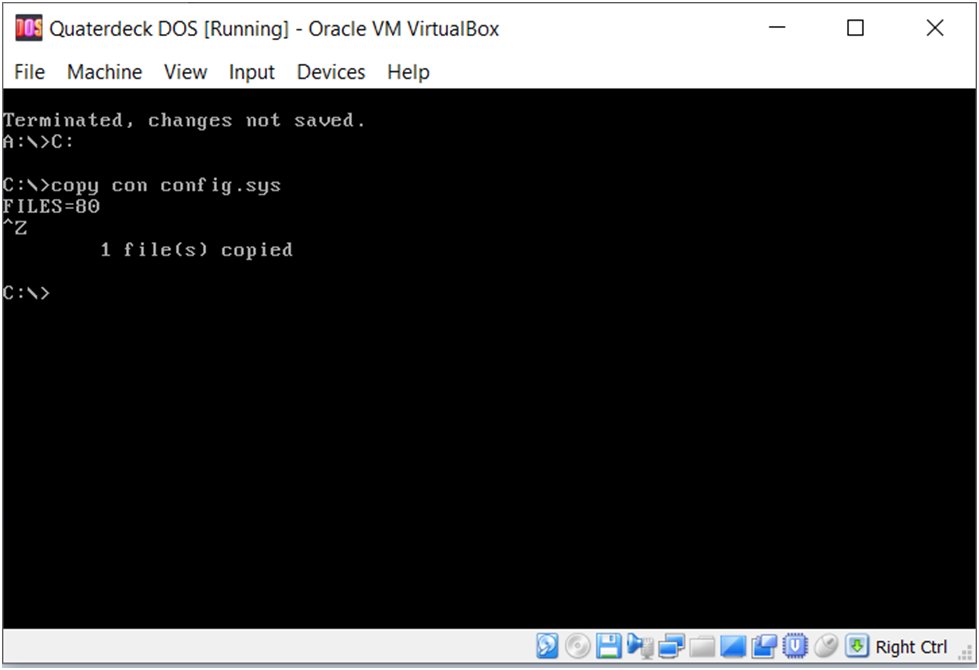
So, first, to do the install, I was once again lazy. I installed DESQview/X in a virtual machine, and then copied the contents to the PS/2. Installation is straightforward, just make sure to have FILES=20 (or more) in config.sys! I'll show some screenshots from the install.
After installing, an optimize program runs and reboots the system several times to find the optimal memory usage. This reminds me of memmaker in MS-DOS 6.x. Gee, I wonder which came first 😂 (hint: it probably wasn't memmaker!)
Next up, this wouldn't be a RetroTech Chris install if I didn't configure networking. I found this really helpful comment on a blog post that told me pretty much how to do that (with some minor errata, we'll talk about that next). virtuallyfun.com/2011/03/27/des…
Here is my autoexec.bat and net.cfg files. I had to change "Protocol IPX" to "Protocol TCPIP", other than that, the procedure was great! I also switched up the PCNTNW usage in the blog post for my IBM LAN Adapter/A driver, which is IBMENIIO
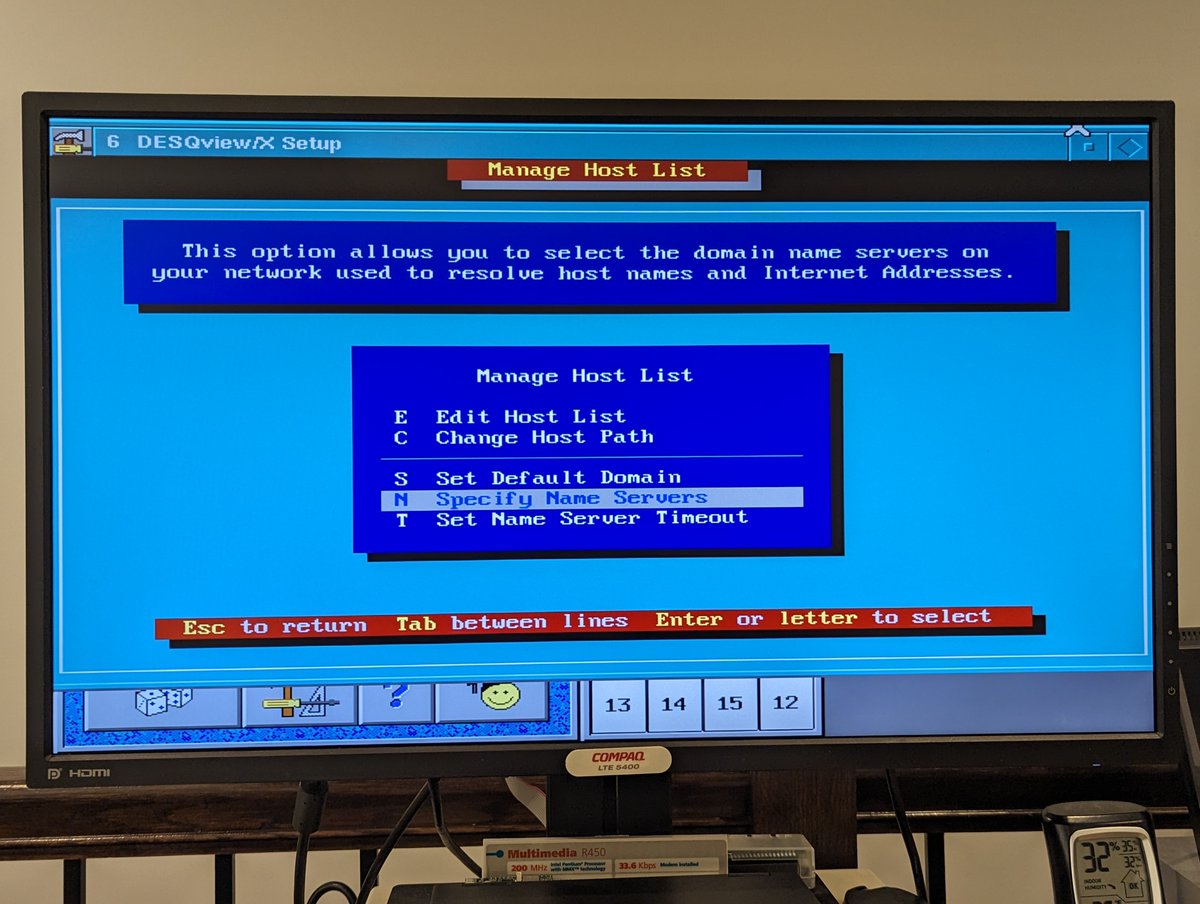
I also had to run the C:\dvx\setup.exe program to configure my network as Novell LAN WorkPlace TCP/IP. I also enabled the services you see below, and configured a name server. Looking good!
And, of course, since this is a PS/2 and that makes it "special," I had to tweak some things in config.sys to get this darn thing to boot with the QEMM utils. I commented out the dosdata.sys driver and added a NOPE line to the QEMM386.SYS line to ignore an unknown adapter.
Another thing I had to do: despite trying multiple mouse drivers, my mouse was erratic. So I plugged it into a serial port instead!
So, with that, we were all set! I decided to play a bit. One thing I tried was remote shell to run some X applications on a similarly configured virtual machine running DESQview/X! Maybe in the future, I'll try this from Unix: we need an X11R5 server for it to truly work.
I did test out FTP capabilities! That's right, DESQview/X has an FTP server! That makes transferring files to the system a piece of cake. I used that to support installing Windows for Workgroups 3.11
Speaking of Windows for Workgroups, DESQview/X supports running Win3.x in a window! So, in theory you could remote shell from a Unix workstation and run Windows 3.x programs! I loaded up some Quarterdeck apps which show system specs and QEMM setup options.
I also did a quick telnet to The Old Net, where I loaded up Google in text mode.
Anyway, that's pretty much it! I did want to highlight this most excellent page on DESQview/X that has some other applications and ideas for those who want to explore more. As always, thanks for following along!
I picked up this $5 VESA Local Bus I/O card at the System Source Swap Meet. Let's test it out! Time for a 🧵
This card is a SIIG Professional VL. And it has your typical I/O as you can see here: dual IDE, FDD, 2 serial, 1 parallel, and 1 game
We'll start out with a base case, which includes the Promise EIDE 4030 card that is installed. I did do a quick bootup with this card installed, and it was successful.
Who here believes in redemption? The other day, I was cursing these SMC Elite 16 ISA network cards as they were giving me all sorts of trouble. Let's give them another chance since I have so many of them 😂. Time for a 🧵
Anyway, this thread starts out with a funny story. I grabbed a PC at random, and it happened to be the Kehtron PC. Guess what kind of card was already installed and operational in it? Yep, a SMC Elite 16 😂. Well, good, this problem should be solvable then!
As science teaches us, always start with a control group, and we lucked out in this case. So I booted up Windows for Workgroups, and the card is working great. Looks like we are set to 0x280 and IRQ 3 per the DOS EZStart utility.
I picked up a $5 ISA video card (!) at the System Source Swap Meet! Let's test it out. Time for a 🧵
So this card is based on the Cirrus Logic GD-5422 chipset. It looks to be a STB System Horizon card. I didn't count the memory, but looks to be 1MB
I installed it in the system, and we can see the BIOS splash screen for it (sorry for the blurry picture). From there, I installed some drivers that I found on Vogons, and bumped up the resolution. Looking good!
I got a memory upgrade in the mail yesterday for my Compaq Armada 7770MT! And, well... OF COURSE this was an adventure. Let's talk about it briefly in a 🧵 here!
So, why was this an adventure? After all, it's a simple memory upgrade, right? Well, for whatever reason, the display wasn't lighting up, so I went with an external monitor. Okay, fine.
I did troubleshoot and solve that. Bad LCD inverter. That's a first! I swapped it out of a parts laptop. Okay, let's continue MemTest. Ah geez! We have a bad module.
I did a system restore on my $3.33 Packard Bell Legend 11CD. This is a GREAT little 486DX2/50 system. Let's talk about the restore process, in a 🧵 of course!
The first thing that I did was to write out track 0 of the hard drive with Packard Bell System Credentials. I found credentials for a Packard Bell Legend 10CD, which is similar. I tweaked them a bit and then wrote them out! The HDD in this system is a 730MB Western Digital.
From there, I needed to track down a boot disk and Master CD. I found a boot disk that was close enough (thank you, ), and from there, changed the port in config. sys for the Panasonic 2X CD-ROM drive in my system. From there I wrote this image to a disk. ryan.thoryk.com/pb-restore/
I decided to do "retro computing from the recliner" tonight, and set up Windows 3.11 For Workgroups on my "Super Armada 7770DMT". Let's talk about it briefly in a 🧵 here!
So, this particular computer doesn't have a traditional floppy drive since it originally had the dreaded Citizen W1D drive. No problem! We'll use OpenFlops and disk images where we need them!
I also decided that I would use my Parallel Port to SD (SDPPD) device to transfer files to the laptop. So after creating a DOS partition, I created a disk image with the driver for the SDPPD with the right changes to config. sys to load it!