THE ULTIMATE BONE BROTH GUIDE🦴
Why you should drink it + how to make it perfectly
(Thread)
Why you should drink it + how to make it perfectly
(Thread)


Humans have been making bone broth for thousands of years. After consuming all the meat and organs and using the hide, they were left with the bones.
By heating the bones, they could extract the nutrients.
By heating the bones, they could extract the nutrients.
Hippocrates recommended it to people with digestive issues. And bone broth has always been used in Chinese medicine to heal the gut.
There are countless examples throughout history—they were definitely onto something. Using the whole animal is the most nutritious way to eat.
There are countless examples throughout history—they were definitely onto something. Using the whole animal is the most nutritious way to eat.
Bone broth is rich in easily absorbable minerals:
Magnesium
Potassium
Calcium
Phosphorus
Silicon
And more
It’s also rich in chondroitin sulfate and glucosamine, both of which are sold as expensive supplements to ease inflammation and joint pain.
Magnesium
Potassium
Calcium
Phosphorus
Silicon
And more
It’s also rich in chondroitin sulfate and glucosamine, both of which are sold as expensive supplements to ease inflammation and joint pain.
A cup of bone broth usually has about 10 grams of protein, but it’s an incomplete protein (so you still need other sources of protein).
But it’s rich in super important amino acids:
Glycine
Glutamine
Arginine
Proline
But it’s rich in super important amino acids:
Glycine
Glutamine
Arginine
Proline
Bone broth is also rich in collagen & gelatin which support bone & cartilage health, gut, skin, hair and nails and more
The nutrients in bone broth can help heal the gut by healing the lining of the digestive tract. It is a powerful tool when dealing with leaky gut.
The nutrients in bone broth can help heal the gut by healing the lining of the digestive tract. It is a powerful tool when dealing with leaky gut.
Now let's get into how I make it:
1. Bones
2. Blanching
3. Roasting
4. Aromatics
5. Water
6. Simmering
7. Straining
8. Storing
9. Reheating
10. Final notes
1. Bones
2. Blanching
3. Roasting
4. Aromatics
5. Water
6. Simmering
7. Straining
8. Storing
9. Reheating
10. Final notes
Bones
The BEST bones for a gelatin rich broth are:
-Beef knuckle bones
-Beef/chicken feet
For minerals:
-Marrow bones
-Rib bones/various soup bones
For Flavor:
-Neck bones
-Meaty bones like short rib or oxtail
My ideal combination is:
3-4 beef knuckle bones
1 lb chicken feet
1 neck bone
This has been a flavorful, extremely gelatin rich combination. I've never been able to find beef feet, but they would be a great addition as well.
You can also add a couple knuckle bones, a meaty bone, and various rib/marrow bones. Any combination works, but if your goal is to get maximum gelatin, including at least some knuckles or feet is a good idea.
If you want to make a chicken bone broth, I'd recommend:
-3-4 lb chicken spines/neck, or a whole chicken carcass
-1-2 lb of chicken feet
If you want to make a beef bone broth, you can use the combination I mentioned, just skip the chicken feet. It will still come out very gelatinous.
It is important to use the best quality bones possible; ideally 100% grass fed, pasture raised beef, and pasture raised chicken.

Blanching
This step is definitely optional. I never used to blanch my bones first, but after experimenting with blanching it has improved the quality and cleanliness of the final product.
Although it is a bit of a pain in the a**, it does reduce the amount of time you spend skimming off the top of your broth.
Put your bones in a large pot, and cover them with cold water. Bring to a boil, then boil for 15 minutes. You'll be alarmed at what comes to the top.
Now, you can absolutely skip this step, you'll just have to be diligent about skimming all of the scum that floats to the top of your broth, especially in the first 2 hours.
Roasting
Whether you blanch the bones or not, roasting is a very important step. This adds a ton of flavor to your broth.
Roast the bones at 450 degrees for about 30 minutes, or until the bones have nice browning on them. The exact time doesn't matter too much, it's really just all about color. I do this on a baking rack so you get color on all sides.
Make sure to remove all the marrow from the bones when they are done roasting. Leaving the marrow in your broth will result in a metallic tasting, cloudy broth. DO NOT. throw it out though, marrow has precious nutrients as well. You can eat it straight, spread on a steak or toast, or mix it with butter and herbs to make a nice meaty, buttery, herby spread.
Aromatics
This is the fun part! You can really use anything you want, and I recommend mixing and matching to see what you like best.
I do always recommend at least using onions, celery and carrots, for a classic broth flavor. It also depends what you're using it for. If this is made to sip on, you probably want to add more things for flavor. If it is for cooking, you may want to add less for more of a neutral flavor.
Some options:
Onions (with the skin on)
Carrots
Celery
Leeks
Parsley
Bay leaves (dried or fresh)
Garlic
Peppercorns
Mushrooms (any kind works, but I like lions mane for their brain-boosting properties)
Rosemary (or any fresh herbs, also has brain boosting properties)
Ginger
Turmeric (be careful with this, the fat will turn neon yellow and stains very easily)
Kombu (is a type of kelp and is an amazing source of iodine!)
Astragalus

Water
Ideally, you want at least 1 quart of water per pound of bones. I usually use more bones, but it probably isn't necessary.
I always recommend using the highest quality water you have access to, and definitely do not use tap water unless you have a filter.
When adding the water, make sure it is cold. Add 2 tablespoons of apple cider vinegar along with the water as well.
Simmering
The broth should simmer for at least 18 hours, and I recommend simmering it for closer to 24 hours. You can let it go even longer as well, but I wouldn't let the aromatics go longer than 24 hours.
Some people prefer to put the aromatics in during the last hour or 2, but I've never had an issue simmering them the whole time.
You really want this to be a bare simmer, and definitely do not let it boil.
A large stock pot is the best option in my opinion, although not everyone is comfortable leaving an open flame overnight. You may just have to sleep next to your broth for a night LOL.
A crock pot is another great option, you just won't be able to make as big of a batch. In my opinion, if you are going to go through all of this trouble, you might as well make the biggest batch possible. But hey, you do you.
I've gotten a lot of questions about using an instantpot, and I have seen people get great, gelatinous broth from it. With that being said, I've never tried it, and it doesn't sit right with me. Most instantpots are made from questionable materials, and when you're cooking something for a long period of time, especially with something acidic (the apple cider vinegar), the materials can definitely leech into the broth. This is just my opinion, but again, you do you.

Straining
Finally, the moment you've all been waiting for.
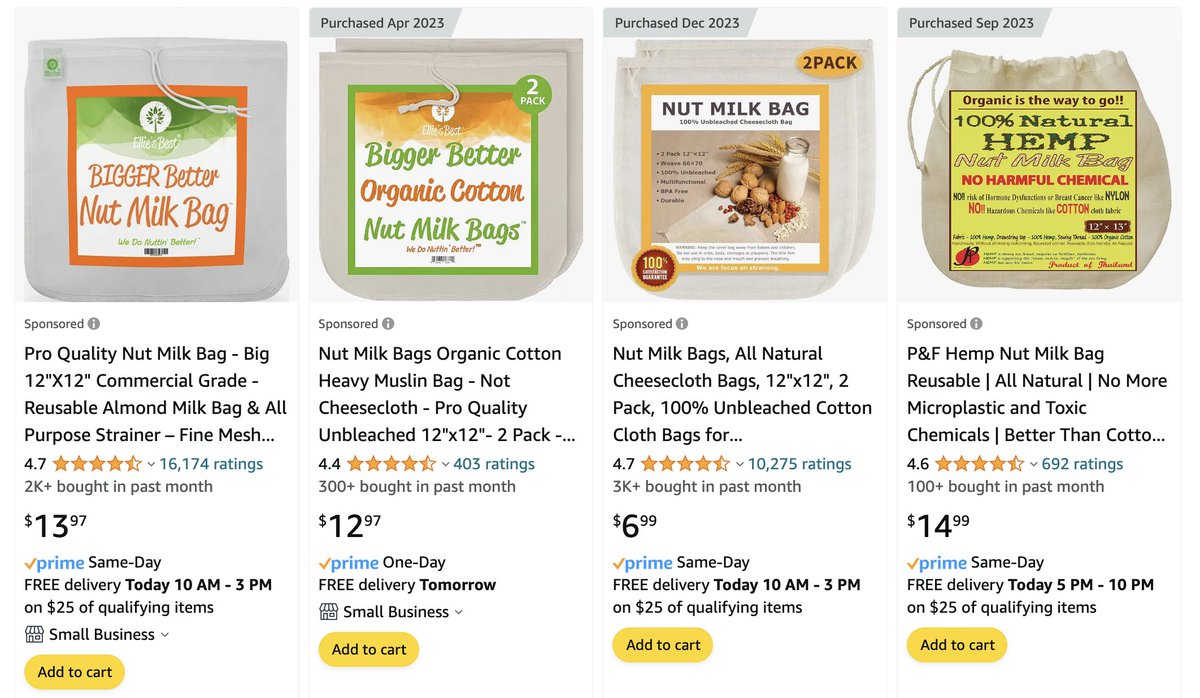
I've strained using a number of different ways, from a coffee filter to a cheesecloth. By far the best (and easiest) method has been using an organic hemp nut milk bag. They are cheap, and you can reuse them quite a lot. I will link to the ones I use below.
If you are making a smaller batch, using a hemp coffee filter in a glass pour over coffee maker is a great option.
Finally, the moment you've all been waiting for.
I've strained using a number of different ways, from a coffee filter to a cheesecloth. By far the best (and easiest) method has been using an organic hemp nut milk bag. They are cheap, and you can reuse them quite a lot. I will link to the ones I use below.
If you are making a smaller batch, using a hemp coffee filter in a glass pour over coffee maker is a great option.
Storing
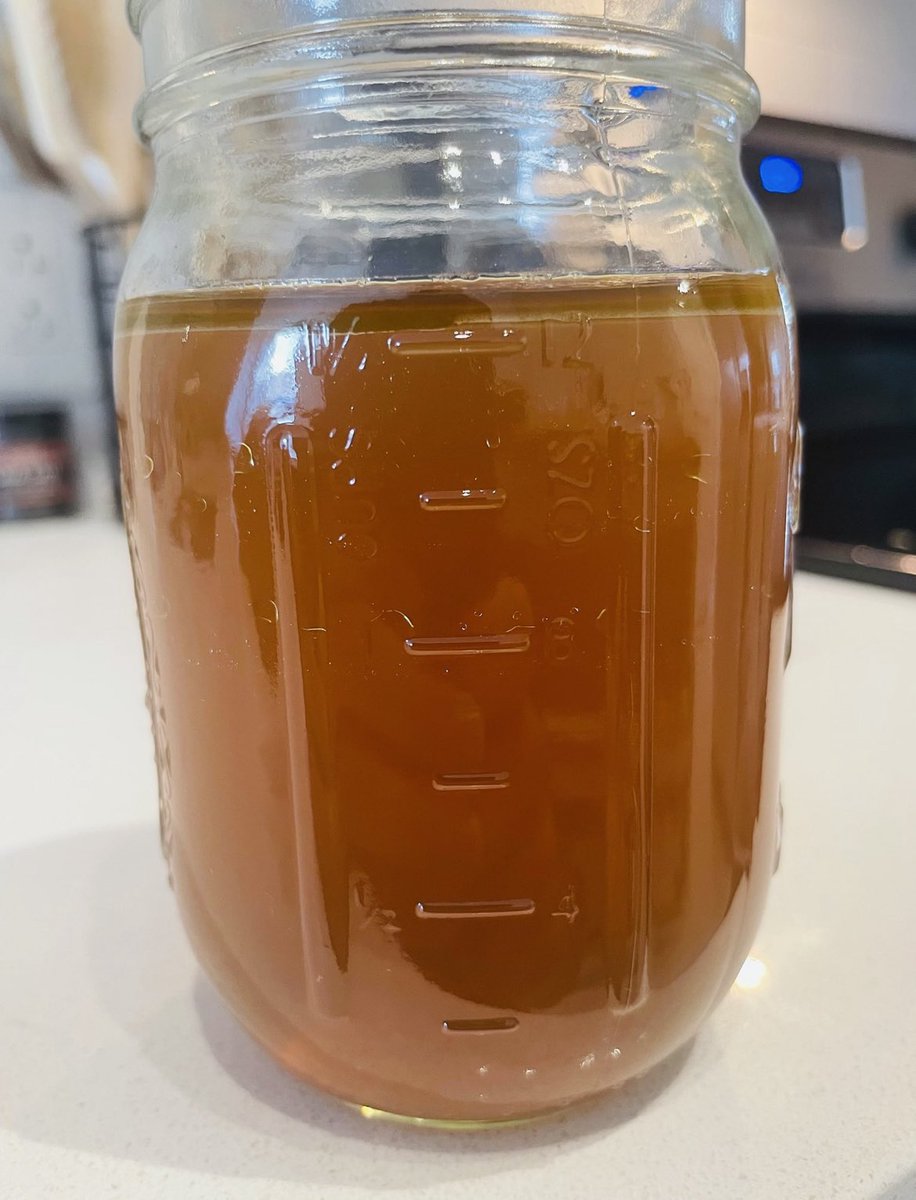
Mason jars are the absolute best way to store the broth. Personally, I portion them off into 8oz (1 cup) jars, so it's easy to use for recipes. I also sip on one cup every morning on an empty stomach with a pinch of sea salt. You can also just buy the really big mason jars and store it that way. Mason jars are super cheap and versatile.
The broth will be good for at least 5 days in the fridge, and can last up to a year in the freezer. Just make sure to let it cool a bit before refrigerating (I don't think the ice bath is necessary like some people do).
This can get quite messy, so I use a large stainless steel funnel to make sure I don't spill the broth everywhere when putting it into mason jars.
Once it's been refrigerated overnight, you should be left with a nice, jiggly, gelatinous broth the next morning.
Reheating
When I heat up my morning cup of bone broth, I skim off the tallow on top and save it to cook with (use it for my leftover baked potato recipe in the sides section).
I heat it up on a small pot over the stove, never the microwave (the thought of zapping my precious broth in the microwave doesn't sit right with me).
Add a pinch of high quality sea salt and enjoy!
Final Notes
NEVER add salt until you are about to consume it, or it is completely done cooking.
This process is a lot of work, but the final product is absolutely worth it. Enjoy it, and make it your own! Every batch I make is a little bit different; I'm always adding new things, trying different herbs, bones etc and I recommend you do the same.
As always, leave any questions you may have in the comments, and if you have any experiences from making bone broth you would like to share, please do so!
All of these options on Amazon are great for straining!
If you want to see EXACTLY how I make it, check out my Youtube video with step by step instructions (and bloopers)!
• • •
Missing some Tweet in this thread? You can try to
force a refresh