RetroTech Chris Profile picture
Aug 3 19 tweets 15 min read Read on X
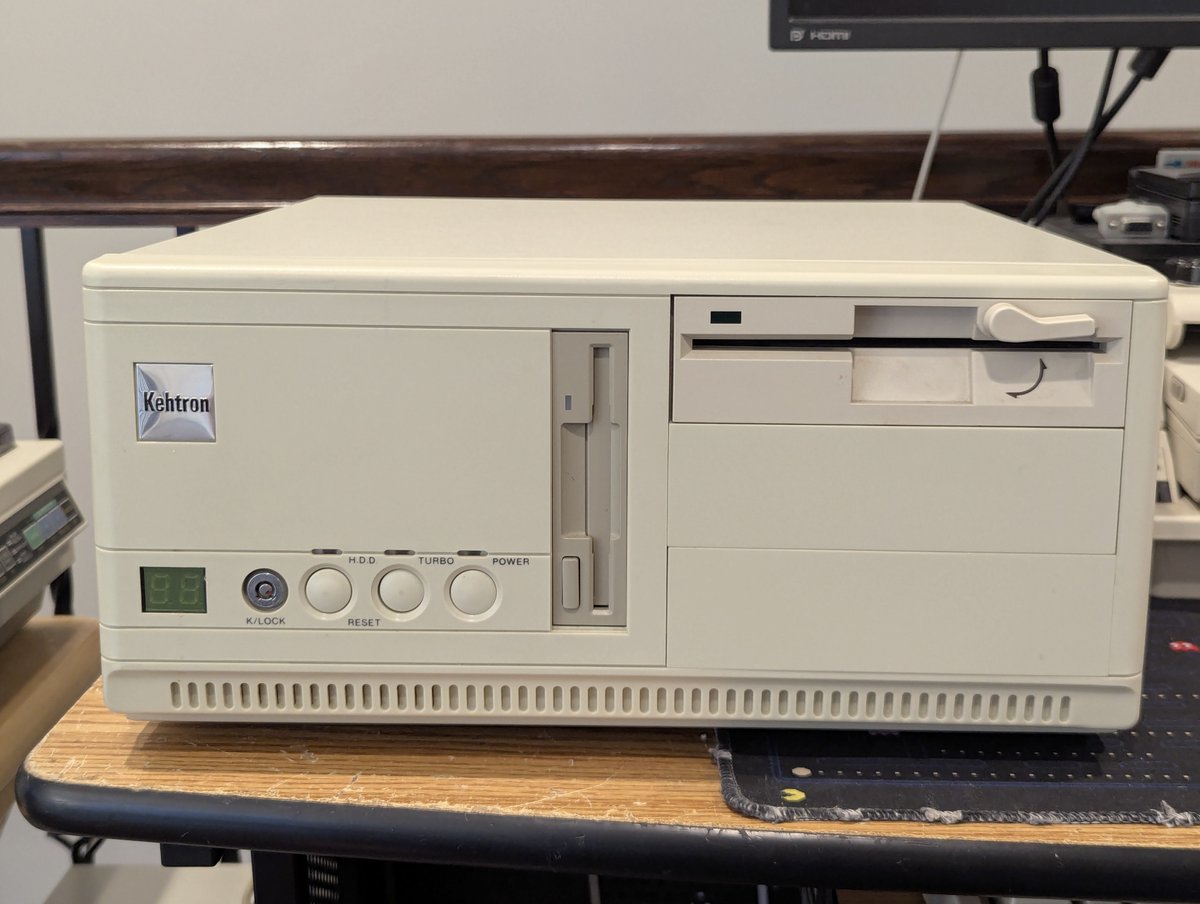
I already have too many PCs, but I had to have this cute little guy... and there is also a good nostalgic reason for having it! This 386 (now 486) PC needed a lot of work to get it running, let's talk about it in a 🧵 here! Image
Image
First, in case you missed it, here's the nostalgic reason. Kehtron is a part of my childhood. And this PC was available locally. The weather was also PERFECT yesterday for making an hour drive to get it and rocking out to some 80s tunes on the way 😂 Image
Image
Image
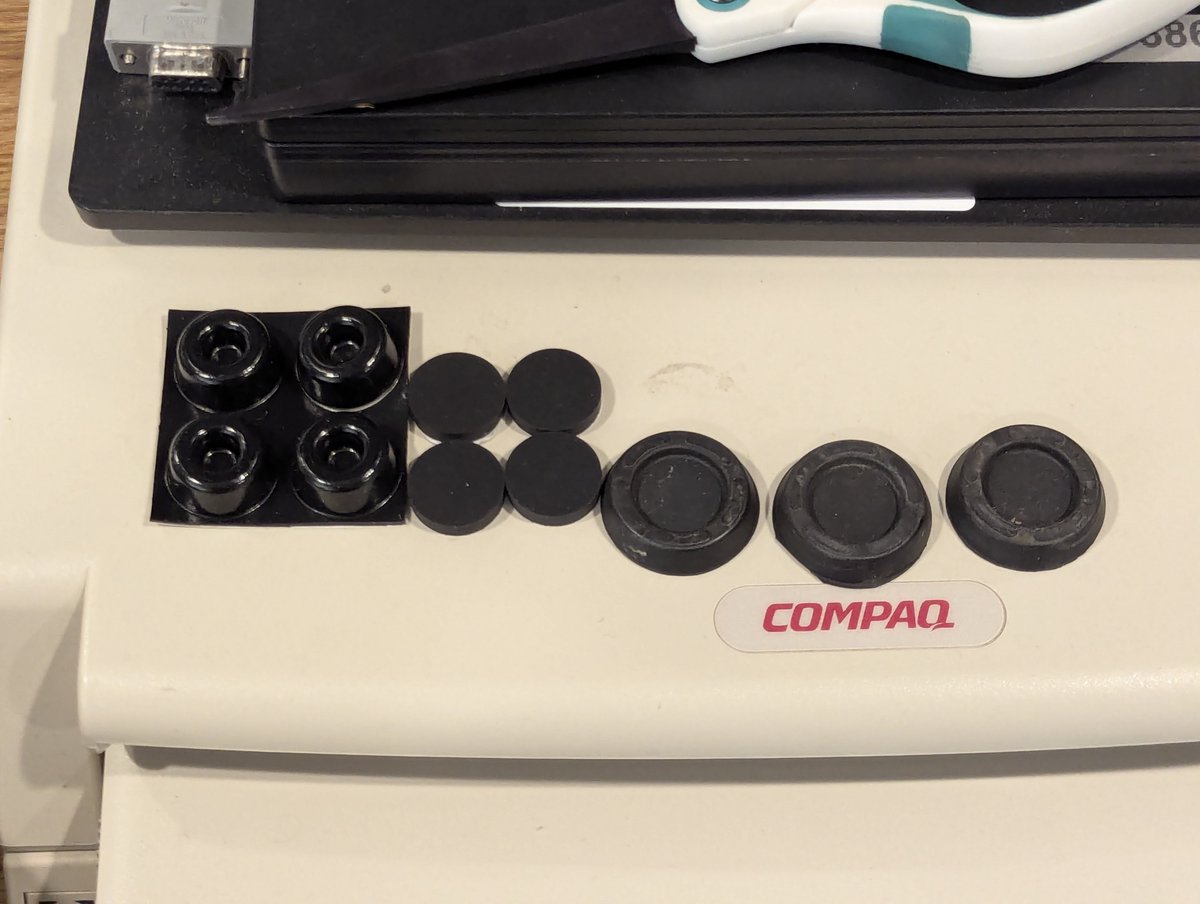
Okay, first order of business, I put this on the table and it was rocking back and forth. I soon discovered why! I didn't have a matching foot so I used a little bit of Goof Off to remove the adhesive. And PSA, like with most chemicals, always work in a ventilated area. Image
Image
Image
Image
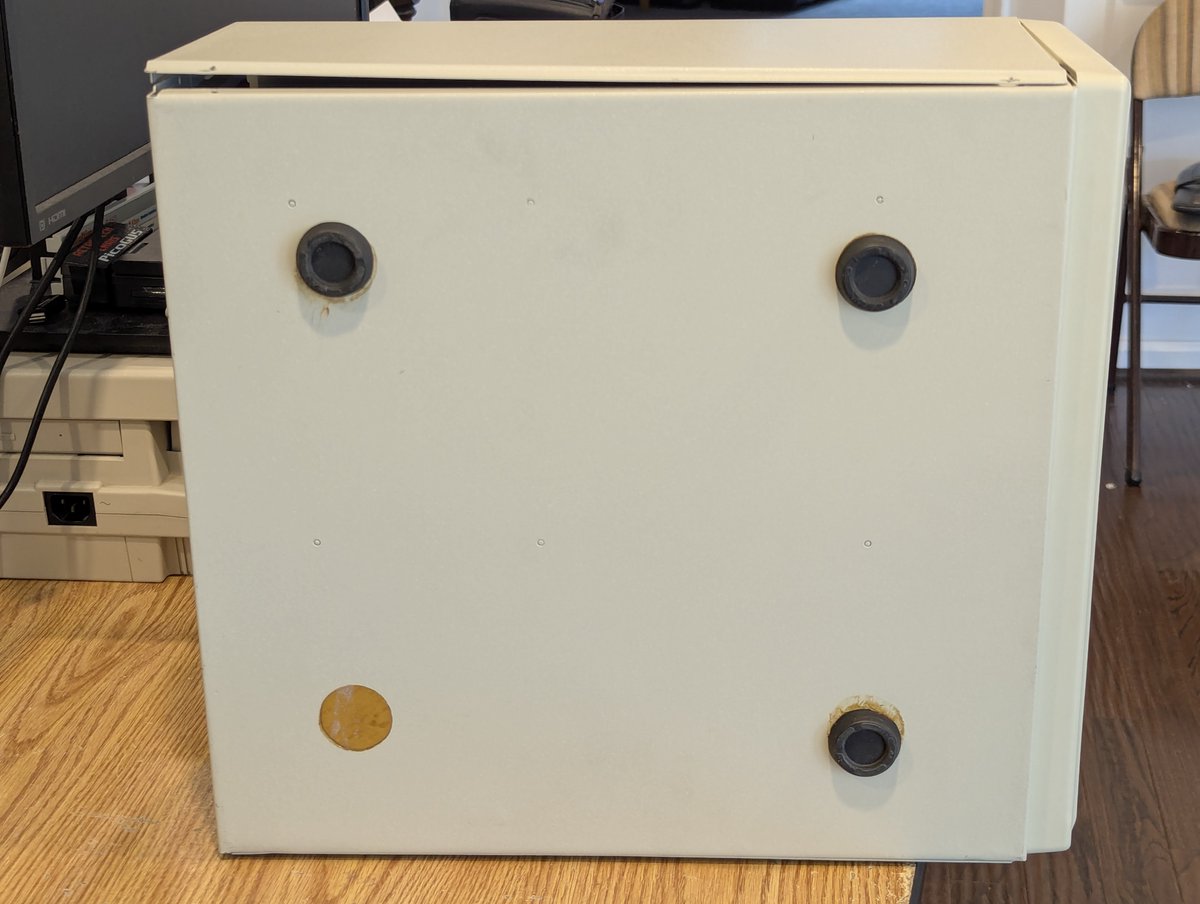
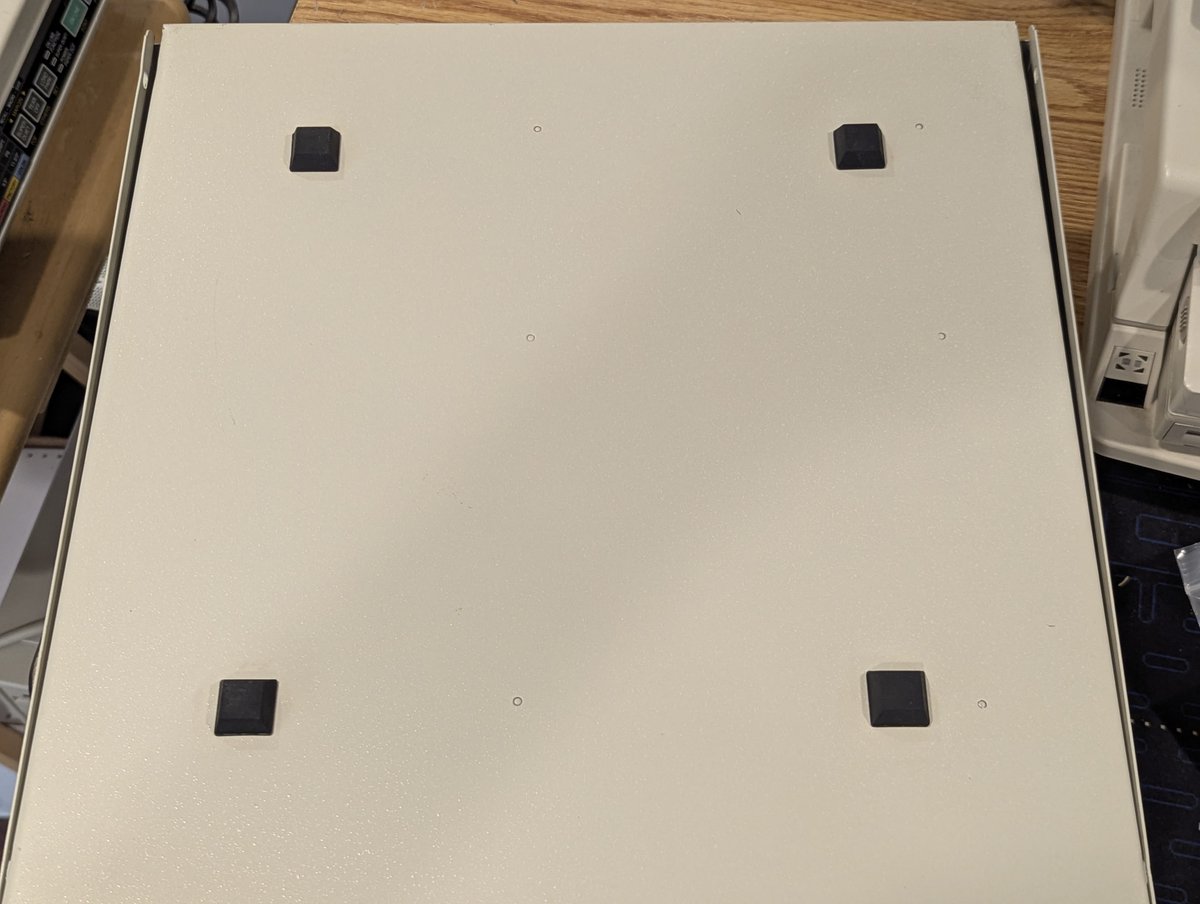
I had some choices for feet, and just went with the square ones I had because I was lazy. Ah, much better now! And as we can see, the removed feet were pretty big compared to the ones I installed! Image
Image
Image
Time for power on... and.... NOTHING. Granted, I already knew this... I had stopped at my friend @wrljet's house for a quick power on test on the way back home from picking this up and this is what we got. Time to investigate. Image
Image
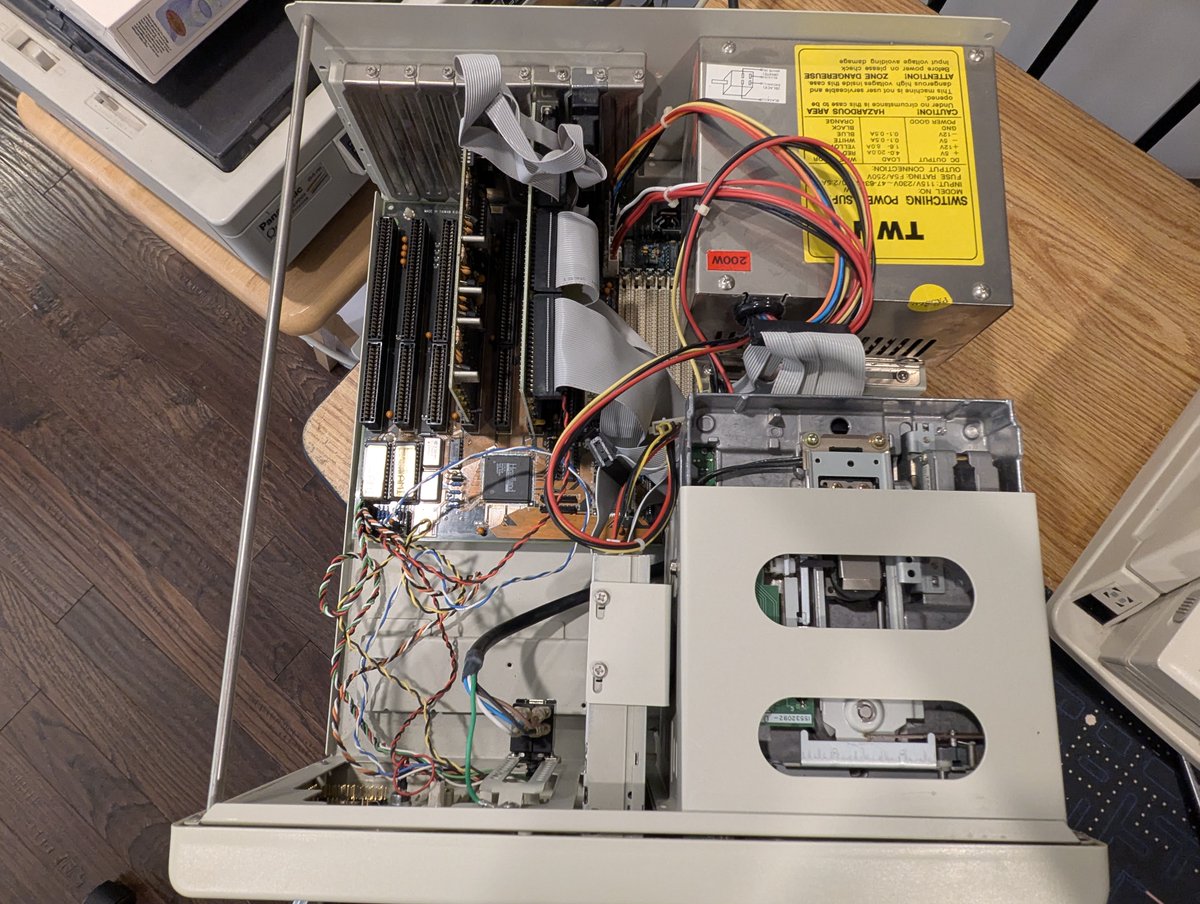
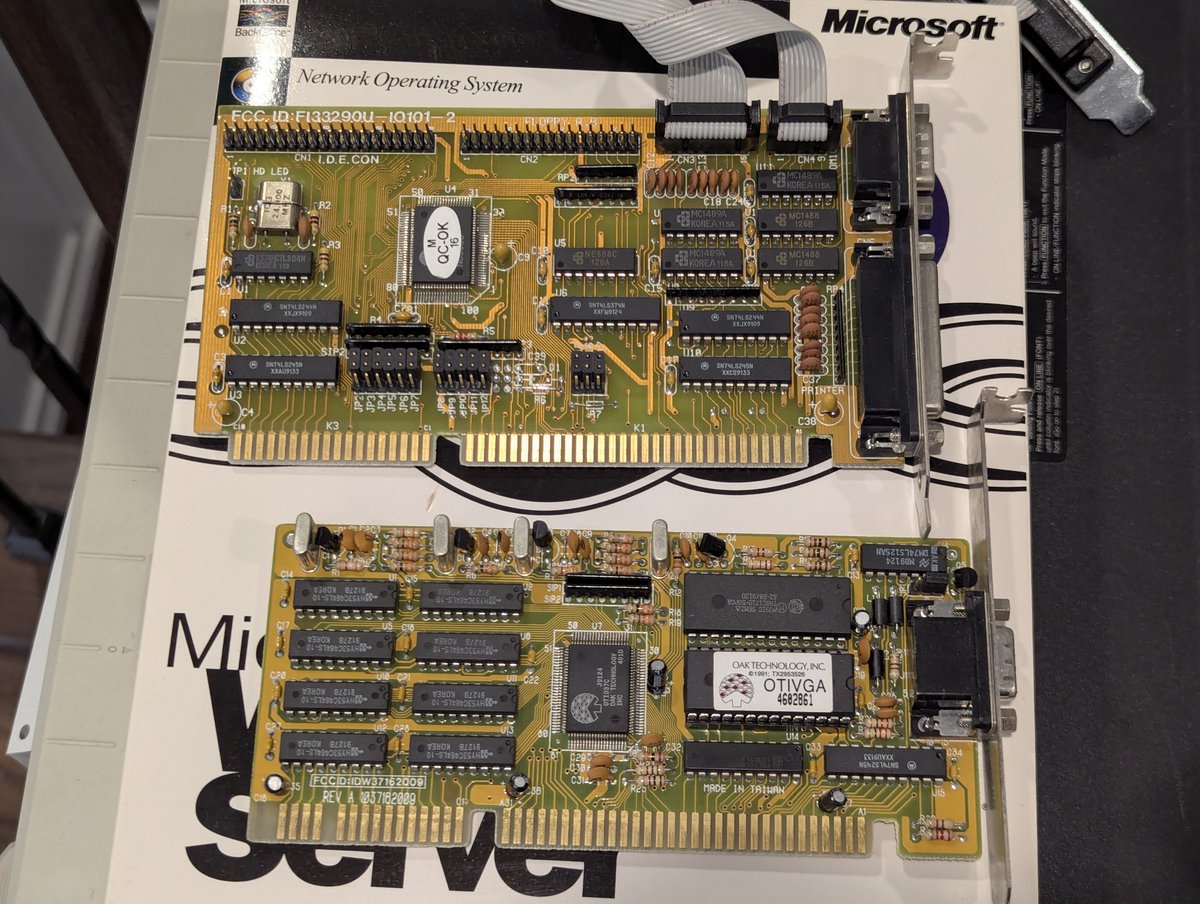
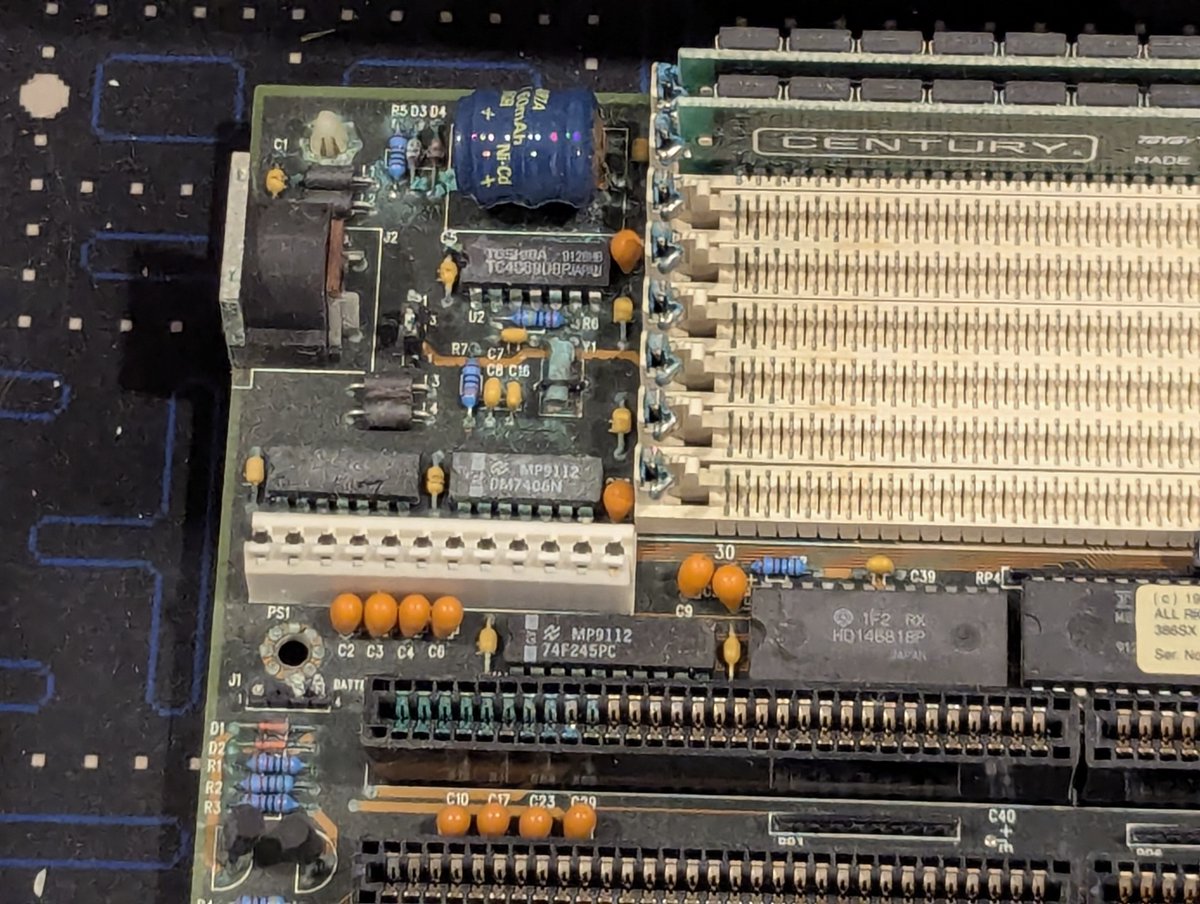
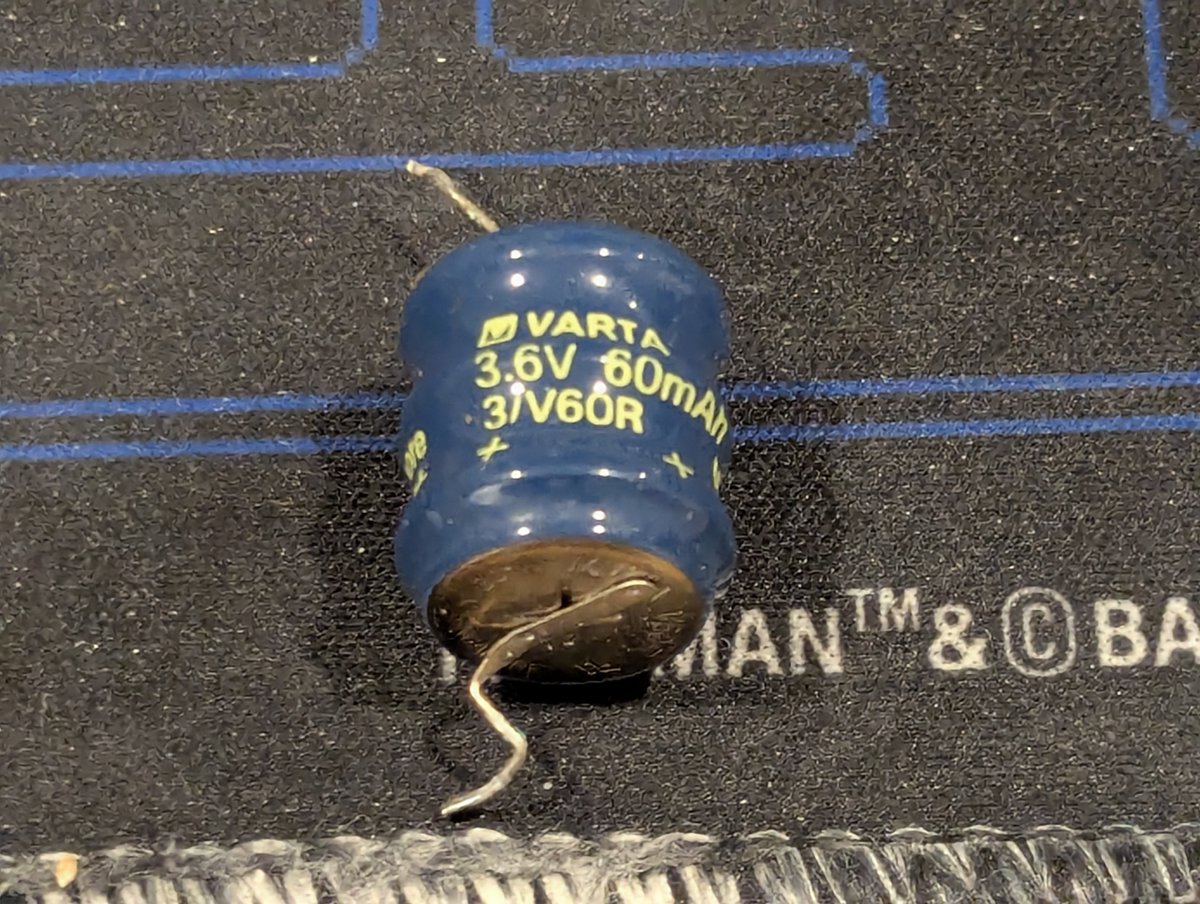
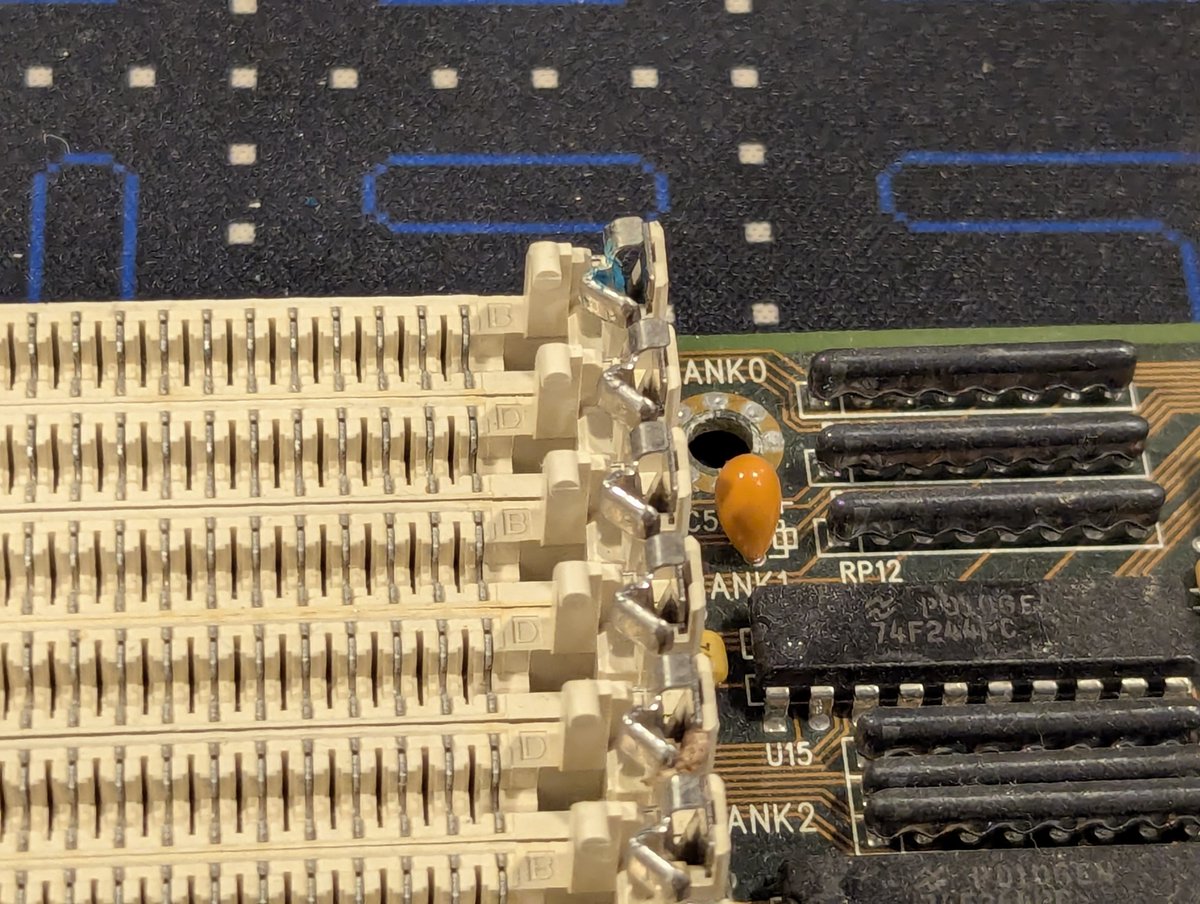
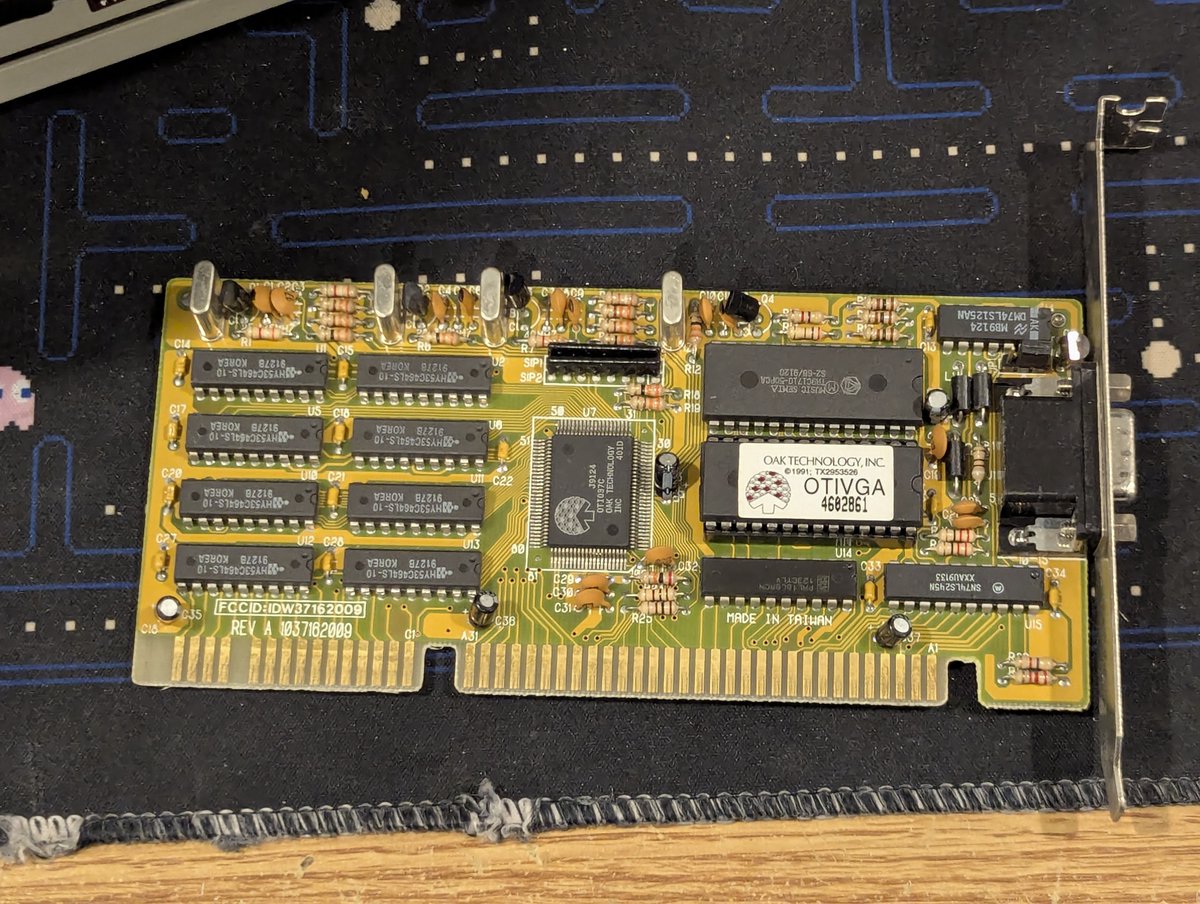
I took the cards out (a generic multi I/O card and Oak video card), and the motherboard out and... uh oh... VARTA'd. Hmm...not good. Image
Image
Image
Image
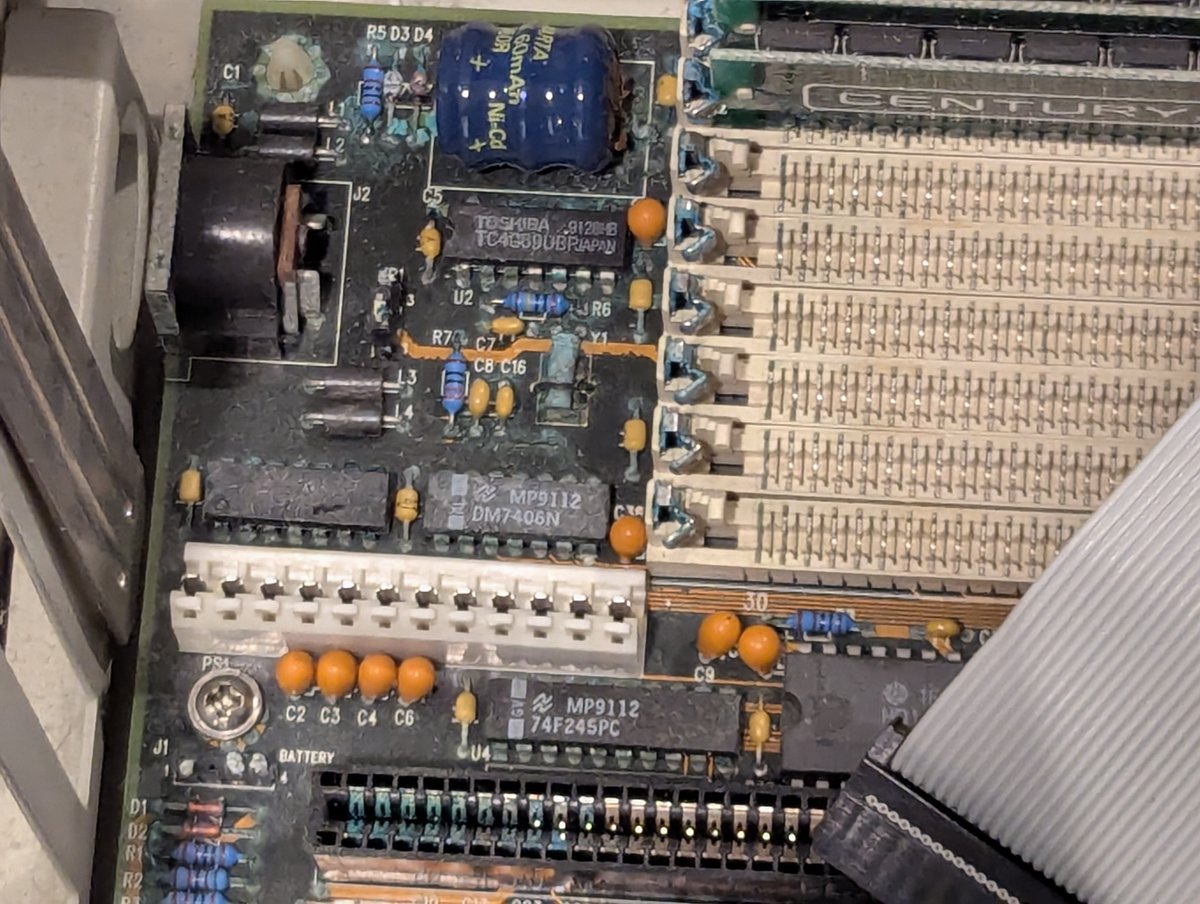
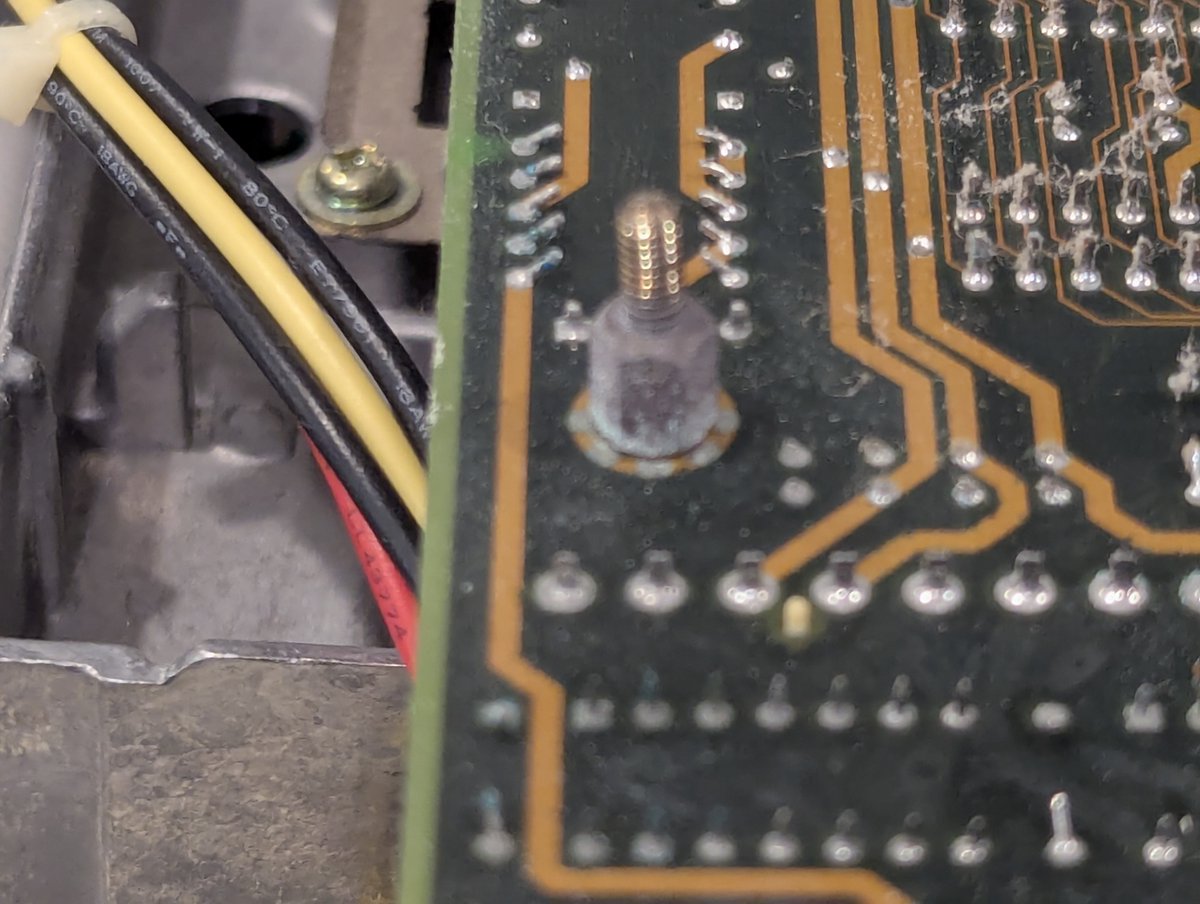
Here's a closeup of the worst area. I went ahead and took the battery out. Just look at all of the green. And... how the heck did it travel all the way over to right clip on the top SIMM slot? One of life's little mysteries 😂 Image
Image
Image
Image
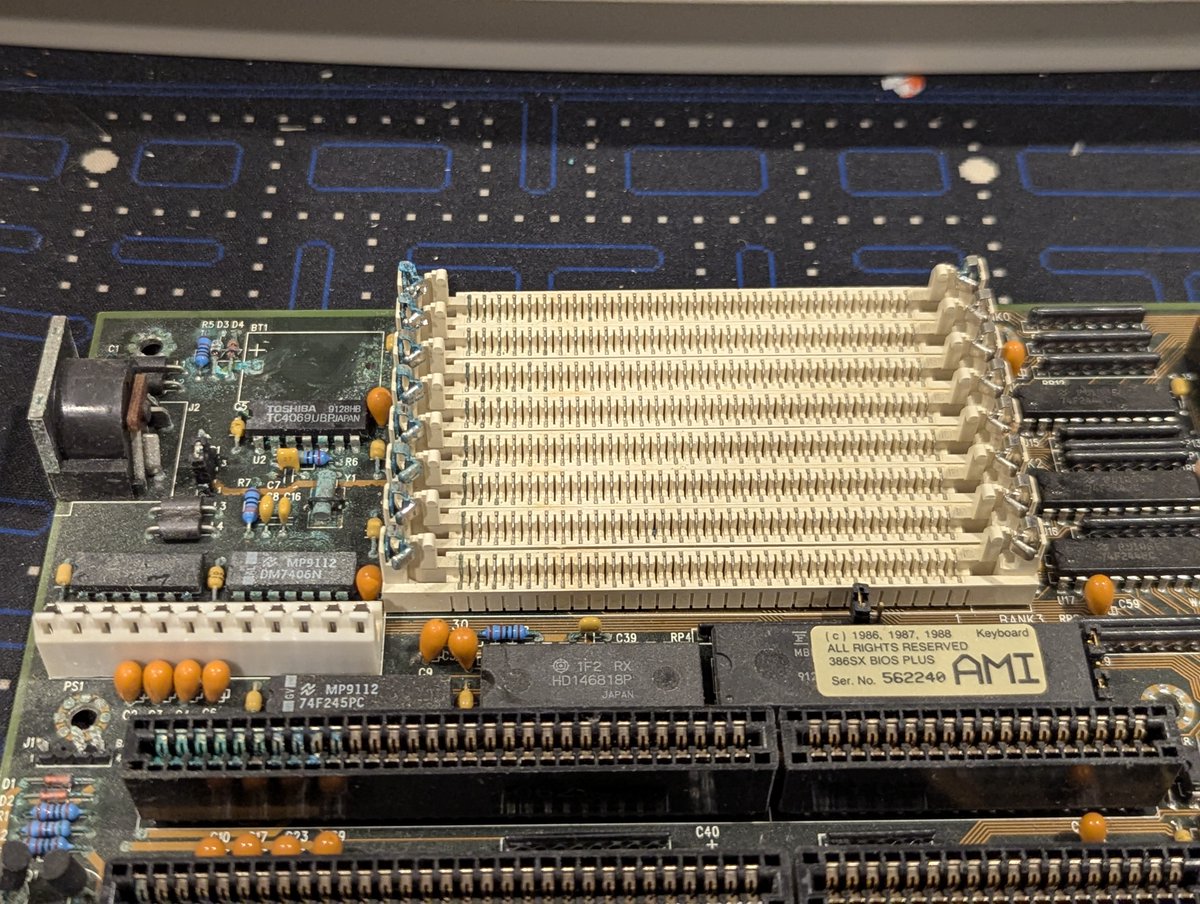
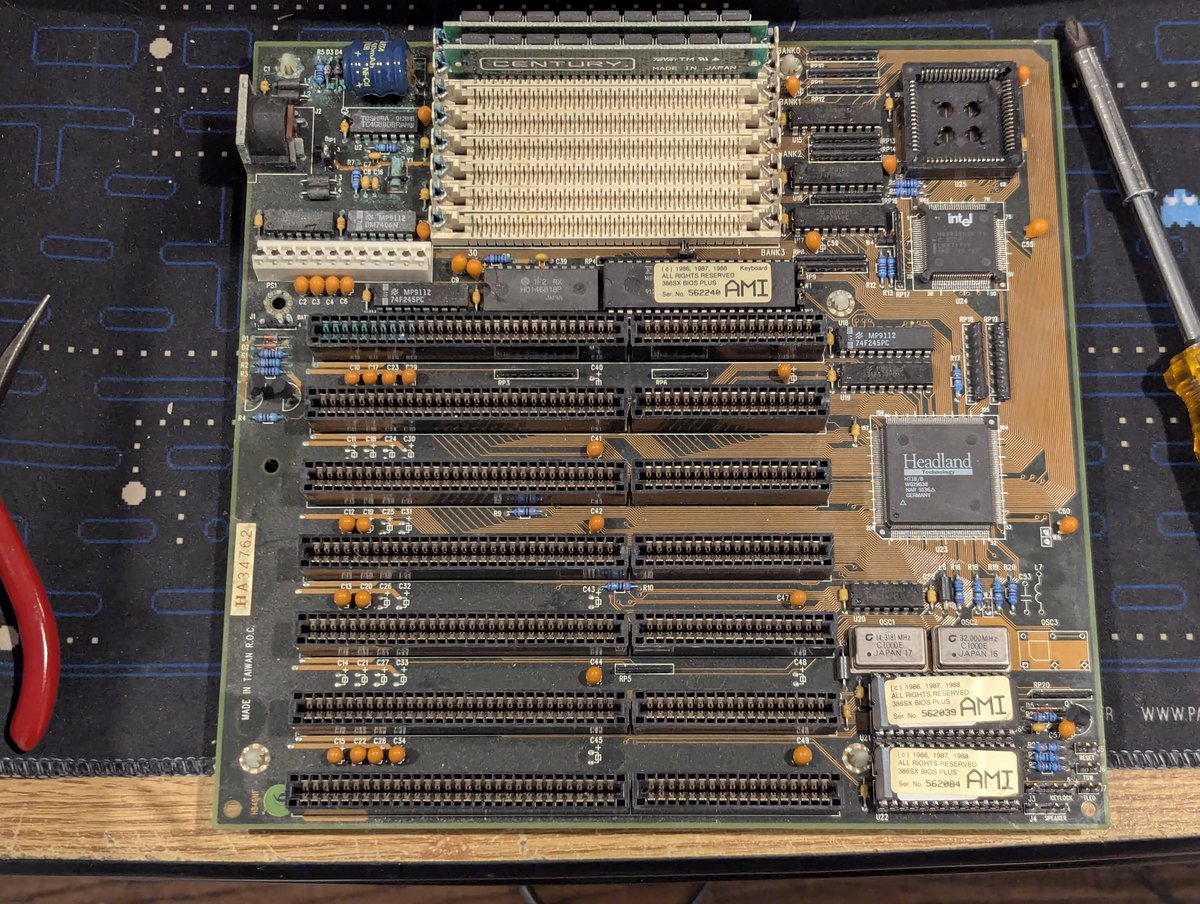
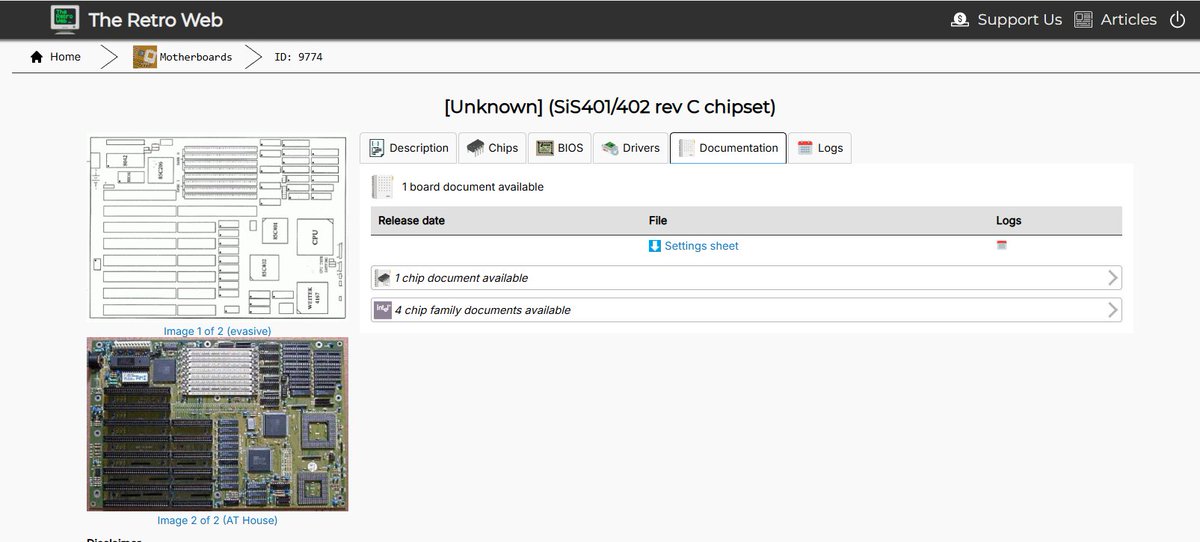
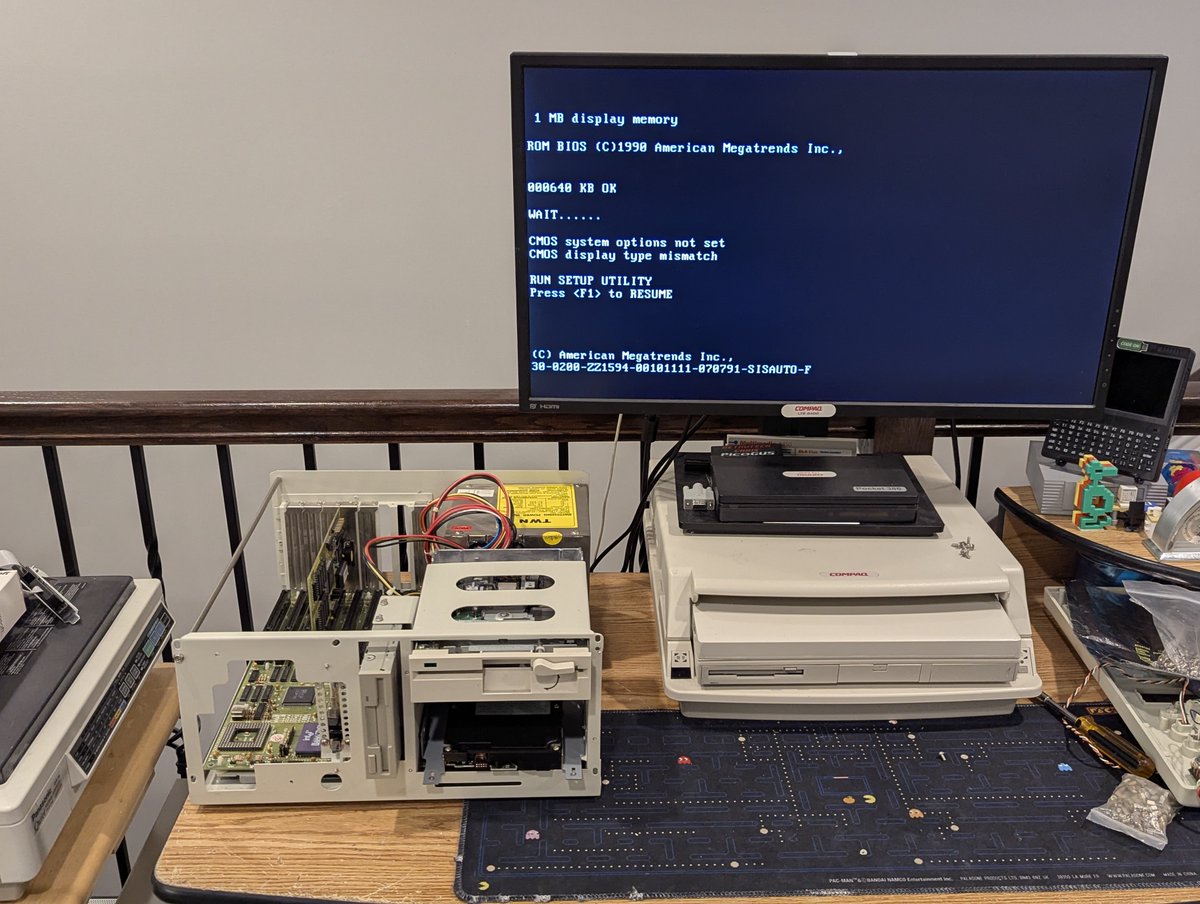
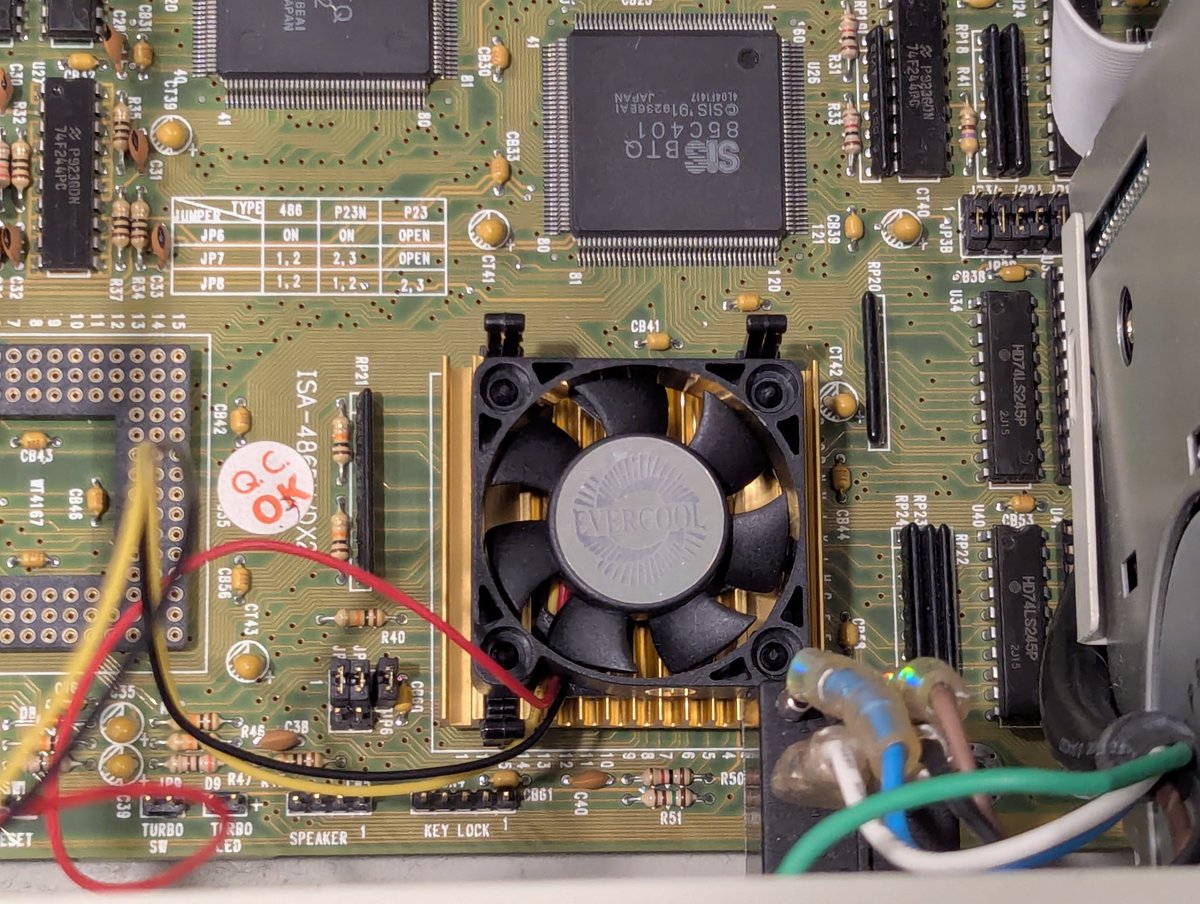
Well, fortunately, this is a case where @wrljet had me covered. He generously gifted me this 486 motherboard with a 486DX/50 processor. No.. not a DX2... a DX!! I'm excited to have this. Board is a Sis401/402 board, with the only identifiable marking being "rev C". Mystery! Image
Image
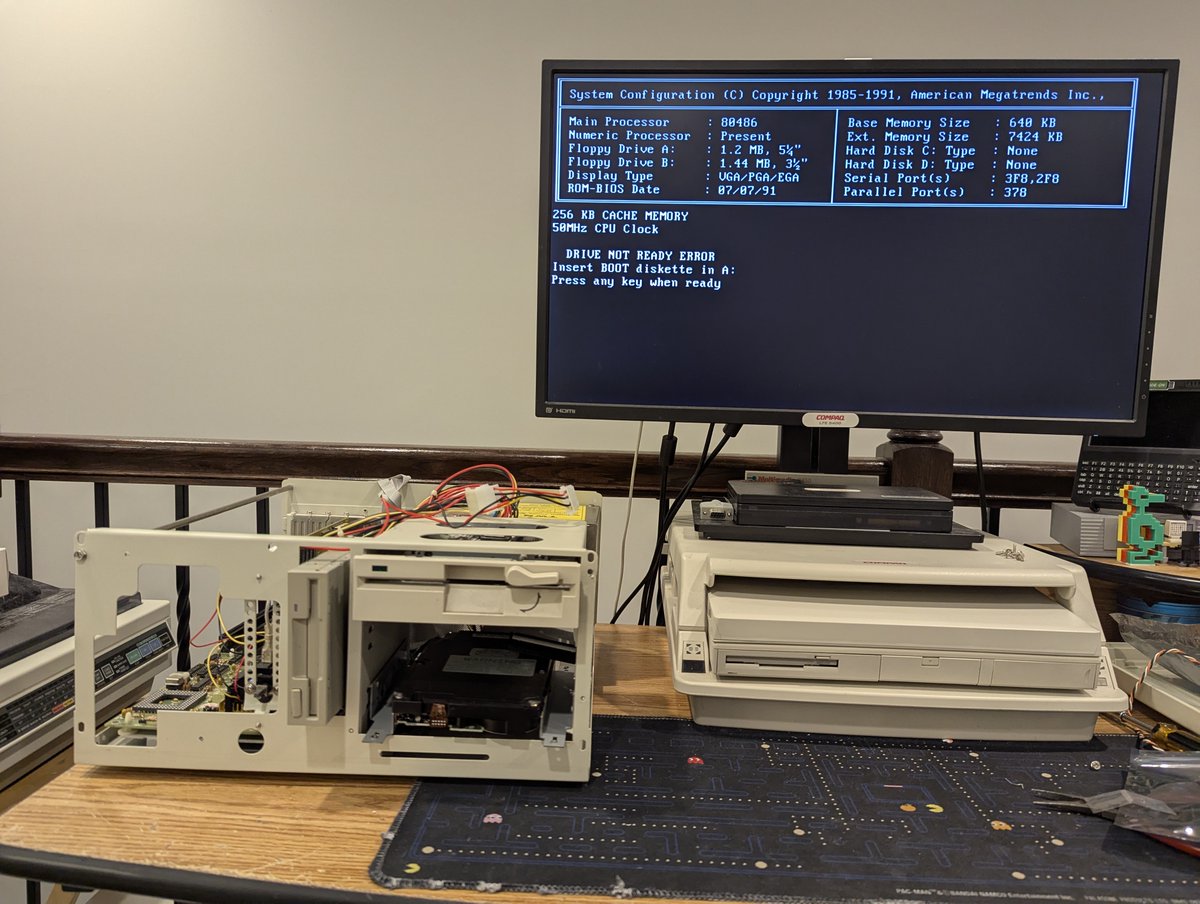
So, okay, board installed, power on, and I get "video error" beeps (2 long, 7 short). Guess that Oak video card is no good. I swapped in a Tseng Labs ET4000AX card and we have life! Image
Image
Image
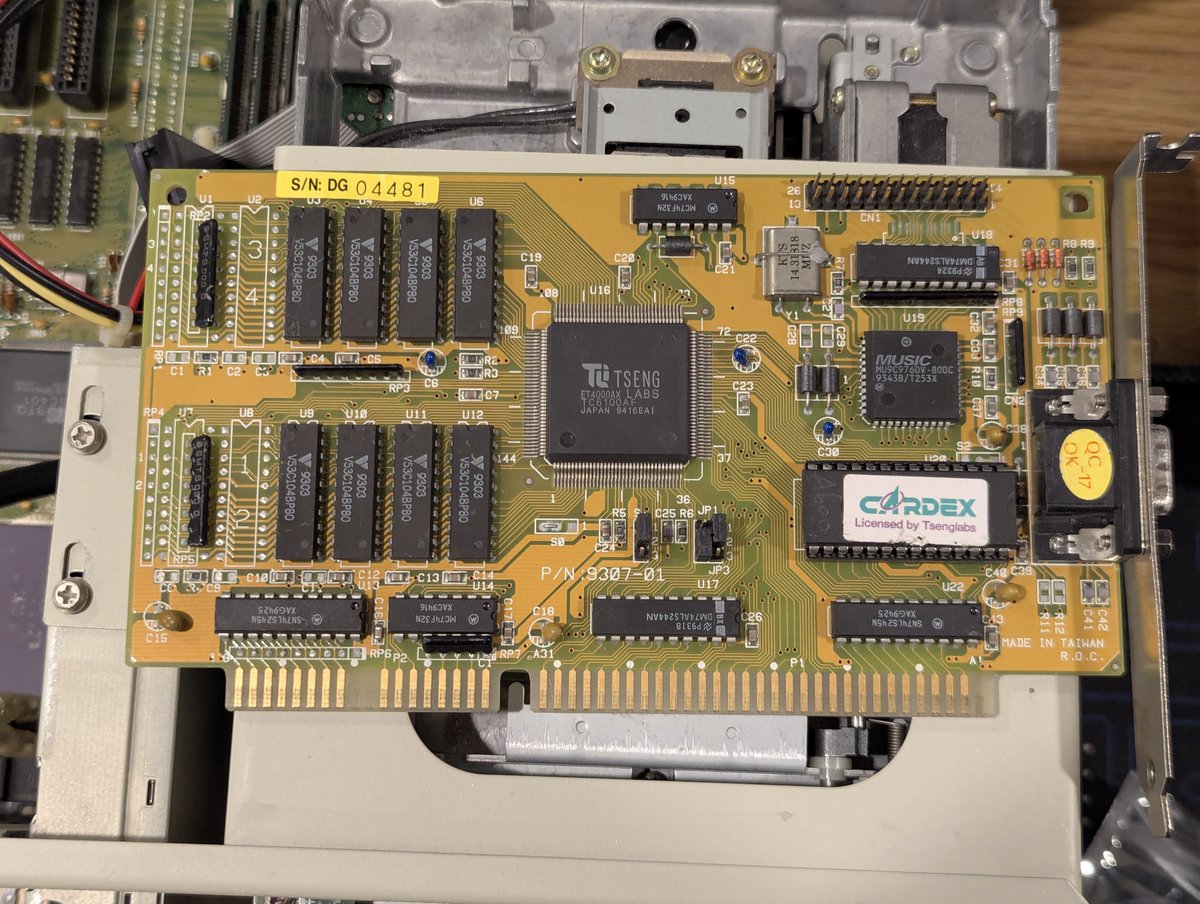
So, I got to thinking, could this be the reason the 386 motherboard that was installed didn't POST? It's a 386SX-16 board. I tried it with the Tseng Labs video card, and still nothing. Okay, we are going to set that aside for another time. Image
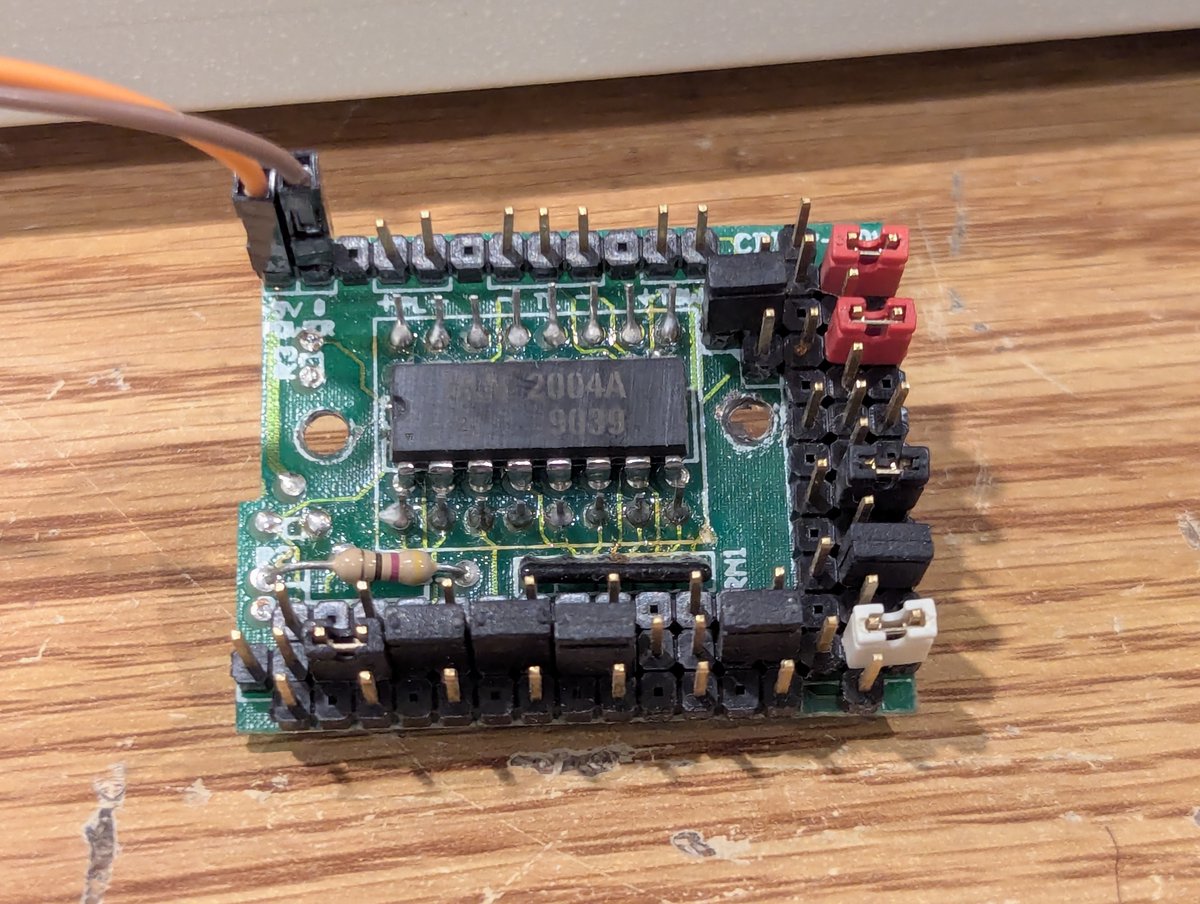
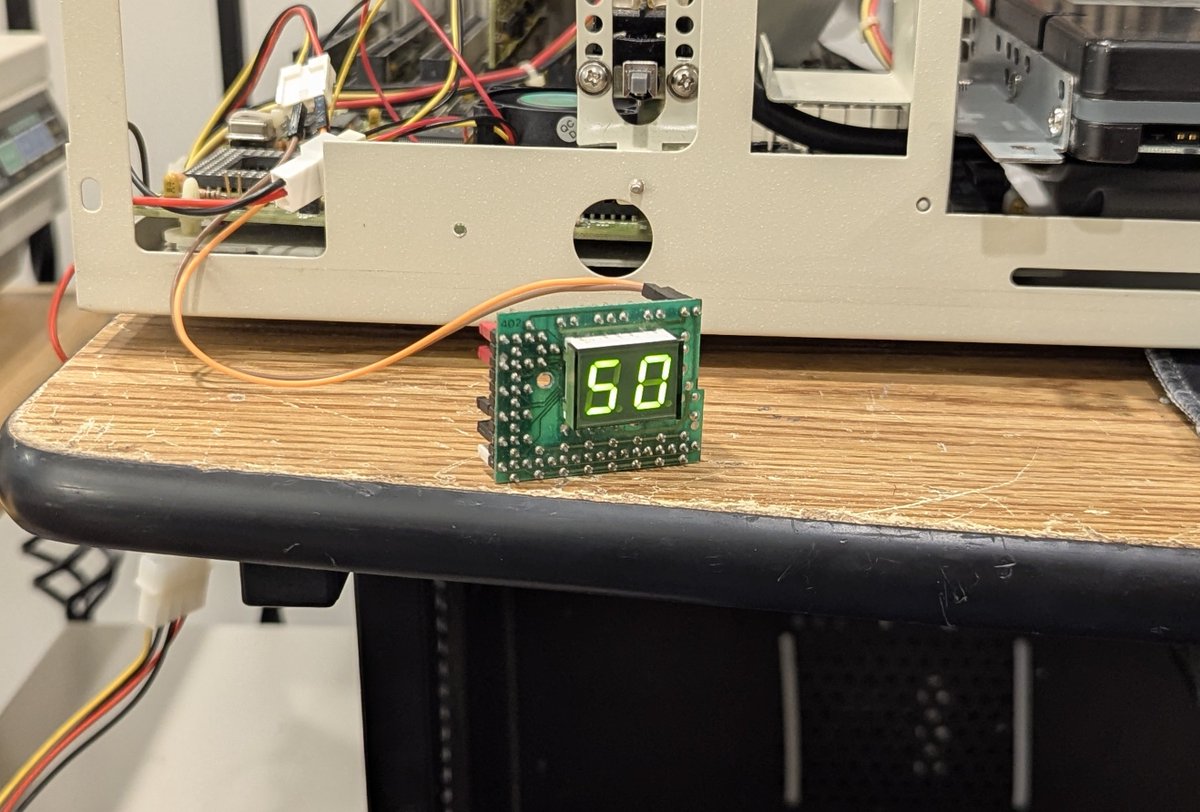
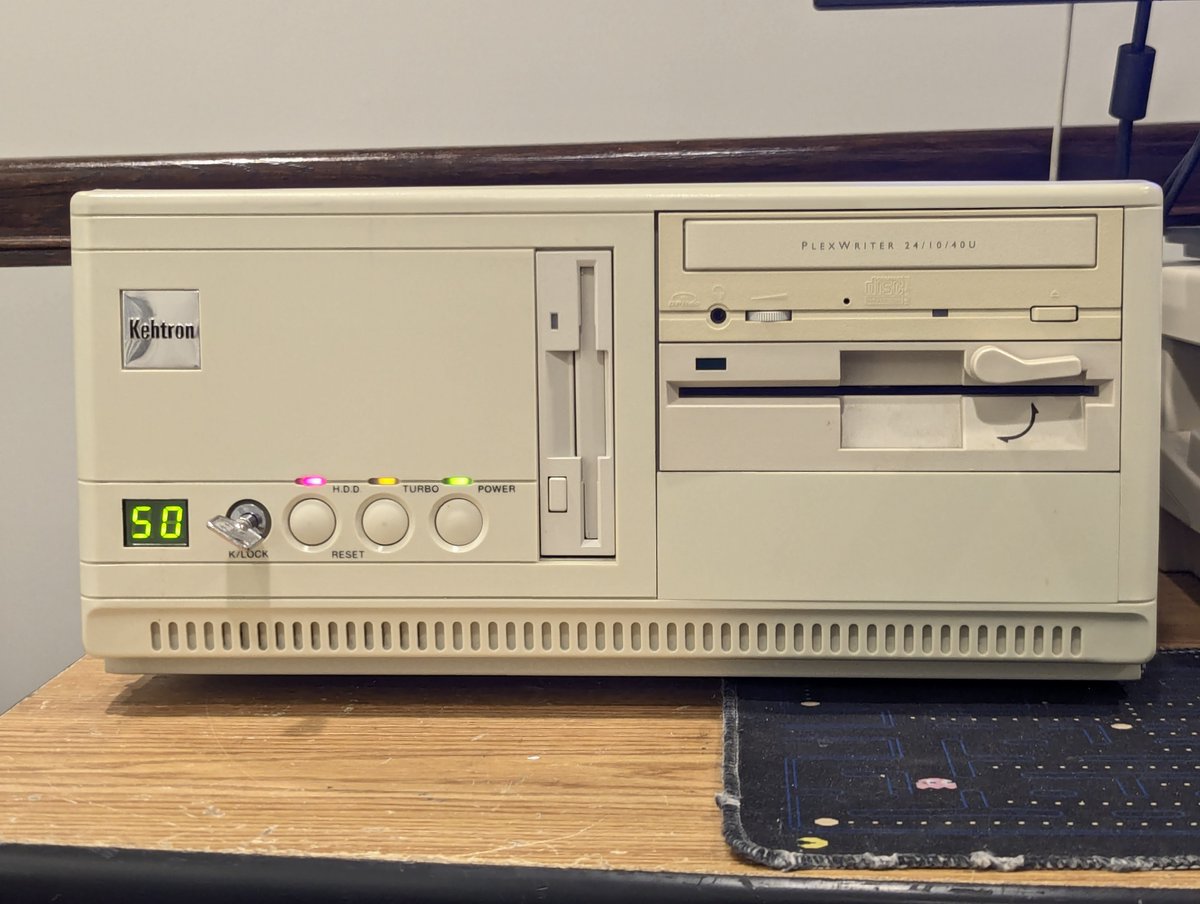
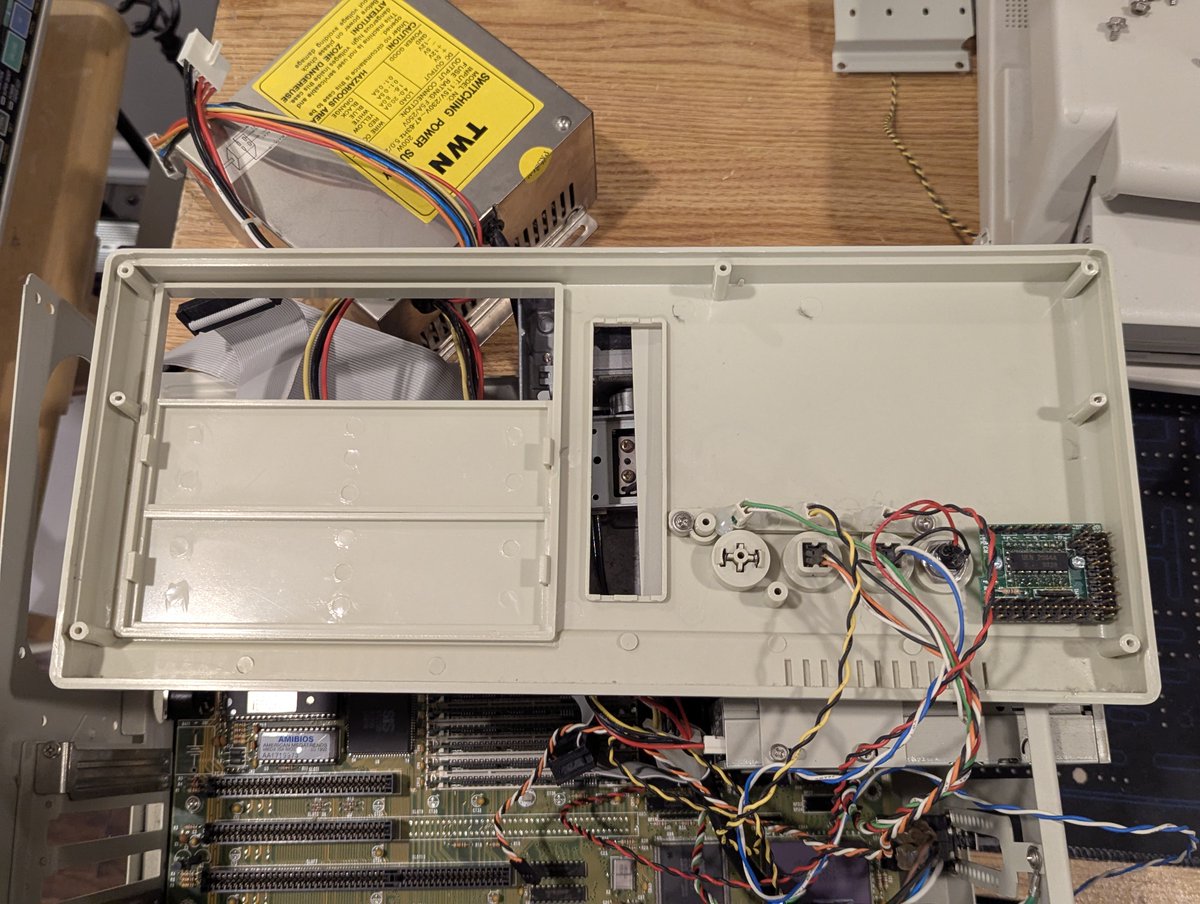
The next order of business was to get the front panel 7 segment display going. I had to pop off the front cover. I couldn't find a guide for this display, but through trial and error, got it to display "50". I won't connect the turbo switch to the display, so this works. Image
Image
Image
Image
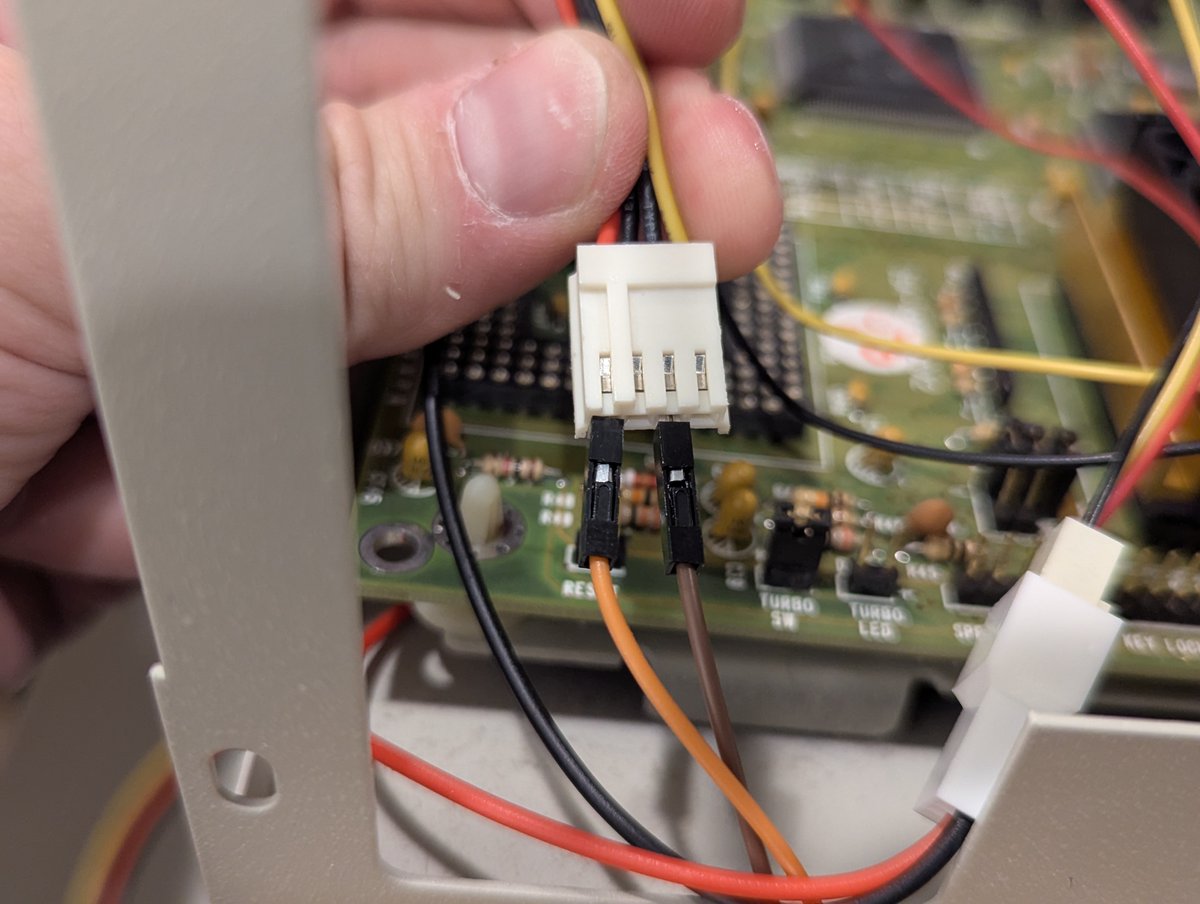
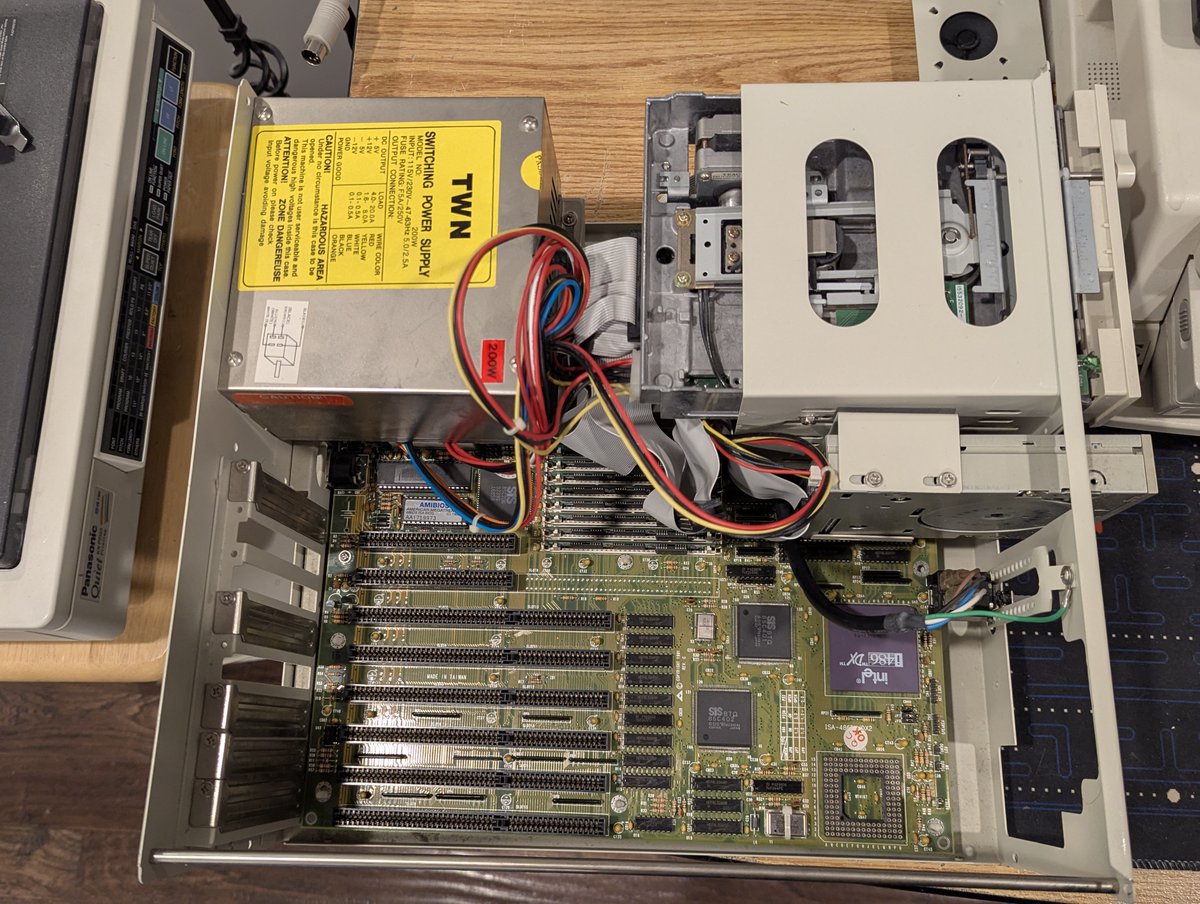
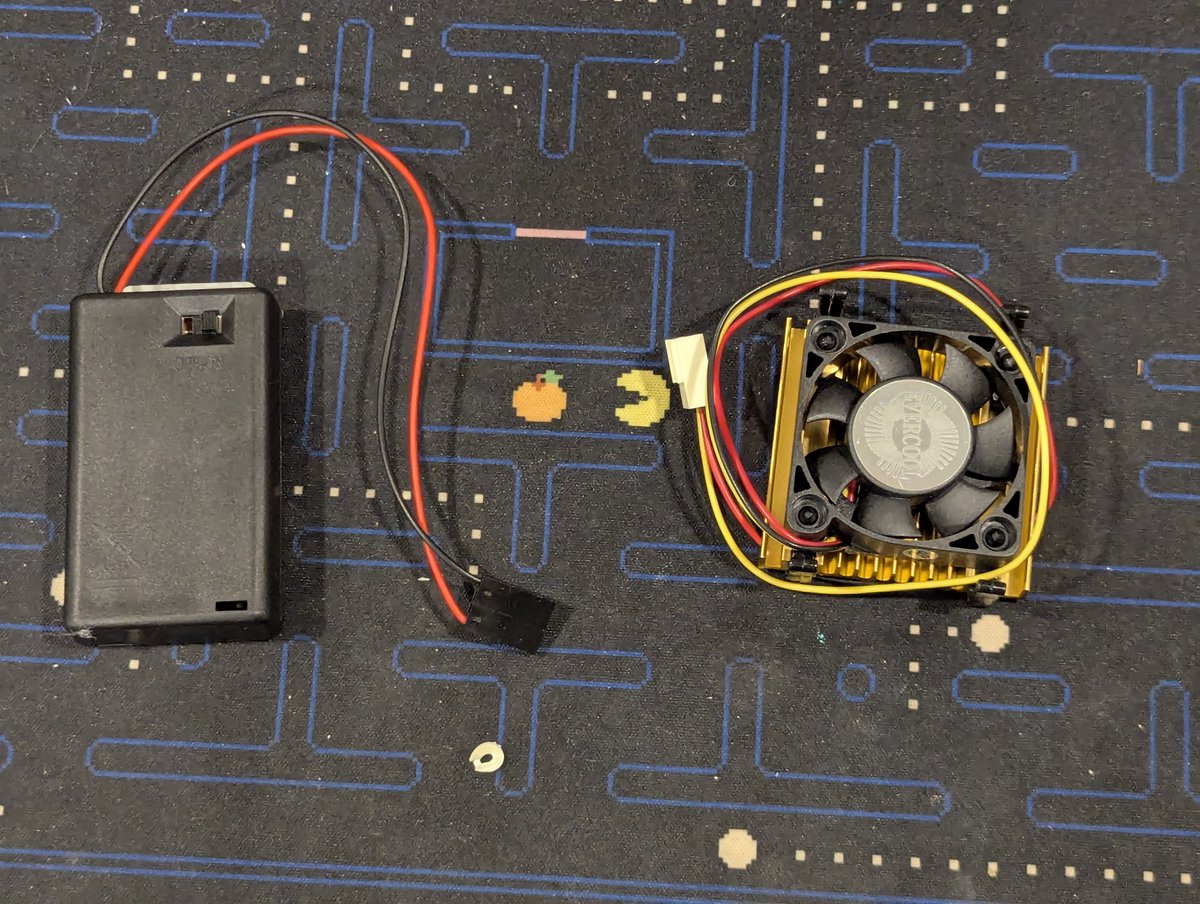
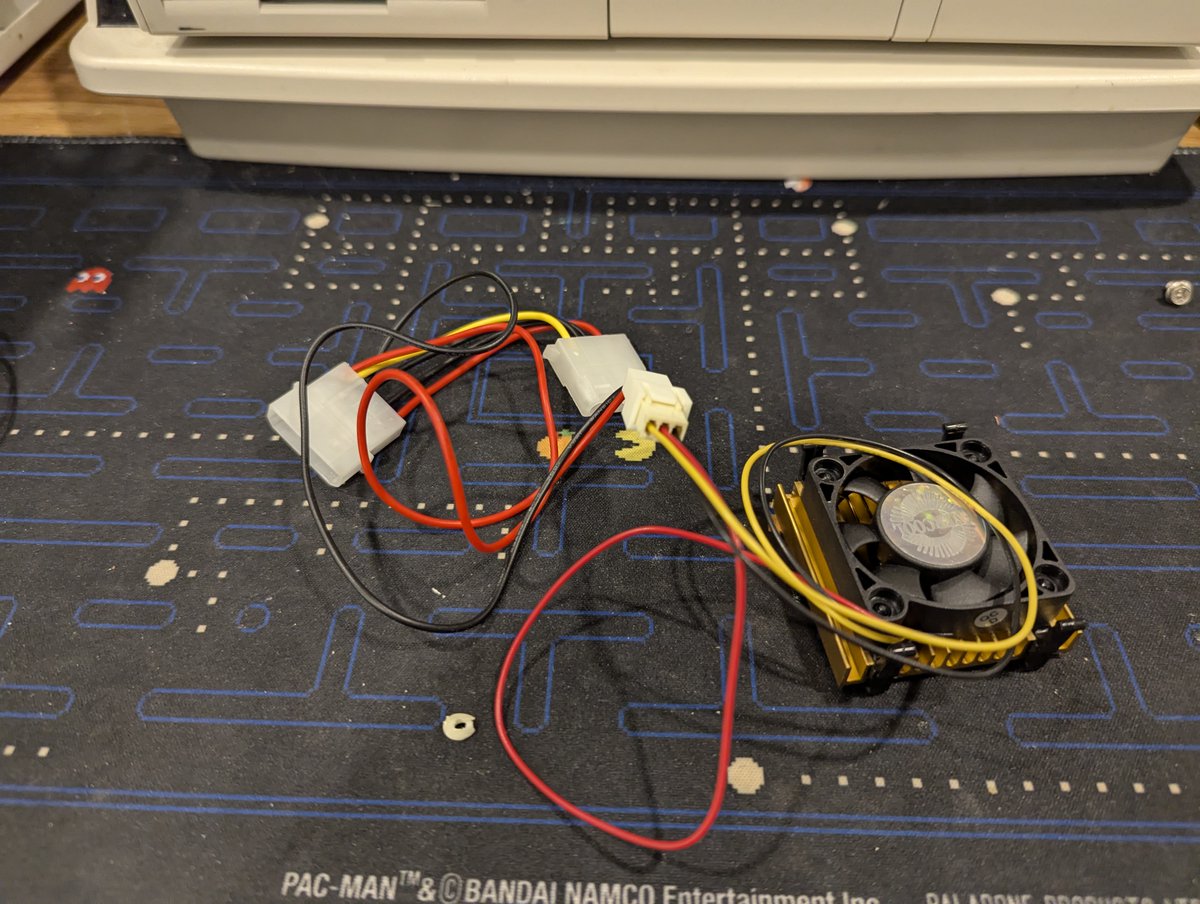
Next up, let's equip this board with an external battery and CPU fan. There we go, nice and installed! Image
Image
Image
Image
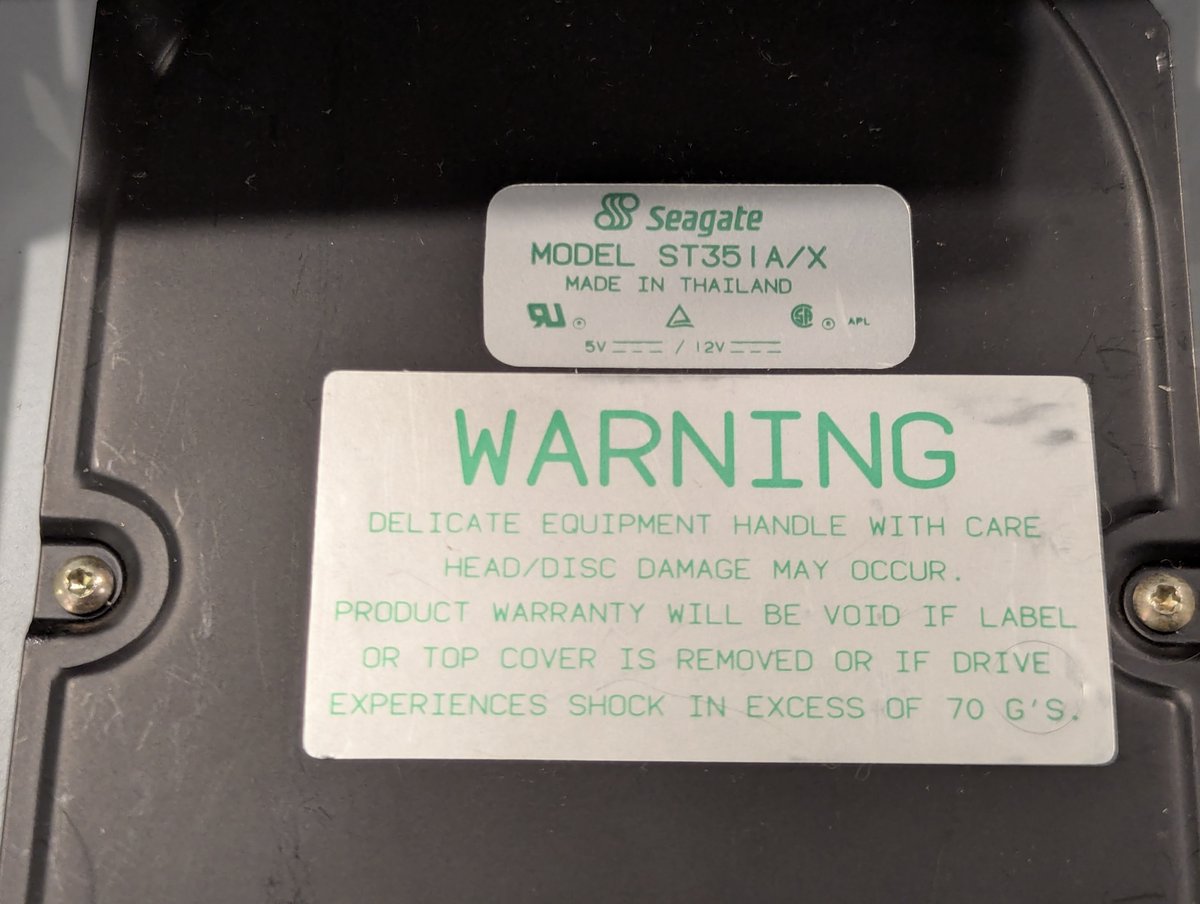
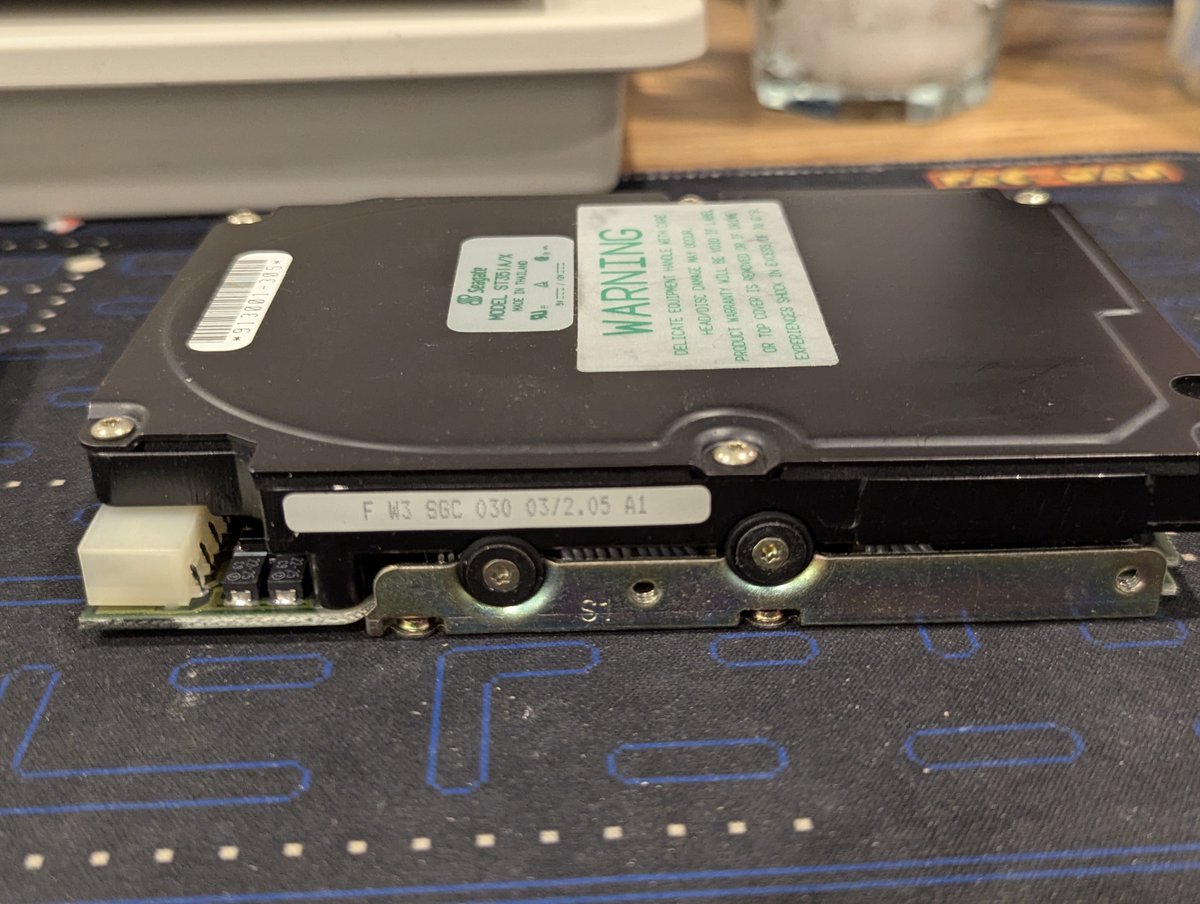
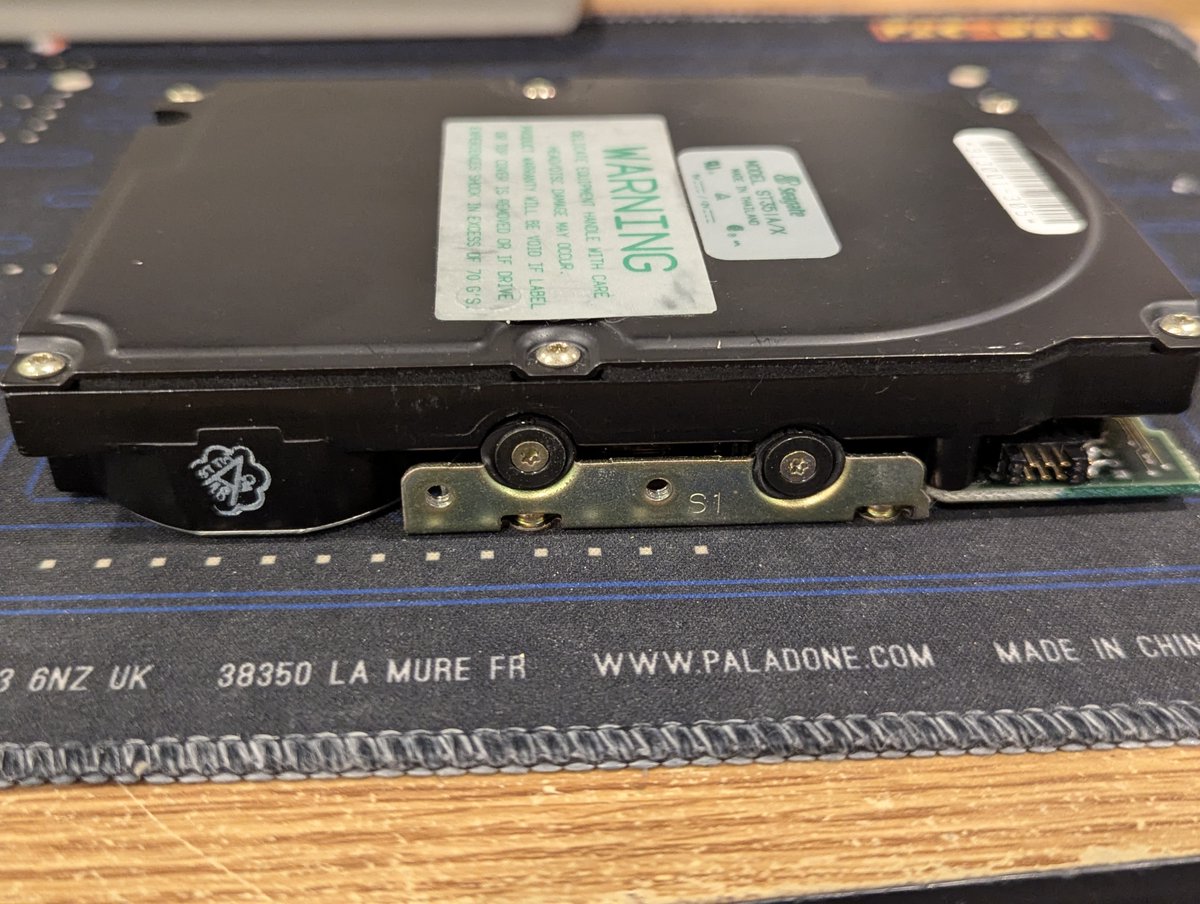
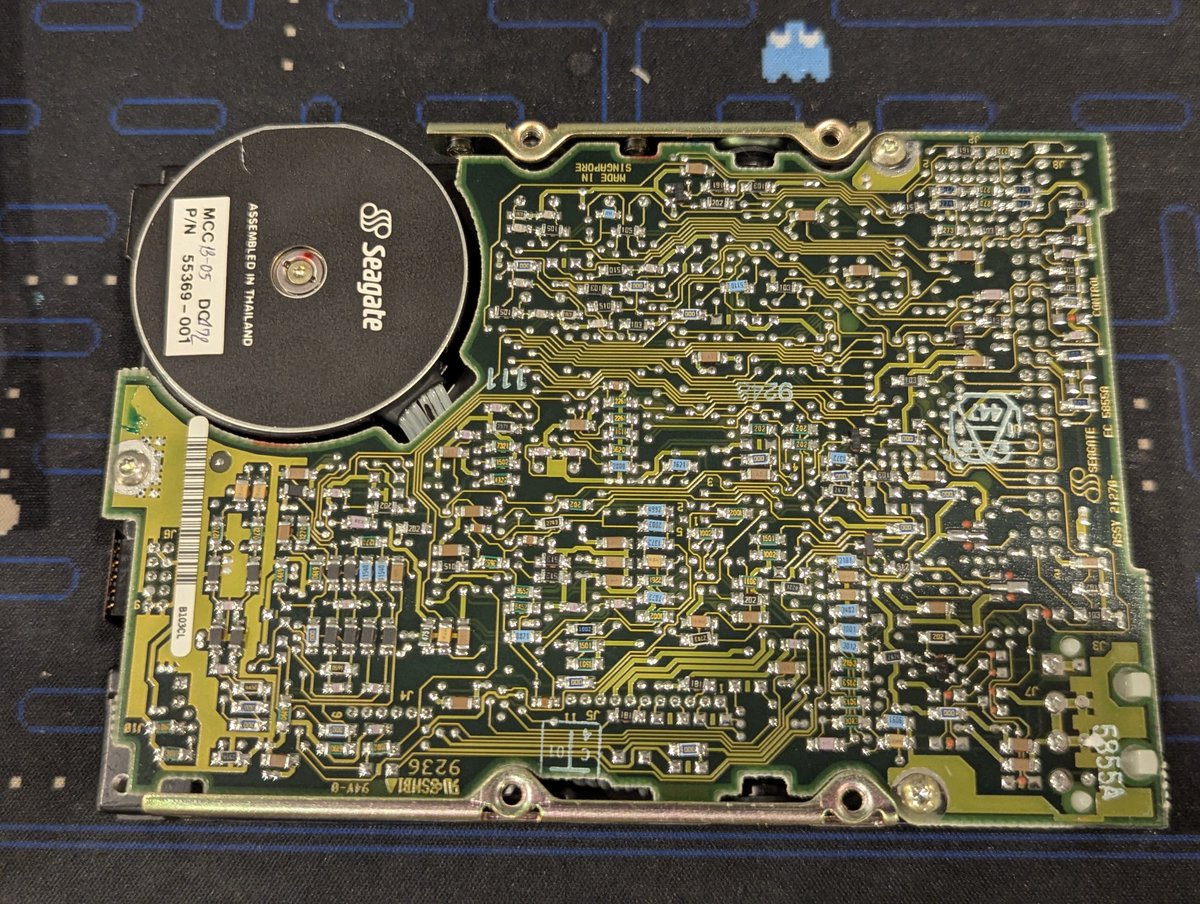
Next, I thought I would check on the HDD. It was sadly pretty poorly mounted (which was a theme for this PC: lots of mismatched and missing screws). The hard drive is a Seagate ST351A/X, which is a 43MB IDE drive. Nice, and well suited for that original 386SX-16 motherboard. Image
Image
Image
Image
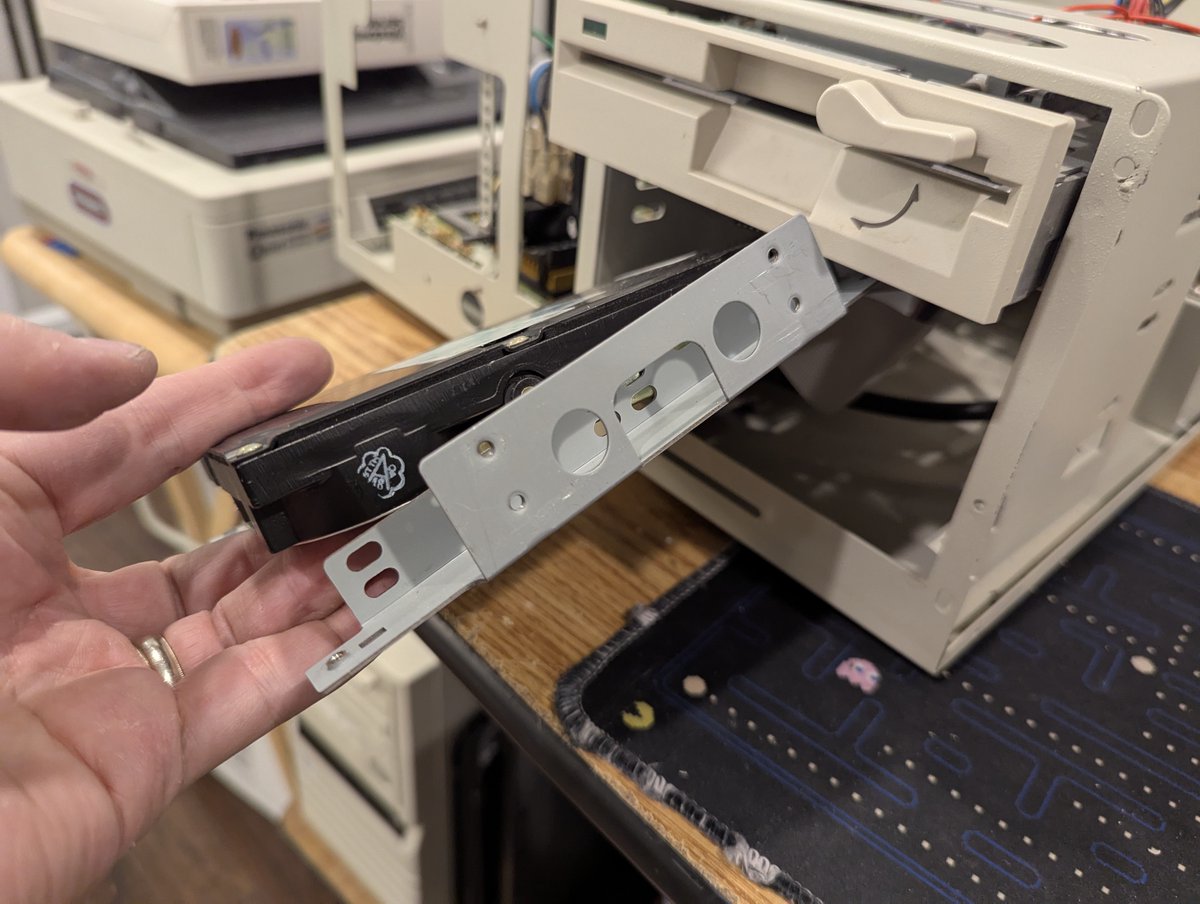
So, part of the reason this drive was poorly mounted was inconsistent screw holes on the sides. However, if mounted from the bottom with this drive, you'd be a-ok Image
Image
Image
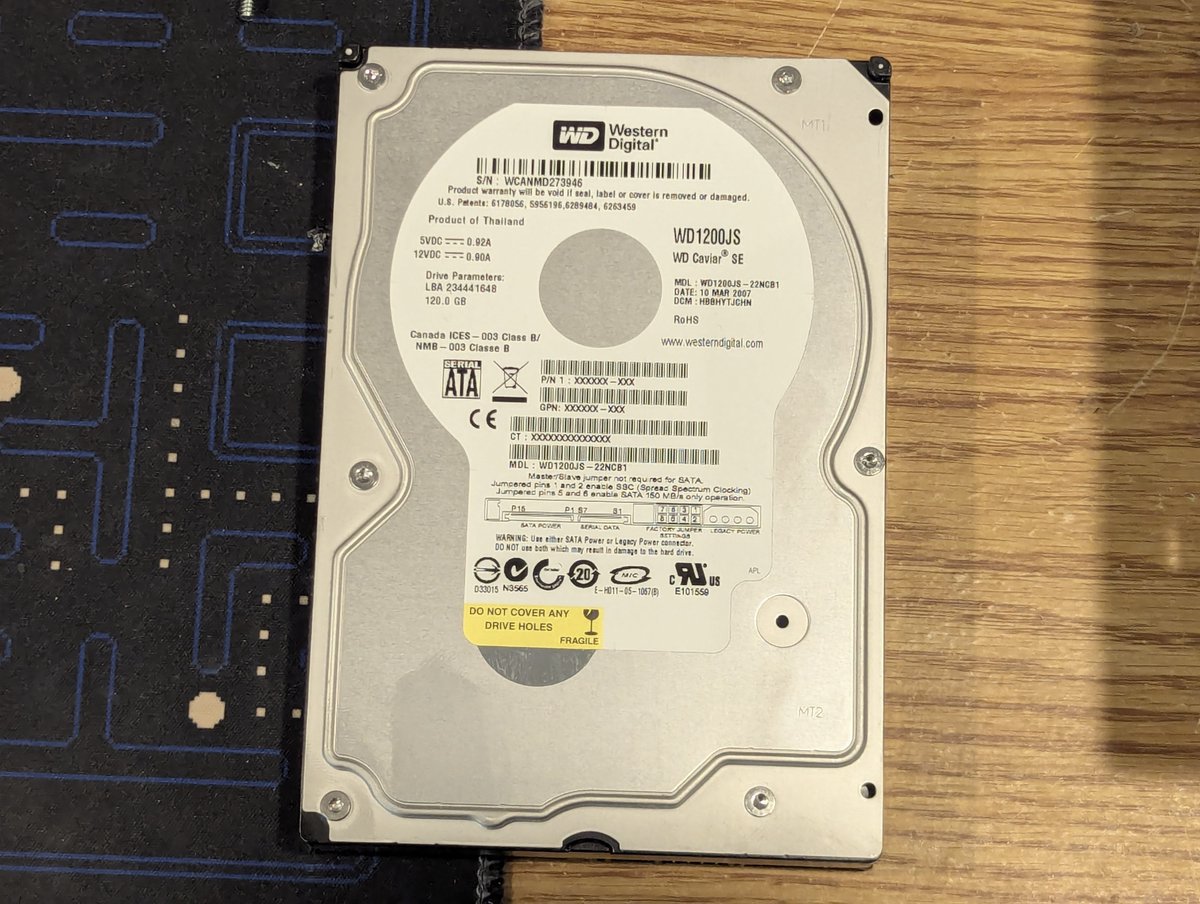
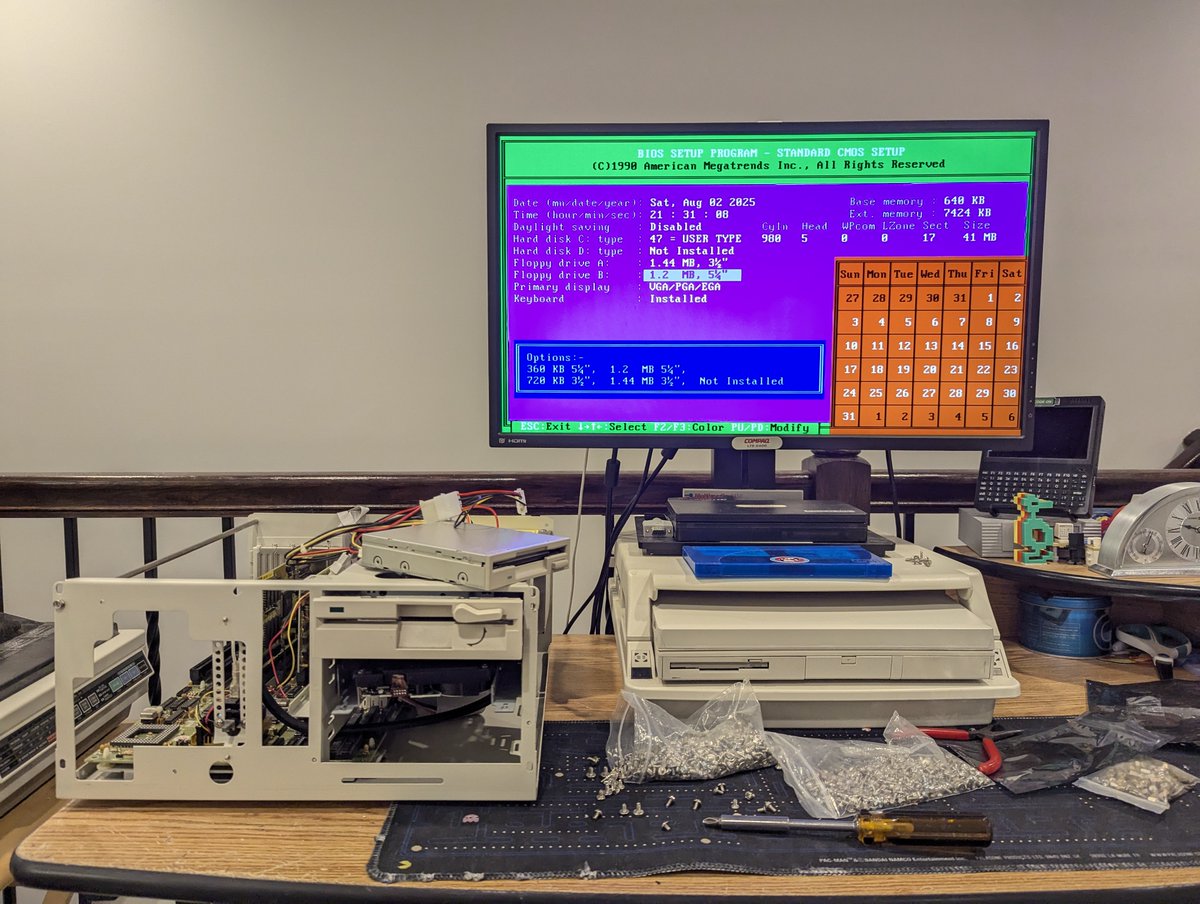
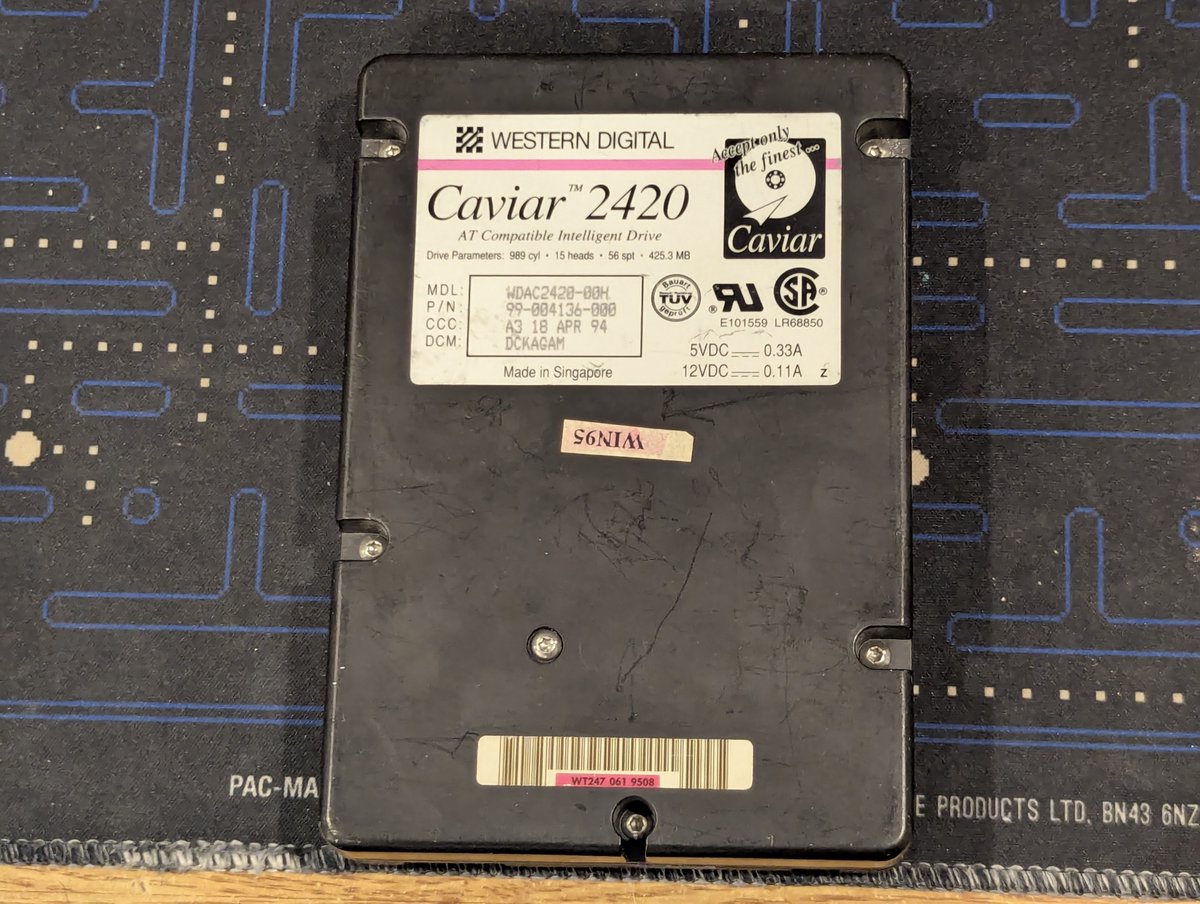
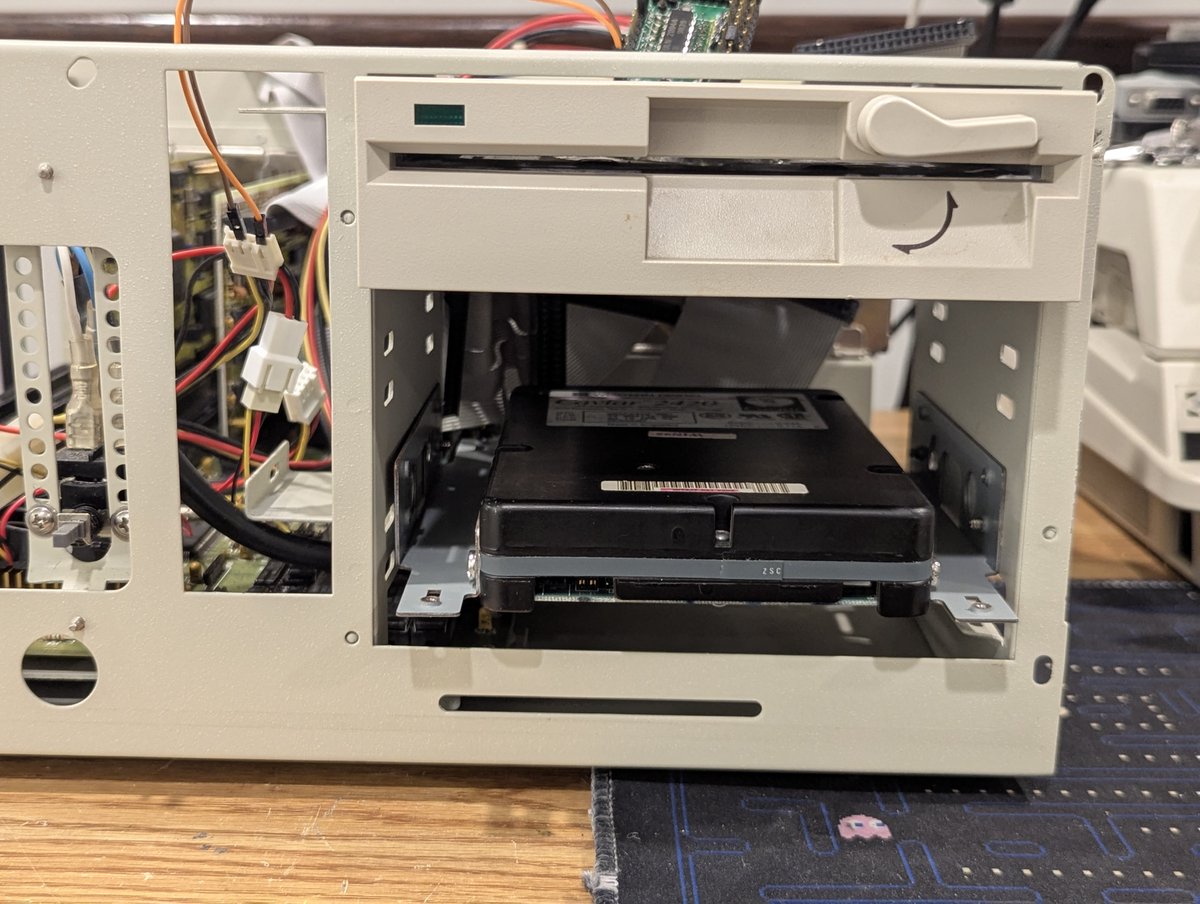
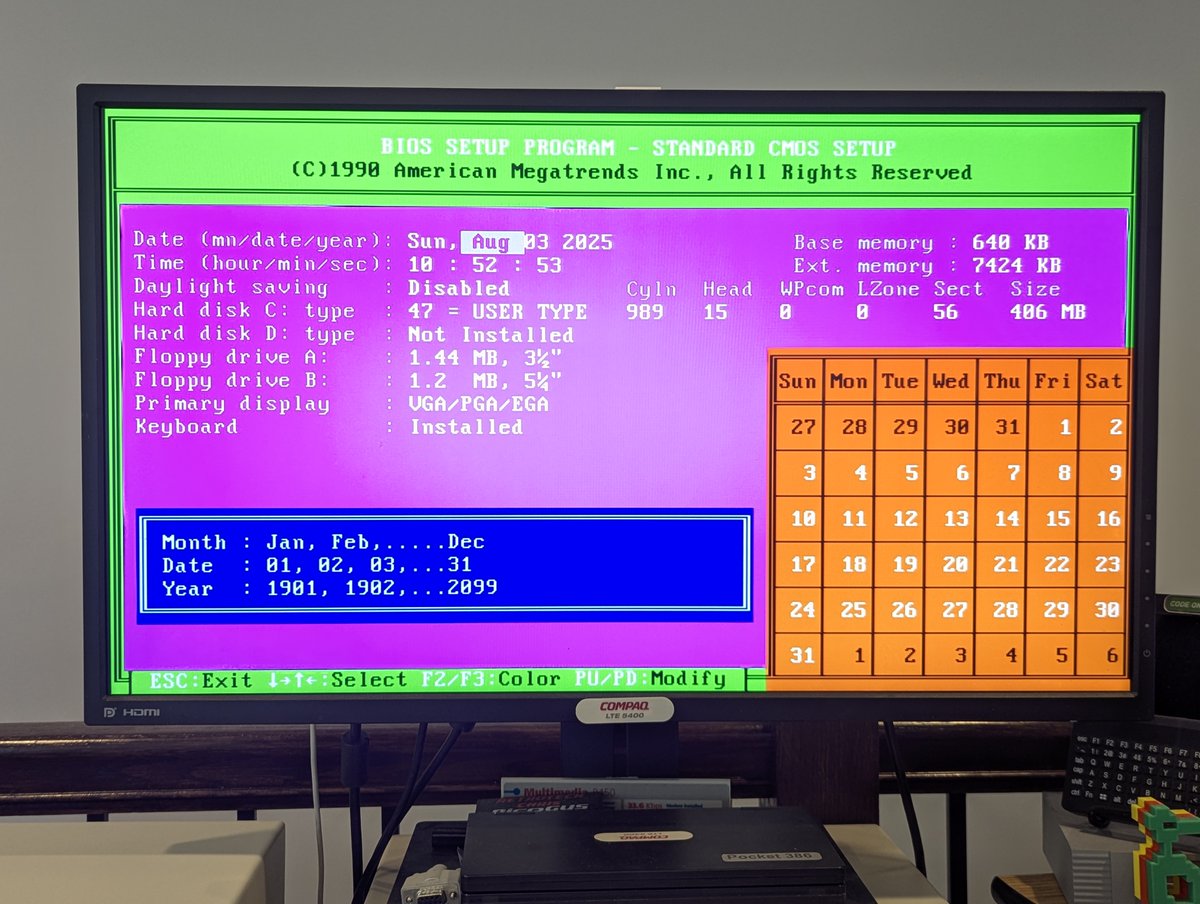
Well, since this is now a 486, and since it has an older AMI BIOS (528 MB limit without "software fixes"), and since I couldn't find a MR BIOS upgrade for this SiS chipset (boo!), I am going to go with a 420 MB HDD for this system. And it mounts cleanly! Image
Image
Image
Image
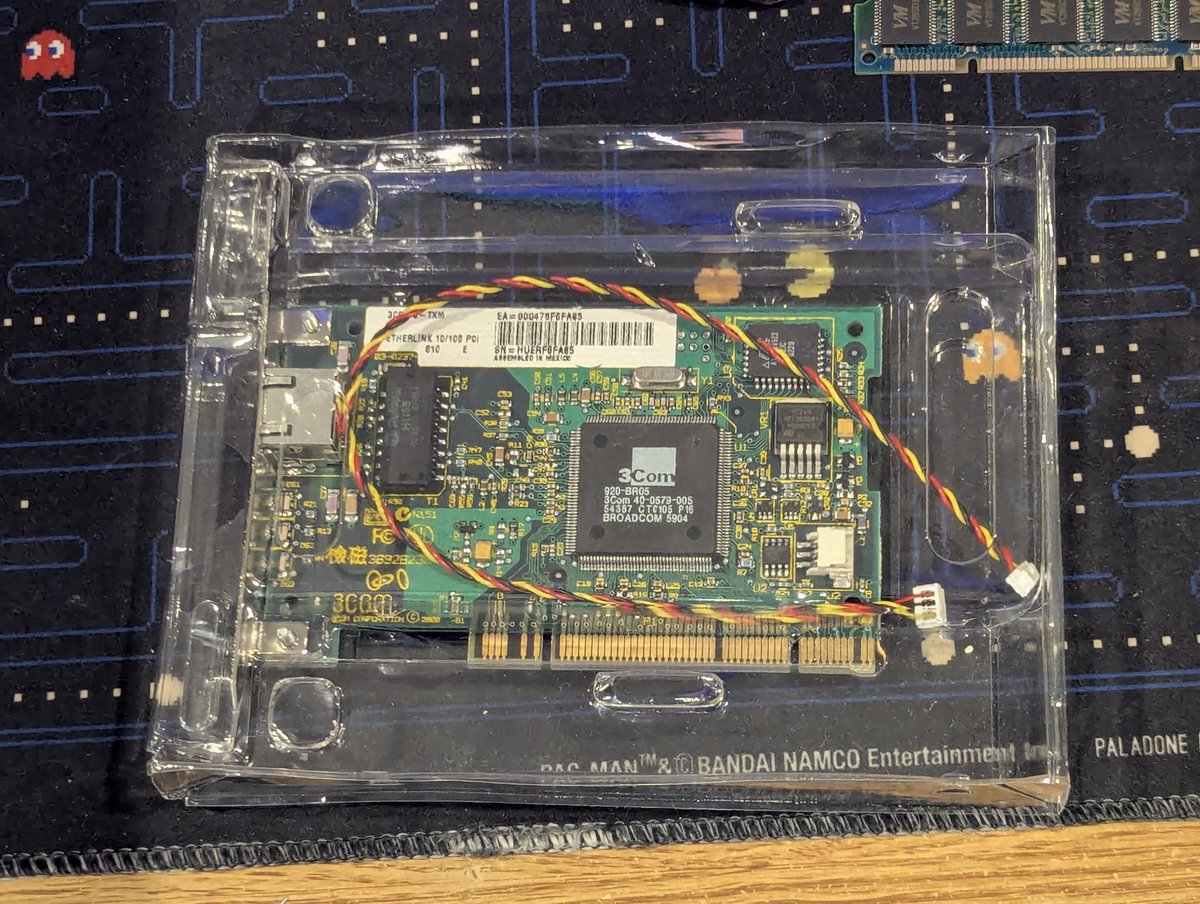
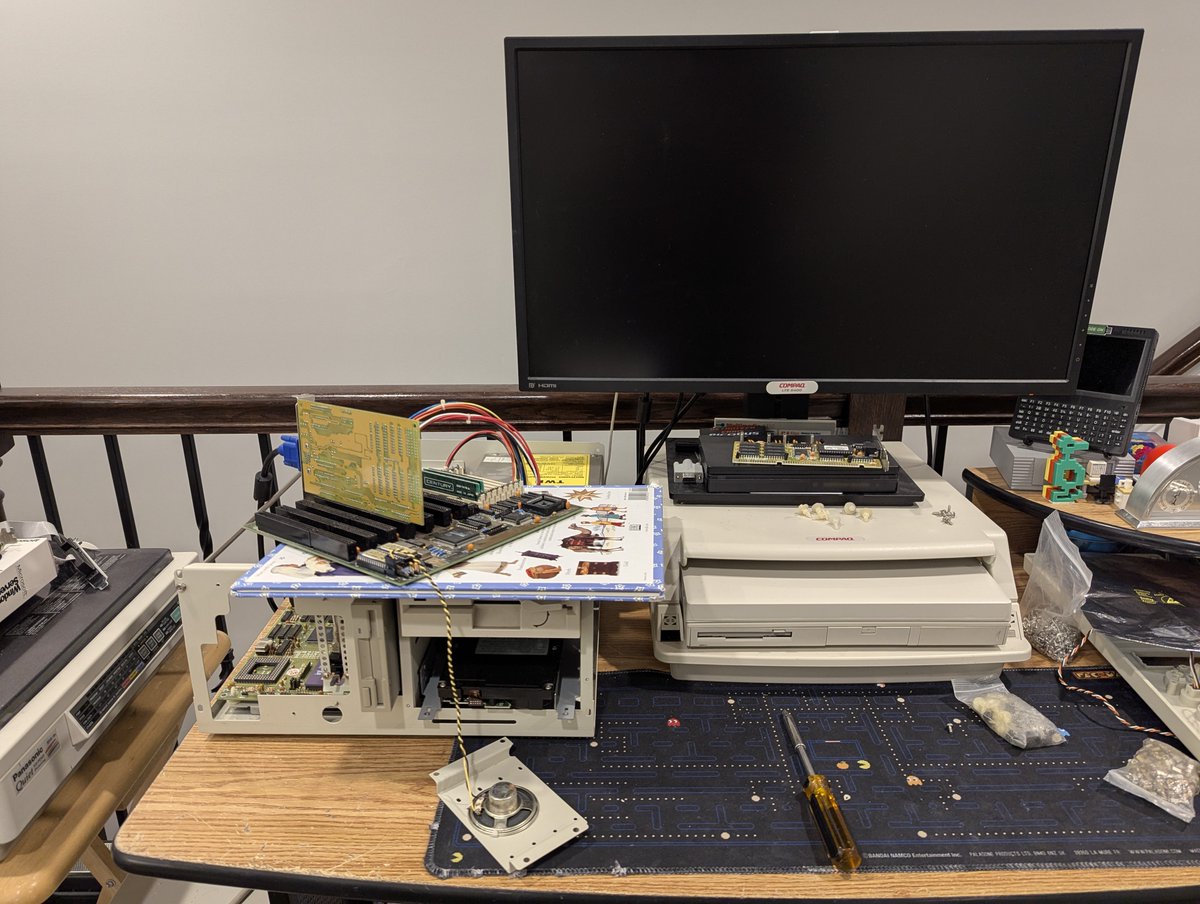
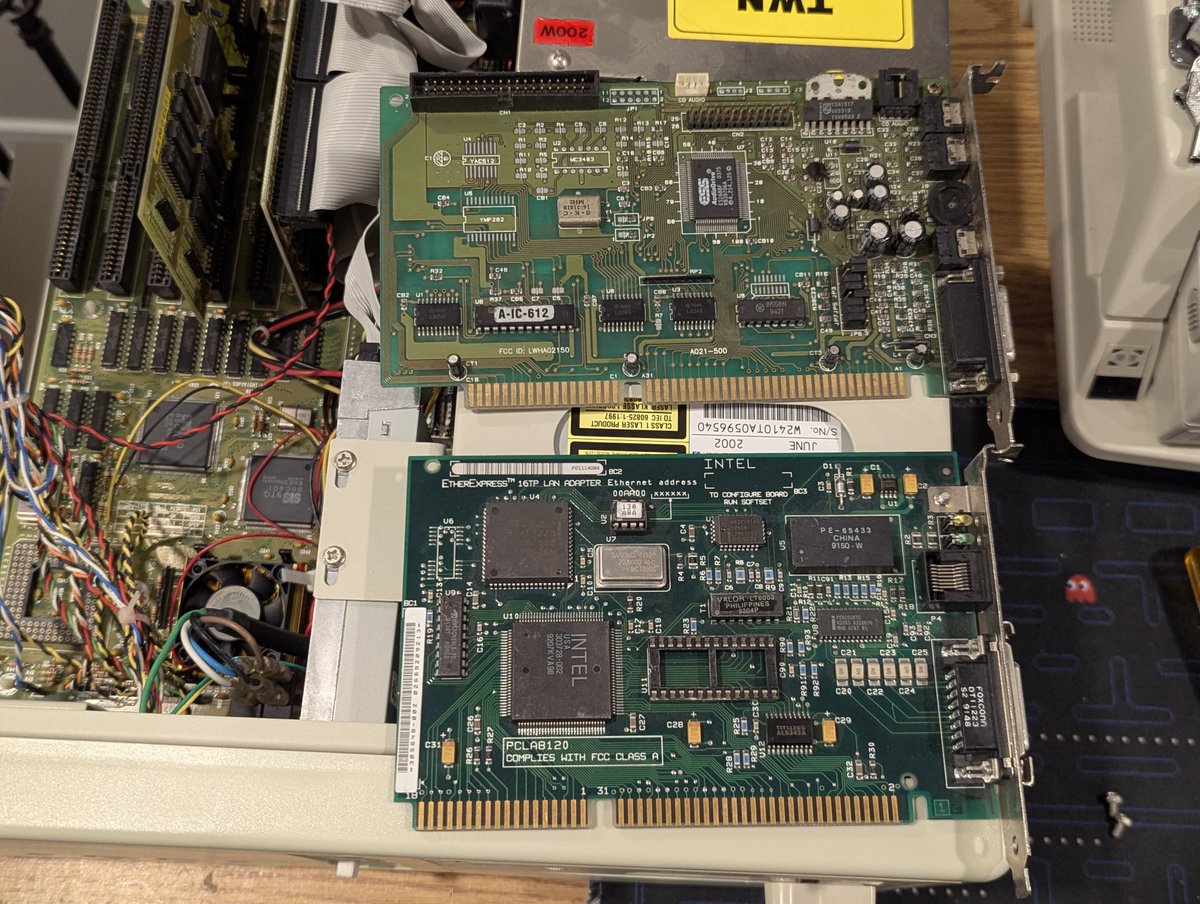
While we have this open, let's put in a sound card and network card too! This sound card isn't fancy, but has a nice ESS 1688F chip. And the network card is an Intel EtherExpress 16TP. Those slots are getting populated now! Image
Image
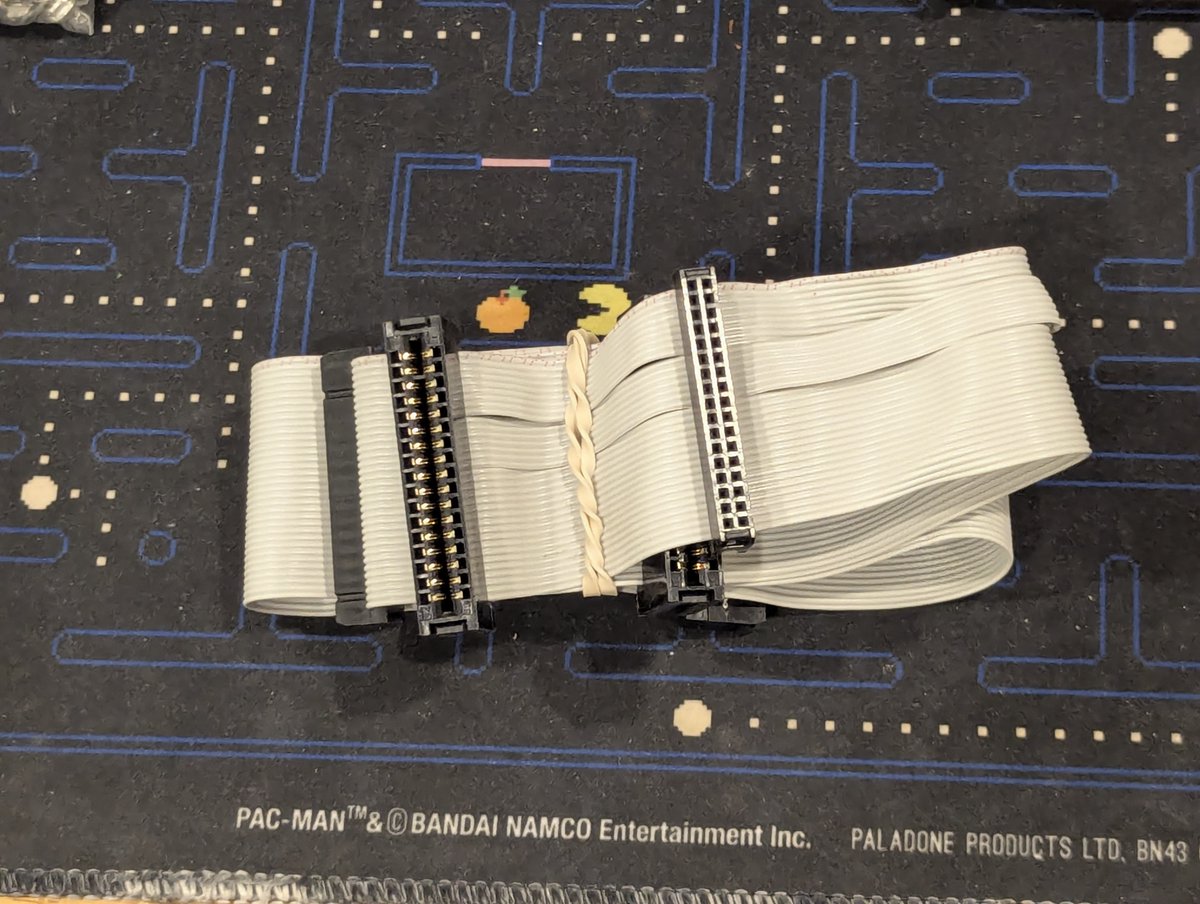
I also wanted the 3.5" drive to be drive A: and the 5.25" drive to be drive B:. But the connections on the ribbon cable were too close, so I swapped in a new FDD cable. Oh.. I also put in a Plextor optical (needs a retr0brite).. and a color-matched FDD too. Image
Image
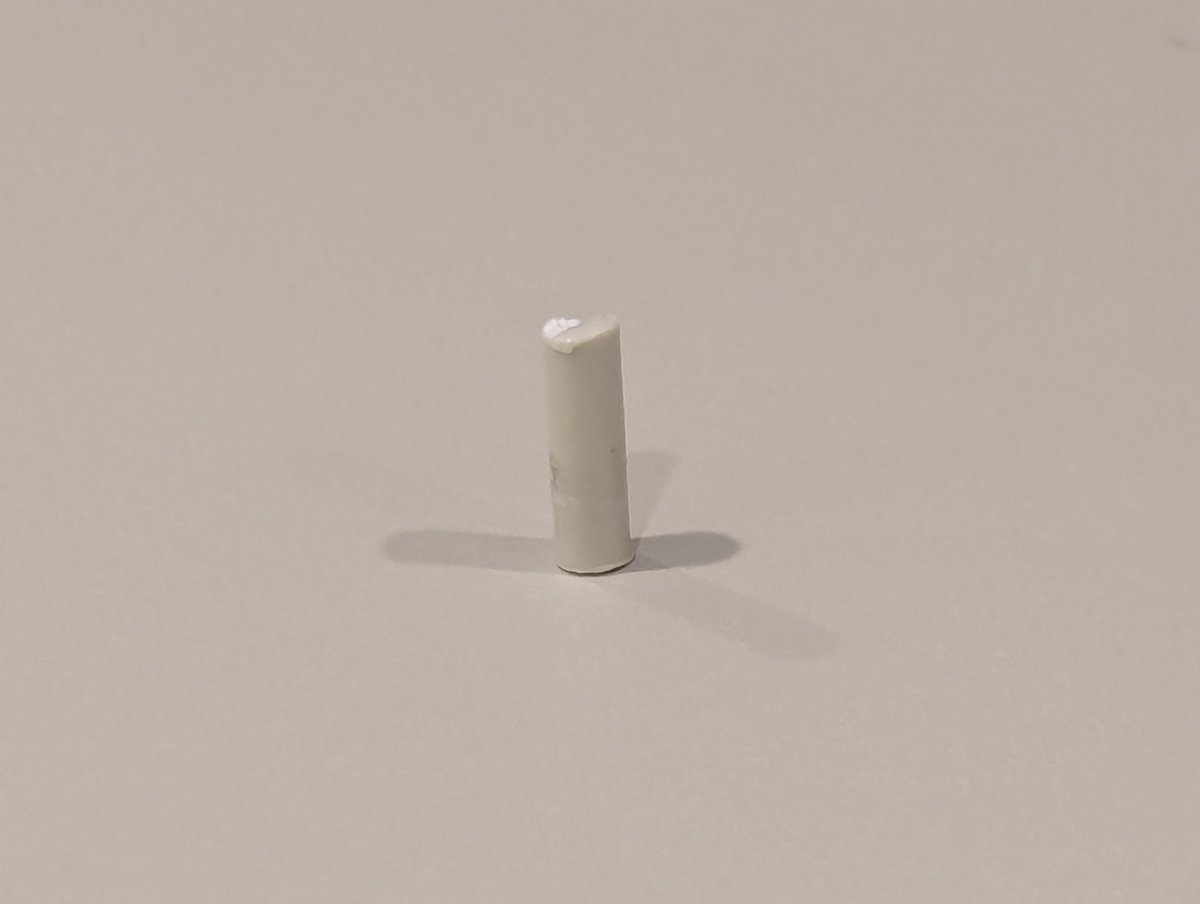
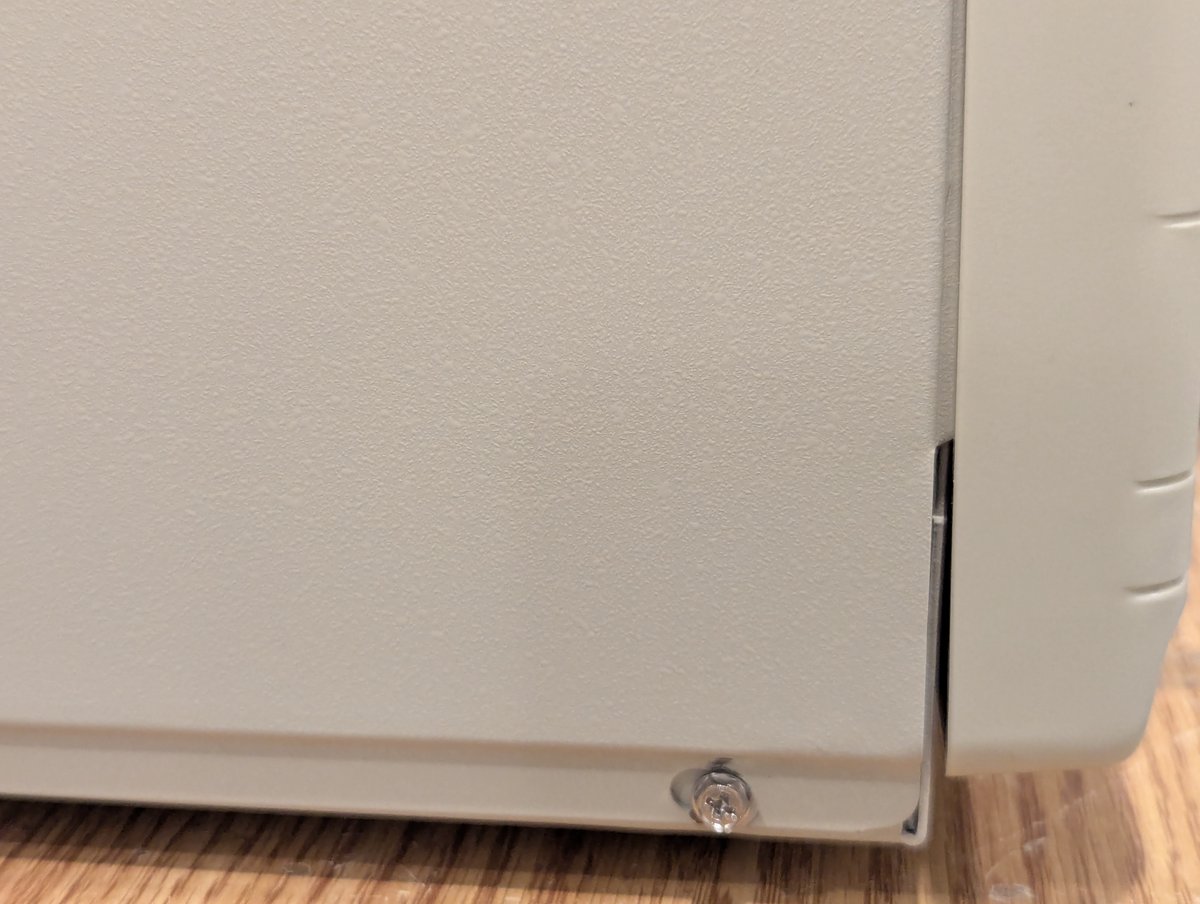
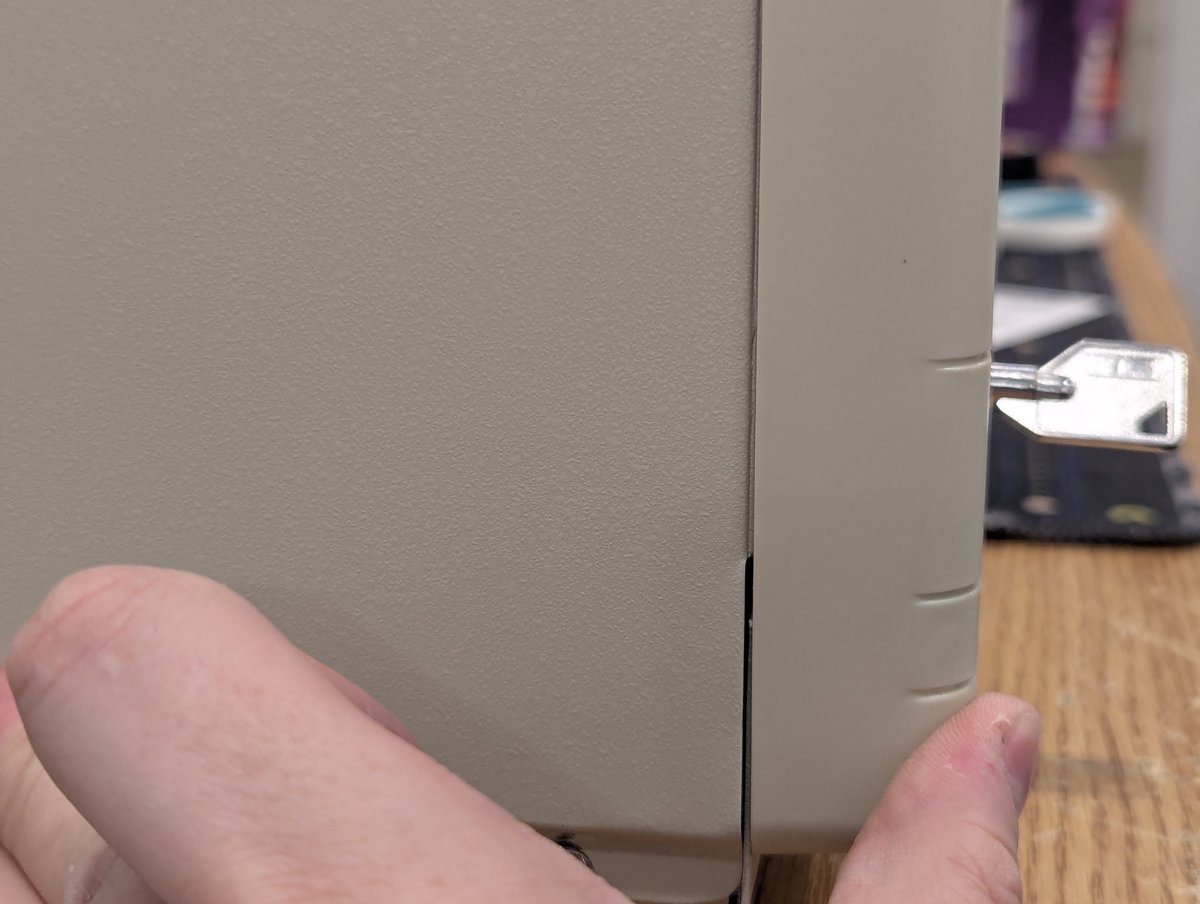
So, there was one casualty in all of this... I over torqued one of the screws that holds on the front faceplate, and it snapped when I tried to loosen it. UGH! It is a little bit noticeable, but the front panel is secure enough as is. Maybe I will "weld" this back later. Image
Image
Image
Image
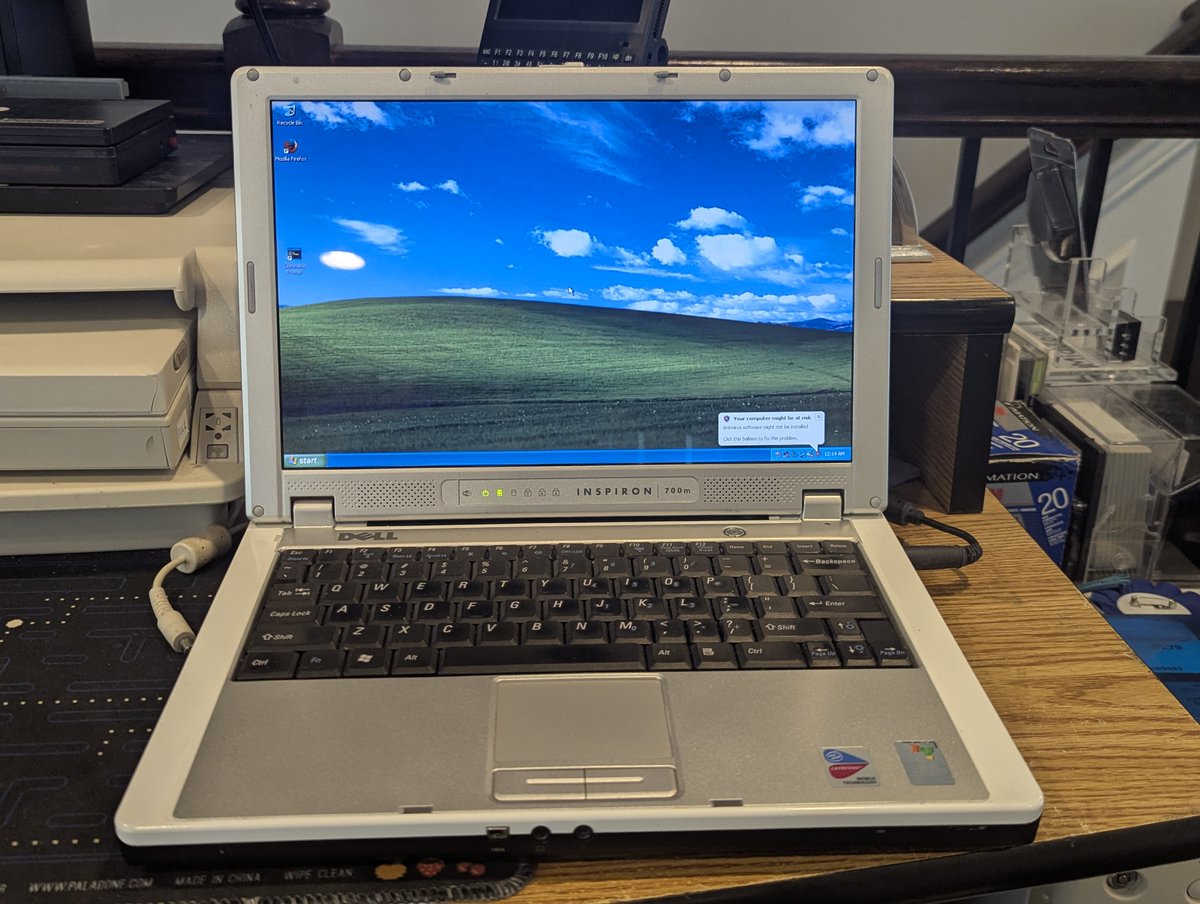
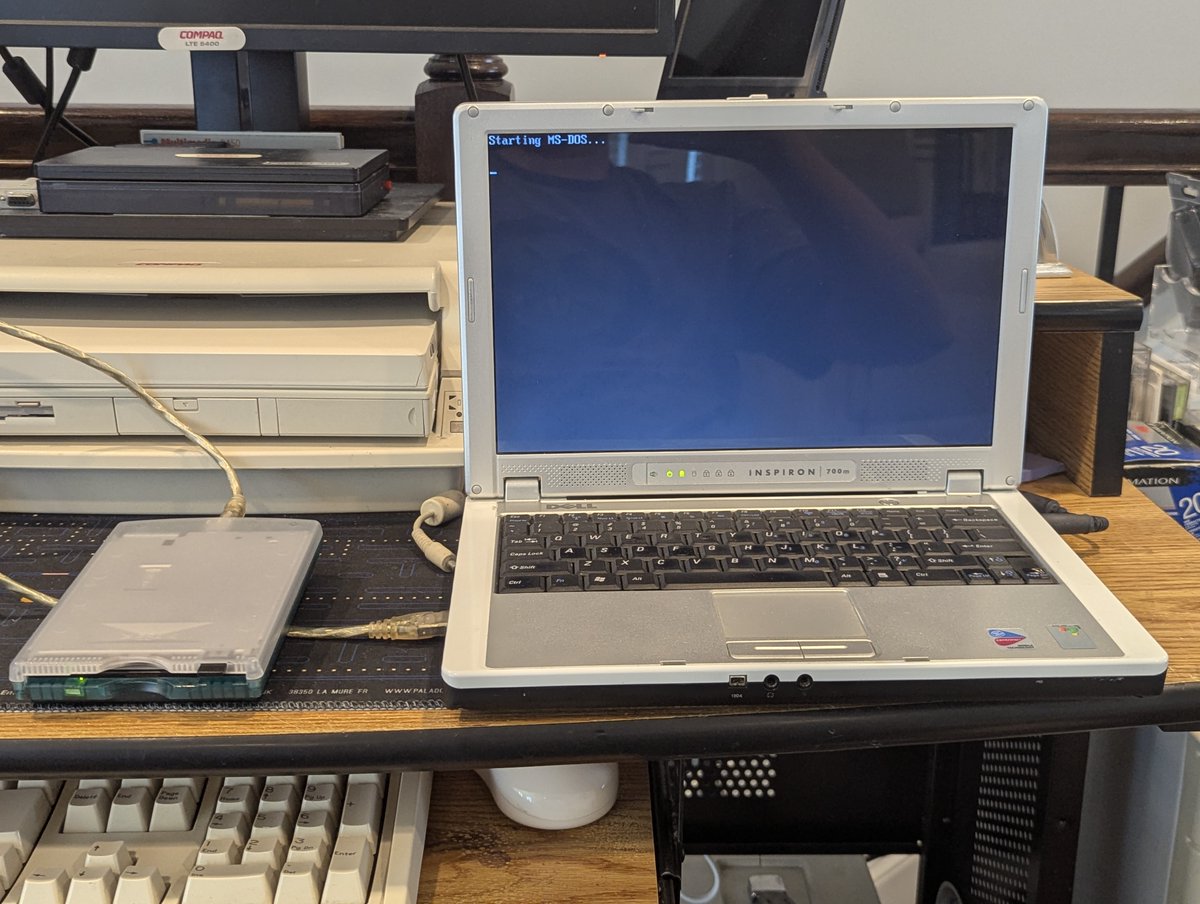
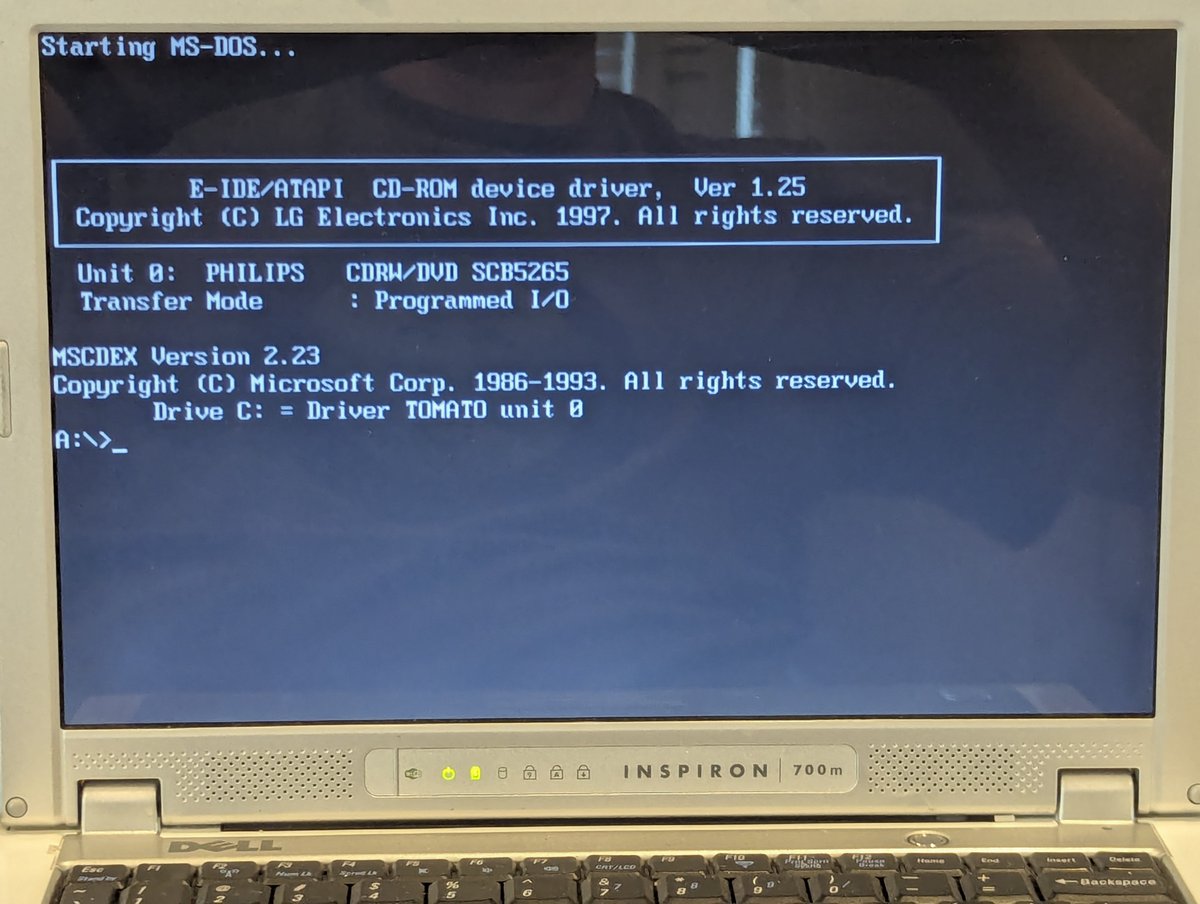
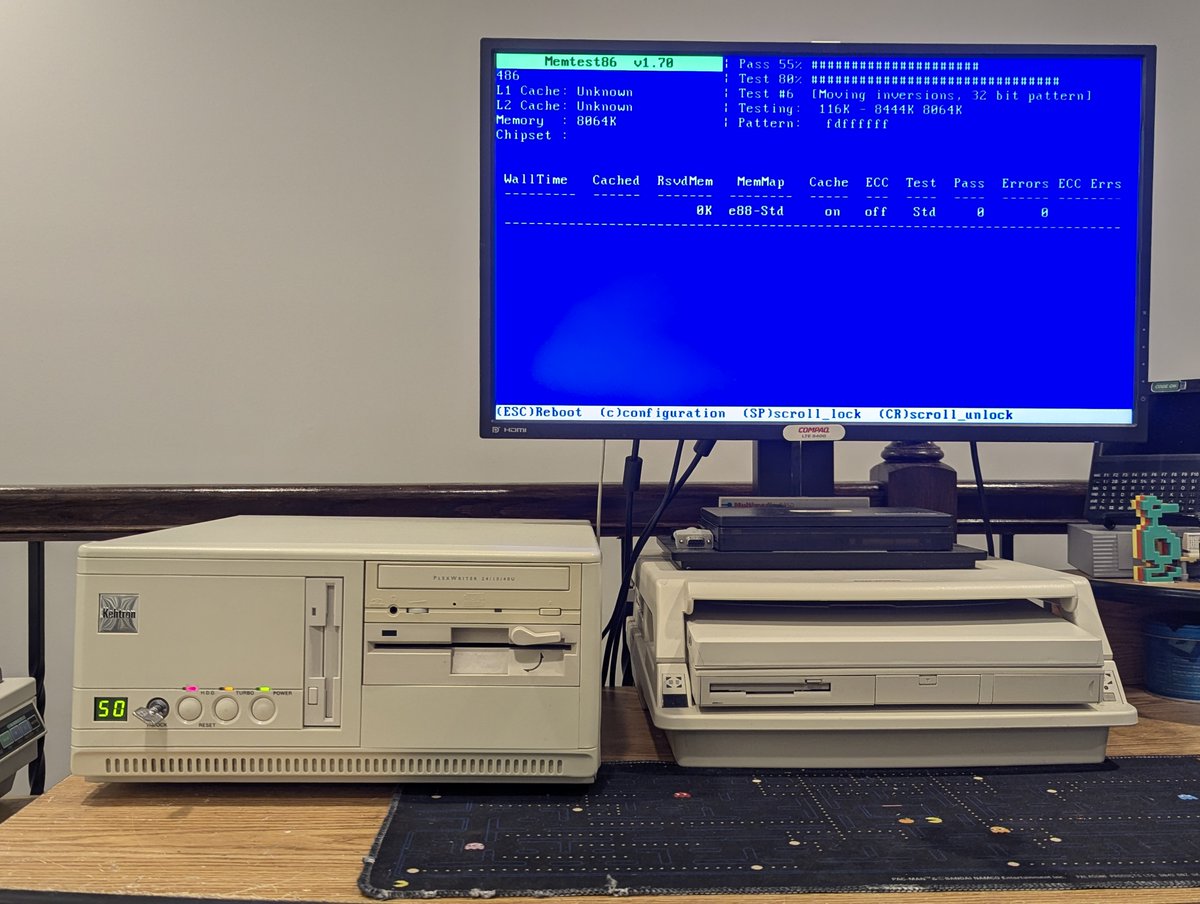
So, overall, I'm glad I made the hour drive to pick up this beauty. I did run MemTest86+ on it, and the 8MB of memory passed. Next, we'll put some software on this, but this thread is already too long. So, as such, thx for reading, and see you soon!

@threadreaderapp unroll Image

• • •

Missing some Tweet in this thread? You can try to force a refresh
 

Keep Current with RetroTech Chris

RetroTech Chris Profile picture

Stay in touch and get notified when new unrolls are available from this author!

Read all threads

This Thread may be Removed Anytime!

PDF

Twitter may remove this content at anytime! Save it as PDF for later use!

Try unrolling a thread yourself!

how to unroll video
  1. Follow @ThreadReaderApp to mention us!

  2. From a Twitter thread mention us with a keyword "unroll"
@threadreaderapp unroll

Practice here first or read more on our help page!

More from @RetroTechChris

Aug 3
My friend Bill gave me a bunch of case lock keys! Back in the days of the AT standard for cases, keylocks were pretty common on PC clones, and IBM systems as well. Let's see how many locks we can open today. Time for a silly 🧵 Image
Image
First, the Gateway 2000 you saw in the intro post. First key I tried worked 😂 Image
Image
Next, let's look at the PS/2 Model 30 286. Not today, not happening, this uses a "more regular looking" key. Image
Image
Read 9 tweets
Jul 28
In my haste yesterday, there are TWO THINGS that I forgot to do and post about for this "eMachines" system. One is more important than the other! Let's talk about it in a brief 🧵 here! Image
First of all, before we get too far, recall that this isn't actually an eMachines. The original motherboard failed, and a Pentium III Biostar motherboard was put in to replace it, in what I am calling a "reverse sleeper"
So, what did I forget? Well, the first thing was to showcase the Wake on LAN capability! I installed a 3Com network card with Wake on LAN support. If we know the Ethernet MAC address and have a program to send a "magic packet", and the BIOS settings are right, we can use it! Image
Image
Image
Image
Read 6 tweets
Jul 28
I recently picked up this "eMachines" from my friend Bill to bring to the next local meetup and plop on the "free" table. I thought I'd spruce it up a little bit in the meantime, since, well, I enjoy doing just that 😂. Let's talk about it in a 🧵 here! Image
So, first and foremost, this isn't actually an eMachines. The original mobo died and it was replaced with a Biostar M6TWL and a Pentium III 600 MHz CPU. Does that makes this thing a "reverse sleeper"? 🤣 Image
Image
Given this, we have a little bit of work to do. First, unrelated, but the CMOS battery is dead. Also, there is a SATA Western Digital 120GB HDD installed, but that won't work without some sort of adapter, since the motherboard only supports IDE. Image
Image
Image
Read 17 tweets
Jul 27
I recently received this Dell Inspiron 700m from my friend Bill. Originally a Windows XP system. I thought "maybe I could make this a mean DOS/Windows For Workgroups 3.11 system." Let's give it a shot in a 🧵 here, I bet we can get pretty close! Image
Image
First thing I did was to look in the BIOS. This system is a Pentium M 2.0 GHz with 512MB of memory. The optical is a CD-RW/DVD. Okay, this should be more than adequate for what we want to do here 😂. Oh... and look, we can boot from a USB floppy drive! Okay, let's do that. Image
Image
Image
First thing I thought I would do is to boot DOS 6.22. And... look at that, I even had the right drivers set up to detect the optical drive. Win! Image
Image
Read 20 tweets
Jul 26
I got a few items in the mail for my Compaq LTE 5000 laptops! A power adapter... and a bunch of Cisco Aironet 350 wireless network cards from a friend who bought like 50+ of them 😂. Let's test out the network cards and go through how to set them up in MS-DOS!! Time for a 🧵 Image
Image
Image
Before I get into the setup procedure, I wanted to inform that I do have a setup procedure for this on one of my old "crap film quality" videos (not that the newer ones were better 😂). If you want a video walkthrough, hosted by a younger RTC, go here! Image
To make these cards work in MS-DOS, we need an older firmware. It has become a bit scarce online, so I put it in my GitHub repo: github.com/cml37/dos-util…Image
Read 16 tweets
Jul 26
Memory testing, final round! Mostly good news, but some bad news too. What happened? And... just how many memory spares did we end up having? Let's find out, 🧵 time! Image
Image
First, let's talk about the cliffhangers from last time. Both the CompUSA custom and the eMachines T2341 finished their round of testing, and are good to go! Image
Image
Now for some bad news. I ended up using the Pacman PC for a lot of PC100/PC133 testing, and when I put everything back together, the 512MB DIMM started to fail. Boo! So we are back to 768MB, but we got to use DIMMs that I bought a while back that were in my basement PII PC. Image
Image
Read 9 tweets

Did Thread Reader help you today?

Support us! We are indie developers!


This site is made by just two indie developers on a laptop doing marketing, support and development! Read more about the story.

Become a Premium Member ($3/month or $30/year) and get exclusive features!

Become Premium

Don't want to be a Premium member but still want to support us?

Make a small donation by buying us coffee ($5) or help with server cost ($10)

Donate via Paypal

Or Donate anonymously using crypto!

Ethereum

0xfe58350B80634f60Fa6Dc149a72b4DFbc17D341E copy

Bitcoin

3ATGMxNzCUFzxpMCHL5sWSt4DVtS8UqXpi copy

Thank you for your support!

Follow Us!

:(