There's a new way to build production-grade MCP servers.
- It takes less than a minute.
- You don't have to write any code.
- You can integrate from 100k+ tools.
Here's a step-by-step breakdown (100% local):
- It takes less than a minute.
- You don't have to write any code.
- You can integrate from 100k+ tools.
Here's a step-by-step breakdown (100% local):
To build MCP servers from scratch with custom tools, one has to:
- read the API docs
- implement MCP tools
- test them, and much more
Today, let's learn how to simplify this and build production-grade MCP servers using Postman's MCP Generator (free to use).
Let's dive in!
- read the API docs
- implement MCP tools
- test them, and much more
Today, let's learn how to simplify this and build production-grade MCP servers using Postman's MCP Generator (free to use).
Let's dive in!
For context...
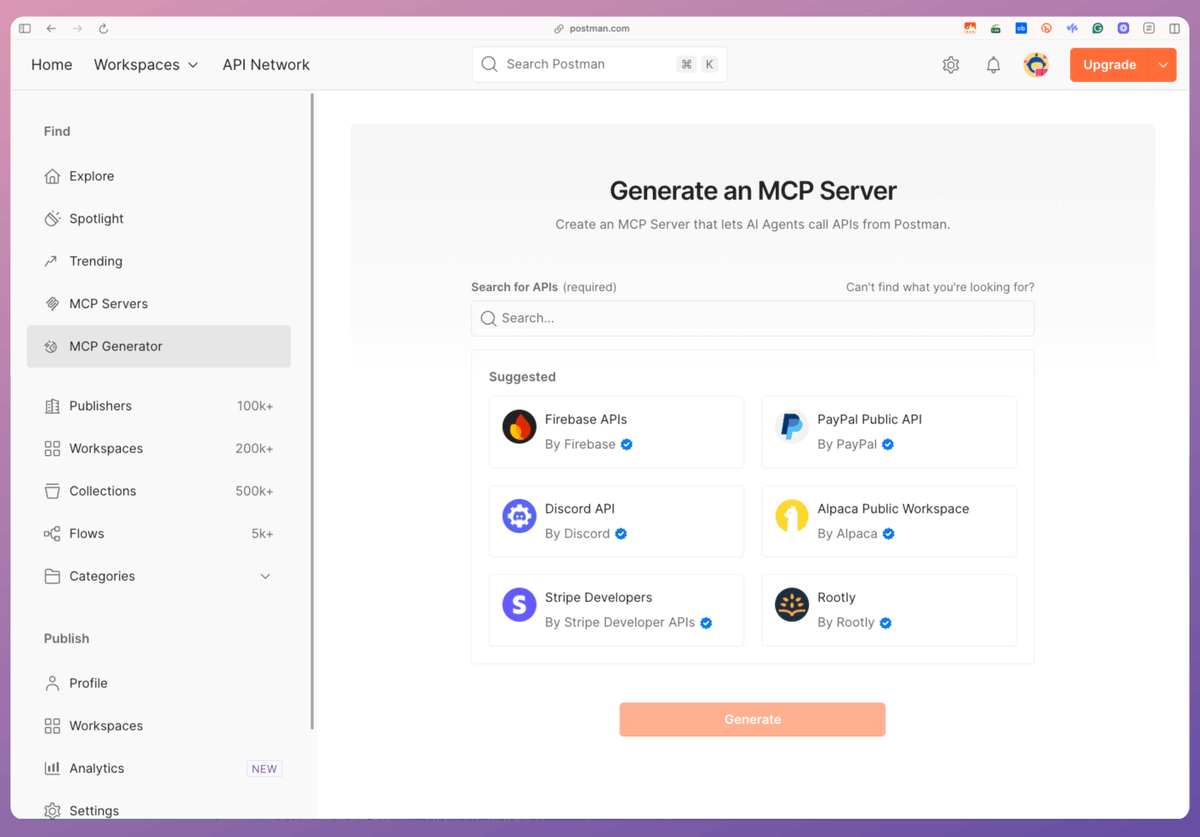
Postman's MCP Generator lets us build an MCP server with tools from its public API Network (with 100k+ APIs).
Steps:
- Select all the APIs for your MCP server.
- Export the code for the MCP server.
- Integrate it with any MCP client.
Check this👇
Postman's MCP Generator lets us build an MCP server with tools from its public API Network (with 100k+ APIs).
Steps:
- Select all the APIs for your MCP server.
- Export the code for the MCP server.
- Integrate it with any MCP client.
Check this👇

To begin, select the tools that you want to add to your MCP server. For simplicity, we select Hacker News and pick all the tools.
Once done, we click on Generate.
This gives us a download link with the code for the MCP server.
Check this 👇
Once done, we click on Generate.
This gives us a download link with the code for the MCP server.
Check this 👇
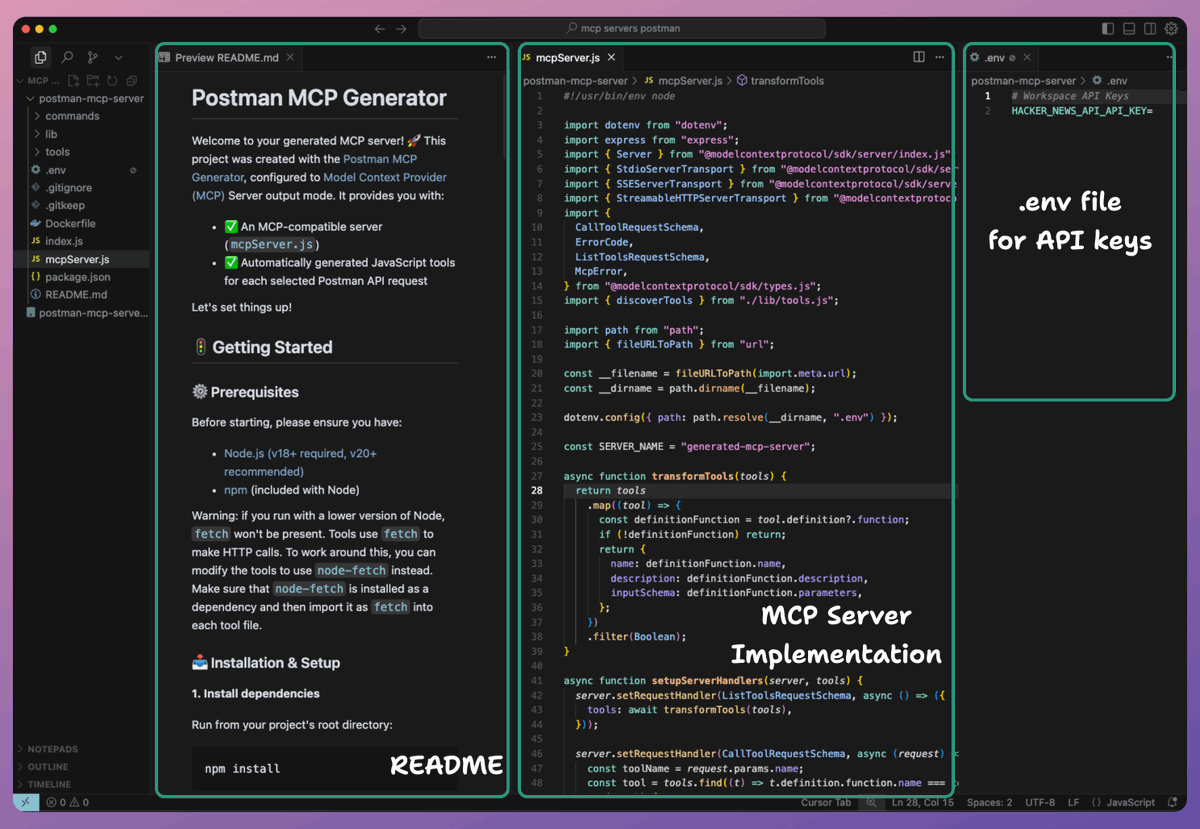
After unzipping the file, we can see the entire repository, including:
- A README with instructions
- A .env file to specify API keys (if any)
- The server implementation, and more.
Check this 👇
- A README with instructions
- A .env file to specify API keys (if any)
- The server implementation, and more.
Check this 👇
As instructed in the README file, we run `npm install` command.
Next, to integrate the MCP server with Claude Desktop, go to Settings → Developer → Edit Config and add the config.
Note: You can run the `which node` command to print the path to node.
Check this 👇
Next, to integrate the MCP server with Claude Desktop, go to Settings → Developer → Edit Config and add the config.
Note: You can run the `which node` command to print the path to node.
Check this 👇

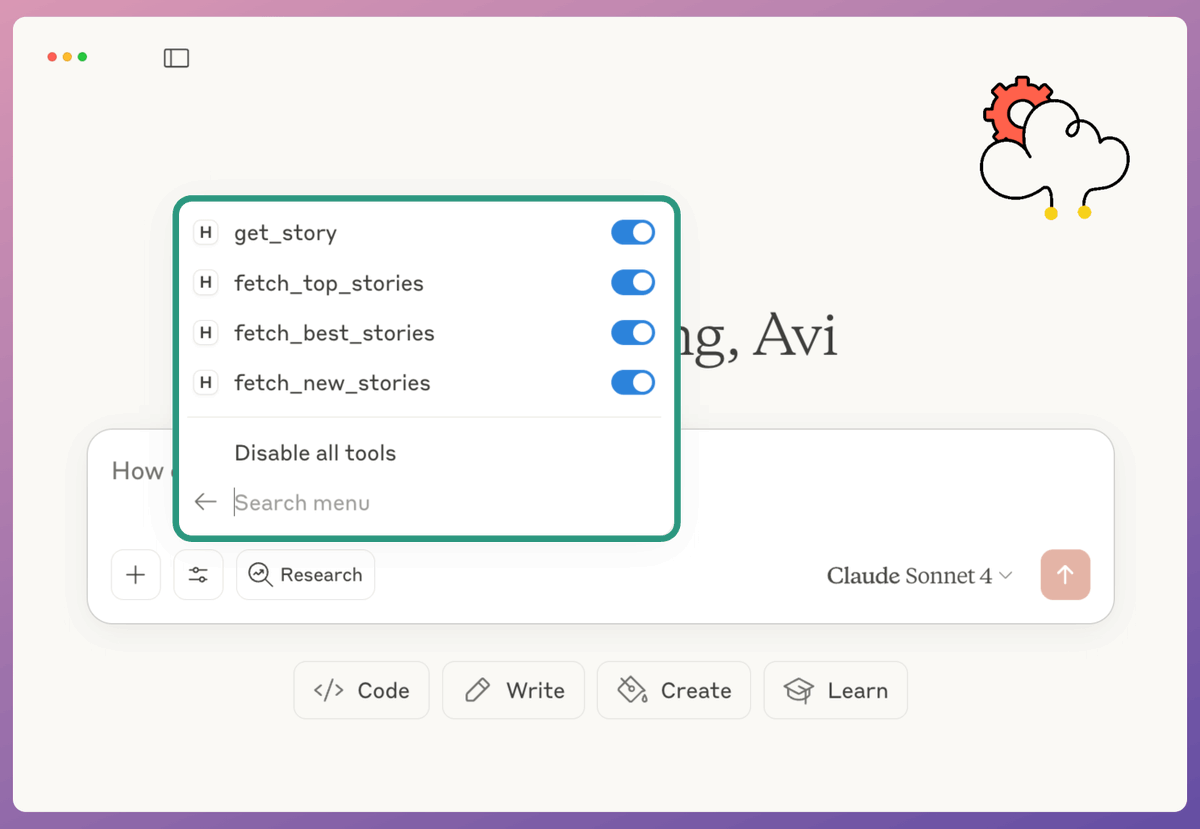
Once the server is configured, Claude Desktop will show the tools we integrated while building the MCP server in Postman's MCP Generator.
For Hacker News, we have:
- get_story
- fetch_top_stories
- fetch_best_stories
- fetch_new_stories
Check this👇
For Hacker News, we have:
- get_story
- fetch_top_stories
- fetch_best_stories
- fetch_new_stories
Check this👇
Finally, we interact with the MCP server we just built.
Check this demo 👇
Check this demo 👇
You can find the MCP Generator tool here: bit.ly/4oV7uUw
To recap, there are the steps:
- Open Postman's MCP generator.
- Select the APIs from Postman's API Network.
- All these APIs will be available as tools in your MCP server.
- Download the code provided by Postman.
- Specify API keys if needed in the .env file.
- Prepare your MCP config file JSON and add it to Claude/Cursor.
Done!
Thanks to @getpostman for working with me on this thread!
That's a wrap!
If you found it insightful, reshare it with your network.
Find me → @_avichawla
Every day, I share tutorials and insights on DS, ML, LLMs, and RAGs.
If you found it insightful, reshare it with your network.
Find me → @_avichawla
Every day, I share tutorials and insights on DS, ML, LLMs, and RAGs.
https://twitter.com/1175166450832687104/status/1960590605480026244
• • •
Missing some Tweet in this thread? You can try to
force a refresh