TechHalla Profile picture
Feb 17 9 tweets 6 min read Read on X
This started as a flat 2D floor plan.

and I'm sharing the exact AI method I used to turn it into a 3D tour inside freepik Spaces 🧵
The key in this @freepik Space is keeping the spatial consistency tight using the reference floor plan.

From there, we create different nodes to generate each room cohesively and then assemble the final video.

Let’s get started 👇 Image
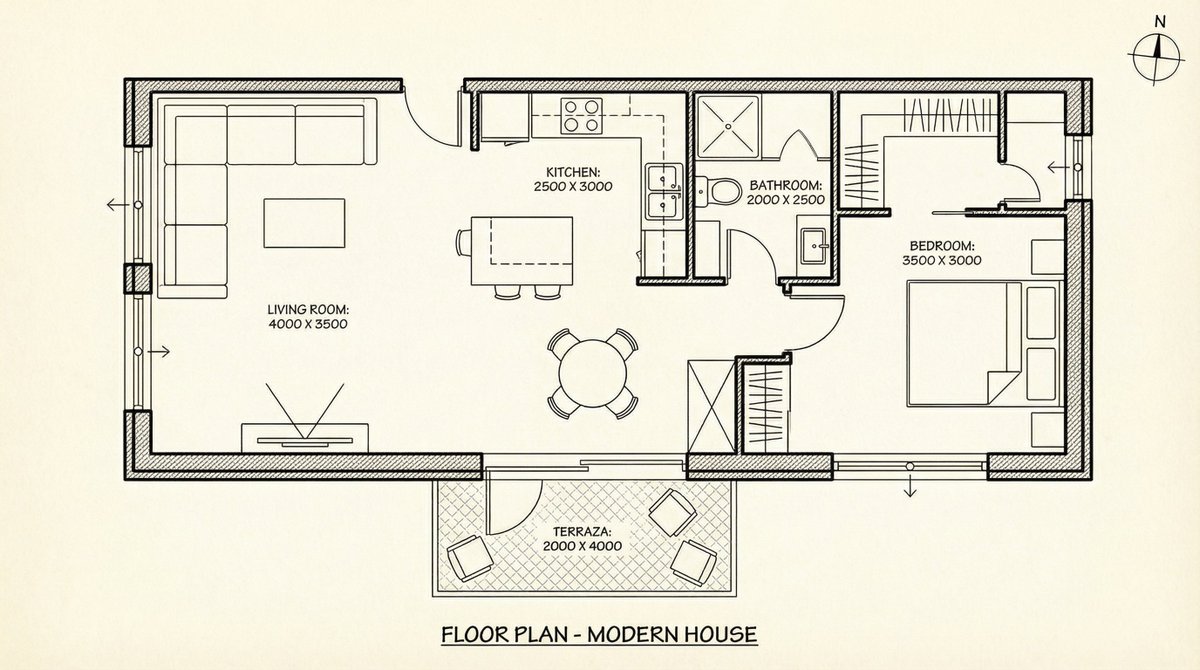
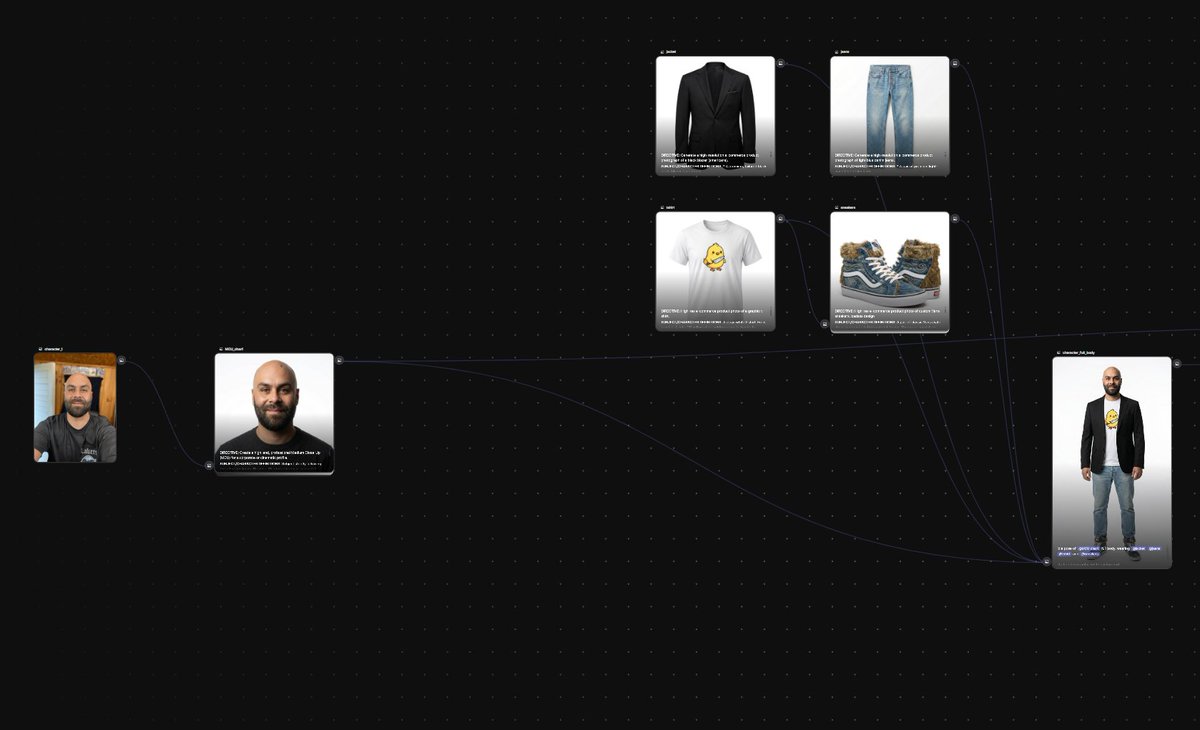
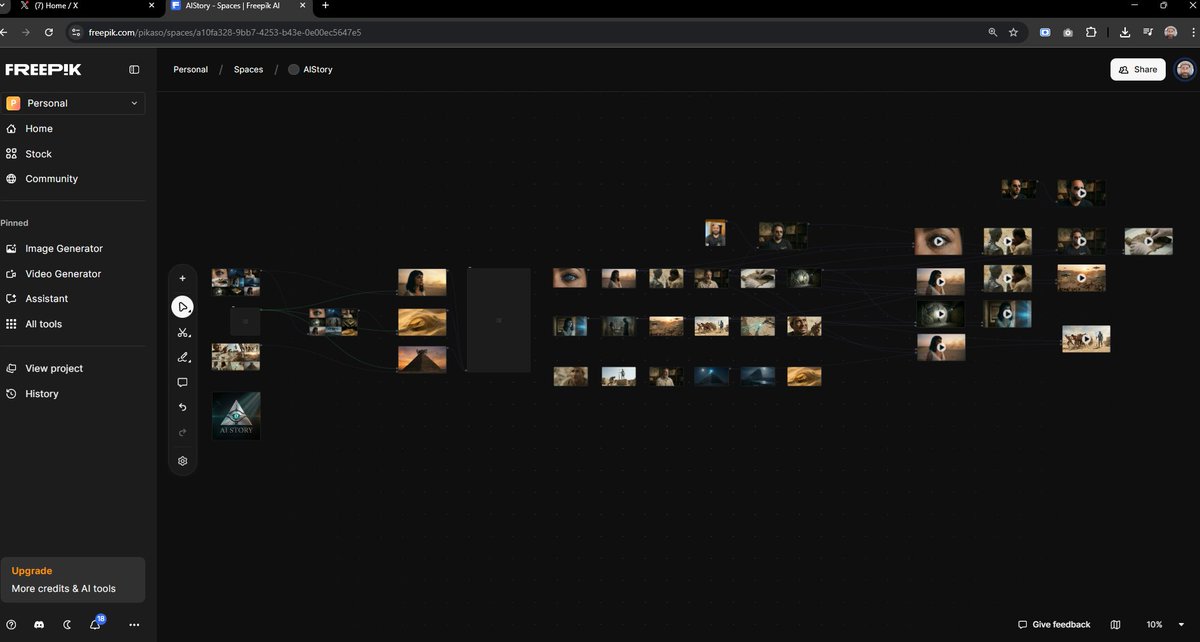
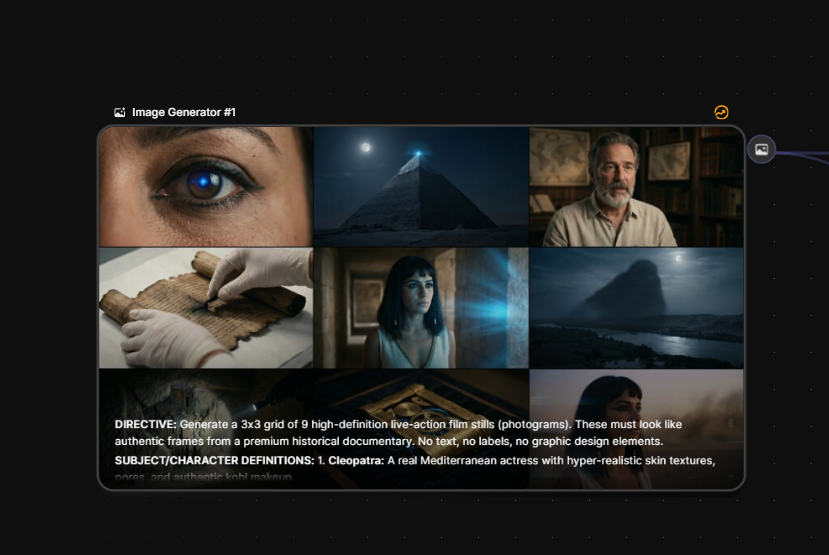
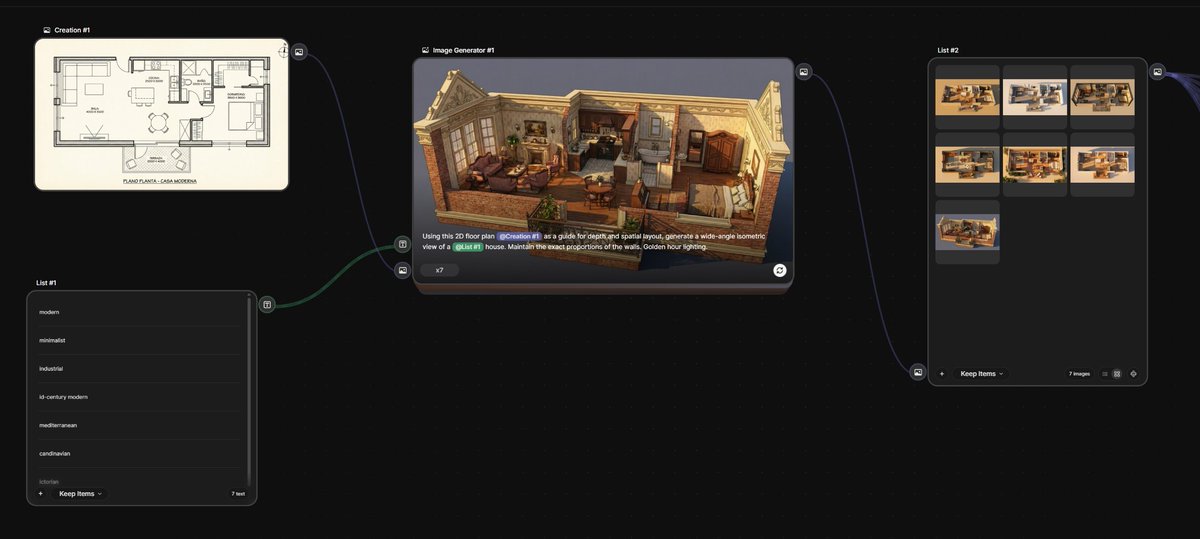
We upload the floor plan and create a List node with different styles, plus an Image node using the prompt you see in the screenshot.

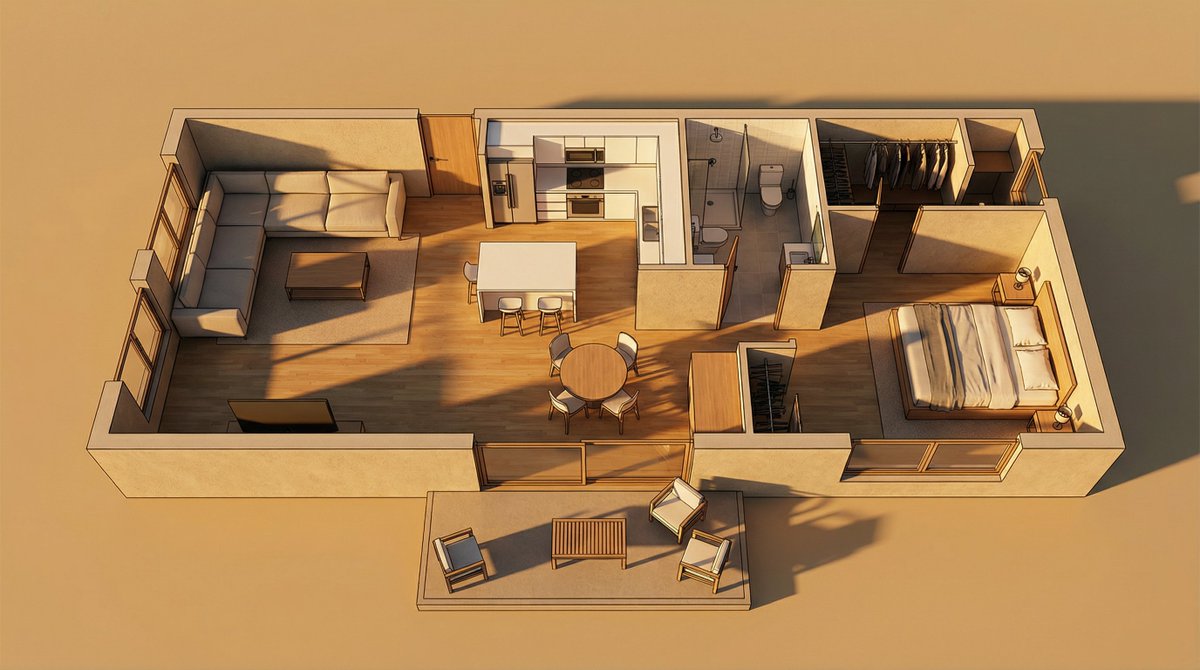
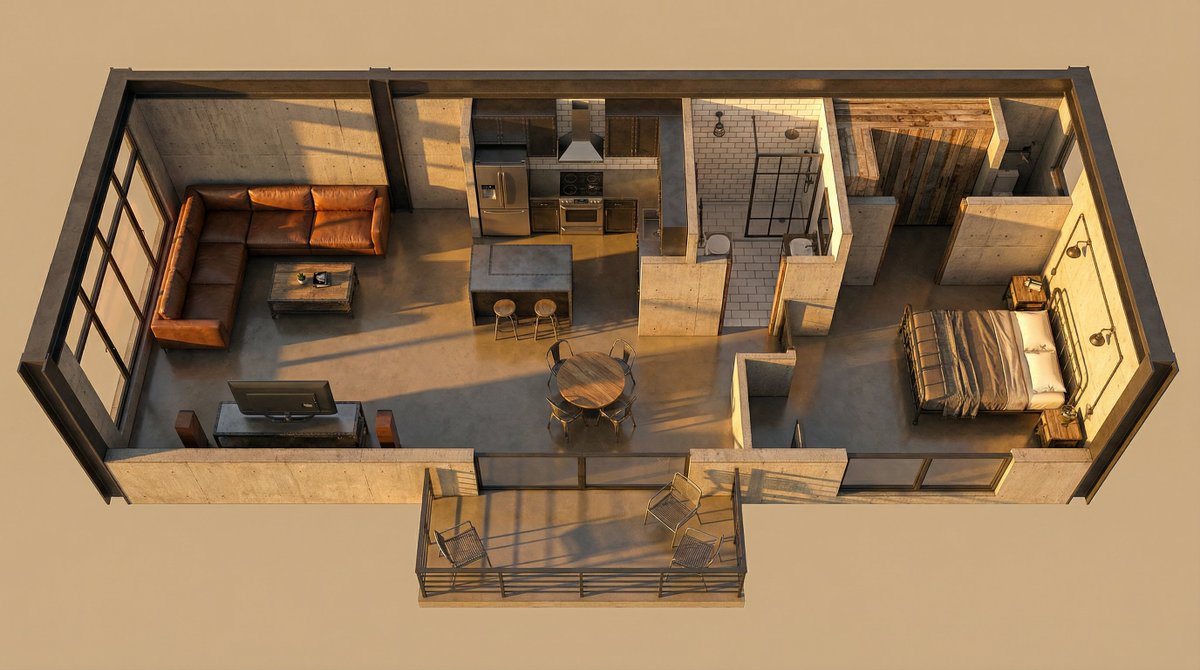
Hit play and boom, you’ve got your first 3D versions that stay consistent with the original layout. Super easy with Nano Banana Pro. Image
Image
Image
Image
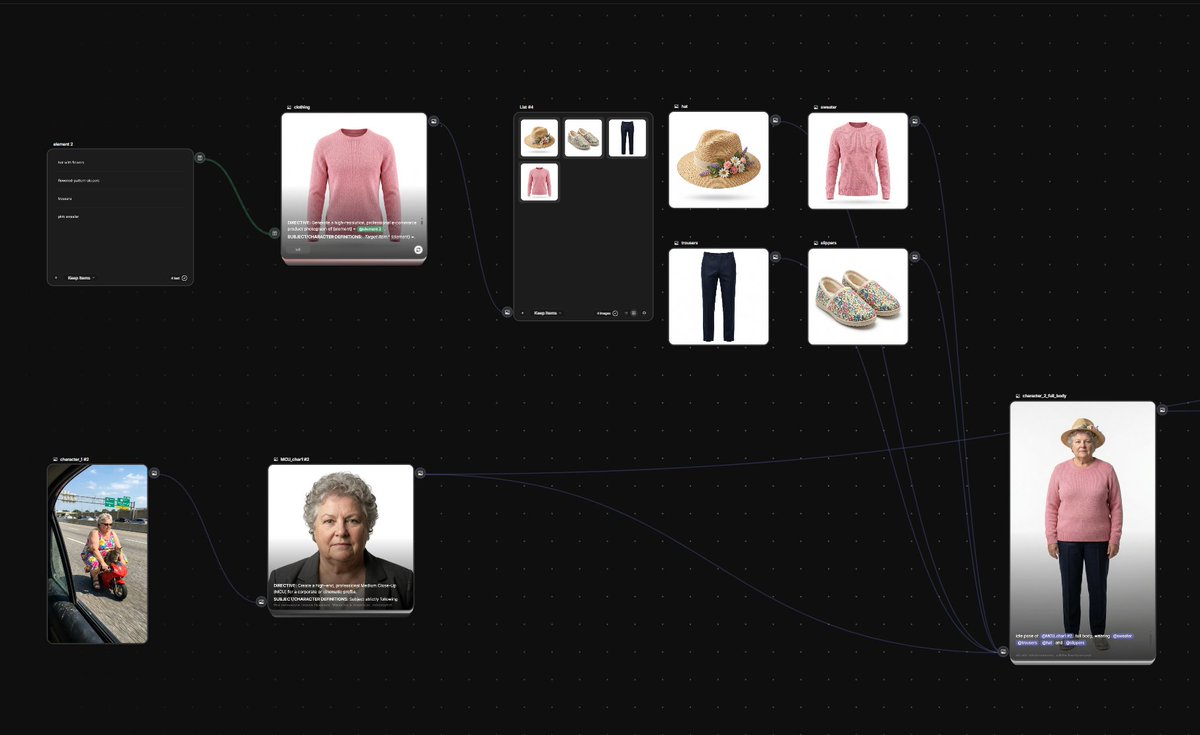
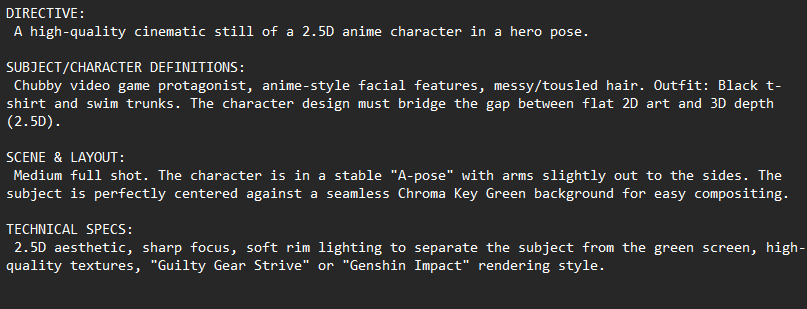
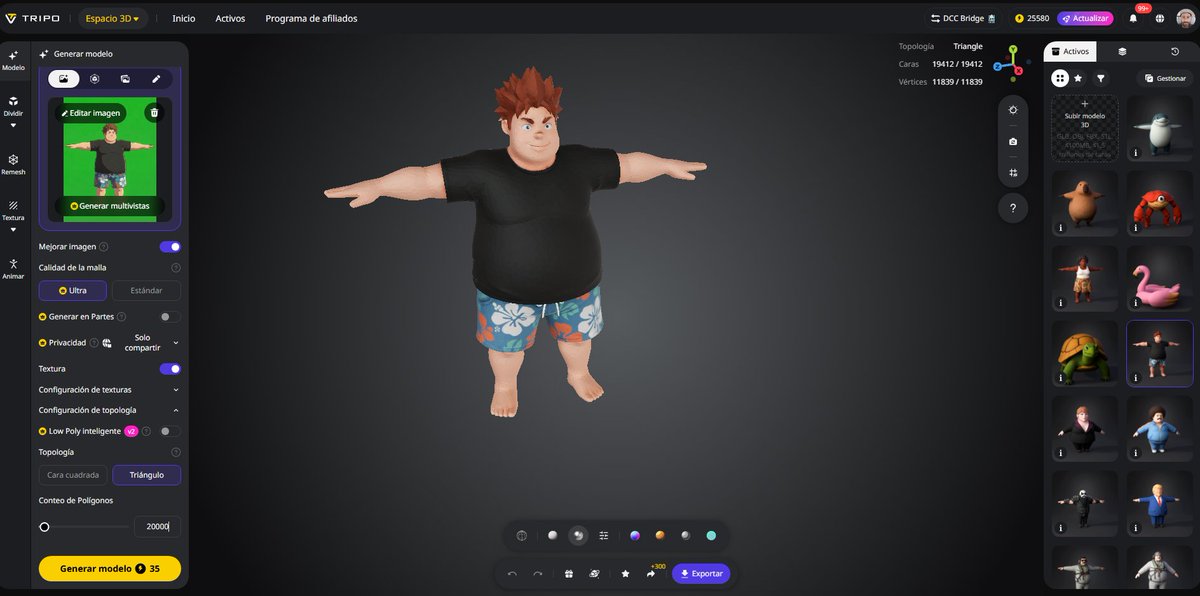
Now, using the list of generated images, we’ll create new Image nodes, one for each room, and generate an interior shot for each one.

We’ll keep the spatial consistency locked in again, this time within our 3D design. Image
Image
Image
Image
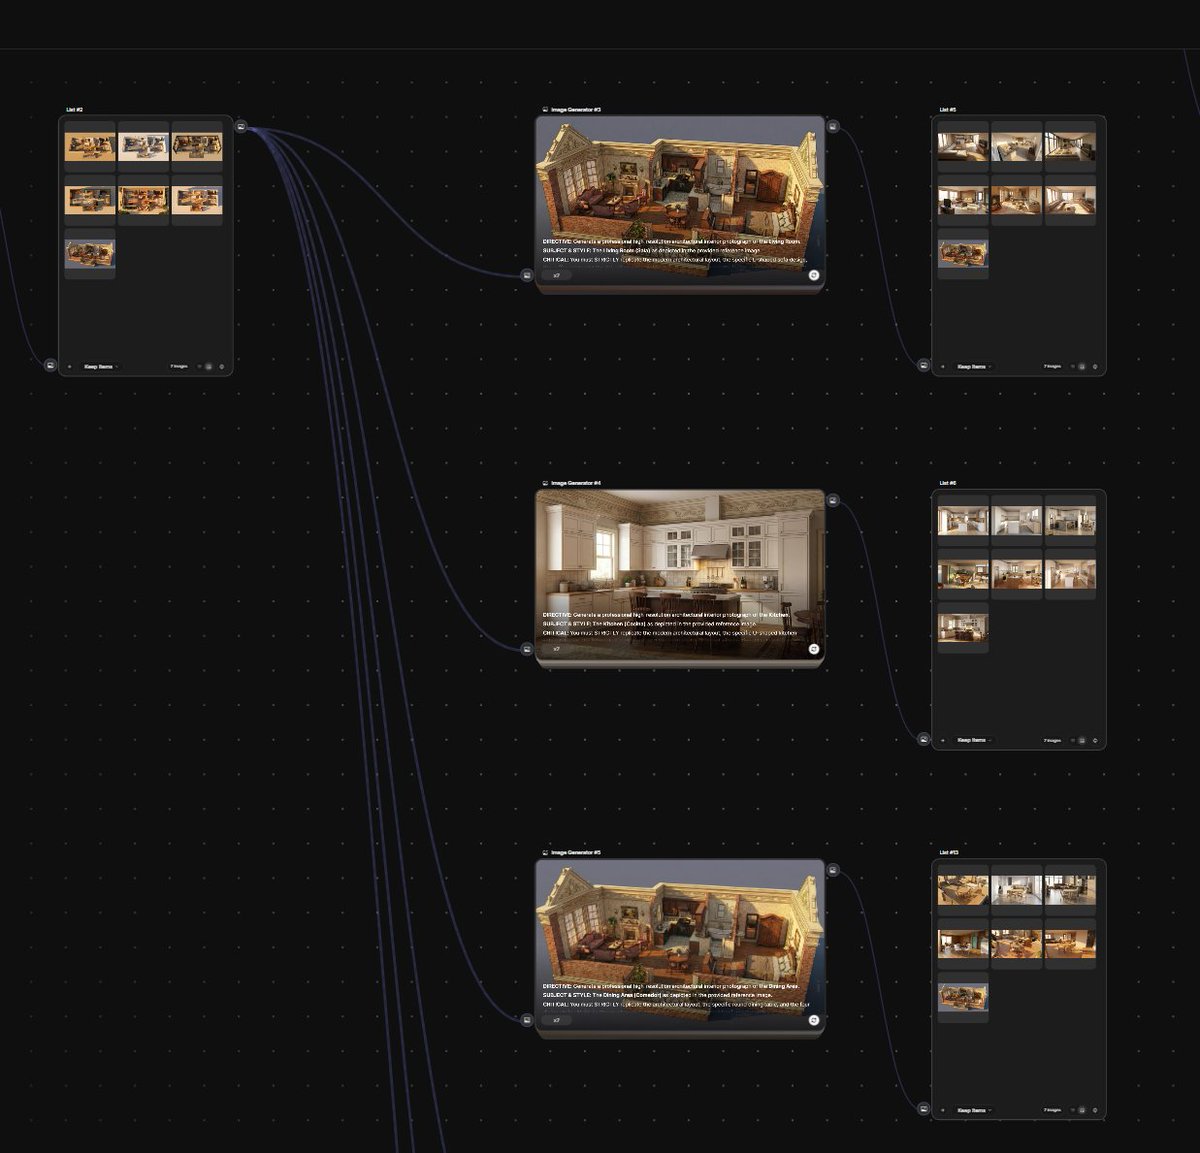
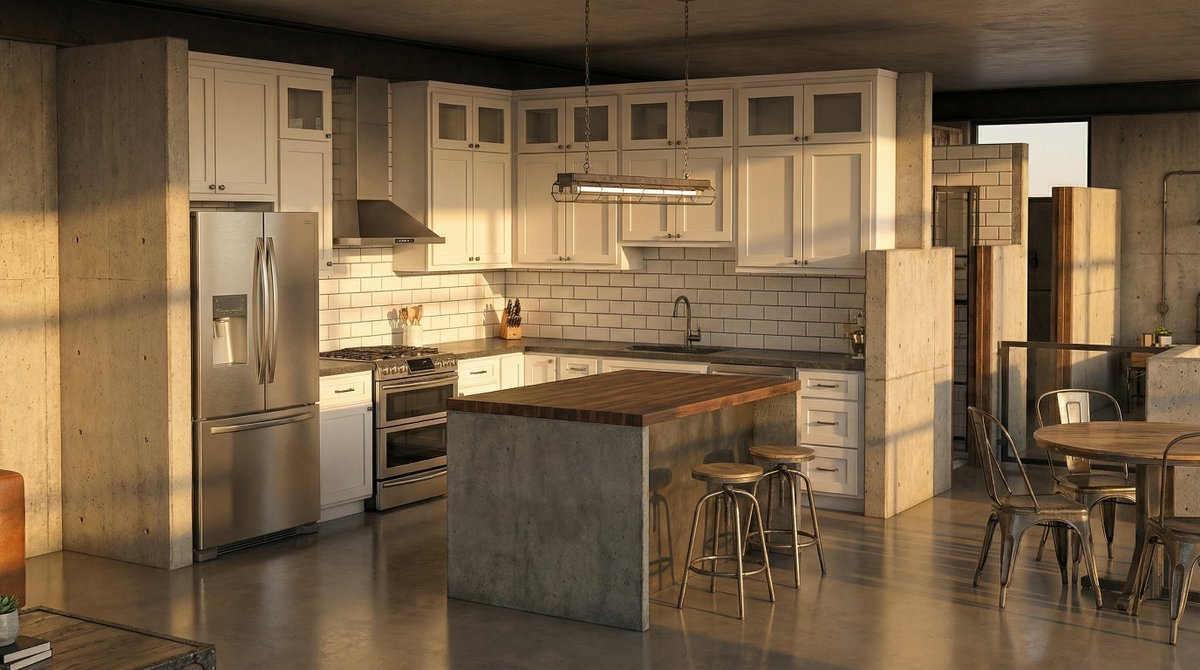
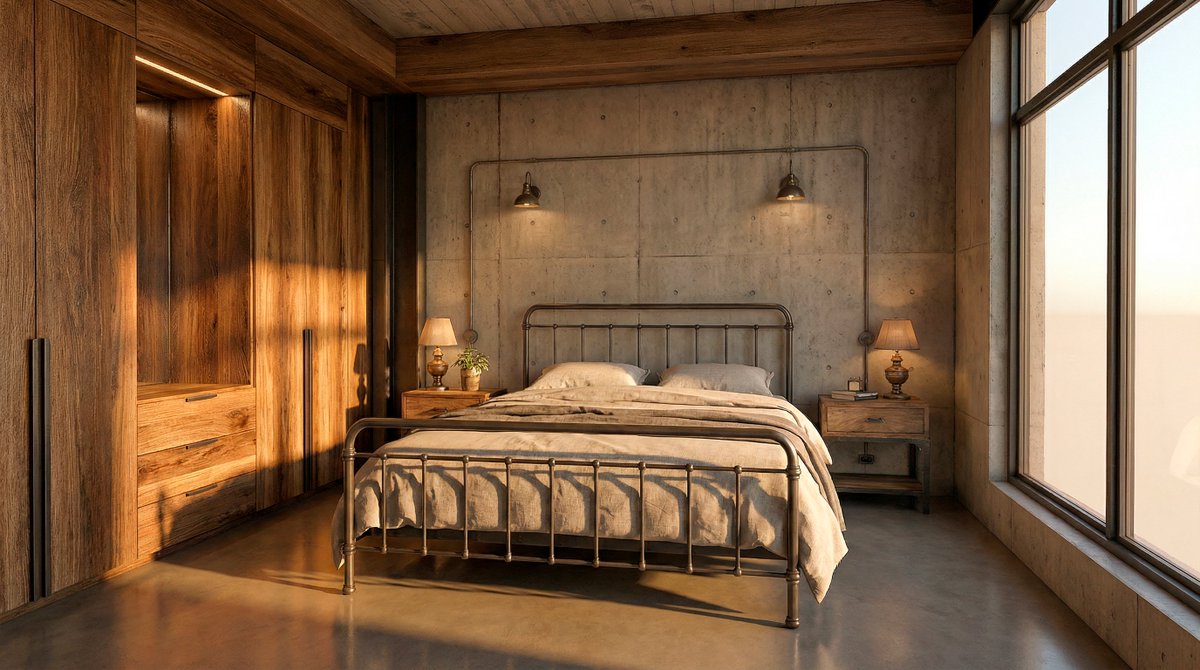
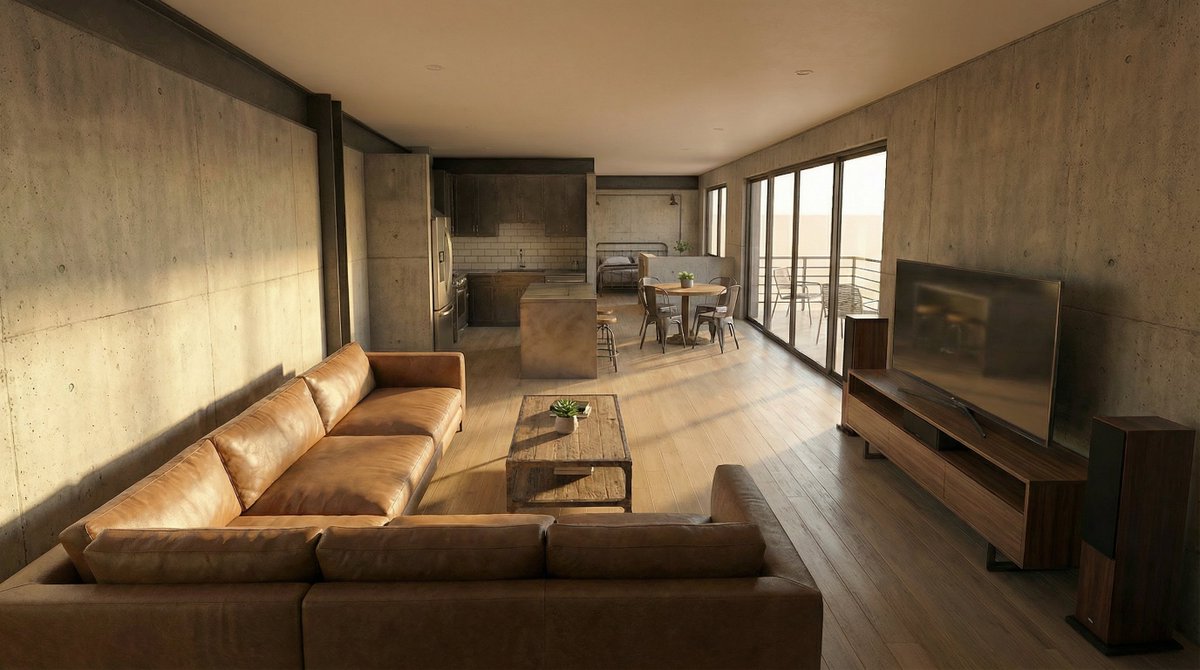
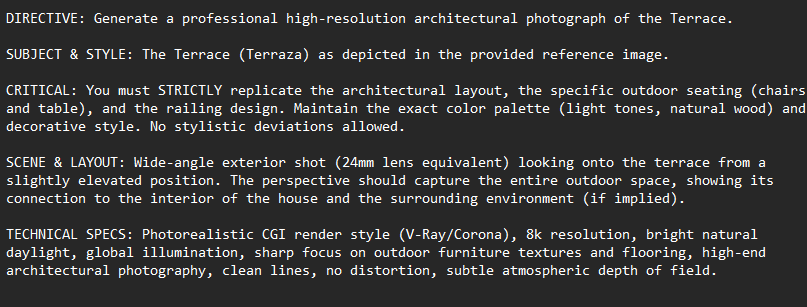
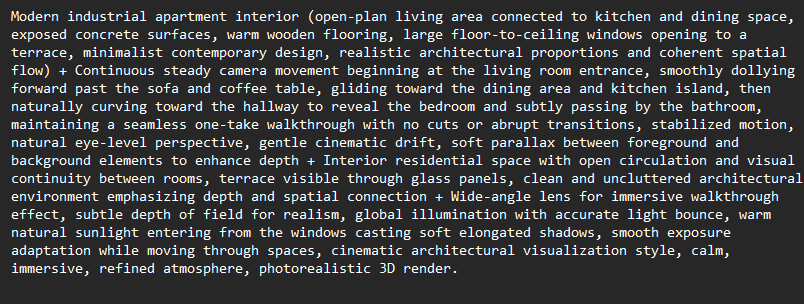
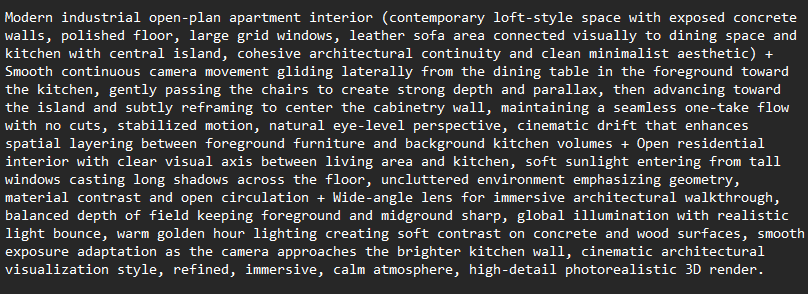
Here’s a sample prompt so you can see how to make it as true as possible to what we’re going for. Image
Image
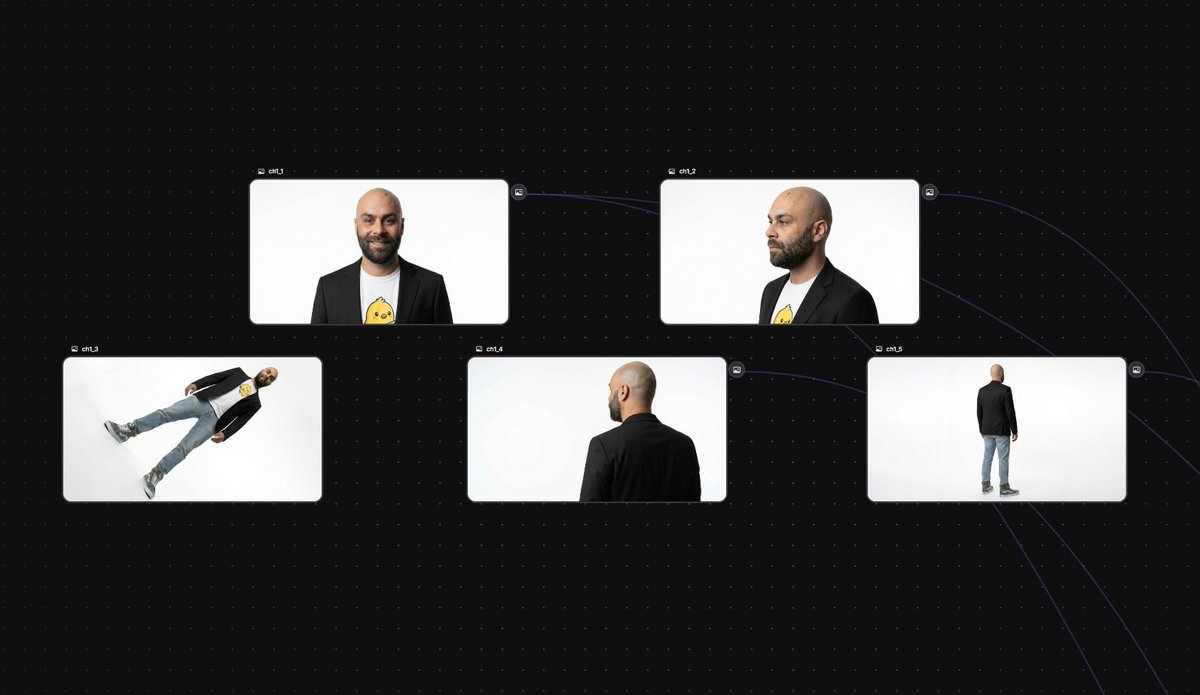
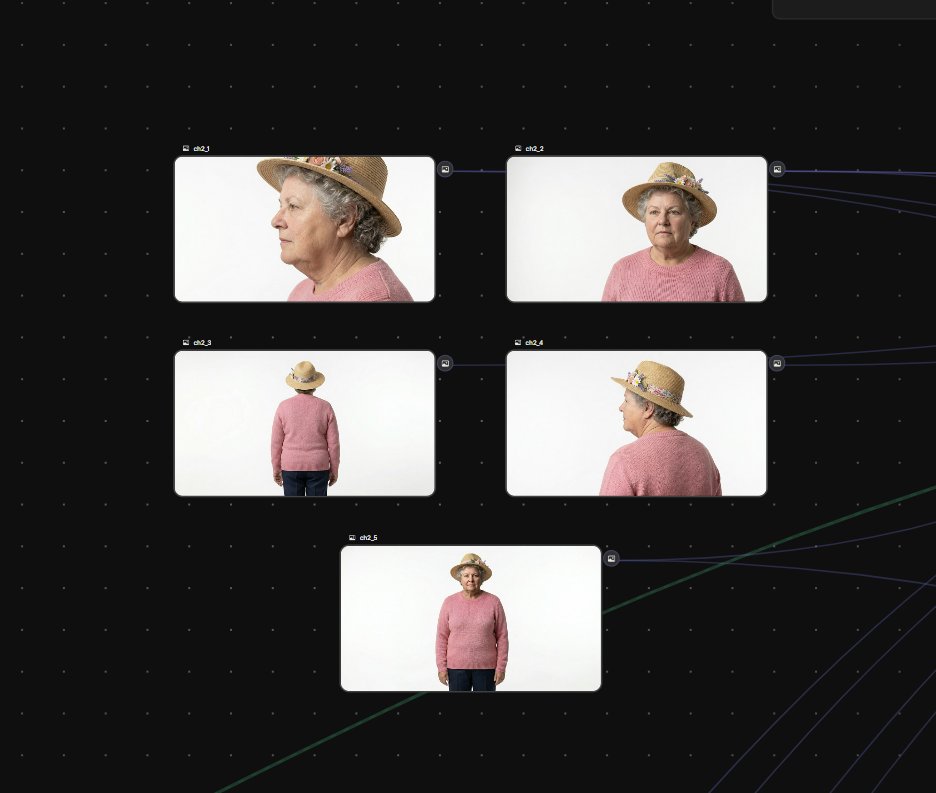
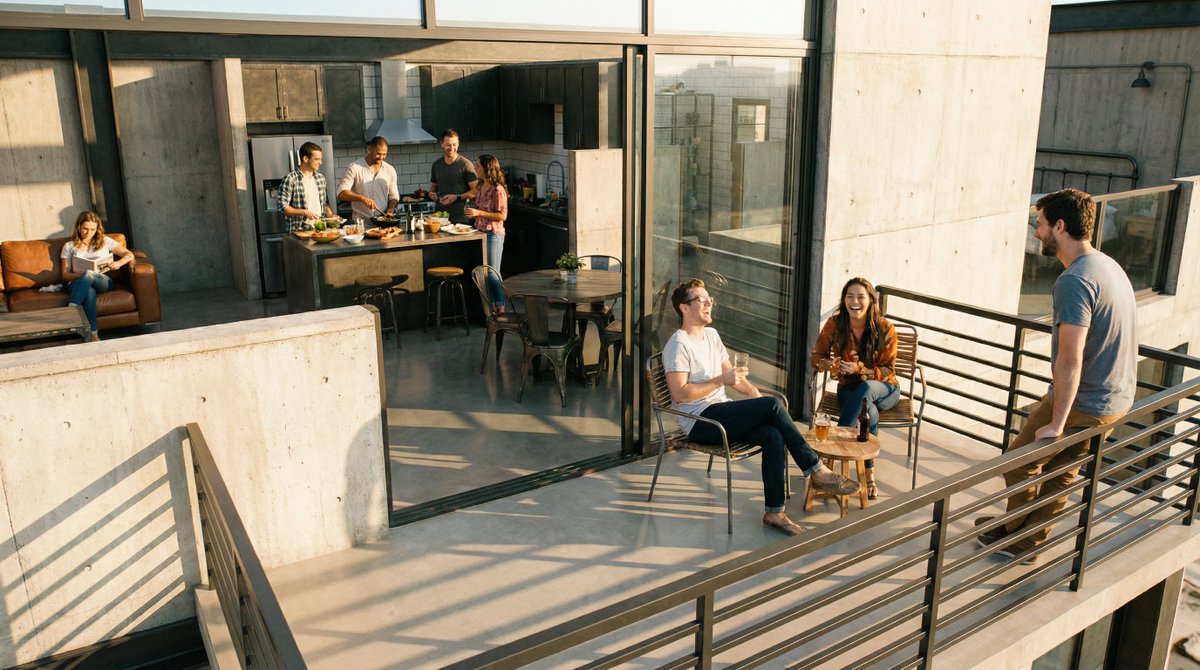
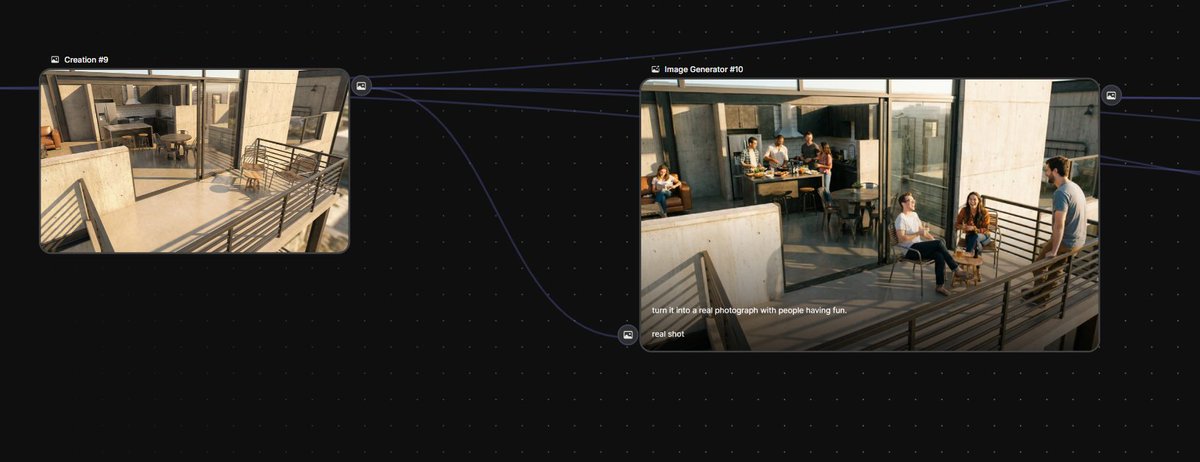
And finally, a couple of extra images to switch up the vibe of the video.

A real photo conversion with people in it, and your studio’s logo! (Using a photo of me as reference)  analize the face of this guy.  based on it, now create a minimalist profesional architectural logo, with the shape of his face and features, but super elegant.  The text should be fine, stilized, minimal and modern, and read: "HallaHomes"
turn it into a real photograph with people having fun. real shot
Image
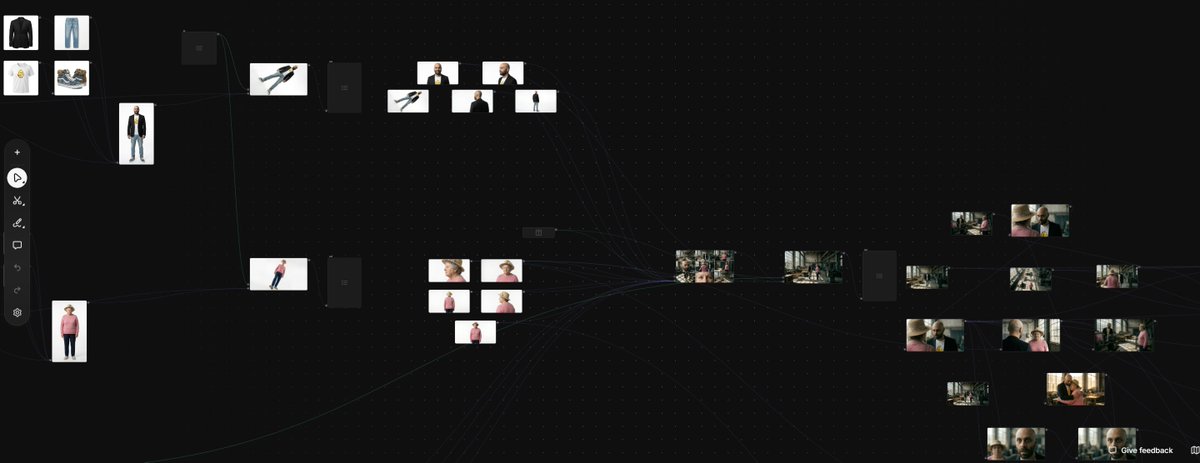
Once all your stills are ready, it’s just a matter of using Kling 3.0 with start and end frames to generate one smooth, continuous video.

I’m dropping a couple of sample prompts below, the key is to focus on the camera movement.

Image
Image
Want to try this workflow?

Awesome, here’s everything you need to get access:
Hope this helps your next project!

Bookmark the main post so you don’t lose the steps. For more daily AI updates and deep dives, follow me @techhalla

• • •

Missing some Tweet in this thread? You can try to force a refresh
 

Keep Current with TechHalla

TechHalla Profile picture

Stay in touch and get notified when new unrolls are available from this author!

Read all threads

This Thread may be Removed Anytime!

PDF

Twitter may remove this content at anytime! Save it as PDF for later use!

Try unrolling a thread yourself!

how to unroll video
  1. Follow @ThreadReaderApp to mention us!

  2. From a Twitter thread mention us with a keyword "unroll"
@threadreaderapp unroll

Practice here first or read more on our help page!

More from @techhalla

Mar 3
Vibe coded this customizable video game entirely with AI.

You can add custom nano banana tiles and 3D models from Tripo.

It's open sourced (repo at the end) and here's how it works 👇
I’m going to walk you through how it works step by step, how I built it over time, and access to the full code at the end.

But first, you need @tripoai to create usable 3D models, you can do it here. I’ll explain how everything works in a second:
The AI stack I used is this:

> Cursor backed by Opus 4.6 to build all the code

> Nano Banana 2 for generating tiles and reference images

>Tripo, like I mentioned, for 2D to 3D

Let’s get into it 👇
Read 10 tweets
Mar 1
this prompt for Nano Banana will save you a ton of time.

with just 3 variables, it helps you create HD cinematic stills!

examples made in freepik, master prompt below 👇 Image
Nano Banana 2 was released just a few days ago, and the @freepik team has already integrated it into their suite. Not only is it much faster, but it also delivers incredibly high resolution results.

Save these variables to try them out later! Image
As you can see, it's perfect for photorealistic shots, capturing incredible detail even when including non-natural elements.

By the way, the template you see here was also AI-generated, but I’m saving that for a future tutorial! 😉 Image
Read 6 tweets
Feb 27
You can lock consistency with just Nano Banana 2 and Kling.

no more random 15s clips.

Full freepik Space breakdown below 👇
I’ve been obsessed with @freepik Spaces lately and this workflow is the perfect example of why.

If you're organized and know some basic prompting, you’re set!

Let’s dive into the details. Image
First, let’s design our characters.

One base prompt to set the tone using a ref image, then variations for outfits, poses, and angles... Image
Image
Image
Image
Read 9 tweets
Feb 14
Lots of people are selling my prompts and my workflows… I don’t give a fuck.

I’m still sharing everything I know about generative AI for free.

9 essential resources from the last 2 weeks 👇

1. Full workflow to create 3rd-person POV continuous videos
2. Another complete workflow with more than 17 prompts to recreate documentaries
3. Tutorial about how to generate locally with the SOTA open-source video model
Read 10 tweets
Feb 12
I’ve built a workflow with over 17 prompts for 6 different AI generation models that can recreate documentaries like this.

All on the same platform.

How I did it, including access to the freepik Space, below 🧵
People always ask how I create so much content so fast. It’s all about optimizing my workflow and focusing on the creative part.

That’s where @freepik Spaces helps. Everything in one place, with state of the art models for images and video.

Let’s take a look! 👇 Image
We start by creating a Space and a 3x3 image grid with nb pro that we’ll use to kick off the story.

This time I’m not sharing the prompts, because at the end of the thread I’ll give you direct access to the full workflow with all the prompts, images, and videos I generated. Image
Read 9 tweets
Feb 10
A real example of using AI to generate 3D animations with full control and consistency.

If you want to learn how, I break it all down in this Tripo thread 👇
This workflow has been the base for many pro animation projects I’ve worked on. The key is using AI to speed things up and get amazing results.

We’ll do the 3D modeling with @tripoai, starting from images like these (prompt’s in the screenshot). Image
Image
Image
Image
From here, we’ll use Tripo with the images we’ve generated as reference.

It works for both animated characters and static objects.

Just upload the image, tweak the settings, and generate the model in under a minute! Image
Read 9 tweets

Did Thread Reader help you today?

Support us! We are indie developers!


This site is made by just two indie developers on a laptop doing marketing, support and development! Read more about the story.

Become a Premium Member ($3/month or $30/year) and get exclusive features!

Become Premium

Don't want to be a Premium member but still want to support us?

Make a small donation by buying us coffee ($5) or help with server cost ($10)

Donate via Paypal

Or Donate anonymously using crypto!

Ethereum

0xfe58350B80634f60Fa6Dc149a72b4DFbc17D341E copy

Bitcoin

3ATGMxNzCUFzxpMCHL5sWSt4DVtS8UqXpi copy

Thank you for your support!

Follow Us!

:(