
Illustrating a spider, step by step. I make no promises here... no idea how this will turn out but I’ll do my best to keep it going right the way through. I warn you, this might take a while so don’t expect it completed tonight 😂 This will be a thread.
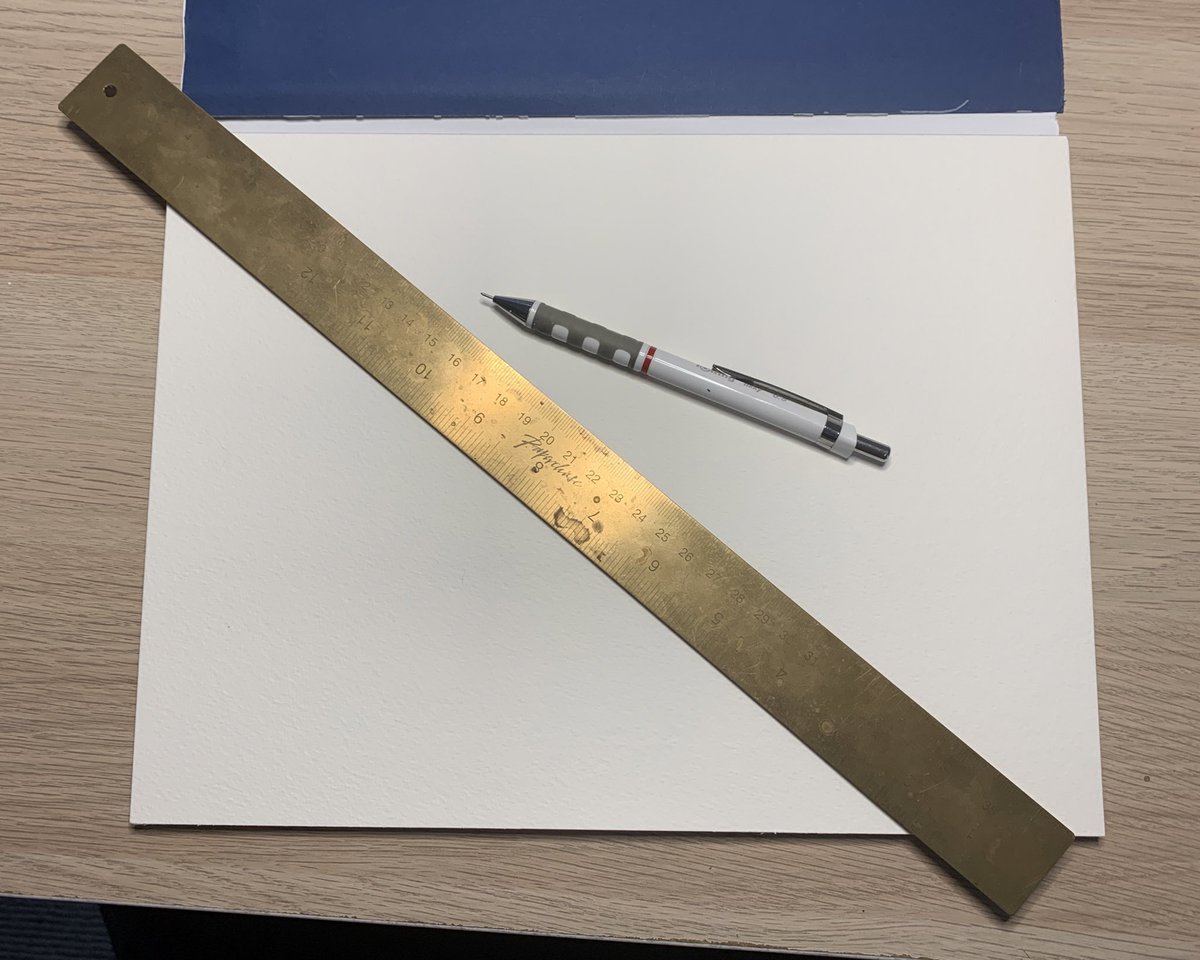
To start out, choose your materials. I work primarily with ink and watercolour, so am using watercolour paper. In this case, The Langton by @DalerRowney- 140lb cold pressed block. I will draw a grid, so I have my ruler and 0.5mm HB mechanical pencil. 
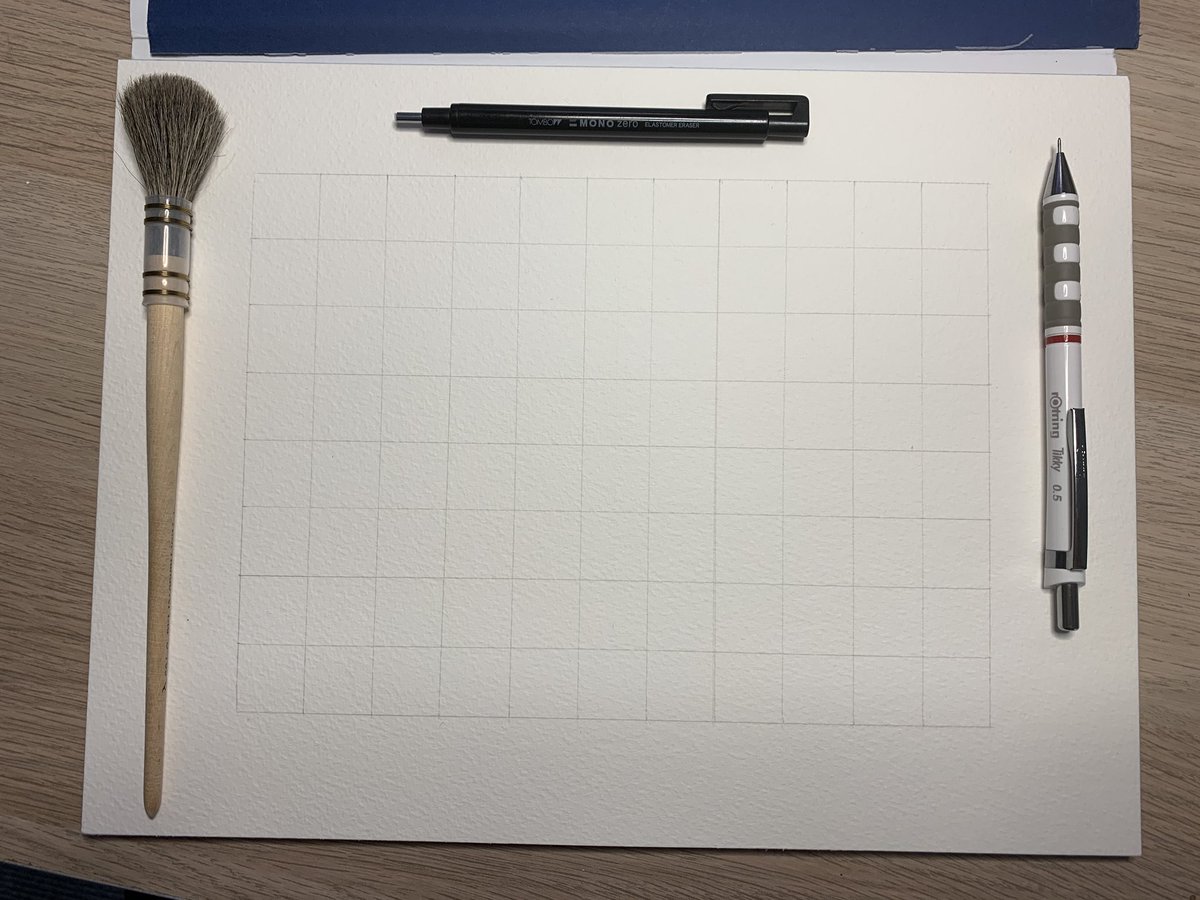
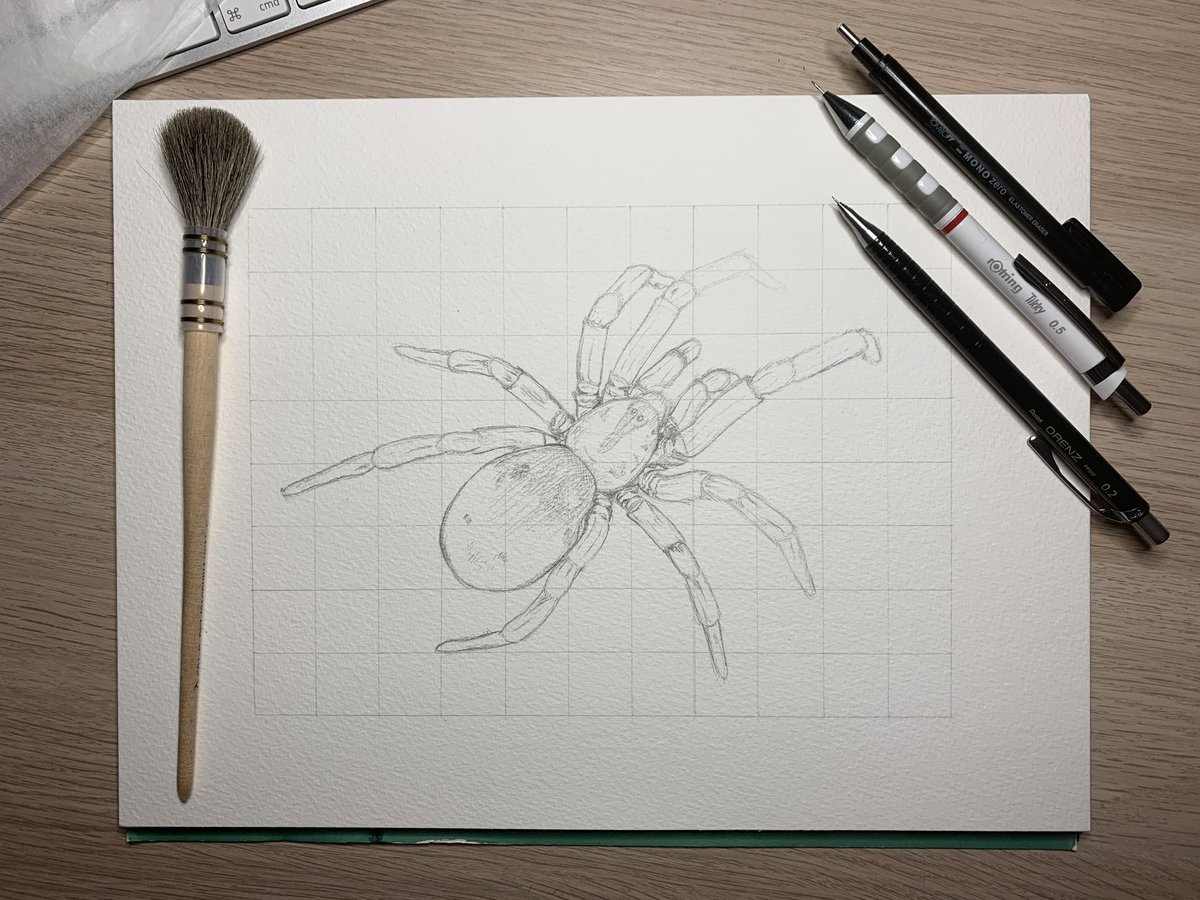
Grid drawn. The grid is penciled in very lightly to ensure it erases completely later. Depending on your reference, a grid or bounding box helps a lot with proportion. Pro tip: don’t blow or brush eraser debris away with your hand. Use a brush & use it lightly to avoid smudging.
I am employing natural history illustration techniques here. This applies to drawing from life as well as from image ref. I am drawing from an image tonight so a grid works well. From life, I would use a bounding box. This helps keep proportion under control.
Please ask if you’re unsure of what any of the things I’m mentioning are! In the meantime, I’ll be back with the next step shortly once I’ve actually completed it 😂
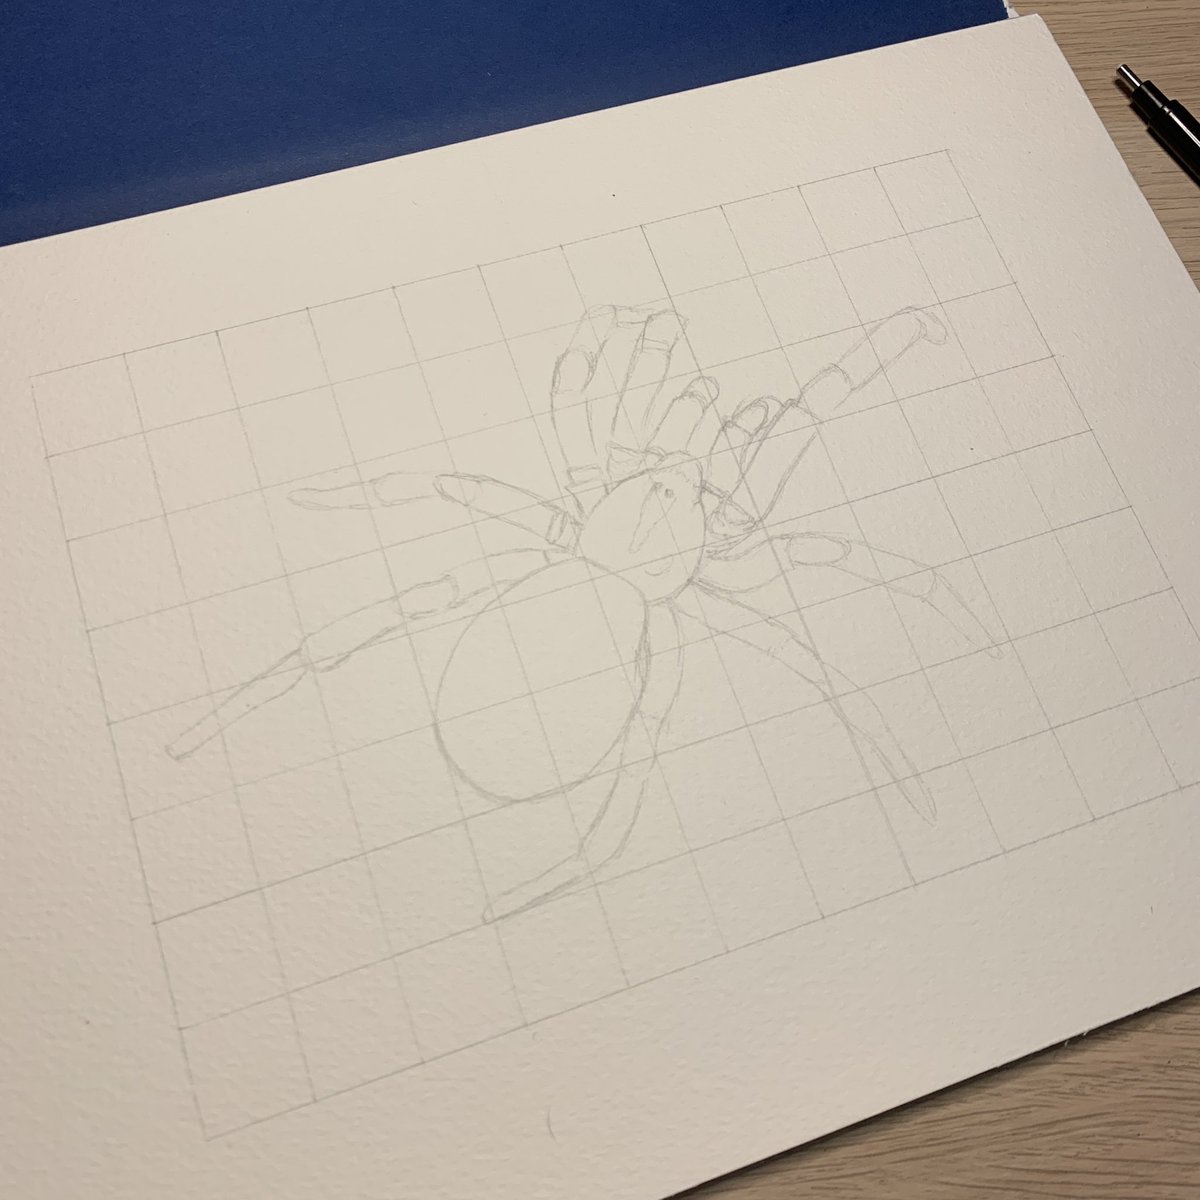
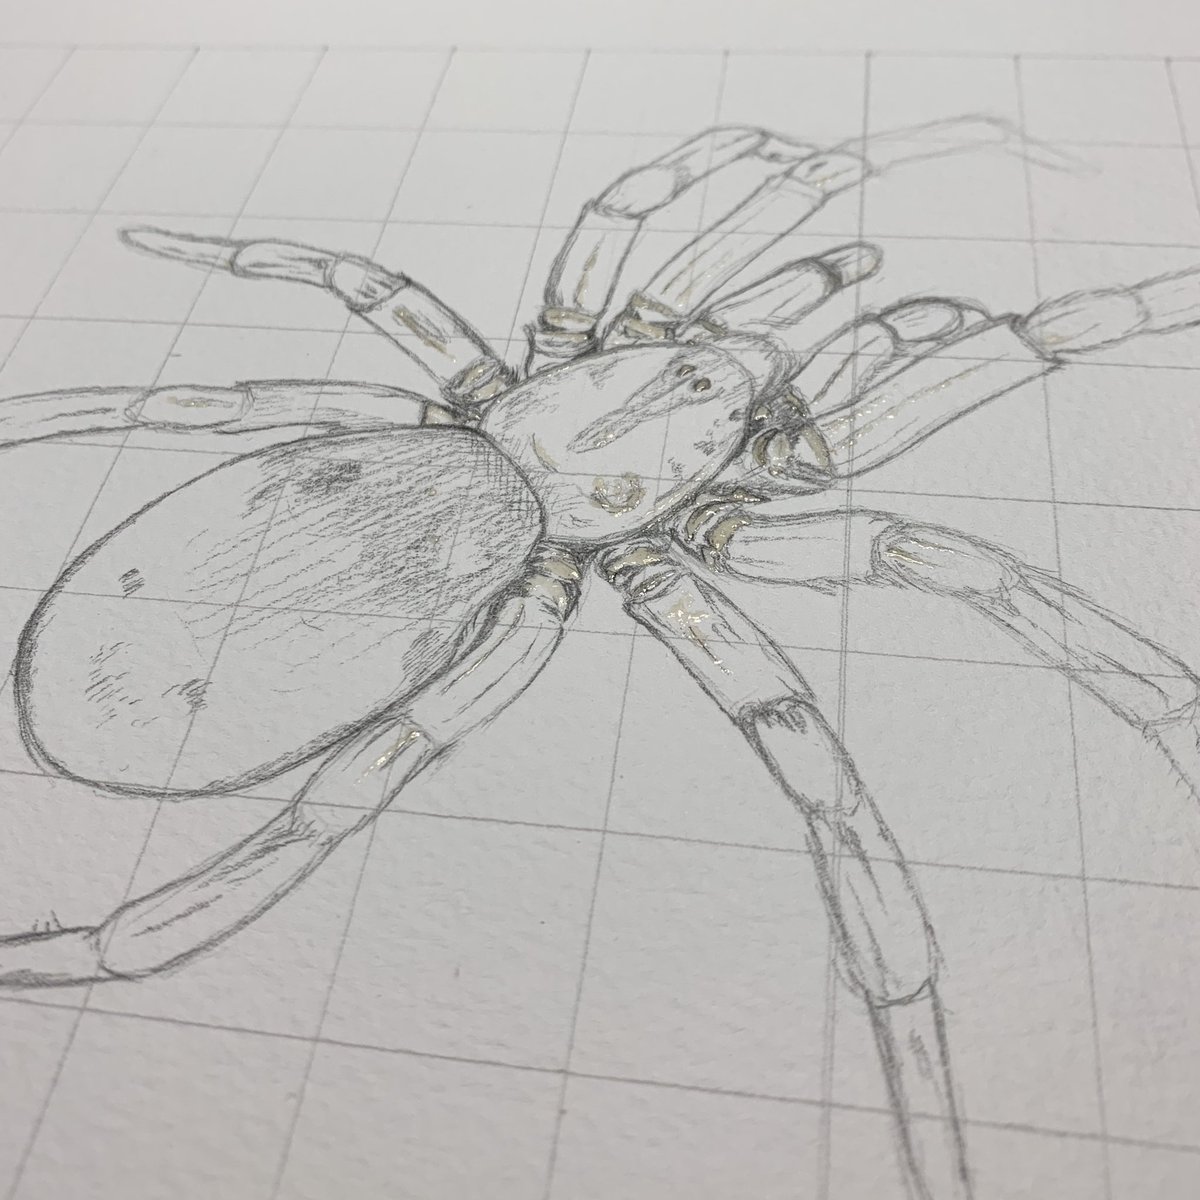
Now your grid is drawn, you can faintly map out the main shapes that comprise your subject within the grid. If you’re drawing from life, using a bounding box, you would plot out the most basic shapes that you see as a basis, e.g. an egg for abdomen, circle for cephalothorax etc.
Keep it faint so that you can erase as necessary without leaving marks on your white areas. You may wish to use a sheet of clean printer paper to use as a barrier between your skin and the page if you rest your hand on it whilst drawing.
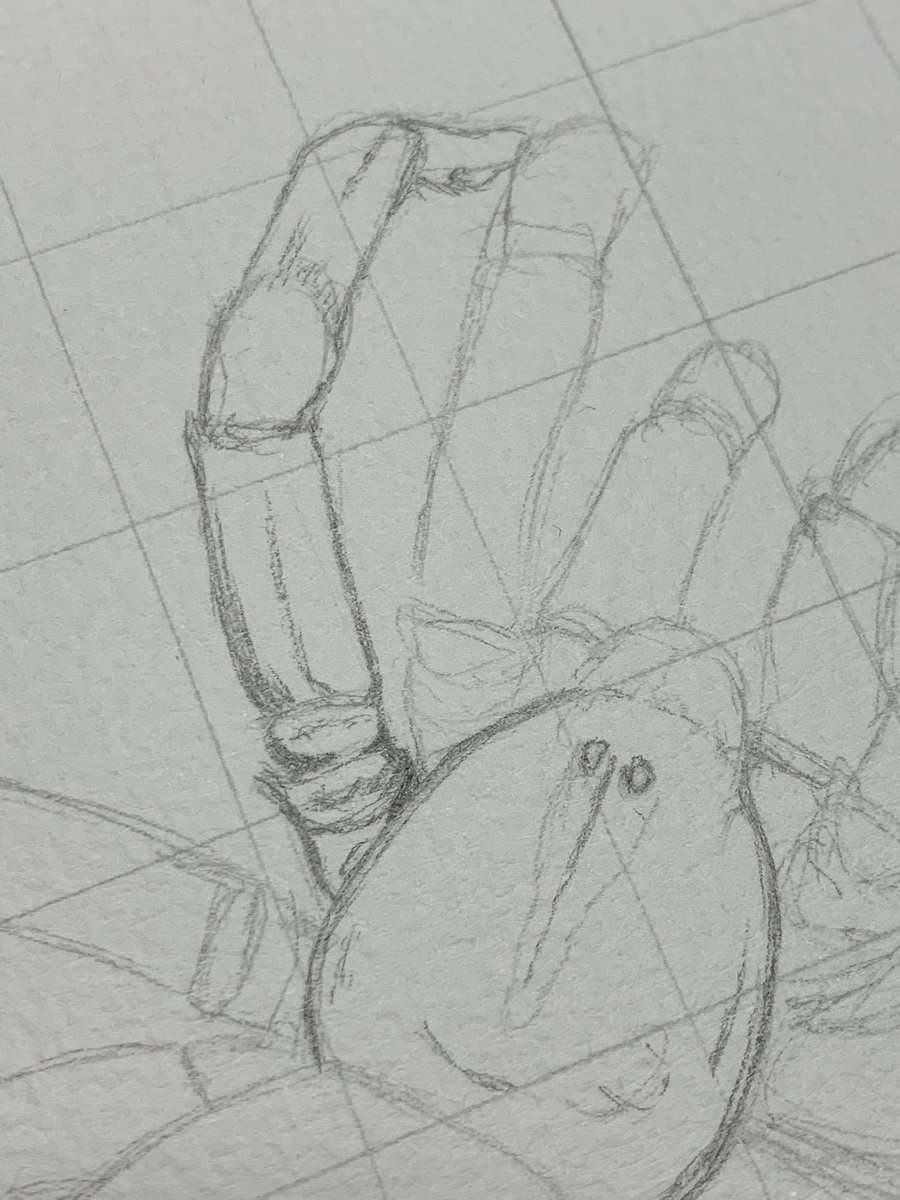
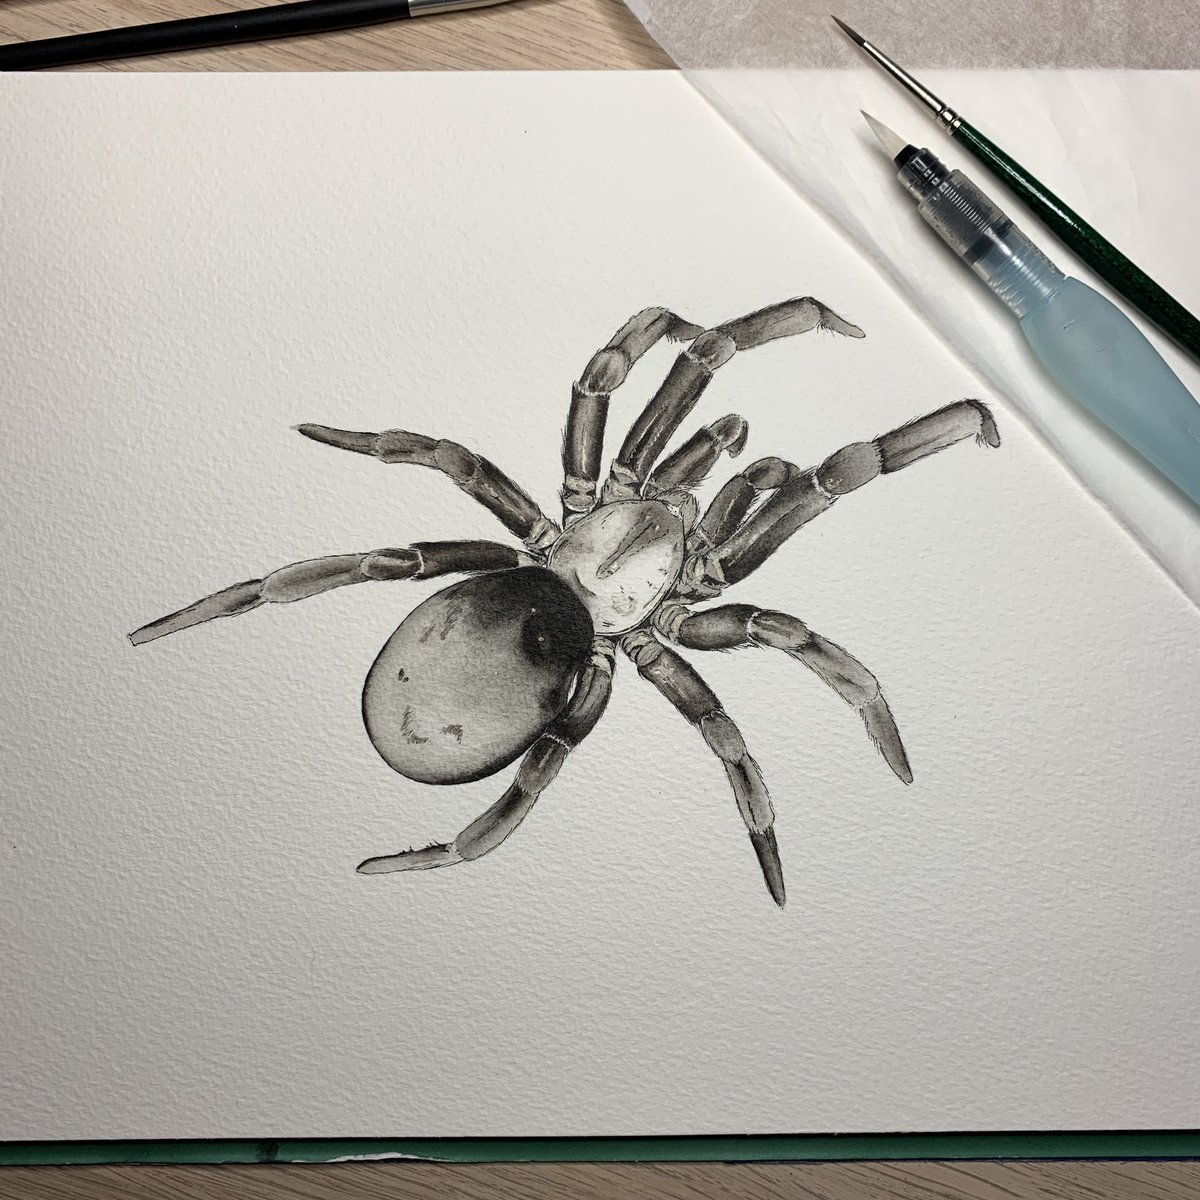
Now I’m starting to get the next level of base shapes down in pencil. As I will go in with black ink once pencil is finished, the outlines and darkest shapes are identified first. I’m now using a 0.2mm HB mechanical pencil & applying marginally more pressure.
Ok. Pencil plotting is done, which means I’m calling it a night for now as I have other things to do before The night is over. Inking will commence tomorrow.
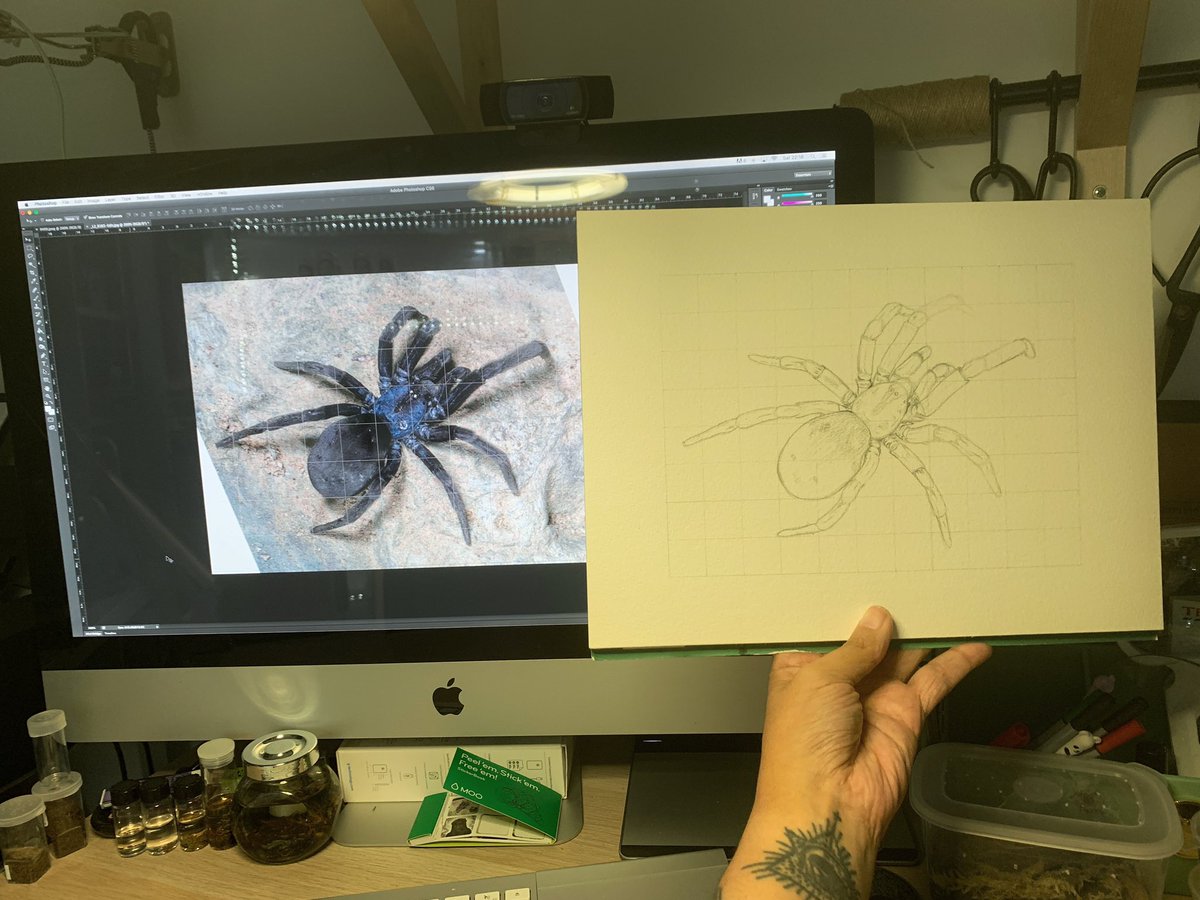
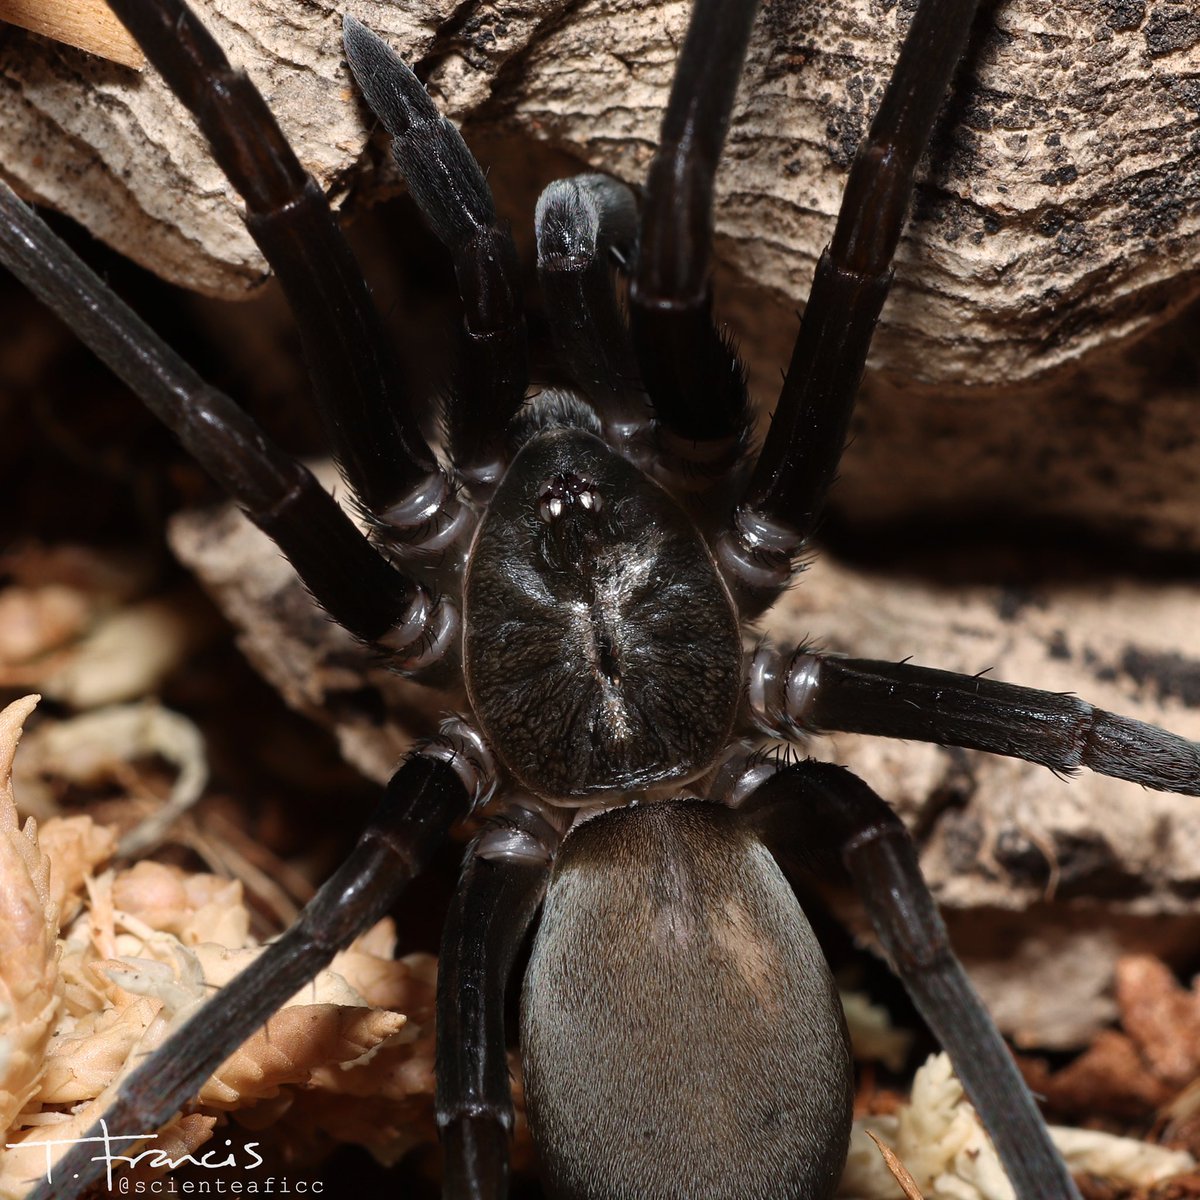
As a point of interest, this pic shows my reference image (cc:@Persian_spiders). This female Sahastata amethystina has lost everything below the patella of her frontmost left leg so I am improvising and adding in the missing metatarsus & tarsus from imagination.
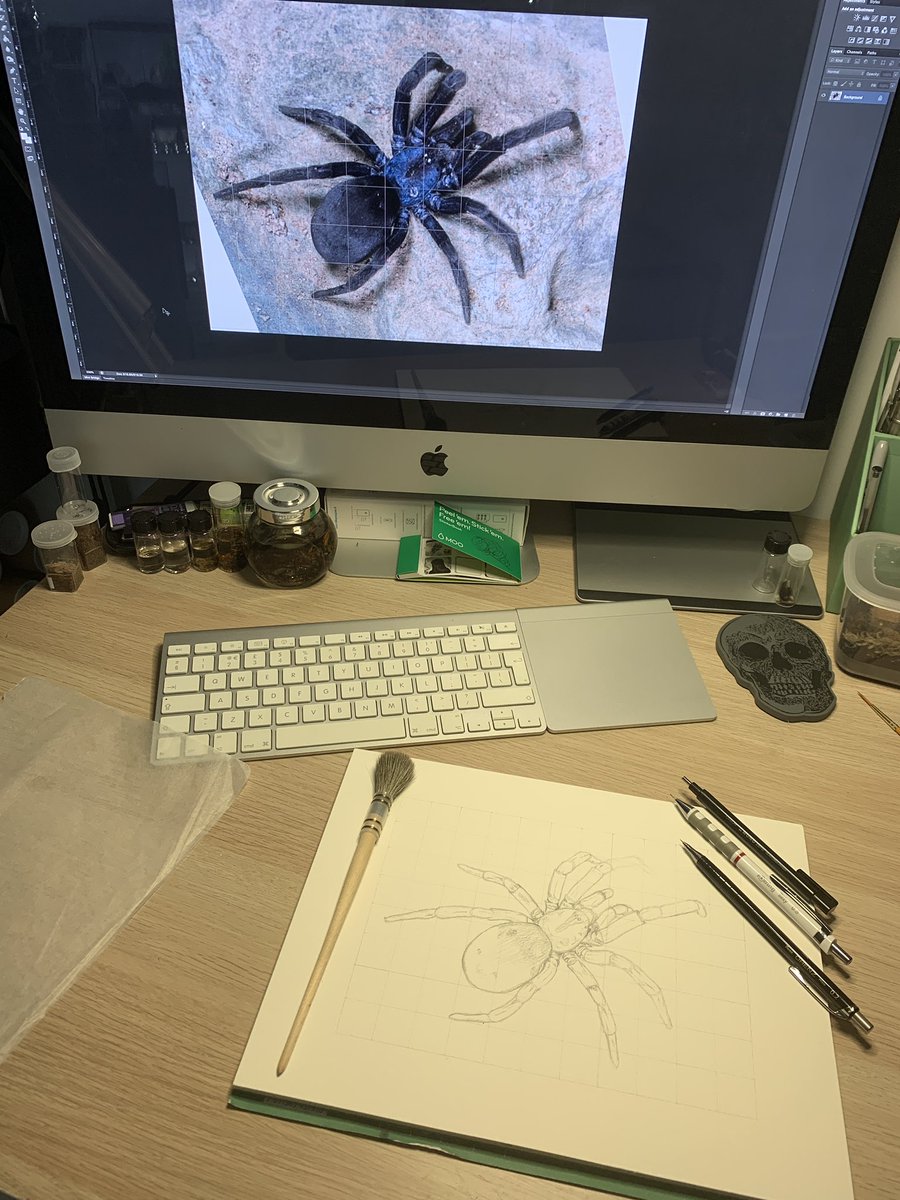
Maybe this image does a better job of showing the importance of the grid. You *could* trace it I guess... but where’s the challenge? Observing closely & translating on to paper by eye means you notice details you’d otherwise miss.
Therein lies the importance of natural history illustration. Illustrators have noticed details that scientists have overlooked before now. It’s an incredibly valuable practice. I am not saying MY illustrations are in that category at all, but the point stands.
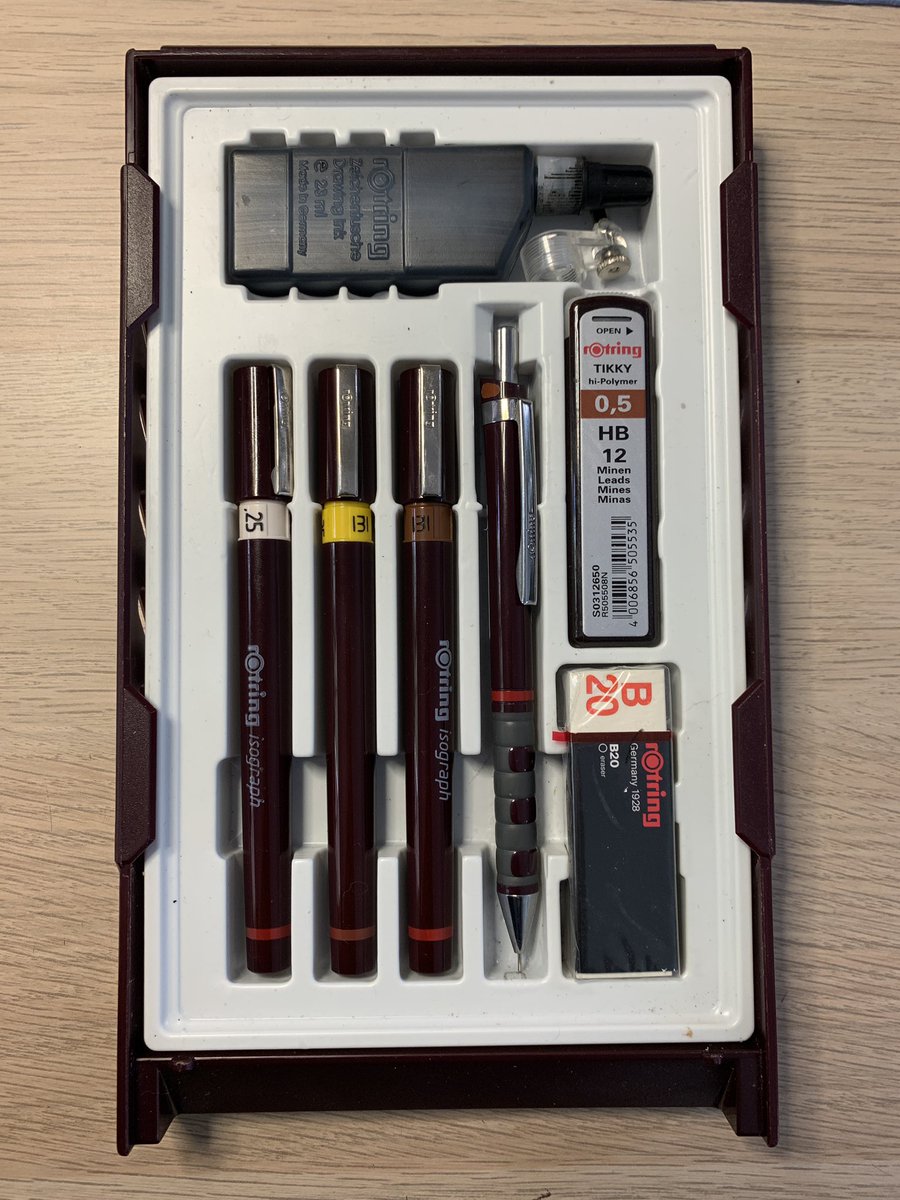
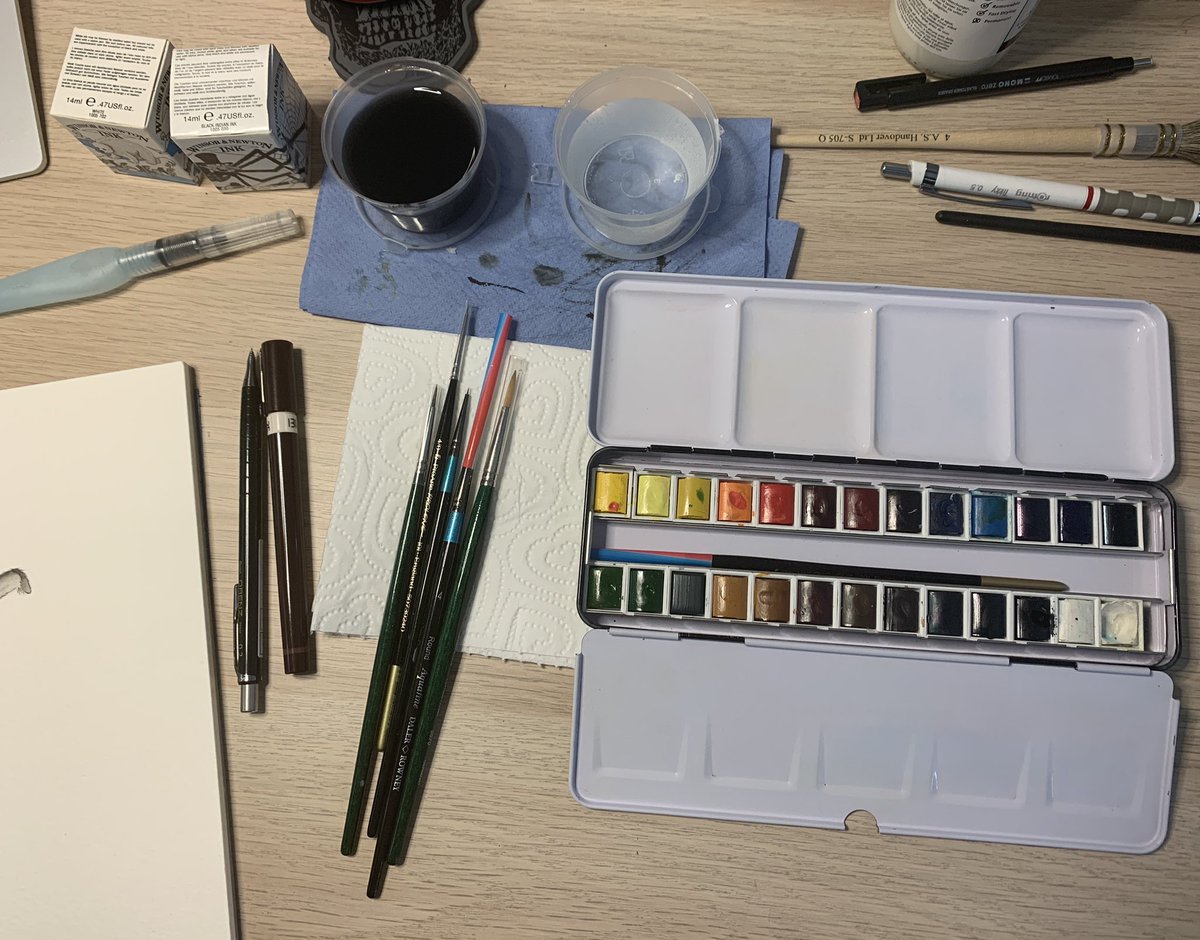
Ok, here we go again! Today’s tools: pencil tools that were covered yesterday, masking fluid for brightest white highlight areas (prevents ink from touching that part of the paper), my preferred precision drawing pens for this type of work & my ink wash setup. Details to follow.

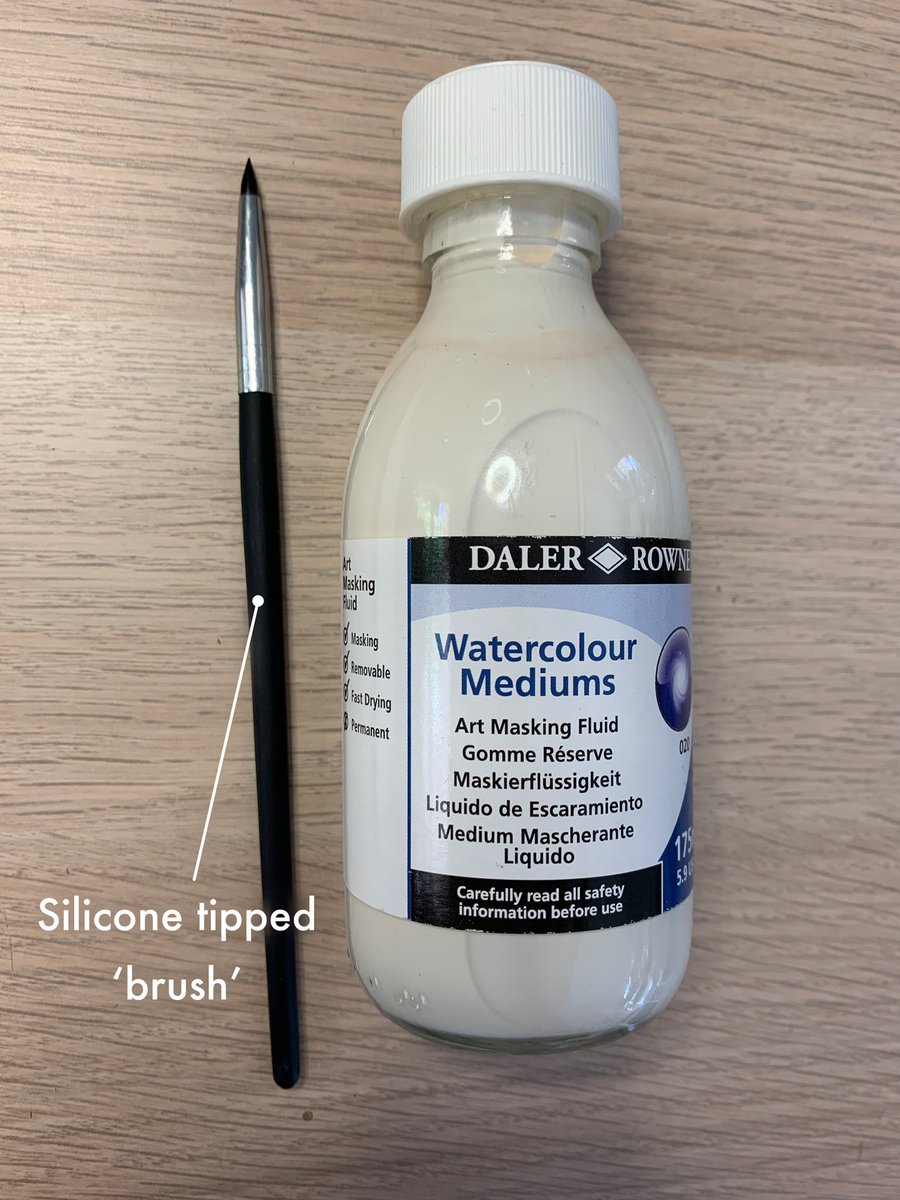
So, about the silicone tipped brush & masking fluid. Any high-white highlights or very pale areas in my reference image will be being masked off with this latex based masking fluid. Once dry it can be painted over no problem, then removed either by hand or eraser later.
The silicone brush is one of about 7 I bought as a set for cheap on AliExpress as a test. Turns out it’s become my go-to for masking as it’s re-usable. Masking with regular paintbrushes was annoying as they get ruined after one use, so I was going through loads of cheap ones.
Here’s a little video of the masking process. At the end, you’ll see why I like these silicone tipped brushes so much! I only need a tiny bit of fluid, so after shaking the bottle, I upend the lid to help keep air out of the bottle & just use what’s pooled inside the lid.
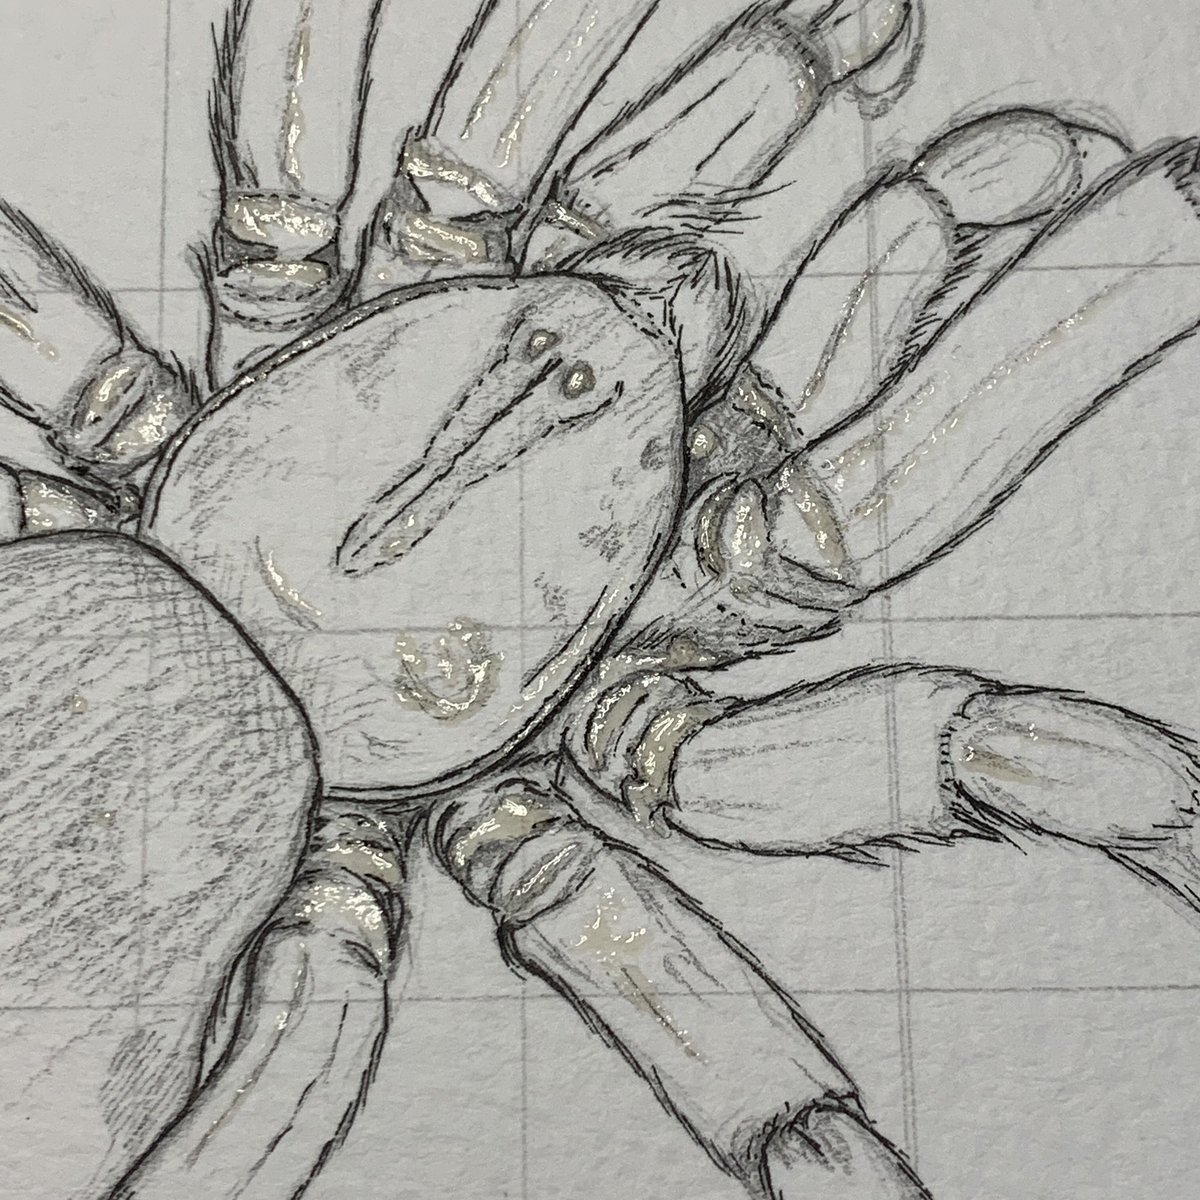
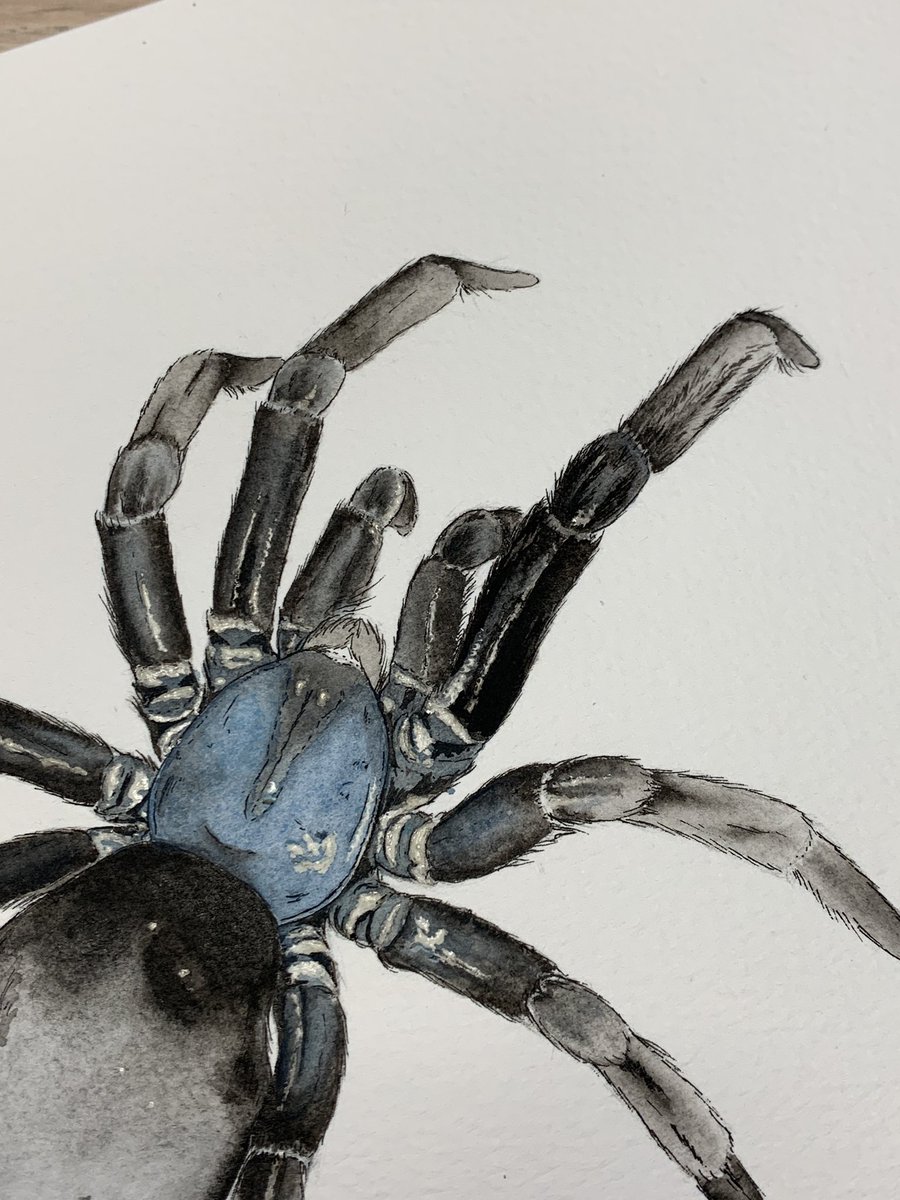
All the shiny/yellow areas are masked now. Mostly coxae and trochanters (as they are quite prominent in Filistatids like this one), eyes, and a few highlights on abdomen and leg segments. Next, ink line work.
It’s worth mentioning that from this point onwards, this becomes less of a ‘by the book’ step by step, and more of a look at how I work personally. The techniques shown up until now are pretty general/universal . Now you’ll see how I do things as an individual artist 😈🎨🖌
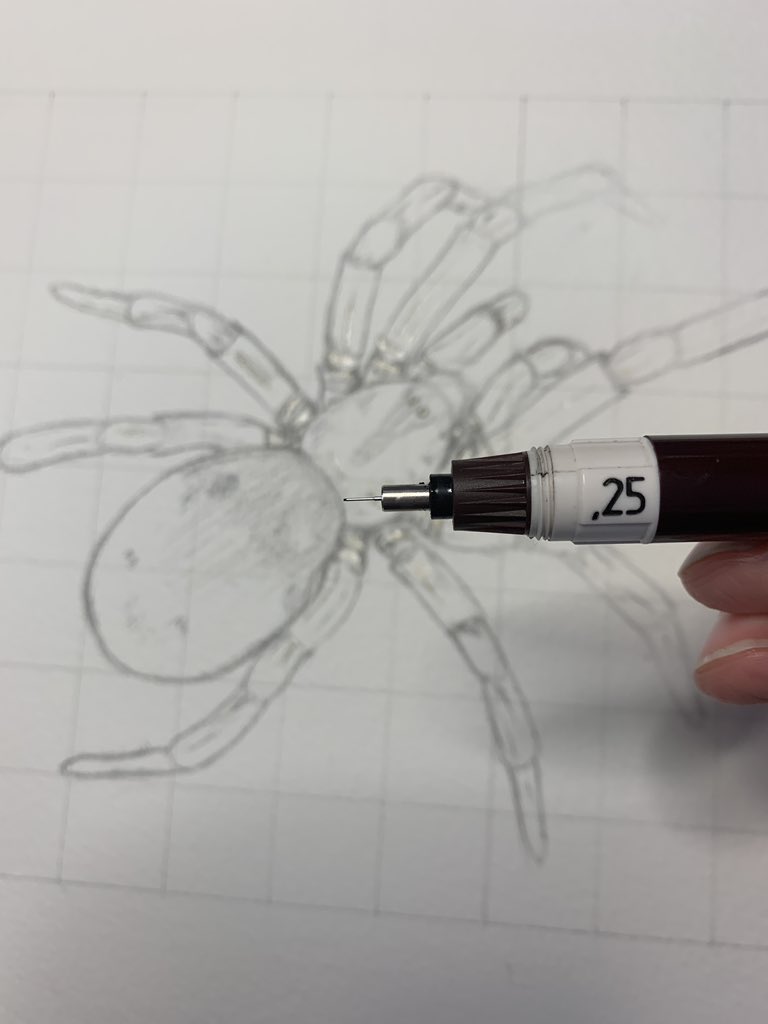
Using my finest precision drawing pen, I’m going to outline areas now. I don’t want a solid black outline all the way around this, so a lot will be built up from hairs etc. I’ll show you what I mean soon.
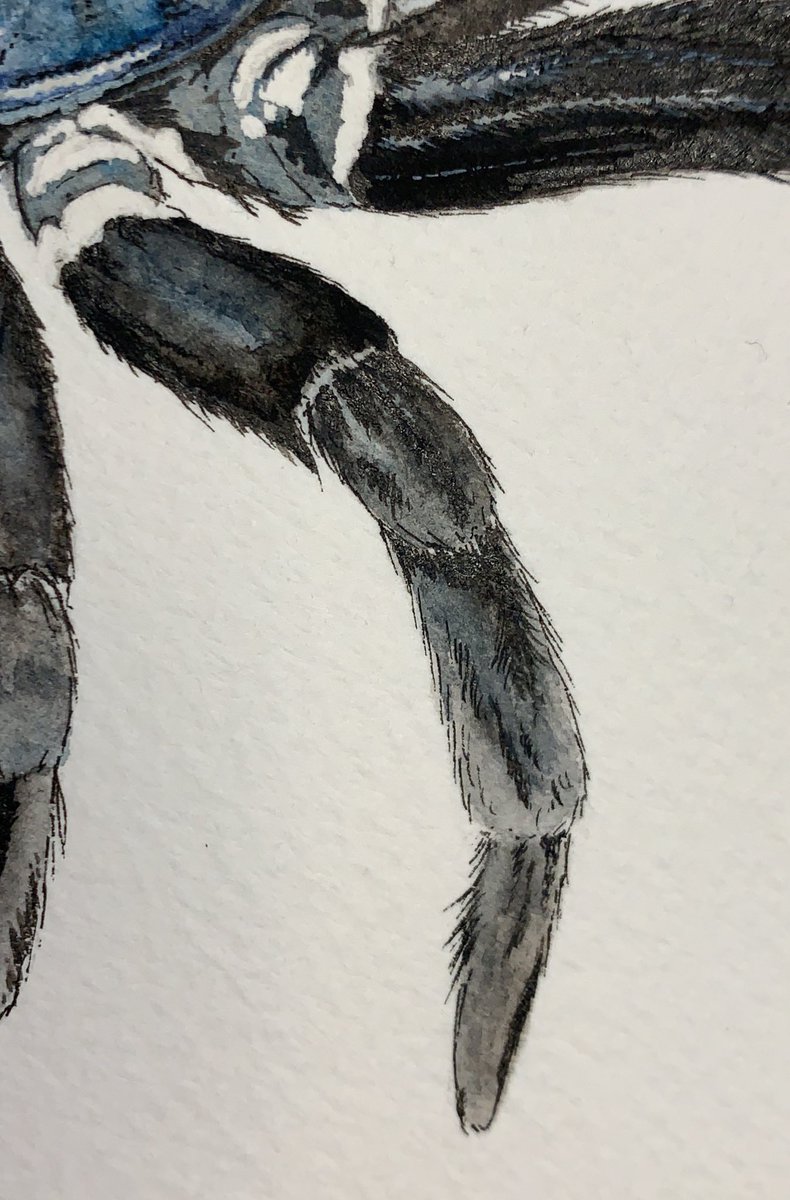
Initial ink lining done, very fine, very few solid outlines. The shapes are mostly outlined with shorter strokes that follow the direction and layout of the hairs around the edges of the subject. Next stage, first ink wash layer. This is where I start building dimension.

A little timelapse so you can see what I’m up to now.
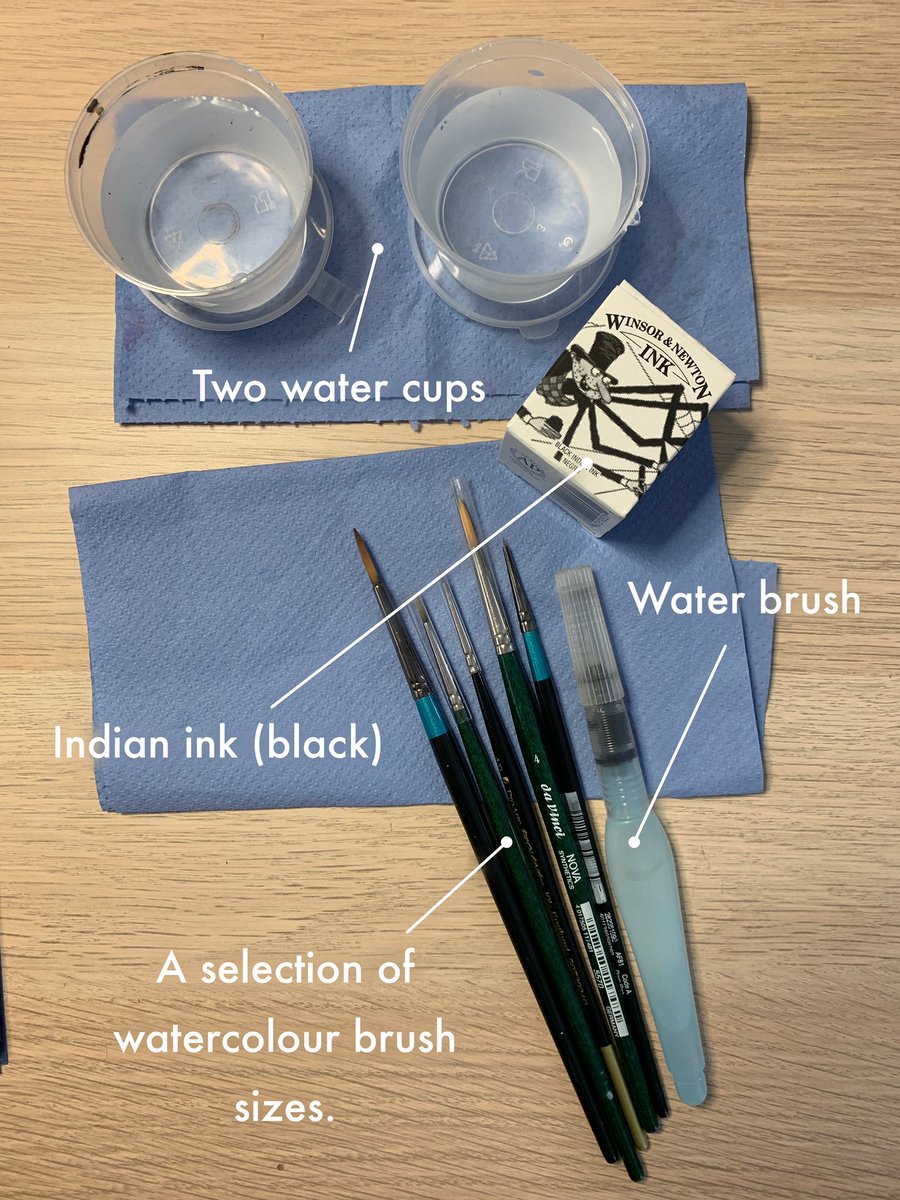
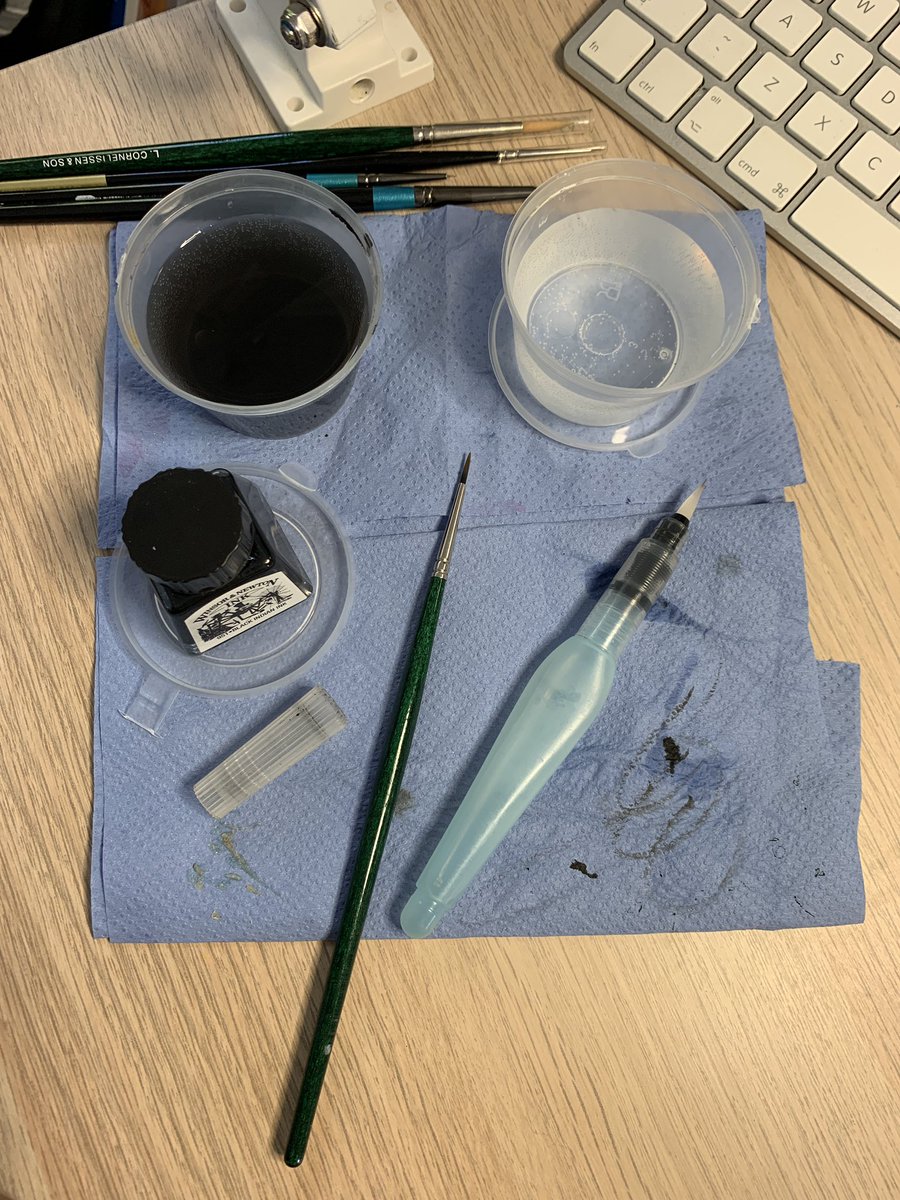
Oh yeah. Why two water pots? One for washing ink out of my brush, the other for clean water if I want or need to wet my brush prior to picking up ink/colour or if I want to use it to apply water to my page prior to colour. I tend to use the water brush for that though.
Erasing the grid now rather than later because the longer the grid is there, the more likely it is to get smudged/messy. Erase now & there’s no graphite to accidentally smear across the page. Also, that eraser? $1.50 per pack from Daiso in America. Best erasers ever.
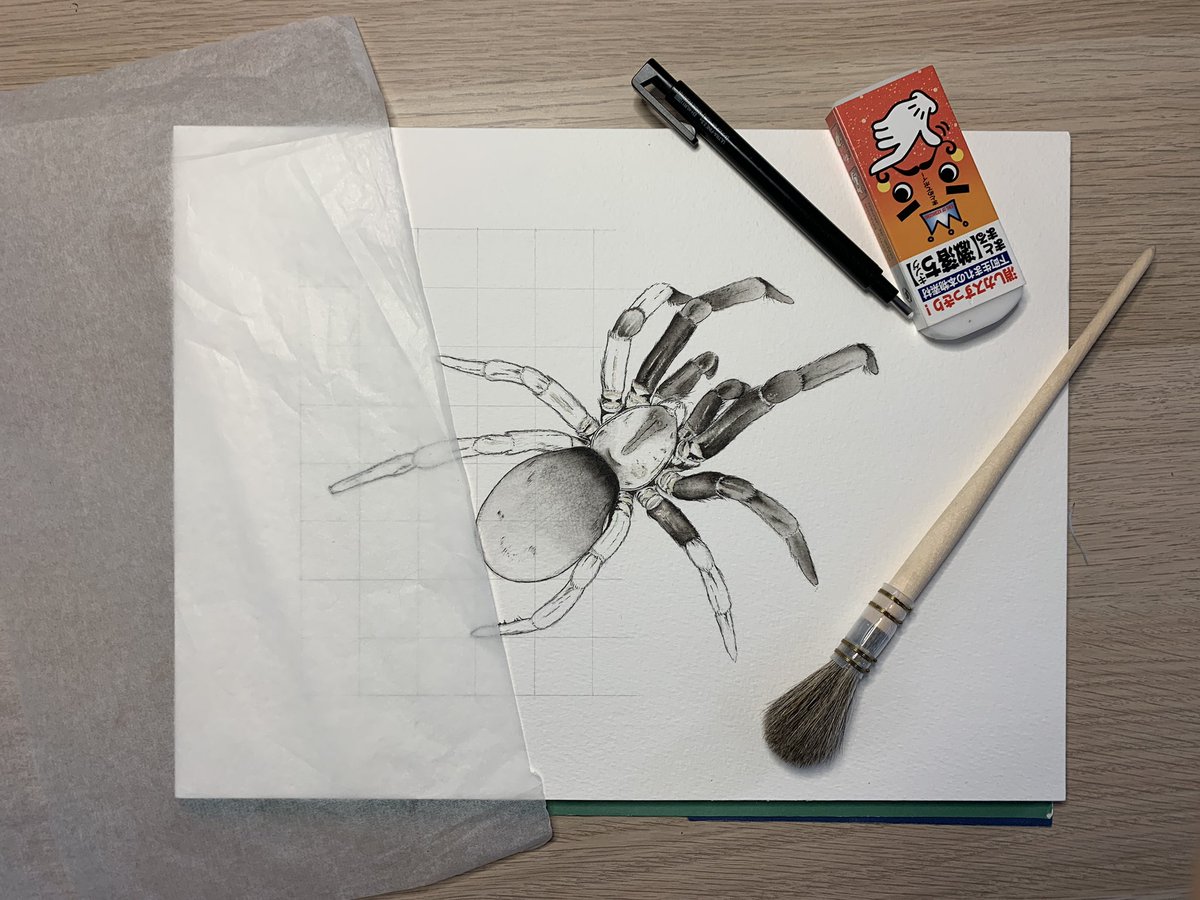
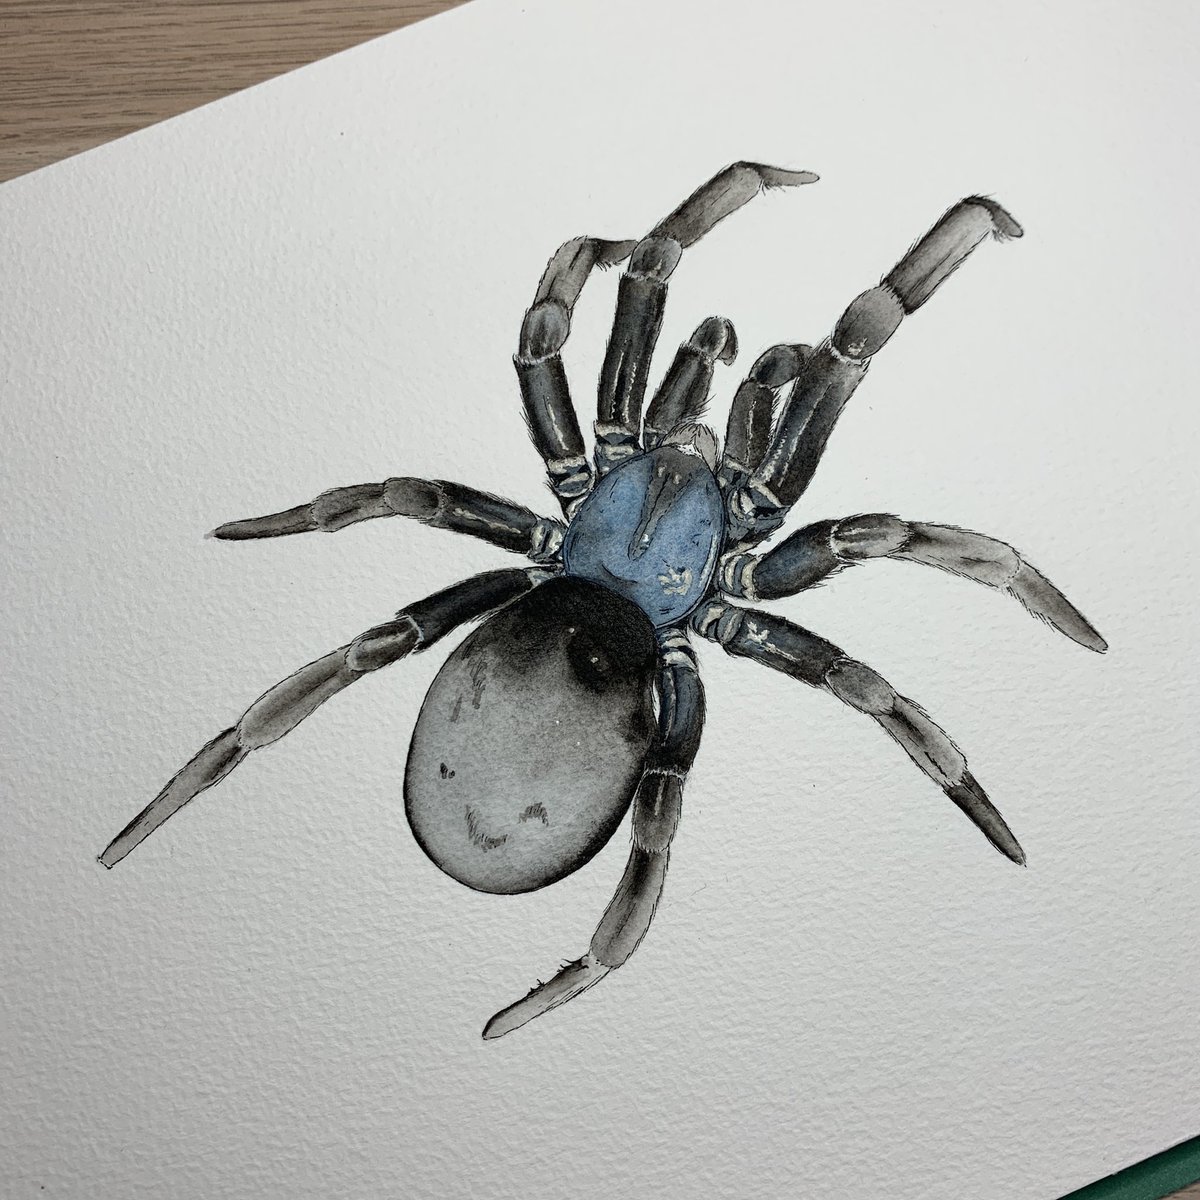
Ok, sorry I went quiet for a bit. I forget to eat when I’m absorbed in drawing so went to get food! So, first inkwash is complete. My process is typically ADHD. I’ll jump from one part to another back & forth til it’s done. But I’ll try and keep it coherent for you all!
The next step will be a watercolour wash to apply the hints of purple and blue this spider has. I will then begin detailing. This will be done with the same pen I did the lining with as well as tiny bushes. Come back tomorrow!
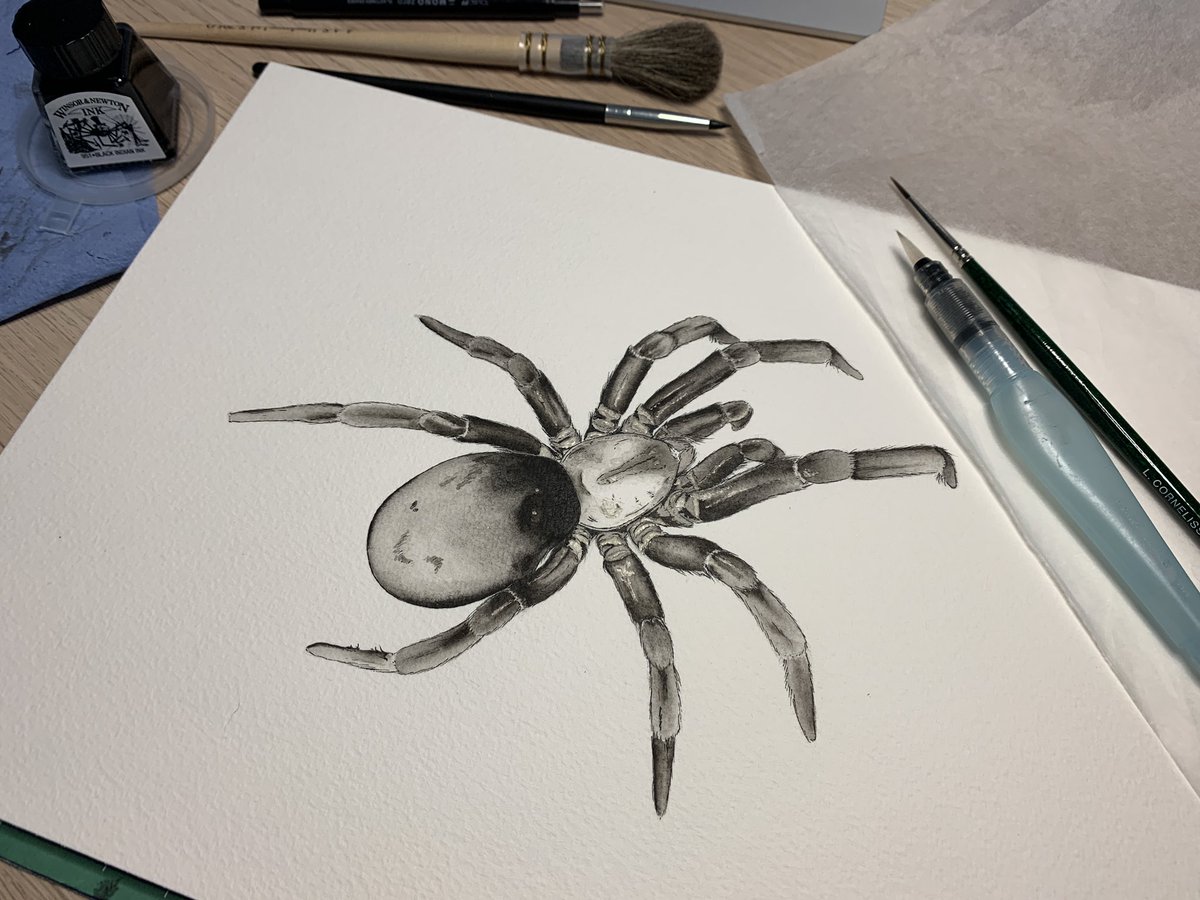
Ok, hi! Spider Illustration: Day 3. Today’s tools. The same brush selection and drawing tools as before but today I’ll be adding colour. I have my @winsorandnewton watercolour palette and a bottle of white ink also by Windsor & Newton (like the black I have been using).
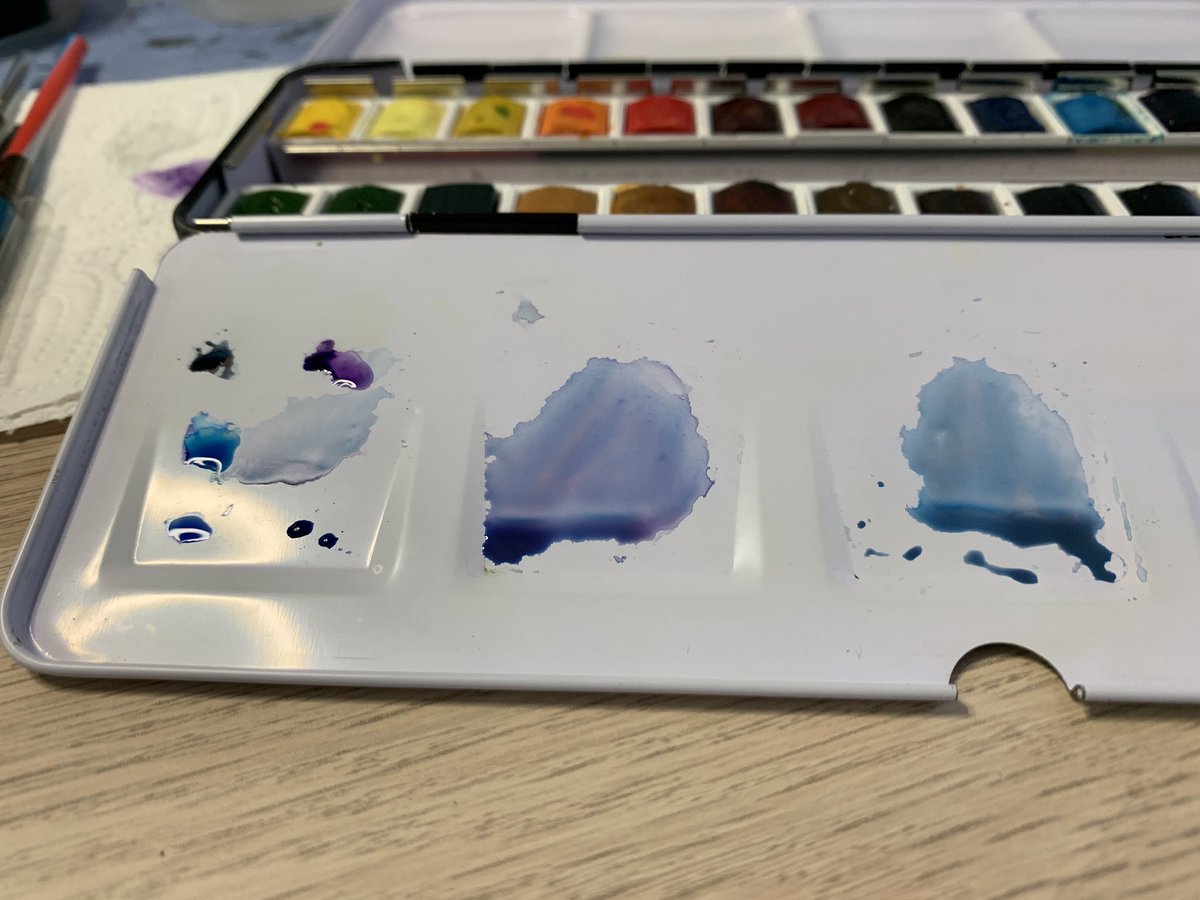
I’m mixing a bluish purple-grey shade for the blue/purple sheen on this spider. I’d love to tell you exact shades but a) it’s not really necessary and b) I’ve forgotten them anyway. Base colour wash is down. Once dry, I start building detail.
Detailing leg hairs now. Detailing happens in layers. The first layer is quite fluid and a bit messy. This illustration will look terrible for a while, but it will come back together with addition of yet more details. Also, she’ll get her other 6 eyes soon 😂

I thought I’d take this opportunity to share a little trick. There will always be little mistakes around the margin of a piece like this (when I’m doing it anyway!), but obviously ink and watercolour are indelible. How to erase such mistakes? Like this...
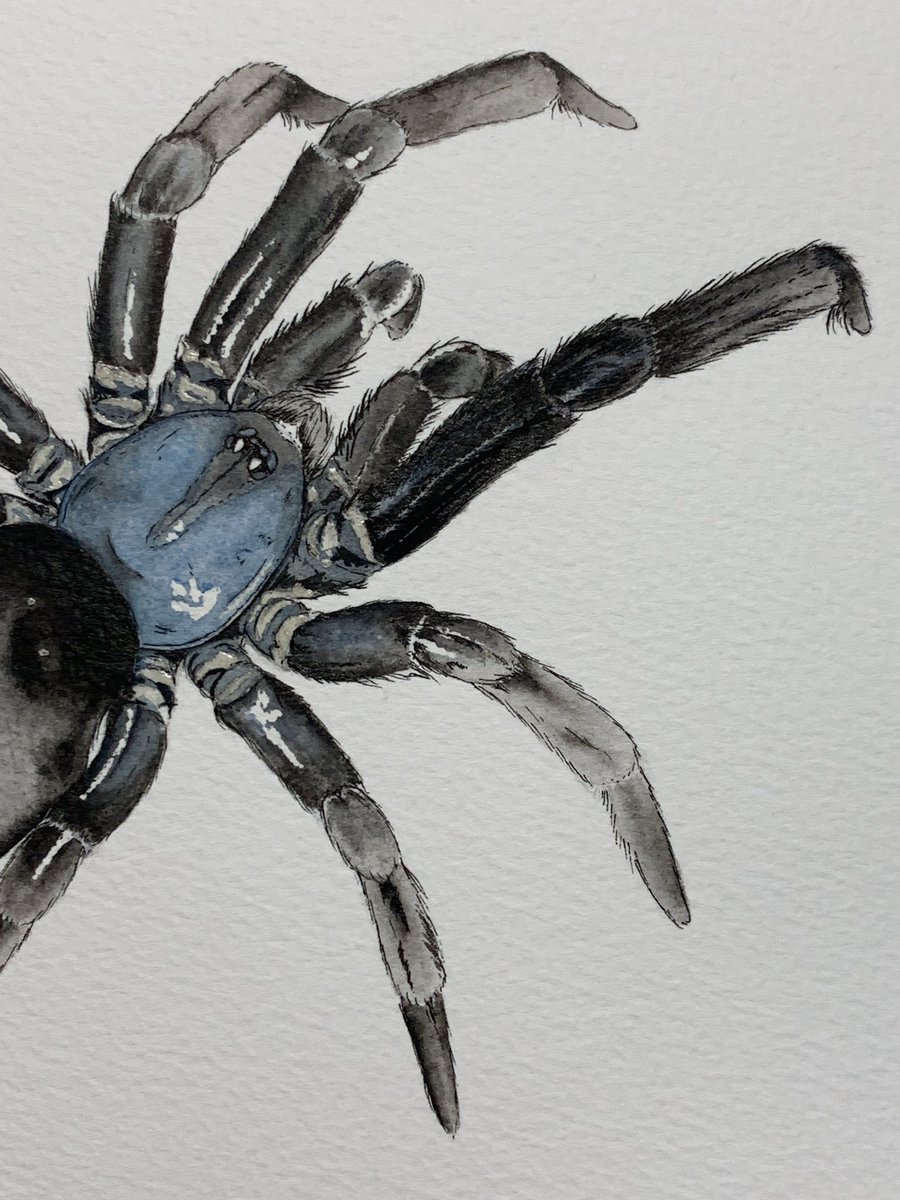
Masking fluid is coming off the less bright highlighted areas now. This means leg areas that have a bluish/grey tint. Right foreleg is more or less done to the level I am working towards for now, so I’m moving on to the next leg. She also now has all 8 eyes plotted.
I am using mostly watercolour at the moment, with a bit of ink on the darkest spots. This stage is time consuming so I can’t guarantee how long it’ll take me to move on the the next bit now. I will continue to upload progress pics though! Happy to answer any questions.
As I said, I tend to jump around through quite a bit. I seem to have skipped from legs to prosoma 😂 I’m calling it’s night now! Comeback tomorrow for more 😁

Ok! I’m back 😁 Continuing the spider illustration today from this point onwards. Today I will be working on the rest of the legs as I’ve only managed to get one done to the stage I need them to get to so far!

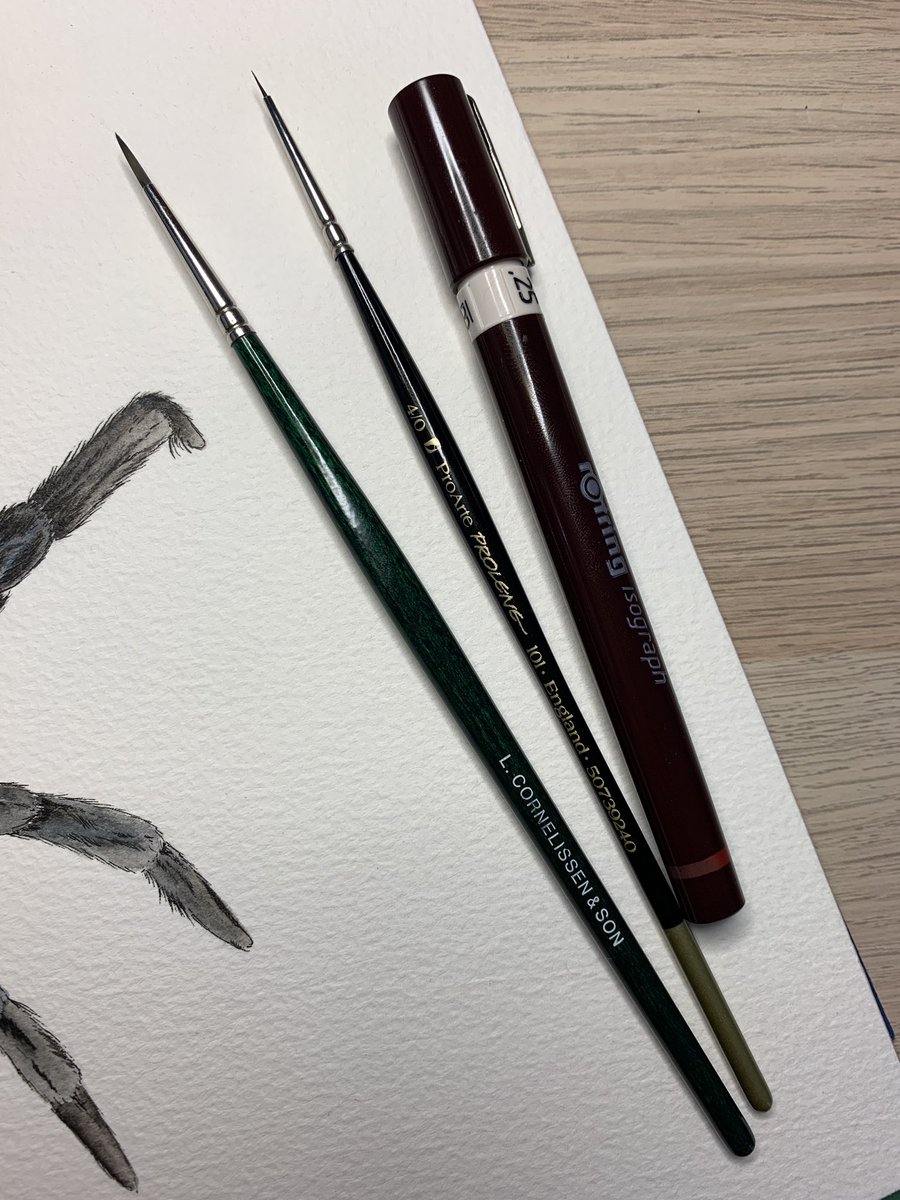
These are the mark making tools I’ll be using today. My Rotring Isograph .25 technical drawing pen, & 2 general purpose brushes- the larger for colour/ink wash areas, the smaller for details. I’ll be using these with the same @winsorandnewton inks & watercolour pans as before.
I have also removed the rest of the masking fluid now so I can begin to work on the coxa/trochanter areas where the legs meet the prosoma. The masking fluid was removed with the big eraser in a previous tweet, which also allowed me to erase the last pencil lines too.

Progress is slow on this part. It’s painstaking and my hand is shaky again 😂 I’ll set up my phone to take another timelapse in a few. For now though, I’m detailing this leg.
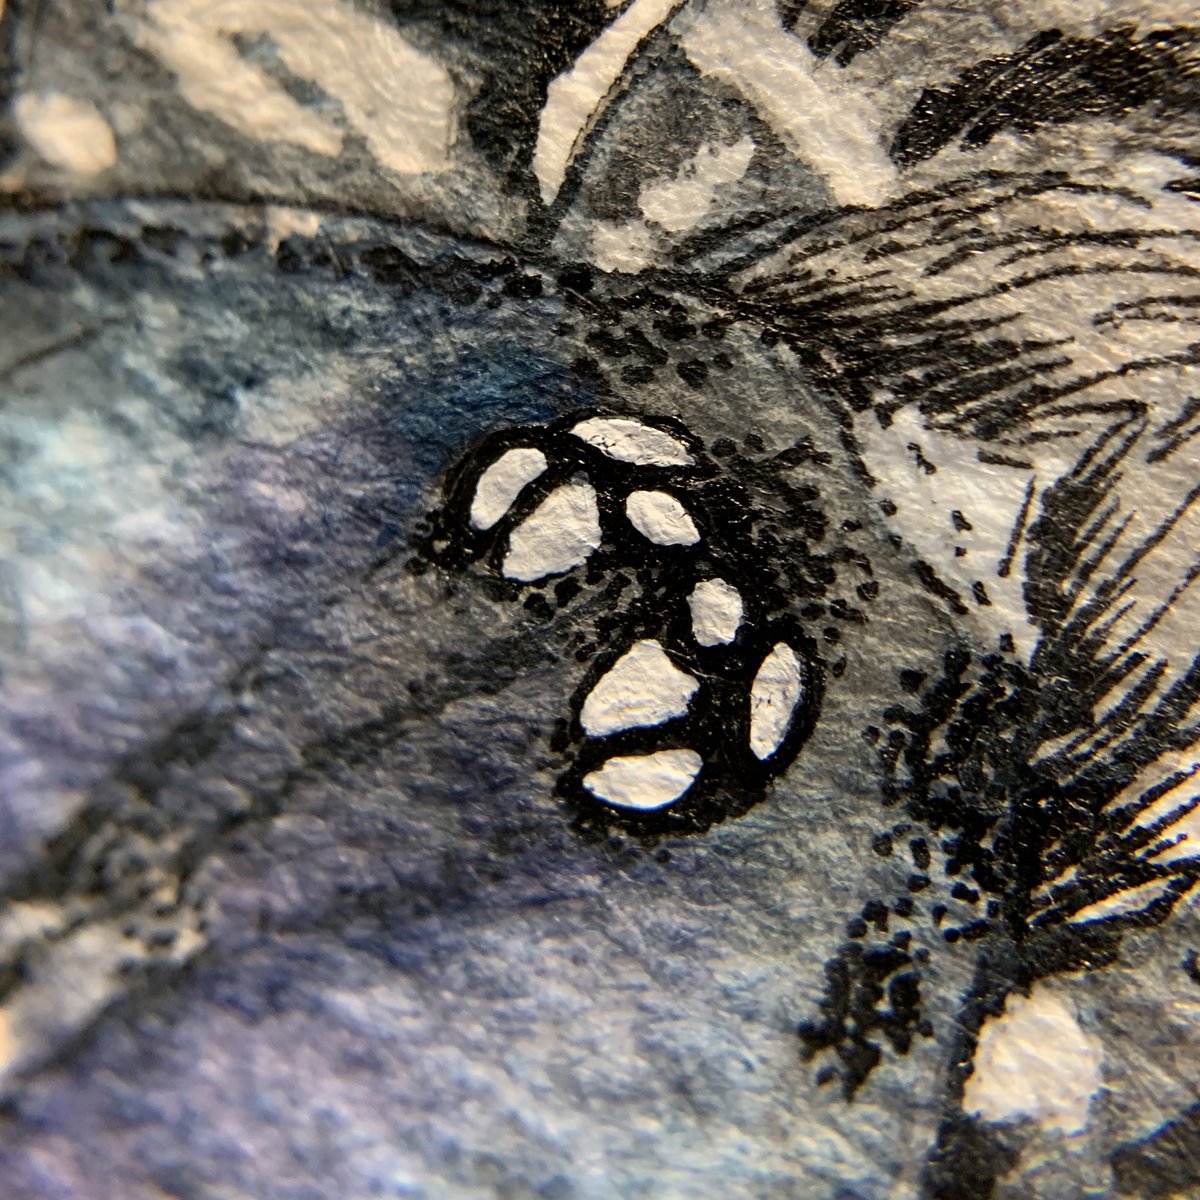
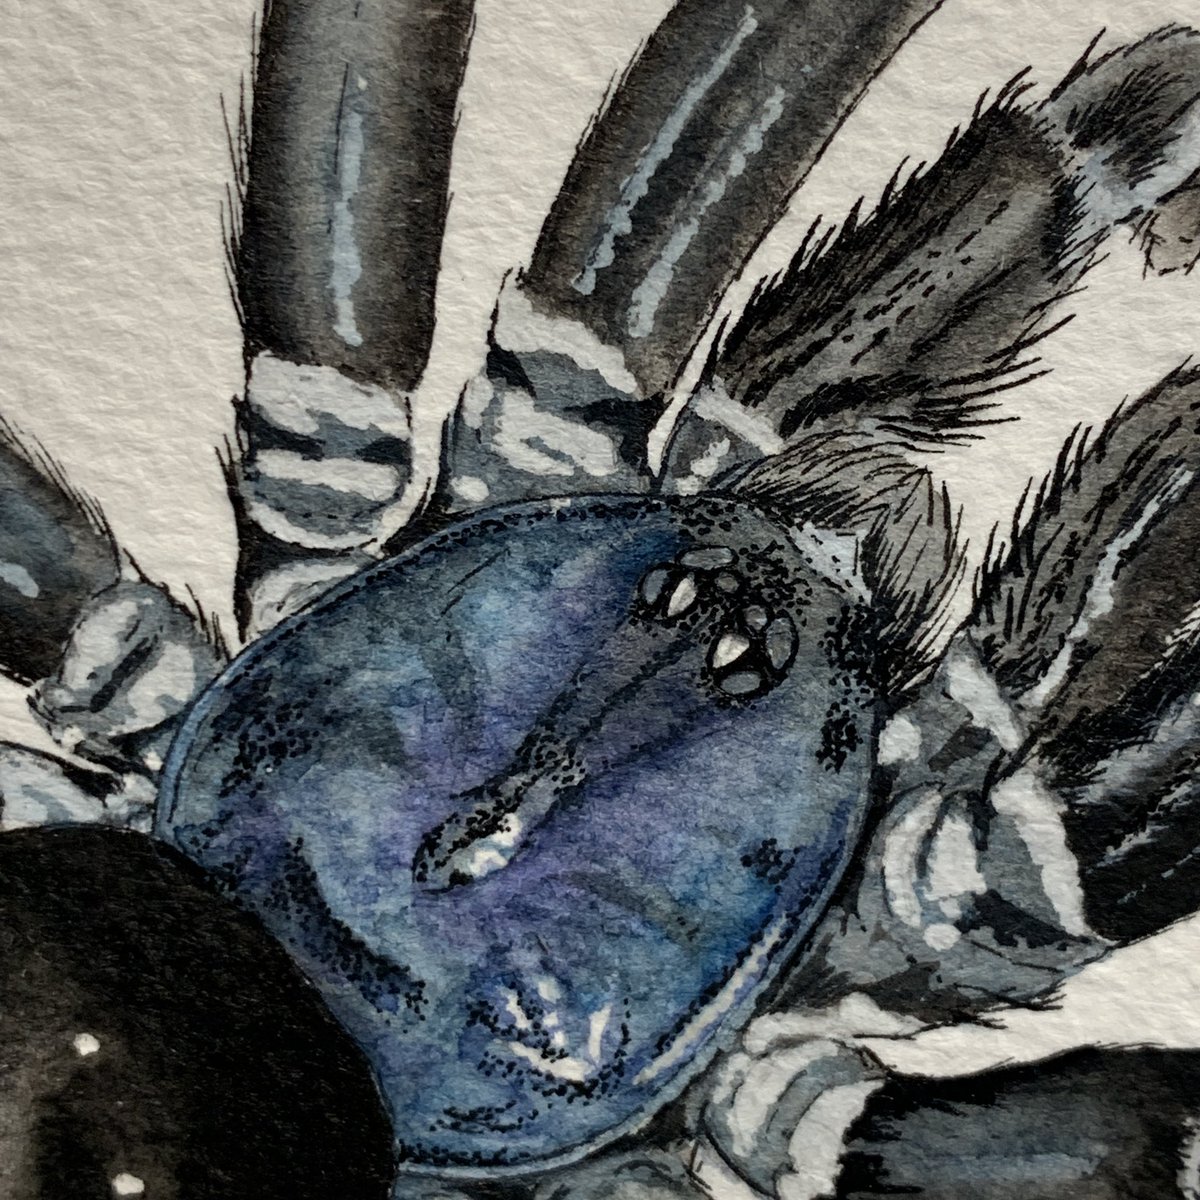
Wanna see how I’m setting myself up for some stupid tiny detailing? Here’s a pic for scale first. Note the eye area...

The reference image is lower resolution that I’d ideally like to be working with, so I’m having to fill in some gaps. The eye arrangement for a start. Look at the original image first. All I can make out are the anterior median eyes because they’re reflecting light. Little else.

Thankfully, I have a beautiful female Kukulcania hibernalis here who is a member of the same family, therefore her eye arrangement is going to be very similar to our S. amethystina subject. So I’ve blown up one of my images so as to take some creative liberties. Here’s my girl.
I’ve decided to block out the eyes with white so o can detail & colour over the top as necessary. I had to bust out my phone macro lens for this pic. Zoomed in crop of the K. hibernalis’ eyes for comparison. Bear in mind, the perspective is different so I’m tweaking them a bit.

Ok. Eye strain imminent so I may be done for tonight. Eyes are done. Well, for now. I expect I’ll darken them down a little more later. In order of appearance- process pic, regular photo, phone macro photo. Come back tomorrow for more painfully slow progress 😎


Working on this again this evening. I'll have some time-lapse footage and some pics for you all soon :D
Tonight, I’ve added another medium to my arsenal for this piece. @derwentart Colorsoft pencils. These are for sharper, bolder fine details in colour, almost exclusively concentrated around coxa/trochanter area. 4.5 of 8 legs are done for now. Finishing the rest next.

Here’s one of a couple of timelapse videos.
And the second.
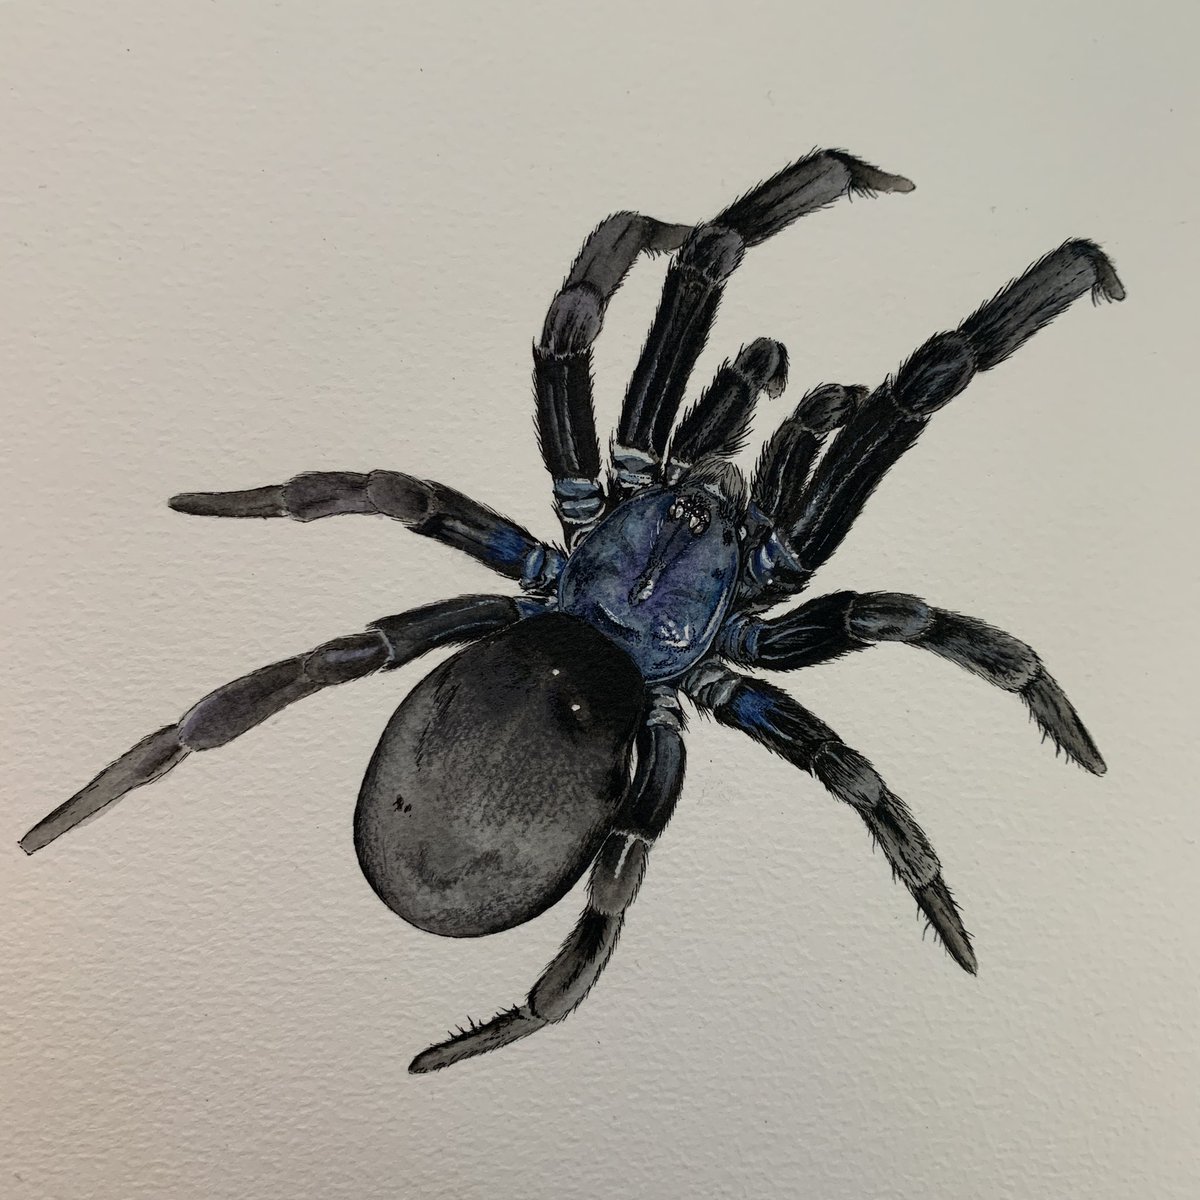
So, to bring you all up to speed, I’ll show you what I’ve been doing. This image is from a couple of days ago. Yesterday I used white ink, very fine brush & .25 drawing pen (all pictured previously) to detail the eyes after I took this. Also note the light areas on the legs.
This is today. Eyes are done for now & I’ve begun detailing the tops of the legs using a combo of watercolour, ink (both brushes & pen) and coloured pencil. Mostly legs on the right of this pic.

If any of you are interested, I’m about 16 hours in so far & maybe 60% finished. I’m calling it a night for tonight as I’ve not drunk enough water today & am giving myself a headache 😂 Come back tomorrow for more!
Ok friends, I’m back, & I’m on the home stretch now. I have some work left to do on the coxa/trochanter area, a bit of colour work on the carapace & details and around chelicerae, then it’s on to highlights.

Tonight, I’ve mostly used coloured pencils, the extremely fine drawing pen & white ink applied with a very fine brush. There’s been little point updating as it’s been a lot of the same thing, but since the last session on this thread, I’ve put in about another 4hrs.

Approximately 20 hours later, it’s more or less finished. HOWEVER, I cant get a good photo of it under my lamp so I’ll get proper images tomorrow. For that reason, I’m not ending this thread juuuust yet.

It’s also highly likely that I’ll look at it in the morning and see 47484 things that need doing/changing 😎 So, on that not, I will say again that I am happy to answer any questions about materials or techniques. Mostly I just hope someone got some enjoyment out of this 😁
Check back tomorrow for a proper look at the final painting. I’ll get some detail shots too.
Here we go. Daylight photos! I do believe it’s finished.


@threadreaderapp unroll

