#PriceAction
Range strategy
Quick write up on a commonly used setup I tend to look for when price ranges.
Criteria is as such:
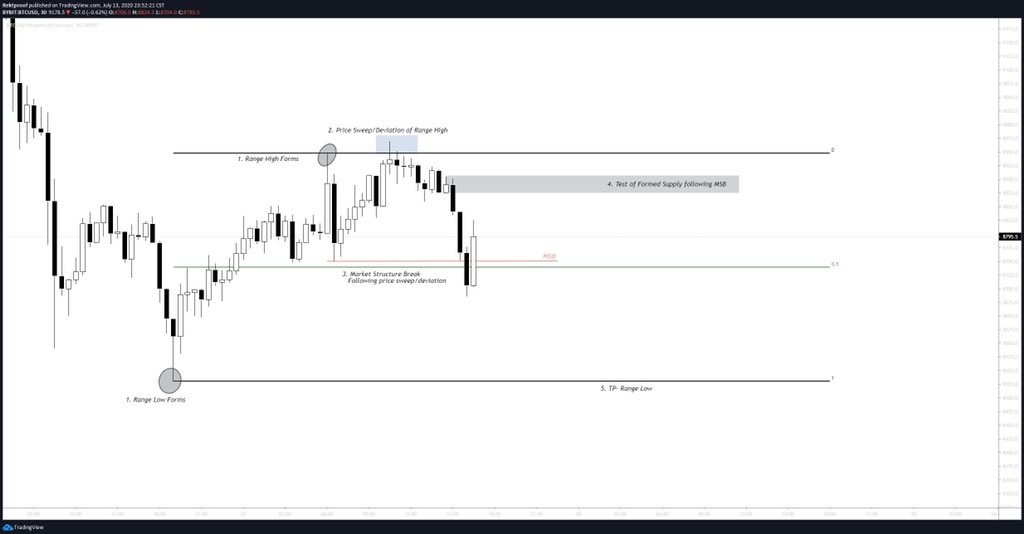
- Range Forms
- Price sweep/deviation of range point
- MSB (Market structure break)
- Test of formed SD
- TP
Enjoy!
Range strategy
Quick write up on a commonly used setup I tend to look for when price ranges.
Criteria is as such:
- Range Forms
- Price sweep/deviation of range point
- MSB (Market structure break)
- Test of formed SD
- TP
Enjoy!
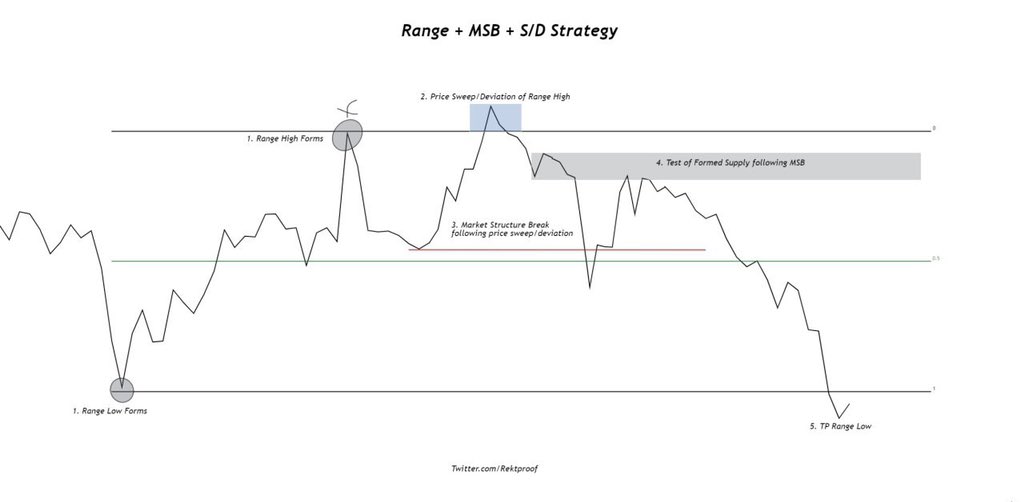
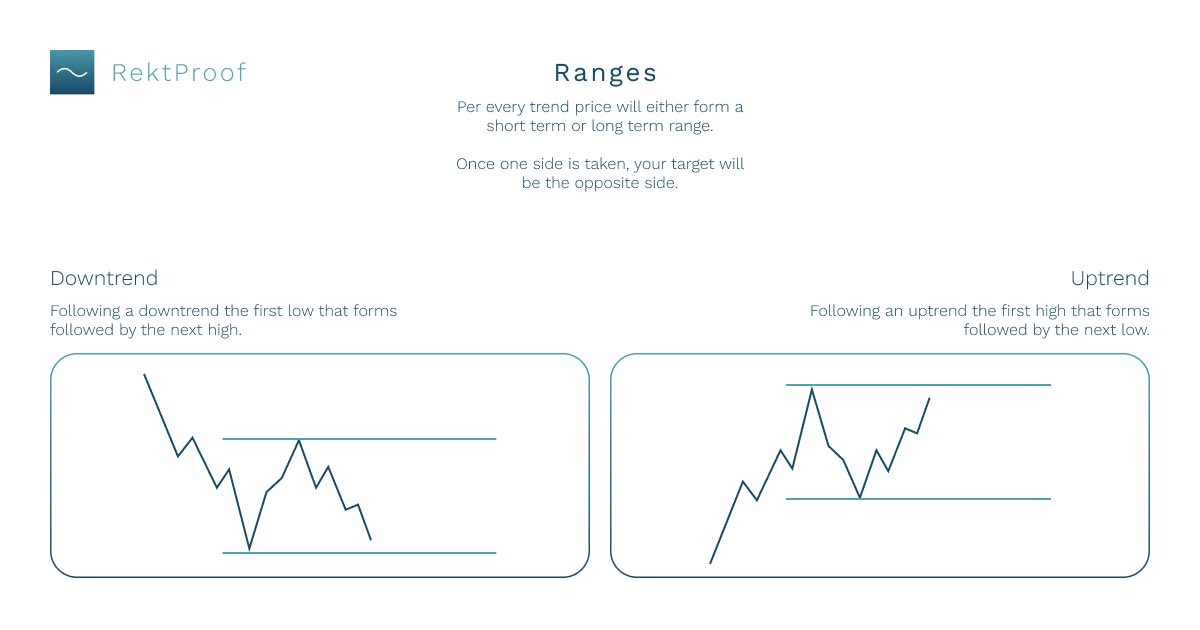
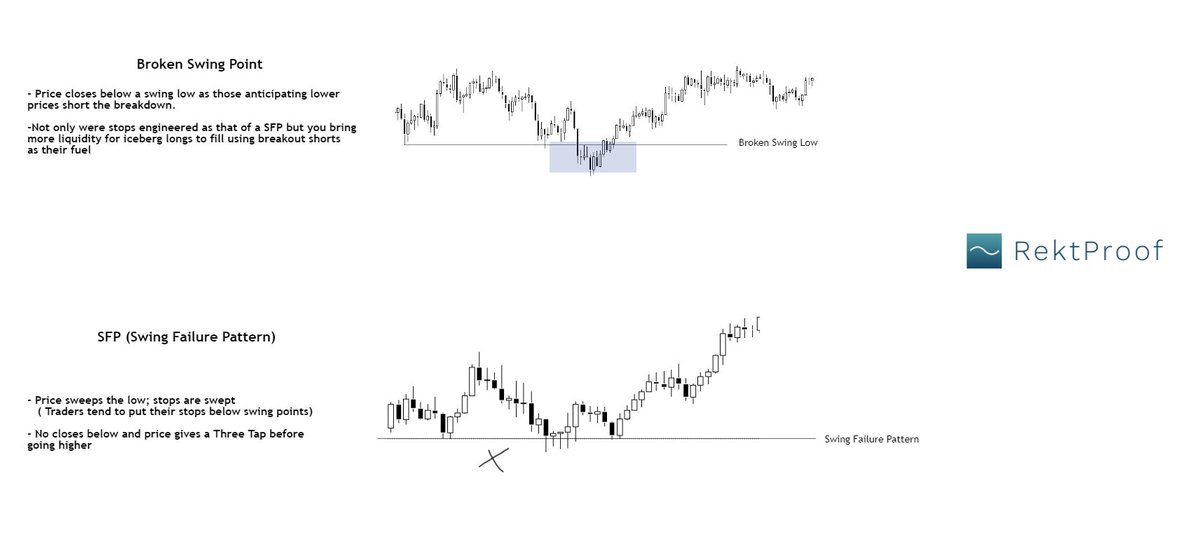
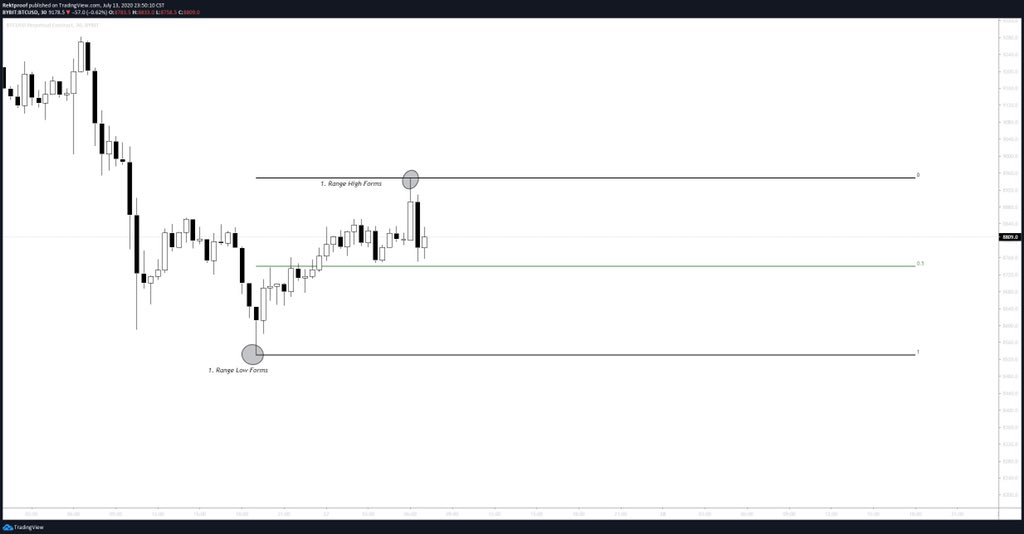
Range forms
Price outlines two swing points in the market.
Price sweep/deviation
Following the identified swing points- price proceeds to sweep/deviate before closing back inside range
Price outlines two swing points in the market.
Price sweep/deviation
Following the identified swing points- price proceeds to sweep/deviate before closing back inside range

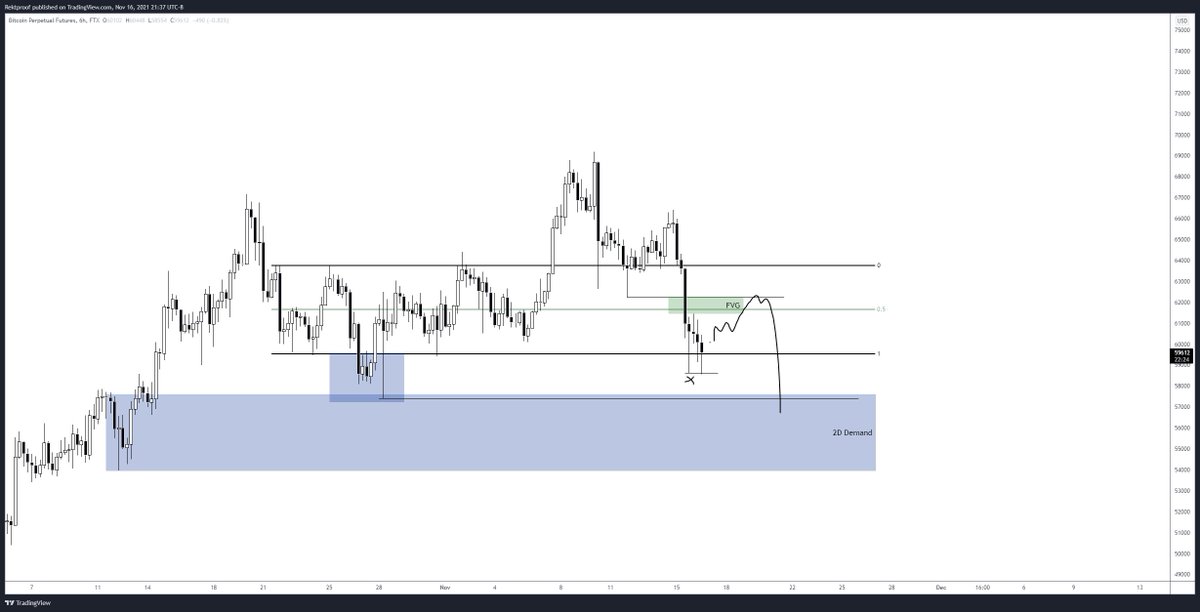
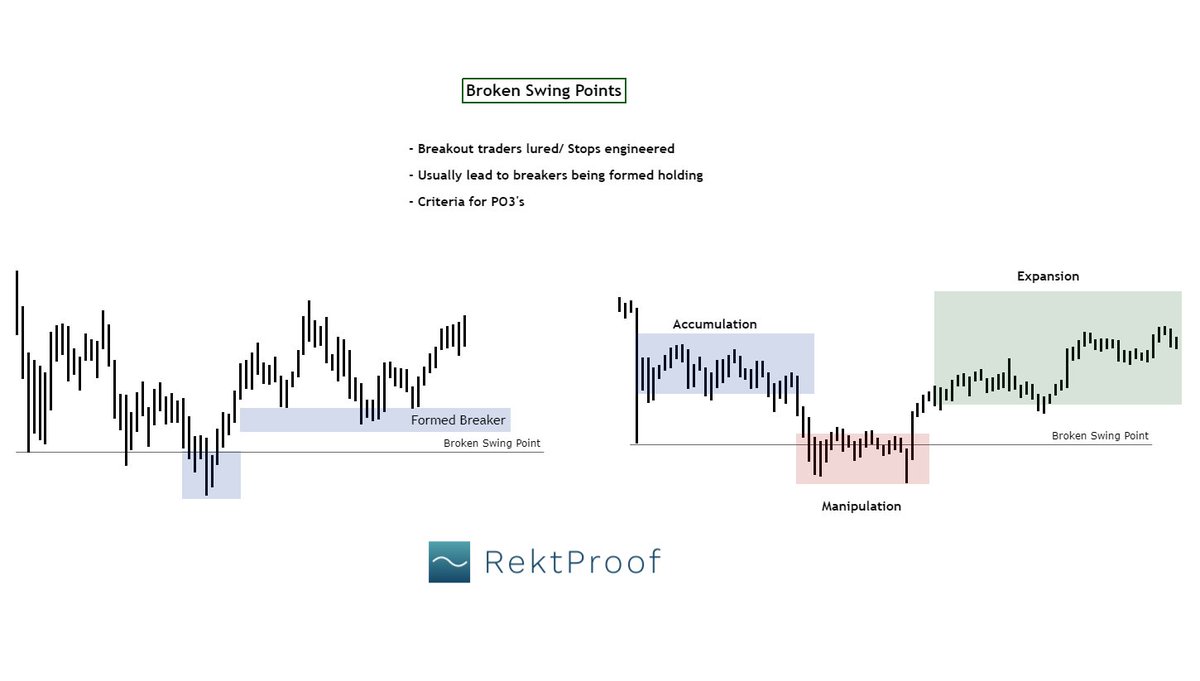
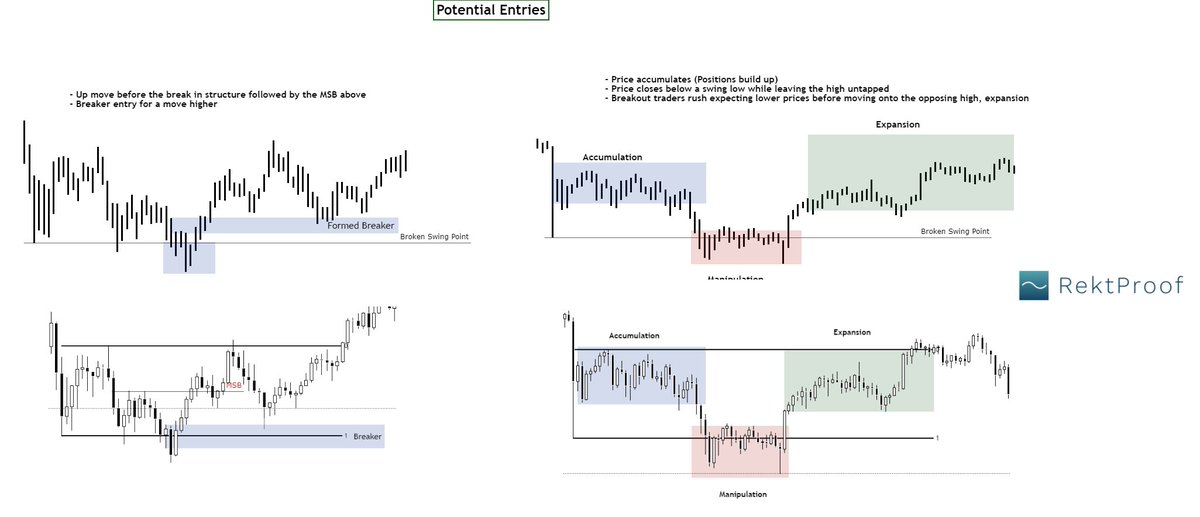
MSB
Following the price sweep/deviation; price breaks structure and shifts a new low.
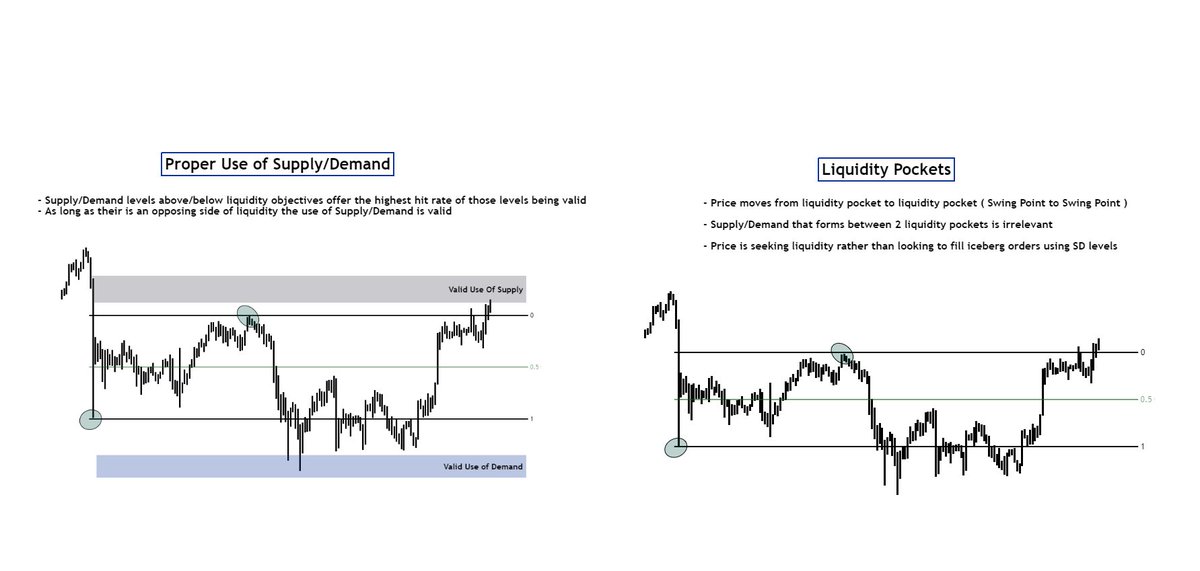
Test of formed SD
Formed supply following sweep + MSB
Following the price sweep/deviation; price breaks structure and shifts a new low.
Test of formed SD
Formed supply following sweep + MSB
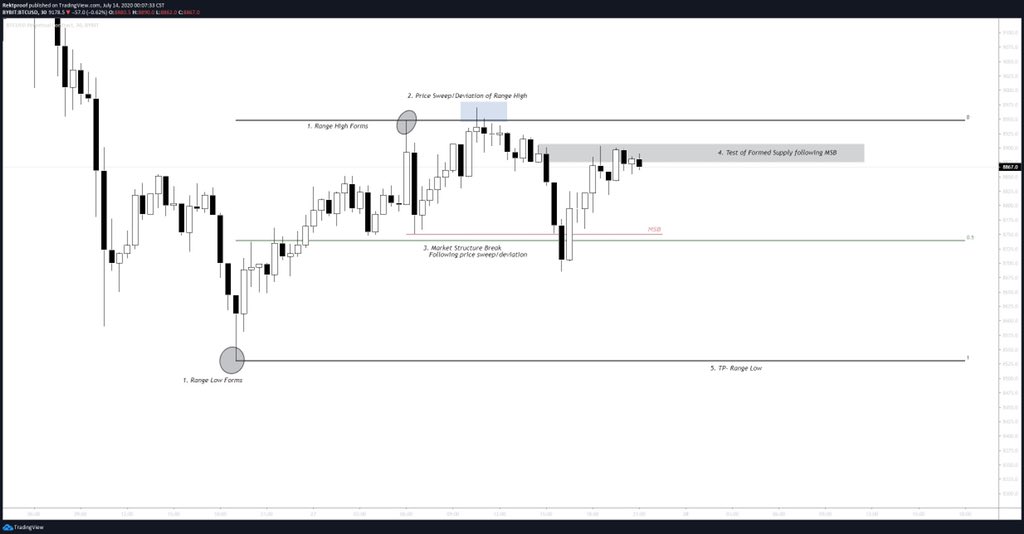
TP
Following test of formed SD price proceeds to the untapped low.
Following test of formed SD price proceeds to the untapped low.

• • •
Missing some Tweet in this thread? You can try to
force a refresh