1/🎨✨Ready to dive deeper into AI image generation with #Midjourney?
🧵In this thread, we'll focus on creating unique prompts that feature diverse characters, photographic styles, and illustration techniques!
Like and share will be welcomed!❤️🔁
#AIArtcommunity
🧵In this thread, we'll focus on creating unique prompts that feature diverse characters, photographic styles, and illustration techniques!
Like and share will be welcomed!❤️🔁
#AIArtcommunity

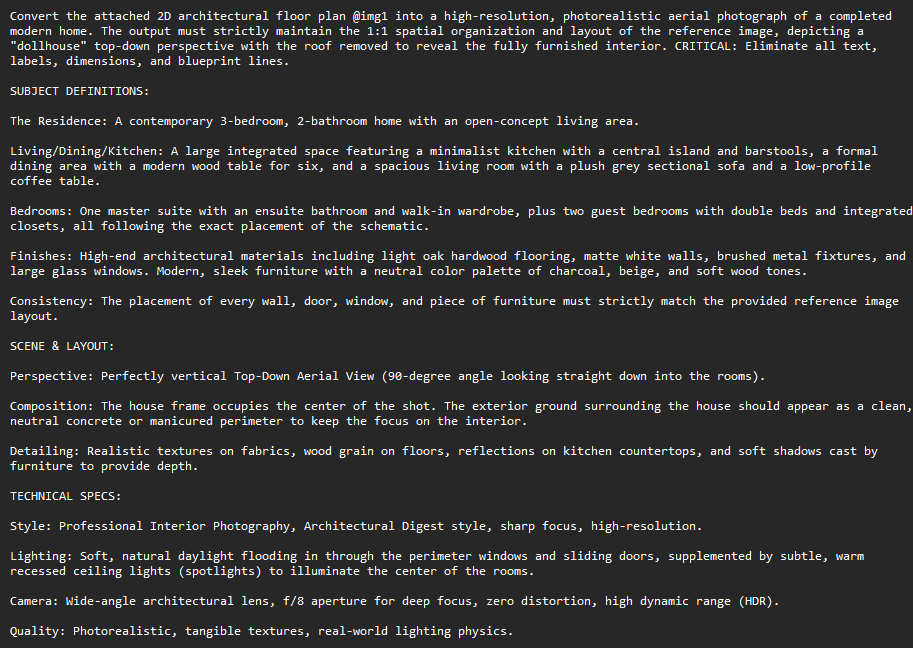
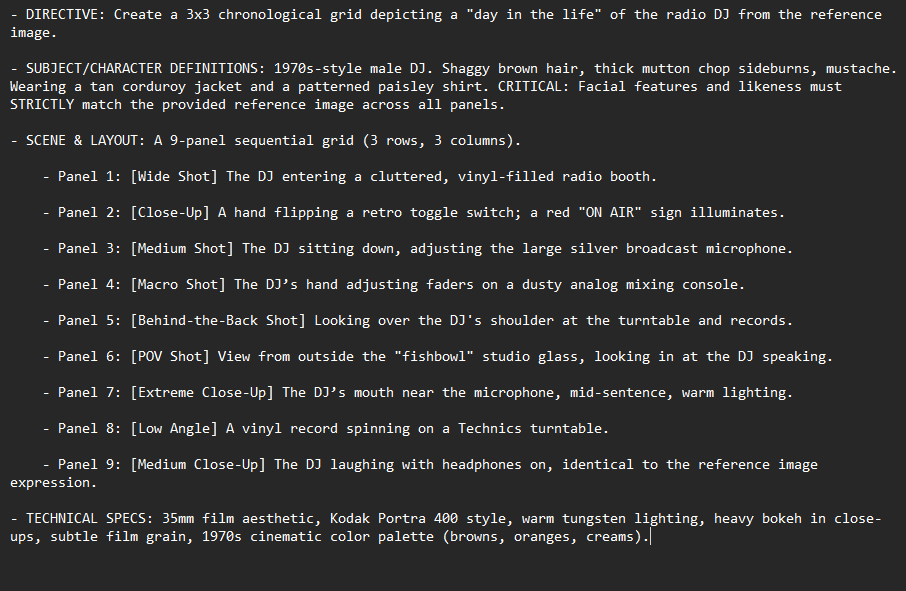
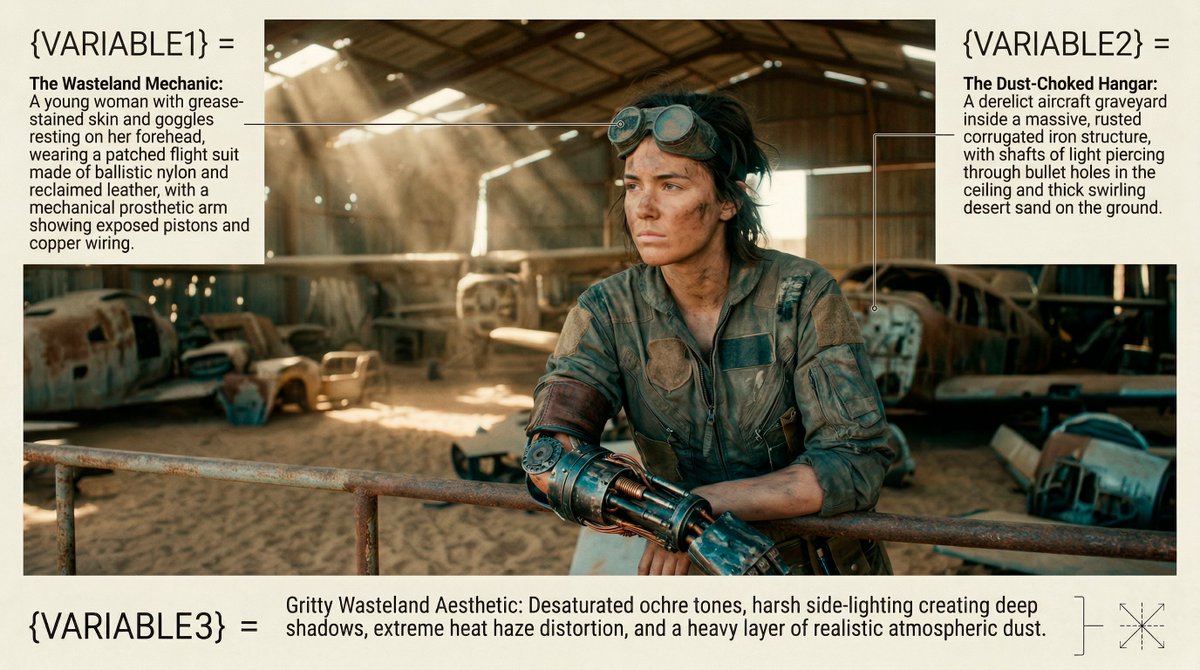
2/🧩 Category Prompting: Break down your idea into specific categories like mood, scene, actors, and location. This helps the AI understand your vision in detail. Example in the ALT of the image #CategoryPrompting

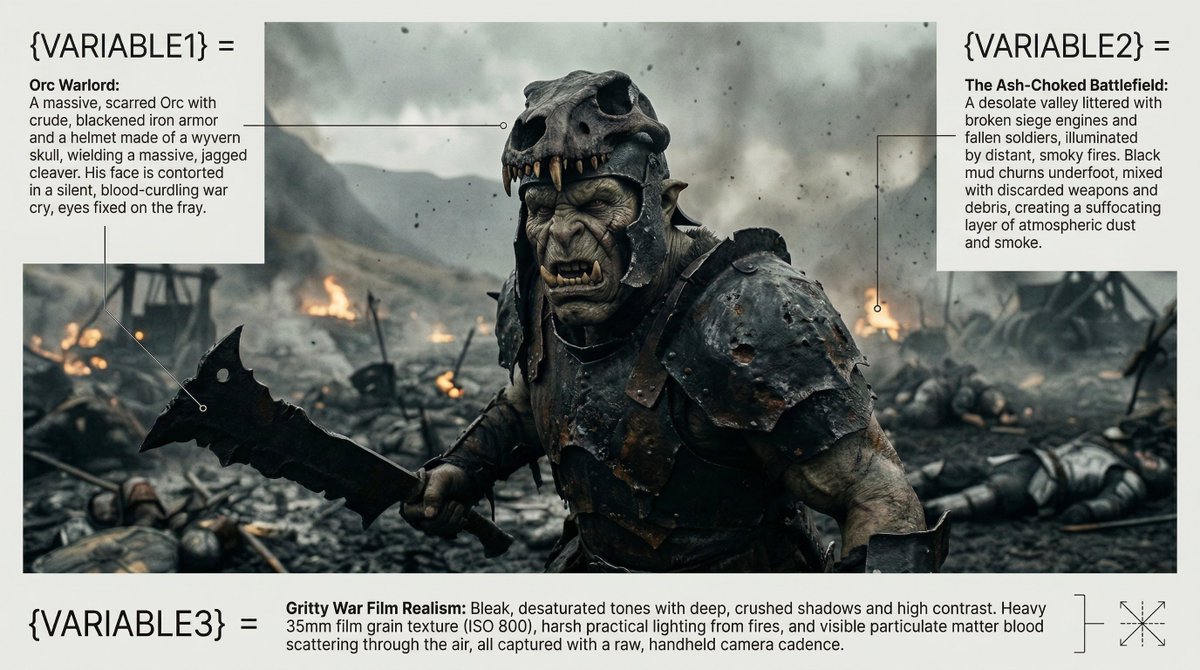
3/➕ Additive Prompting: This style focuses on adding specific elements to your prompt, one by one. Example in the ALT of the image #AdditivePrompting

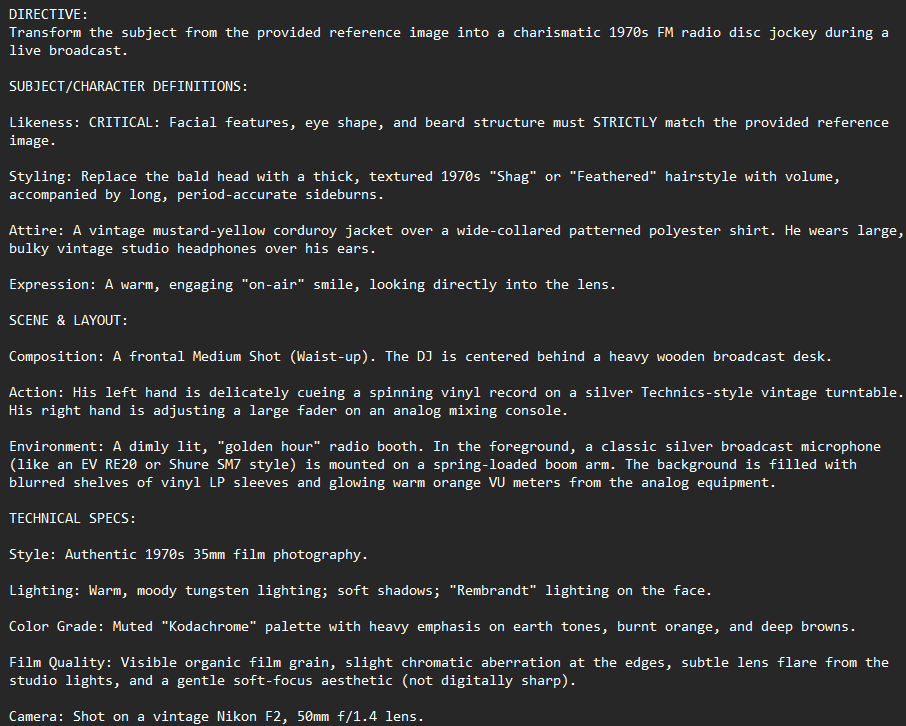
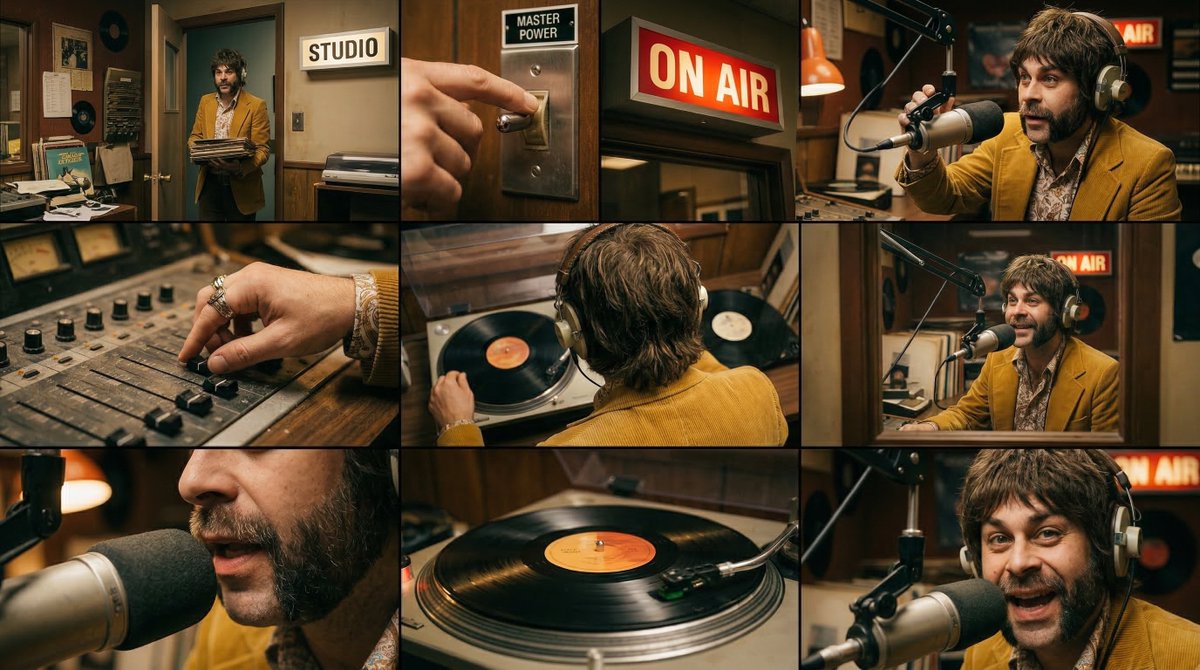
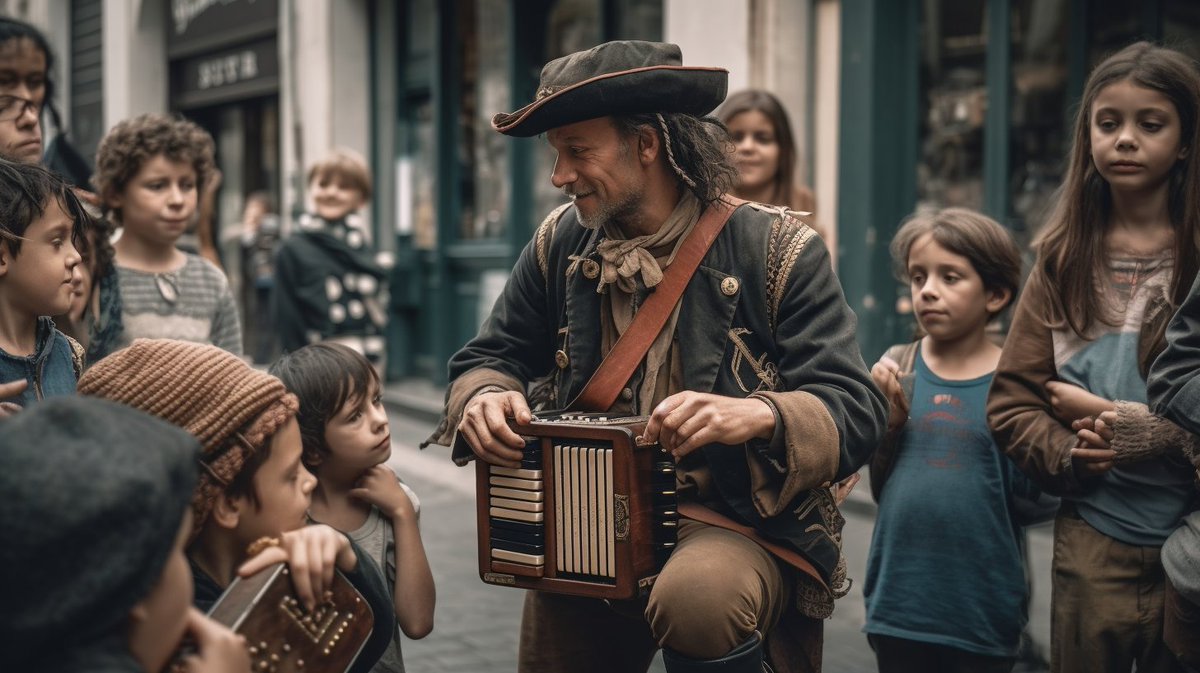
4/📚 Narrative Prompting: Tell a story or describe a scene in a detailed manner. This style helps the AI generate images based on the narrative you provide. Example in the ALT of the image #NarrativePrompting

5/❓ Interrogative Prompting: Frame your idea as a question. This encourages the AI to come up with an image that answers the question. Example in the ALT of the image #InterrogativePrompting

6/🌟 Lighting & Mood: Create a unique atmosphere in your prompts by playing with lighting and mood, such as dramatic contrasts or soft, diffused light. Example in the ALT of the image #LightingAndMood

7/🔑 Remember: Don't use commas within the prompts! Use semicolons or other punctuation instead. Commas should only be used to separate prompt styles. Keep this in mind when crafting your prompts! Example in the ALT of the image

8/💡 Start by experimenting with different prompting styles and see which one works best for your needs. You can even combine styles to create a more refined and detailed prompt. The possibilities are endless! 🚀
9/🎉 Now you're ready to create amazing AI-generated images with Midjourney! Share your creations with the world and inspire others. Happy prompting! #AI #ImageGeneration

10/10 🥳 That's it, folks! We hope this thread has inspired you to explore the world of AI image generation with Midjourney. Have fun, and don't forget to share your unique and captivating creations with your friends and followers! #AIArt #AIartcommunity #Midjourney

• • •
Missing some Tweet in this thread? You can try to
force a refresh