
People asked about my workflow in creating the 'Last Night' 2.D pixelart project in @UnrealEngine -- this is a process thread! I hope this helps and feel free to ask any questions.
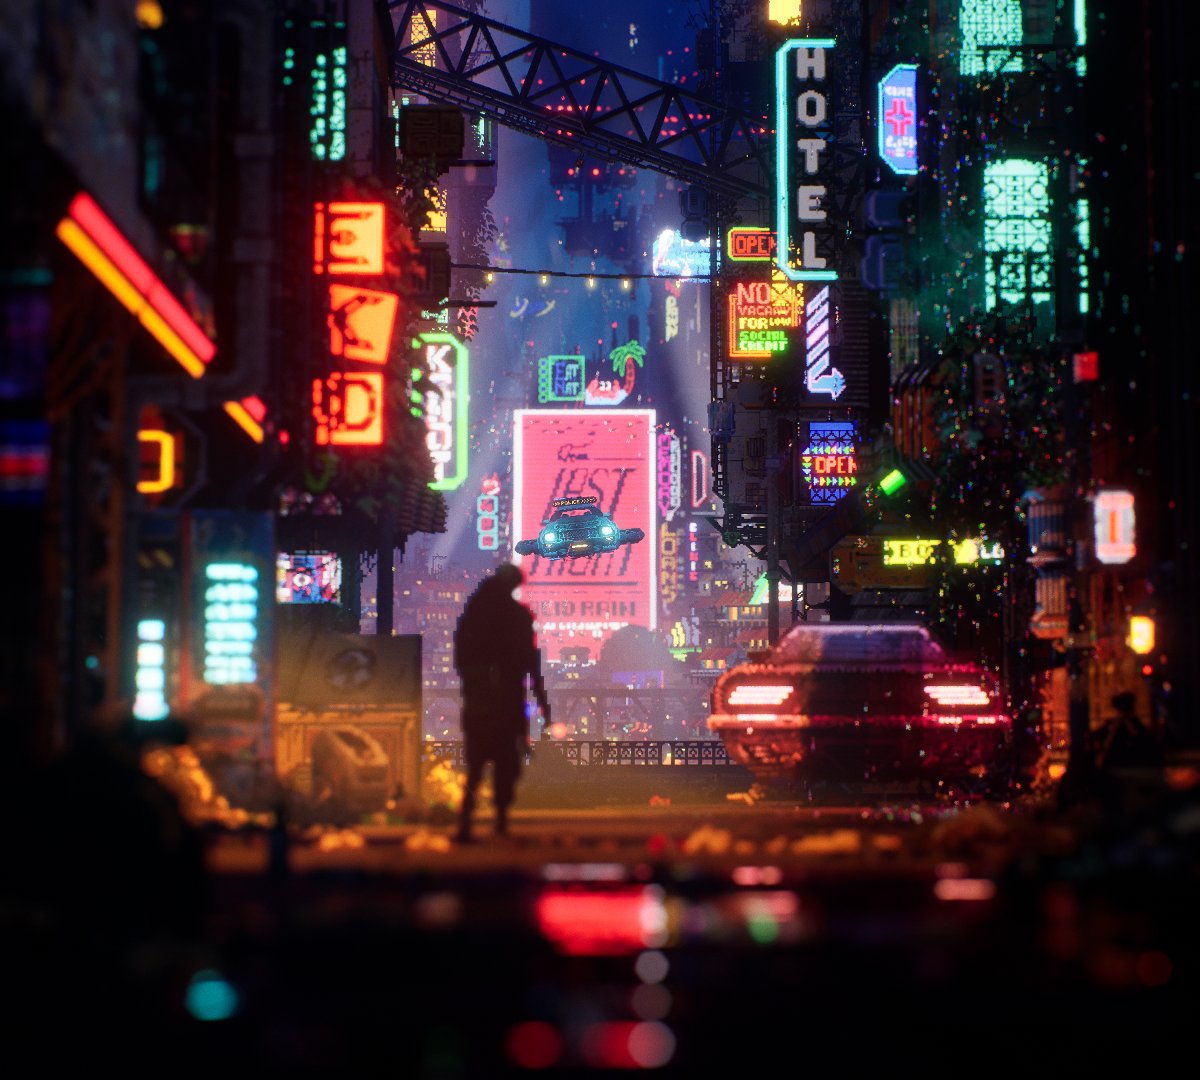
Here is the final capture:
#pixelart #gamedev
Here is the final capture:
#pixelart #gamedev
Here is how we kicked off - I blocked in all of the camera movement in Sequencer, major geometry and a focus character using some test shapes/characters.
I tested out the Paper2D shading with some key lights in the scene to see if the idea even had merit.
I tested out the Paper2D shading with some key lights in the scene to see if the idea even had merit.
Next up was to get a scale character in the scene, and block in some more assets/mood lights to get a feel for the space. I wanted to also compose more large shapes to move the eye towards points of interest.
Scale is key!
Scale is key!
I wanted to frame the action in the sequences, using billboards, whilst building a contrast between fore, mid and background. Also testing some minor assets into the scene to see how the handled perspective with minor camera changes. Fog, rain for atmospheric tests.
Most of the assets in the scene use a single material parent with multiple instances. It's a standard Paper2D sprite (lit) material with a few tweaks; mainly I have options to load custom PBR maps, as well as boost emissives. The switches are great for controlling per instance! 
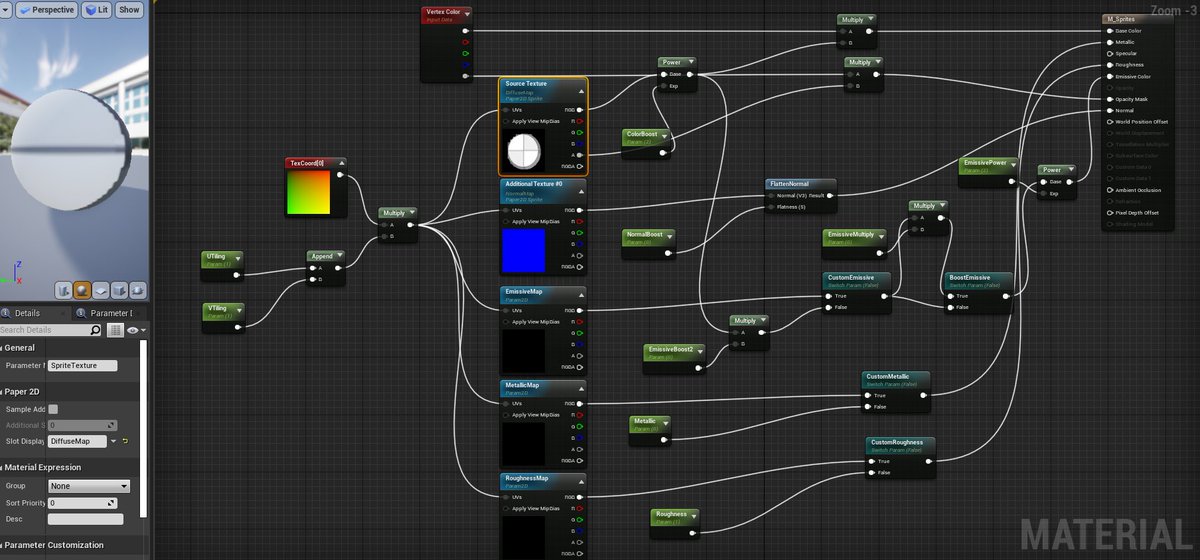
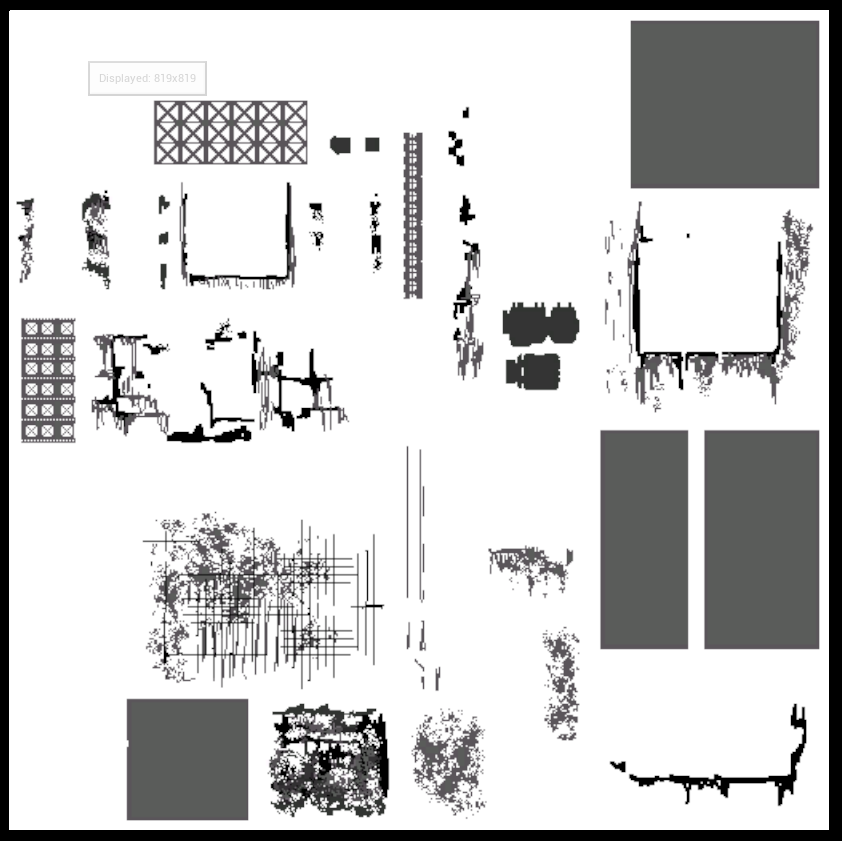
For the assets, almost everything in the scene is actually just Paper2D assets like this one, with their Metallic and Roughness maps included. Normally I'd actually RGB package them, but it wasn't necessary for this project (but you should!).

Some hand UE4 tips - when importing textures for Paper2D use, you can apply the Paper2D default texture settings automatically.
This is really useful to make sure all of your imports have the same settings, pixel units etc.
This is really useful to make sure all of your imports have the same settings, pixel units etc.
And you can set all of your default Paper2D import options here -- Project Settings > Paper2D:

Did you just import 30 sprites into the game and now you need to assign materials?
No problem! The Bulk Edit option is a complete life saver and will probably shave off hours over a project!
Hit this bad boy, and you can assign your instances/materials to all your sprites.
No problem! The Bulk Edit option is a complete life saver and will probably shave off hours over a project!
Hit this bad boy, and you can assign your instances/materials to all your sprites.
So onto the really cool atmospheric stuff, like flying ships, big buildings, billboards and that police flyer!
Our flying cars in the scene are just texture panning planes with... flying cars. It's a really simple little texture!
I made two of these, one with a higher tiling on the UVs, to build two sets of ships. Emissives give the glow.
I made two of these, one with a higher tiling on the UVs, to build two sets of ships. Emissives give the glow.
The background building actually has a unique material - to get the distant 'rain' effect and different cycling patterns of lights, I built a kind of bad material. I'm sure there's a better way to do it. Panning a large cloud noise over the emissives, lerping with sines.
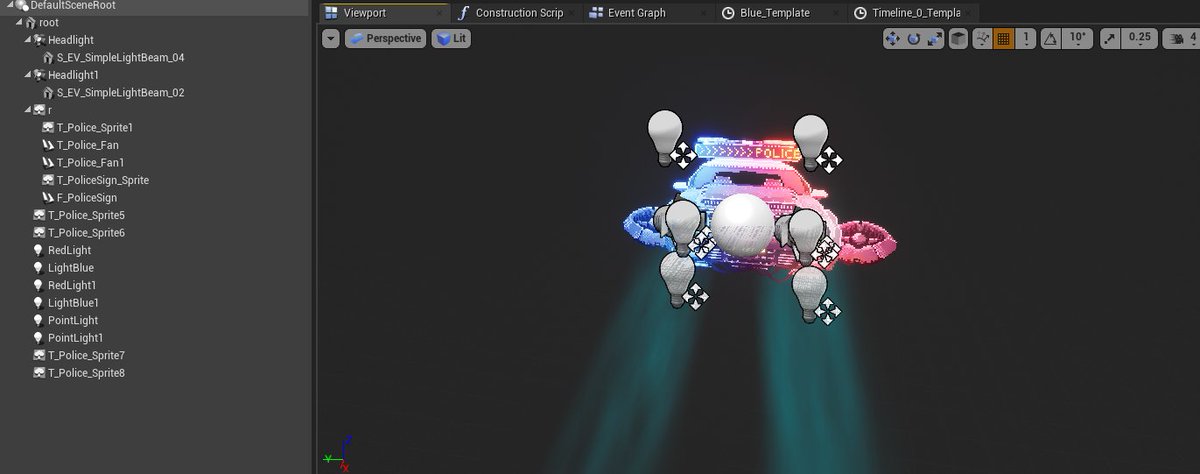
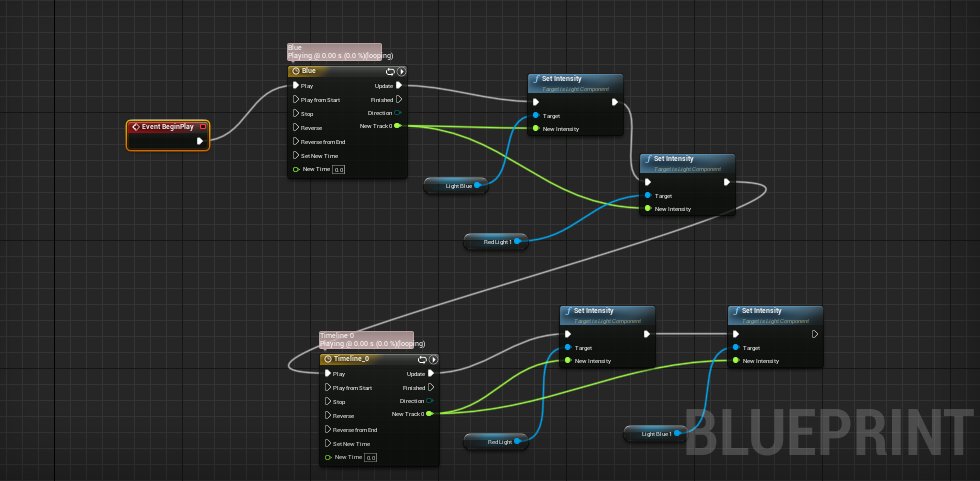
Police car is a blueprint actor, with a simple setup. The lights are controlled by timelines that loop with delays. It's messy but it works!
All of the signs basically follow this workflow; either they're panning across meshes or planes, or are emissive flipbooks.
Some, like this one, actually have two sets of textures that pan at different speeds.
Some, like this one, actually have two sets of textures that pan at different speeds.
And this is how it looks in-game, wrapping around meshes! It's great for populating the scene and building depth.
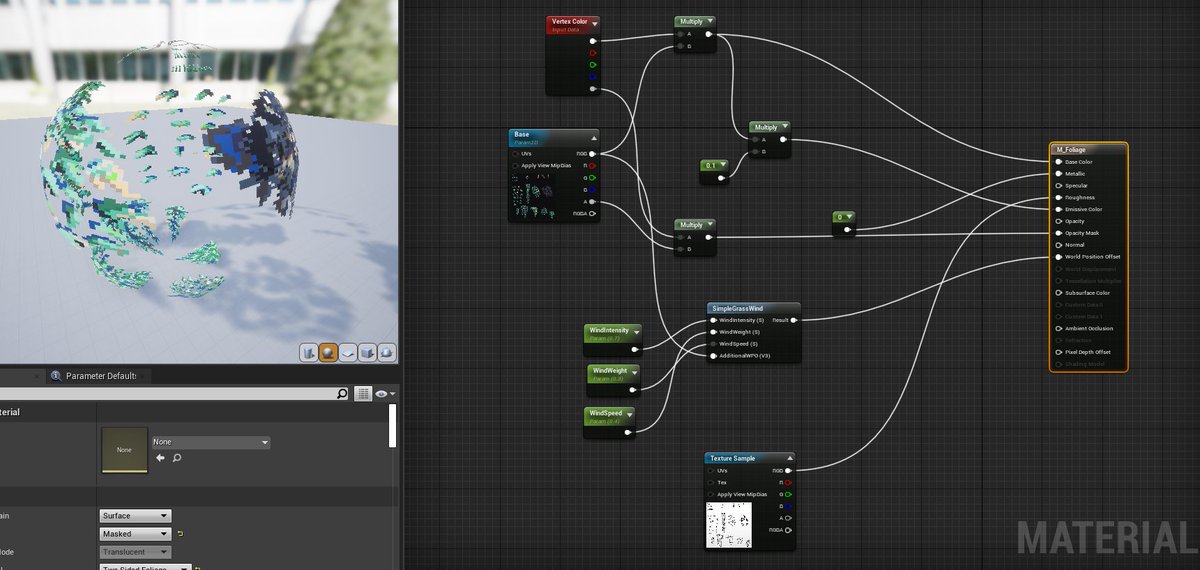
Movement in the scene was super important, so I have 5 instances of different wind-movement speeds on foliage and wires in the scene. This let me build a sense of depth in the atmospheric exposure to the storm, also it looks cool.
With roughness maps, they catch light!
With roughness maps, they catch light!
So yeah the plant material setup is here (I think the previous tweet got lost somewhere).
Simple wave setup, with the same sprite setups from previous materials.
Simple wave setup, with the same sprite setups from previous materials.
Nothing too special about our main character -
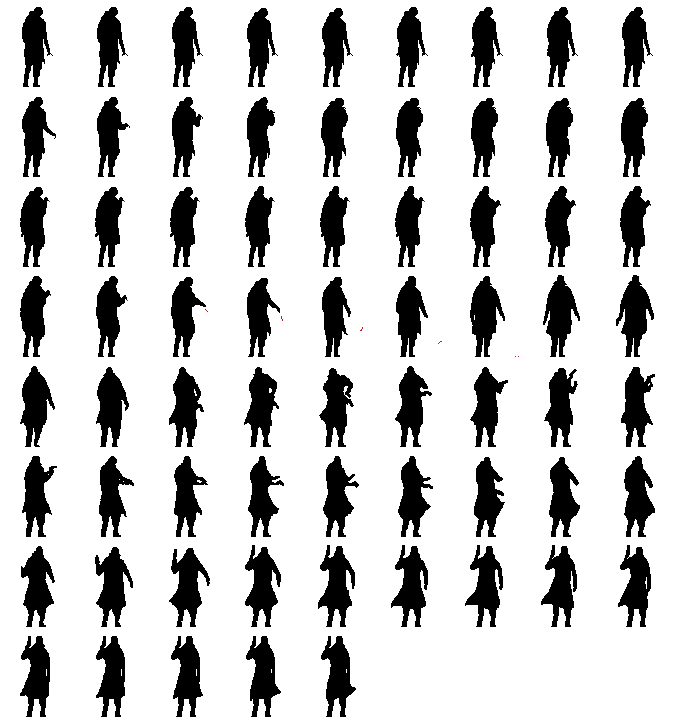
It's a set of flipbook animations from one sprite atlas paired with emissive maps. Blueprints let us control when the animations will play, making life much easier. You can cut the flipbooks to have multiple animations.
It's a set of flipbook animations from one sprite atlas paired with emissive maps. Blueprints let us control when the animations will play, making life much easier. You can cut the flipbooks to have multiple animations.
So this was the sprite sheet - animated in Aseprite. Two textures loaded, one for this, one of the emissives.
Ok this got way too long, but...
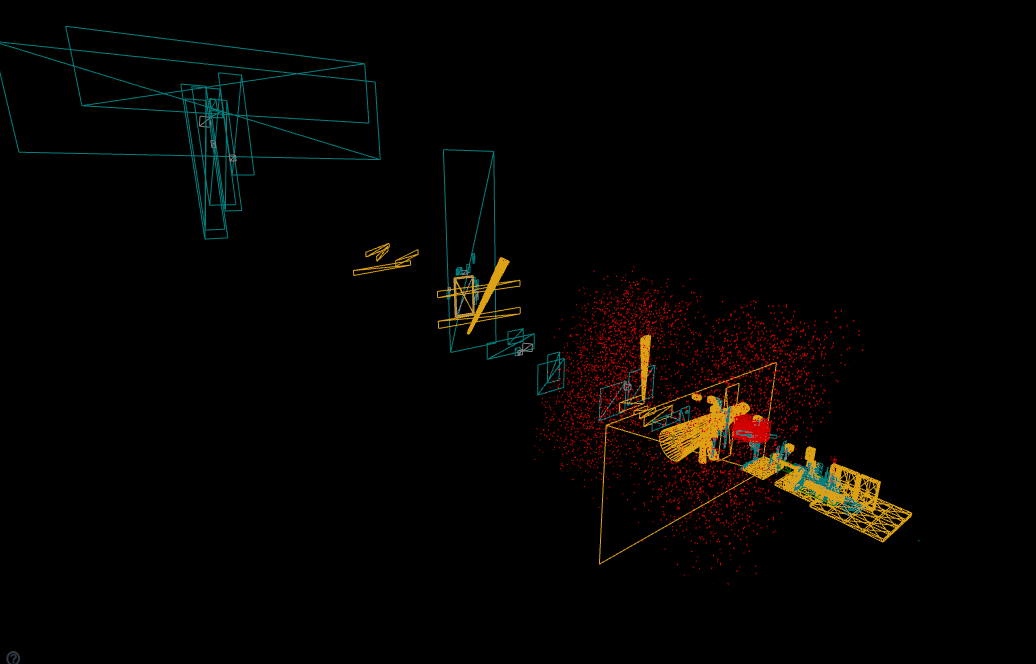
This is what the scene setup looks like in wireframe. Everything is theater. Pixel/Sprites are scaled at x5, x10, x20 depending on their scene depth to preserve line thickness, with directional lights and fog to help sell it.
This is what the scene setup looks like in wireframe. Everything is theater. Pixel/Sprites are scaled at x5, x10, x20 depending on their scene depth to preserve line thickness, with directional lights and fog to help sell it.
Anyway, thanks so much for all the kind messages and RTs, and I hope this gives you some pointers!
For background, this scene took a week's worth of work and does use some vfx from Unreal Engine content, as I'm terrible at vfx, but it's quite easy for anyone to dive in!
For background, this scene took a week's worth of work and does use some vfx from Unreal Engine content, as I'm terrible at vfx, but it's quite easy for anyone to dive in!
• • •
Missing some Tweet in this thread? You can try to
force a refresh


