I did a comparison of the different hill shading tools in #QGIS and got some amazing results. Each one was blended with a DTM to give a bit of depth. Have a look at this thread for details on the 7 ways I tried, these are the most interesting. 1/n 

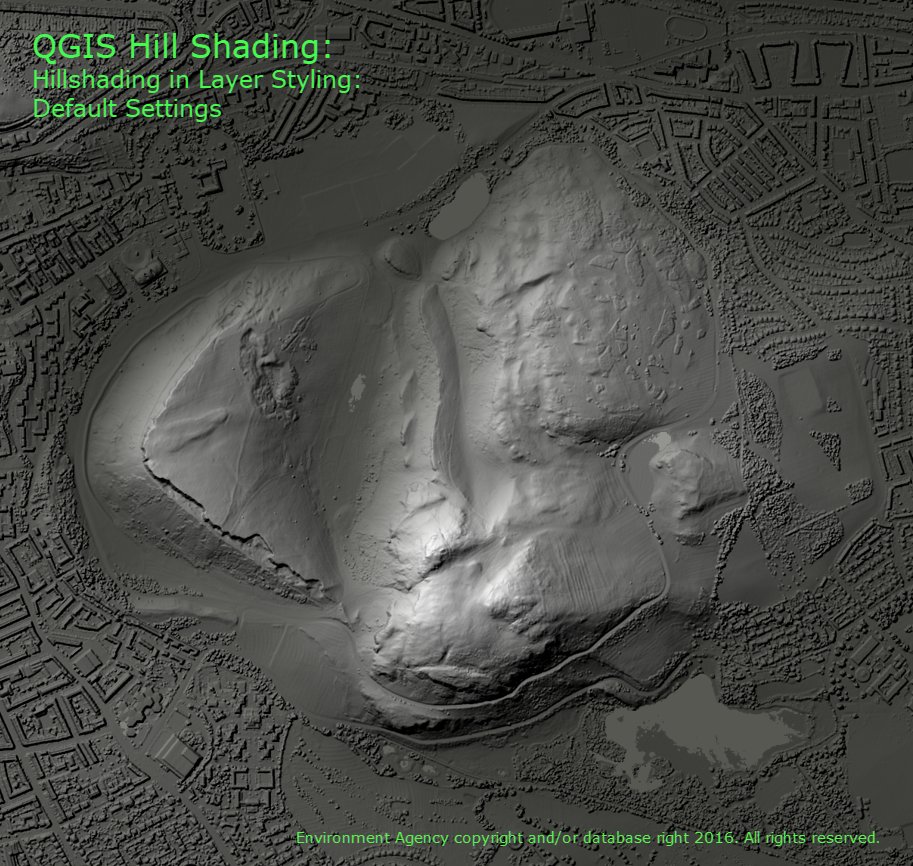
I was using a DSM of Arthur's Seat in Edinburgh. The first method was the most simple, just switch to Hillshading in the Layer Style Panel. Not bad, but a bit low on contrast. 2/n
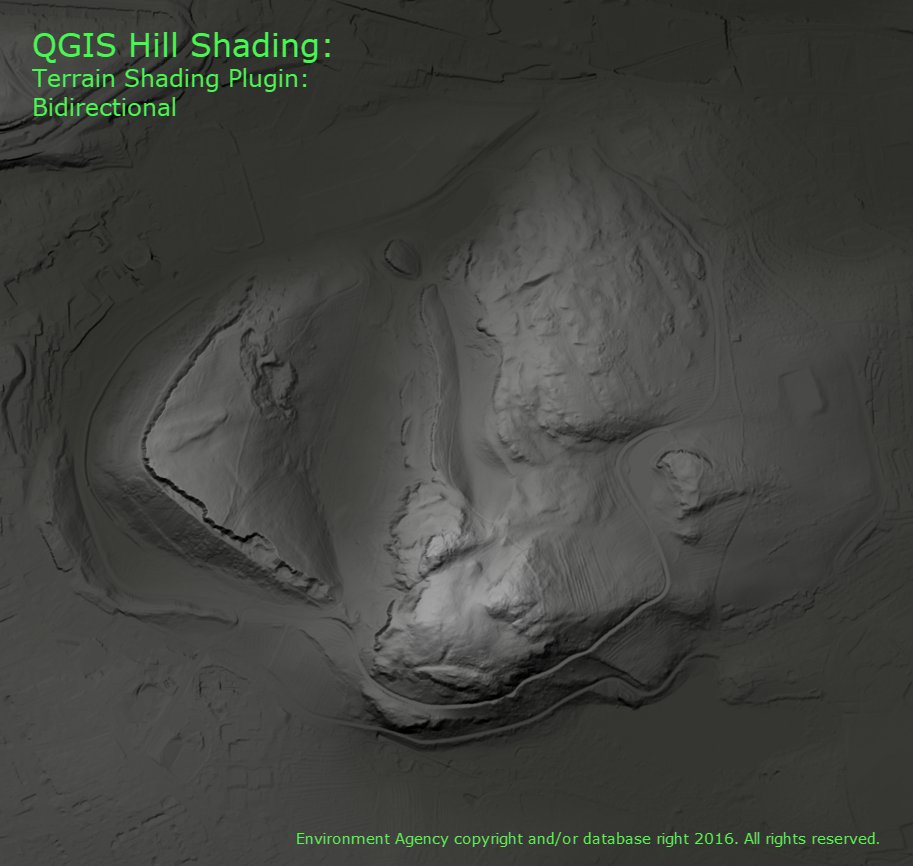
I then tried the Terrain Shading Plugin, I ticked the Bidirectional lighting to boost the contrast. It was a bit disappointing compared to others but the Plugin can be used to calculate other layers which can be combined manually to create much better effects. 3/n
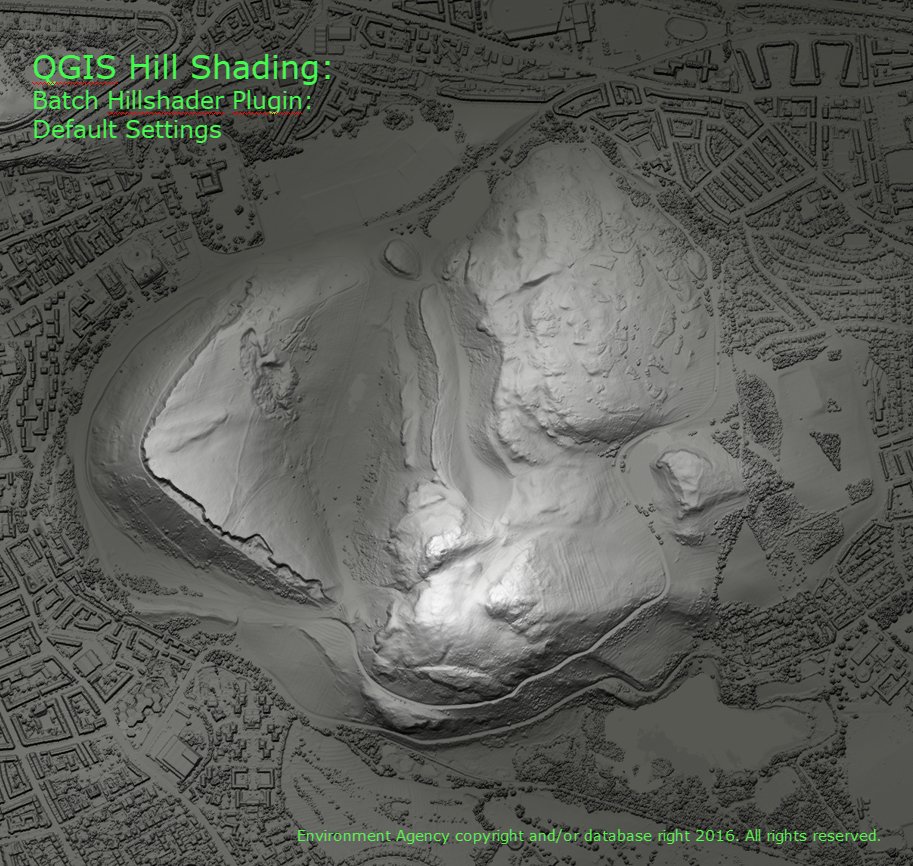
Next I had a look at the Batch Hillshader Plugin, to see what it could do. It uses a multidirectional approach so you can set 3 different lighting directions. I left the defaults and it instantly starts to pick up more detail in the landscape. I really liked this one! 4/n
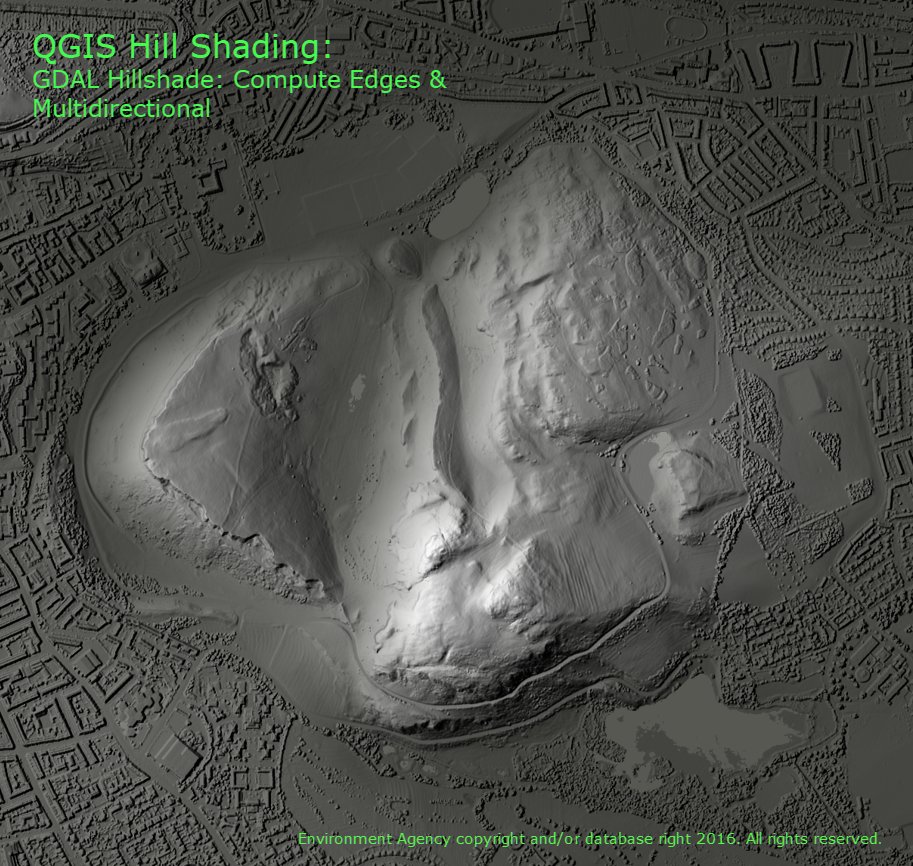
Going back to native #QGIS I tried out the GDAL hillshader in the processing toolbox. Again, keeping most default settings I switched on multidirectional lighting and compute edges to pick out even more details. Nice! 5/n
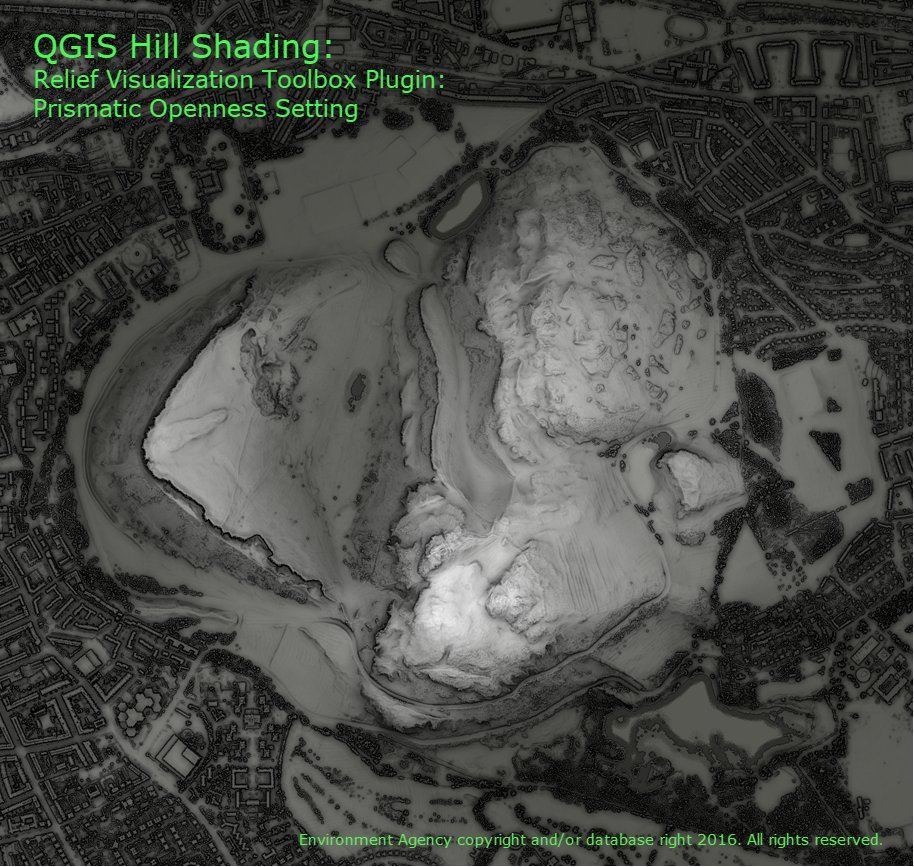
After a tip off from @stevefaeembra I had a look at the Relief Visualization Toolbox Plugin... Wow! I went to the Blender tab and created 2 hillshades from the pre-sets with no further tinkering. First, the Prismatic Openness setting, loads of extra details were revealed! 6/n
I also tried the Archaeological setting which has been designed to really pick out every last detail in the surface of the hillshade. It looks amazing and a great research tool, but perhaps a bit too much for landscapes. 7/n

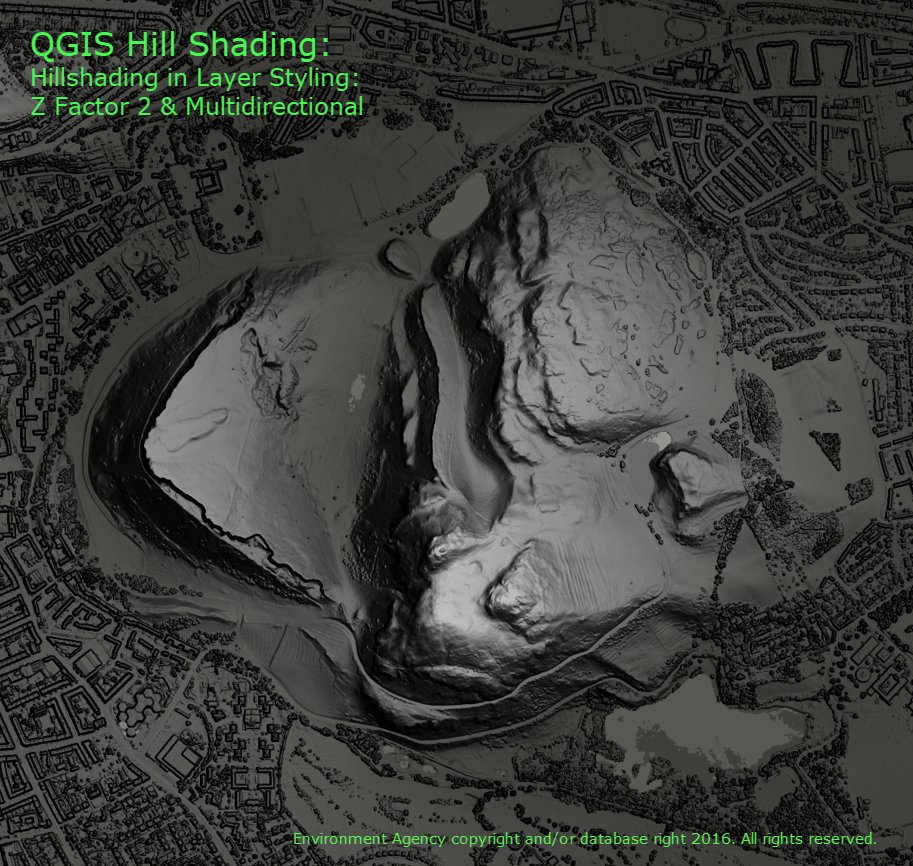
Finally I went back to the basic hillshading style in the Layer Styling panel and made some tweaks based on what I had seen in the other interfaces. Just by changing the z factor to 2 and ticking on multidirectional I got a remarkable result for an on the fly render! 8/n
Lots to explore further and different techniques will suit different scenarios, hope you all find this useful... one last thing, make sure you change the resampling to "Cubic" for a nice smooth result on zooming!
• • •
Missing some Tweet in this thread? You can try to
force a refresh