This one’s for all the SEOs out there…
The Landing Page report. Universal Analytics has it, GA4 does not.
But… you can make it! I’ll show you how to make your own landing page report in GA4 in a few easy steps,
🧵
The Landing Page report. Universal Analytics has it, GA4 does not.
But… you can make it! I’ll show you how to make your own landing page report in GA4 in a few easy steps,
🧵
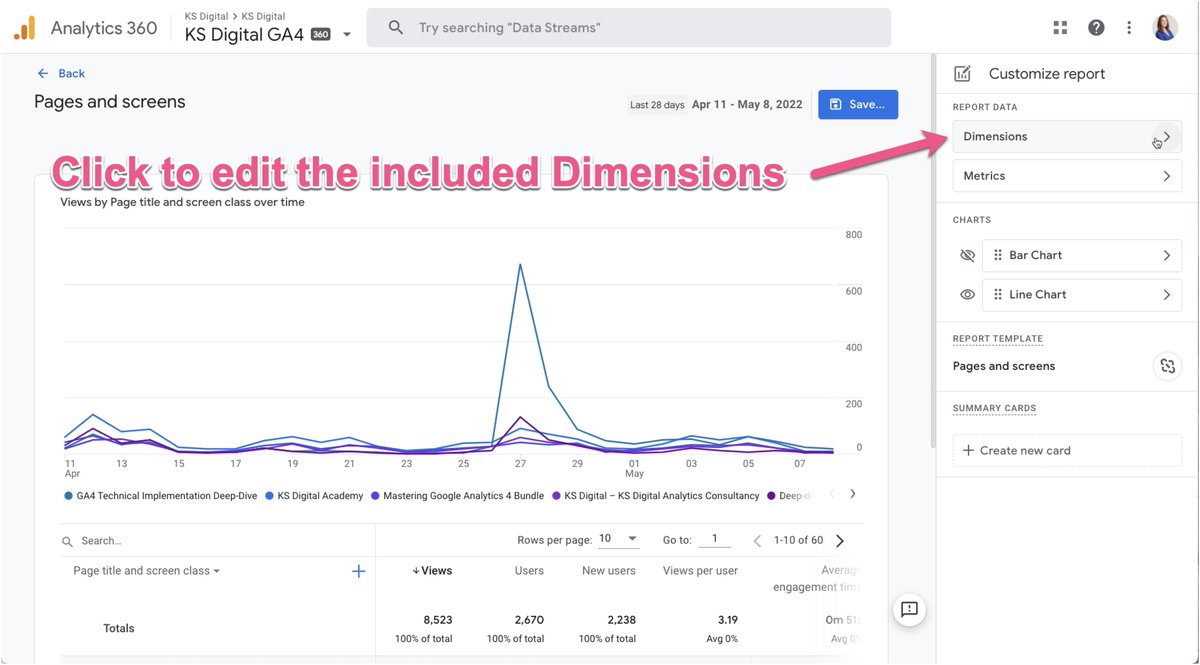
1/ Start from a similar template, in this case, the “Pages and Screens” report in GA4. Then click the “Customize Report” button in the upper right hand corner. 

2/ Next, click in to edit the included dimensions, and click “Add dimension”. Scroll down the list until you find “Landing Page” and select it. 


3/ Click the 3 dots on the right hand side of the “Landing Page” dimension name from the list of included dimensions and choose “Set as default”. Then hit apply in the bottom right corner. 

4/ Landing page is now the default report dimension. Yay! While you’re here, you can also add or remove metrics and change/hide the chart types if you’d like. I’ve selected just a bar chart and removed the second chart by hitting the eye icon to hide it. 

5/ Save as a NEW report. This is important - don’t save changes to the current report since we started off using the “Pages and Screens” report, otherwise you’ll no longer have the “Pages and Screens” report. Title is “Landing Page” 

6/ Next you’ll need to add the report to a collection. Go to the library section - you’ll find this icon while in the “Reports” section of GA4 at the very bottom of the left hand nav. 

7/ Choose which collection to add this new report to. It likely makes most sense to add it to the “Life cycle” collection, into the “Engagement” topic, right next to the “Pages and Screens” report. Click “Edit collection” for where you want to put it. 

8/ Scroll to the bottom of the list of reports on the right to find your new Landing Page report, and then drag and drop it into the topic section you want on the left column. 


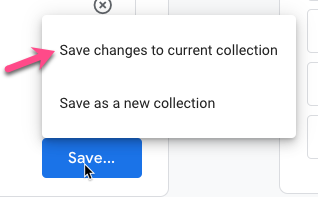
9/ Click save on the bottom of the screen. This time, choose to “Save changes to current collection” choice so that the Landing Pages report is added into your nav collections that are already published/visible 

10/ That’s it! Check out your shiny new Landing Page report in the left hand nav. Now that you know how to build a custom report, go wild! Add all those reports you’re yearning for that don’t yet exist in GA4 ;) 

If you learned anything from this thread, please consider giving @kristaseiden a follow for more #GoogleAnalytics and #GA4 tips/threads. I’ll be tweeting out a new tip via thread each week.
• • •
Missing some Tweet in this thread? You can try to
force a refresh


