
Posada Doublet Tutorial
Hello all, so I have been asked to show how I am currently making Jaskier's posada doublet. I will try to keep it as simple as possible but please feel free to ask questions.
The fabric I use it a medium weight cotton canvas 1/?
Hello all, so I have been asked to show how I am currently making Jaskier's posada doublet. I will try to keep it as simple as possible but please feel free to ask questions.
The fabric I use it a medium weight cotton canvas 1/?
Some steps, I had to search for resources for you to use as some things I just know how to do from experience/making other doublets. I have tried to keep it as easy as possible. 2/?
These are the pictures I am using as reference :
These are the pictures I am using as reference :

I picked my fabric with a slight yellowish tone because netflix uses a yellow filter on many of the scenes (I also preferred that color personally) so you will notice my fabric doesn't match the reference pictures for that reason. Here's the color with the yellow filter 3/?

I will start with the pants since I just made them. I personally wasn't a fan of his pants we can see them here. Those seems to be high waist straight trousers. (side decoration explained below) You can use this free pattern here (don't put pockets): 4/?
moodfabrics.com/blog/the-basqu…
moodfabrics.com/blog/the-basqu…

In my case, I decided to go with renaissance trousers that have more puffs because I love puffy stuff. I have picked an old pattern I have Simplicity 4059. It seems to be still available online although Simplicity doesn't have it anymore. Those are high waist trousers 5/?


I have extended the lenght and put cuffs instead of the little strings at the bottom. See below the result. With my boots, it will look like the pattern picture with the boots. I will not put the side decoration on these, but I will explain how you can put them on yours below.6/?

You can see the progress Video here. It's a quick sew for me, about 2 hours total. 7/?
tiktok.com/@eliasthegarde…
tiktok.com/@eliasthegarde…
Now that the bard isn't pantless anymore, let's look at the doublet. Again, reference pictures. So here you have two options. You can use the same pattern as the pants, Simplicity 4059 Option B, but you will need to add some sleeves (more advanced).... 9/?

But I have decided to recommend some Easier option which is a pattern I had in my stash Simplicity 8235 Option B which is an adjusted vest. I have added 2 inches at the bottom to have enough to give it the proper shaping at the bottom (V shape) 10/?

If you are using medium cotton Canvas like me, you will need to plan a medium interfacing so the texture is like the original one (kinda stiff). I use Iron on interfacing like this 11/?

Here I have cut all my pieces from Simplicity 8235 (adding 2 inches at the bottom like I mentioned before)
**NOTE** This pattern is a costume pattern and like many of them is NOT LINED. Because jaskier's doublet has cuts where you can see gold, you have 2 options... 12/?
**NOTE** This pattern is a costume pattern and like many of them is NOT LINED. Because jaskier's doublet has cuts where you can see gold, you have 2 options... 12/?

You can add/sew patches of gold inside the specific holes or you can line the entire piece.
Because I have sensory issues with certain fabric, I have decided to line the whole thing in gold. It will also make it warmer. Here's my gold 13/?
Because I have sensory issues with certain fabric, I have decided to line the whole thing in gold. It will also make it warmer. Here's my gold 13/?

Posada Doublet Tutorial Part 2
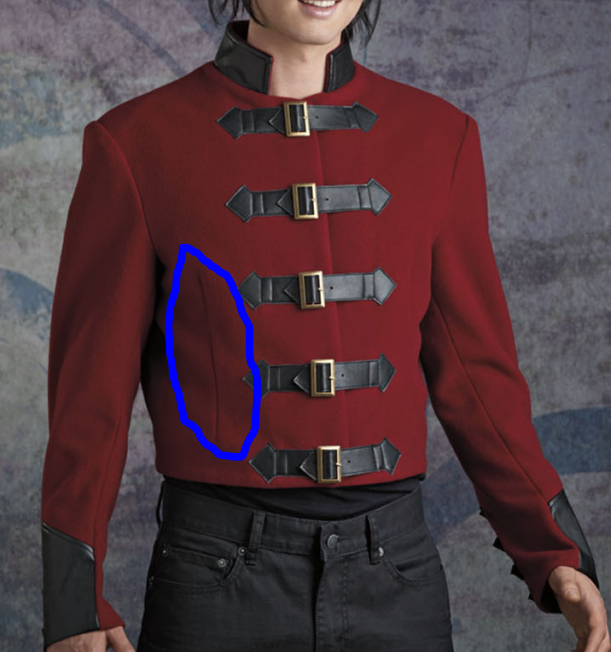
Now that we cut our pieces (and in my case the lining as well, we need to explore the doublet itself and the details. I picked the back picture because it is easier to see.
Here we can see the details 14/?
Now that we cut our pieces (and in my case the lining as well, we need to explore the doublet itself and the details. I picked the back picture because it is easier to see.
Here we can see the details 14/?

These lines here looks very much like a quilting technique called "prairie points". (You can choose not to do it this way, this is what I will go with because I enjoy the texture/thickness it will give the doublet.
cutting triangles inst of folding will be thinner/cheaper) 15/?
cutting triangles inst of folding will be thinner/cheaper) 15/?

My doublet will have a quilted/thick texture like a blanket which is how I like my doublets.
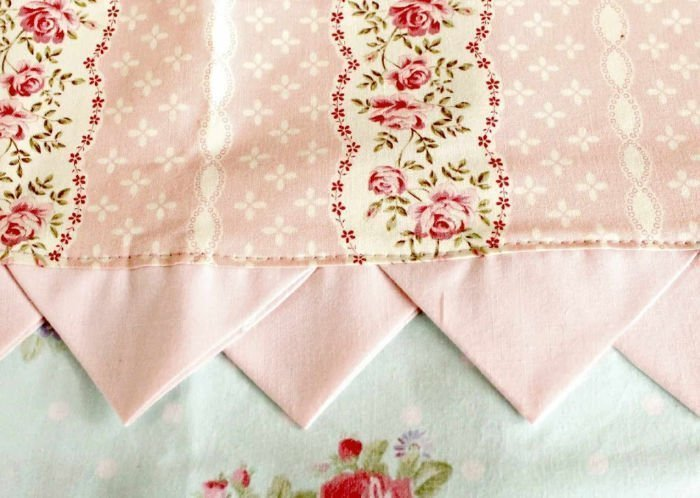
Prairie Points explained - This is how it looks. You can find it on quilts and it is used for a lot of different things including Scales effect 16/?(prettydiyhome.com/pretty-diy-tea…)
Prairie Points explained - This is how it looks. You can find it on quilts and it is used for a lot of different things including Scales effect 16/?(prettydiyhome.com/pretty-diy-tea…)
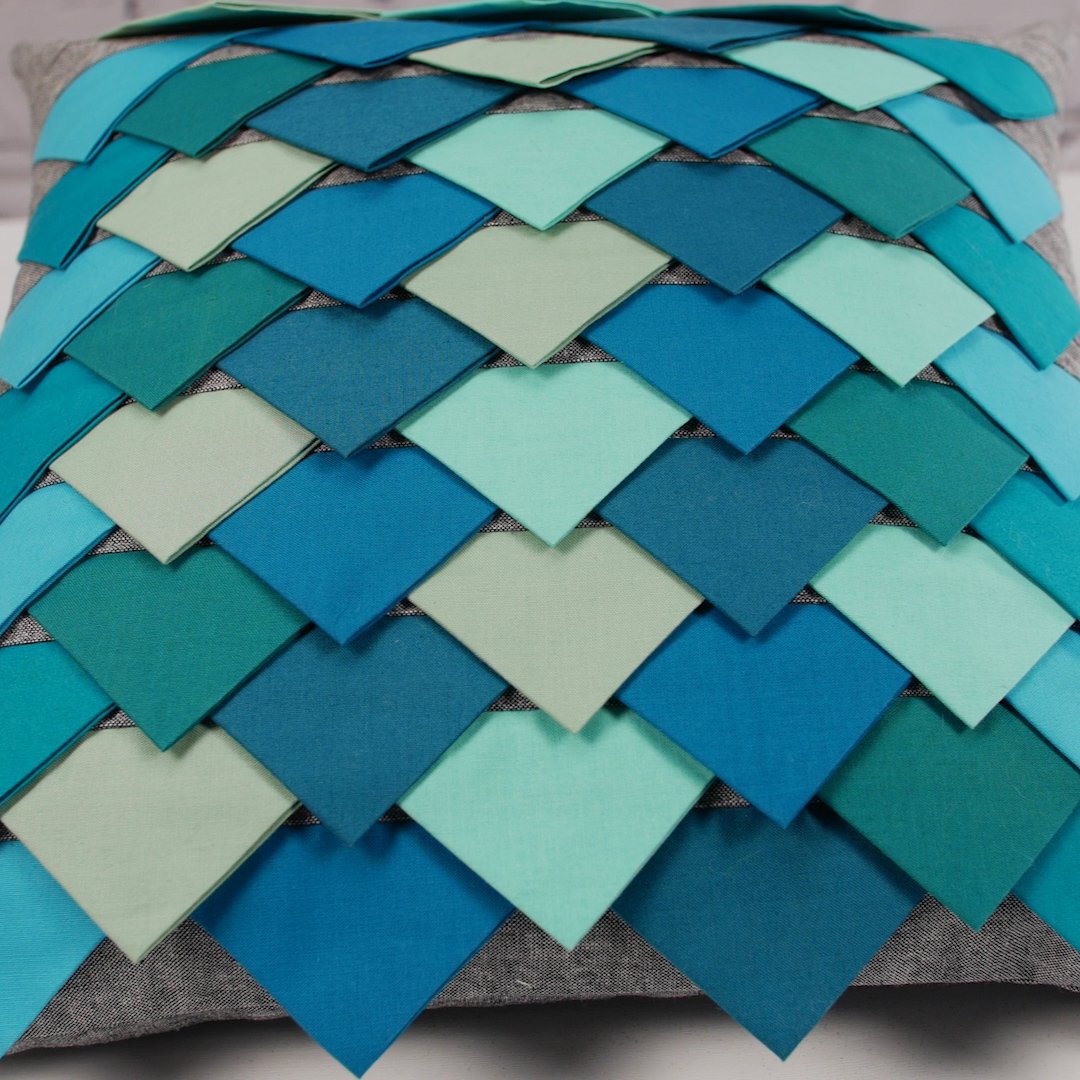
Exemple of Scales effect here - I have used them in the past to make some scales gloves but I unfortunately couldn't find pictures.
The good thing about prairie points is they hold with only 1 seam at the bottom 17/?
weallsew.com/prairie-points…
The good thing about prairie points is they hold with only 1 seam at the bottom 17/?
weallsew.com/prairie-points…
To come back to the Doublet, I will be making 4 bands of prairie points for the doublet and 4 smaller bands for the sleeves.
My goal is to have a 2 inches band so I will be using a 5 inches square here 18/?
My goal is to have a 2 inches band so I will be using a 5 inches square here 18/?

Prairie points is an easy 2 fold into a triangle. They are then inserted into each other. Here's a video of me making the fold. Easier to explain 19/?
This gives me a 2.5 inches point so with the seams and such, it's perfect. See? Not that hard. Now for the band themselves.
Now we only need to create the piece 20/?
Now we only need to create the piece 20/?

I recommend for this part to do it on the mannequin with your doublet already pinned on it. But since not everyone has a mannequin, you can place it on the front piece itself. make sure when you pin your points on your red band that the red band has the curve you need 21/?

The way it is pinned, it will keep the curve you need (Mine might have to be redone because I was enthusiast about showing how the curve holds). Here's a tiktok showing how to put it together 22/?vm.tiktok.com/ZMNnTnP28/
That's enough for Today - I will come back with the rest - Stay tune
Hello Again - Sorry for the delay.
Today, I am working on the prairie points. I have pinned them here Just to make sure I had made enough
Today, I am working on the prairie points. I have pinned them here Just to make sure I had made enough

As we can see here, we need 2 for the sleeves, 2 for the front and 4 for the back.


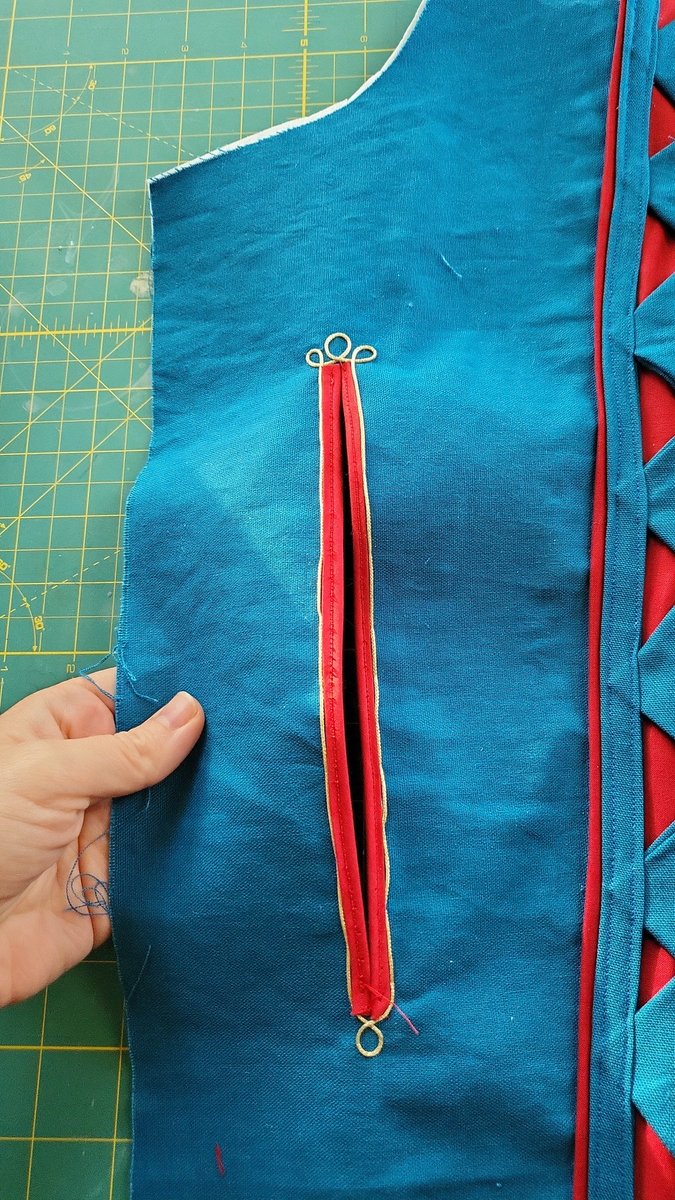
All of them except for the two in the back have a small red line so I will show you how I made it happen. I suppose you could use large red seams as an alternative option but I just integrated it to the prairie points

After sewing the bottom of the triangle, I made my own bias tape (you can see here how helensclosetpatterns.com/2019/03/14/mak…) I installed on top of my points to secure them as we can see it on the doublet (valid for all but the 2 center back line I will explain later)
I sew the tape in place
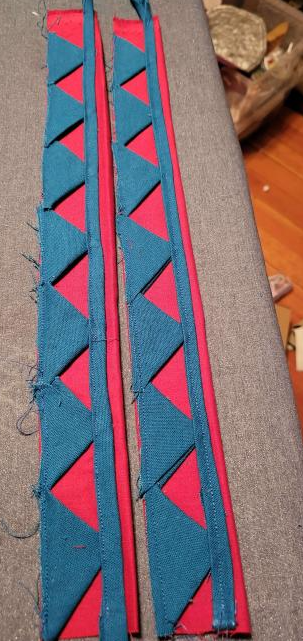
Now for the red line, I am leaving part of the red fabric peek (I might use it to sew the points to the doublet, we will see)
Now you have two pretty prairie points - I will get back when I am done with the rest of them to show you the next step - Thank you
#Jaskier #posada #doublet #thewitchernetflix #TheWitcher
#Jaskier #posada #doublet #thewitchernetflix #TheWitcher
Here's the result for now. All my bands are ready for the #jaskier #doublet. On the far right is the back in the middle ~ Time to put together the doublet ~ Stay tune

Jaskier's Lining - Following the pattern (this is simplicity 8235 but you can pick something similar) I put together the lining of the body (we will be able to see through the holes). This is what it looks like for now

I have then put some interfacing on the main body for a stiffer look (It will also prevent the holes to open more etc) and After putting the interfacing I am now affixing the bands to the main body.We can already see what it will look like #thewither #thewitchernetflix #jaskier

We are approaching the end of my #jaskier #doublet #cosplay tutorial. After putting my bands on all the pieces, I need to make the holes on the main body - Using a rotary cutter here we are 26/?

I am using bias tape from the store for this part here - measuring and cutting 27/?

This is while I install the gold trim. I am using fishing thread for this 28/?

Result here on the main body 29/?
I show the whole process on here. The next few steps will be the sleeves and how to draw the puffy part of the sleeve 30/?
Tutorial Part 4 - The sleeves
Here's finally the guide how to make puffy sleeves out of any pattern you have - In this case, I am making a puffy part on top of the regular sleeve which is usually the case with doublets.
Regular sleeve from this (simplicity 8235):
Here's finally the guide how to make puffy sleeves out of any pattern you have - In this case, I am making a puffy part on top of the regular sleeve which is usually the case with doublets.
Regular sleeve from this (simplicity 8235):

Trace the regular pattern you have on a cardboard or pattern paper (I like cardboard better)
Now that you have your copy, cut it vertically in strips of equal lenght
For this part, it depends how big you want the puff to be. In my case, I added .5 cm everywhere as jaskier's sleeves are not super puffy (compared to let's say Game Dandelion). if you want more, you can add more. Don't forget that it will be adjusted at the end anyway
Trace the new pattern (the first and last piece of your pattern should match the original pattern)
Cut 2 of your new pattern
Cut 2 of your new pattern
Set your stitch lenght on the longest setting you have a stich leaving a long thread tails. Pulling on these tails, gather the fabric to create your puff.
Make a band to old the bottom of the sleeve and gather there as well.
Make a band to old the bottom of the sleeve and gather there as well.
This is how it looks like now. I made sure to look at the pictures I had to match the puff effect of the sleeves
You can finish the sleeve, ready to be attached to the doublet
I made a Tiktok Video with all the steps #jaskier #thewitcher #thewitchernetflix #doublet #jaskierthebard #sewing #sleeves #Geraskier
tiktok.com/@eliasthegarde…
tiktok.com/@eliasthegarde…
• • •
Missing some Tweet in this thread? You can try to
force a refresh


