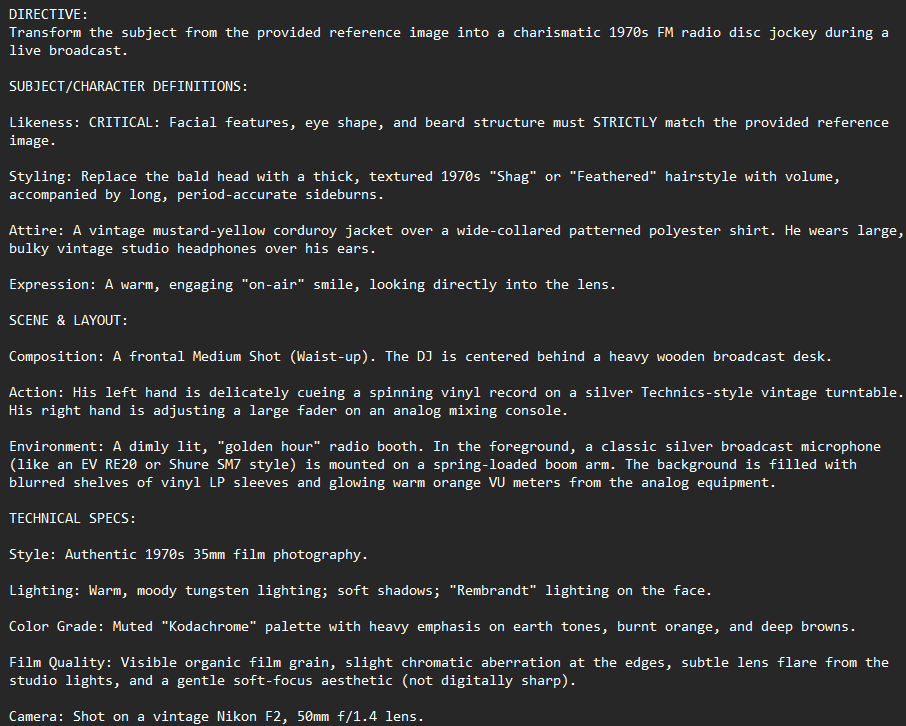
(1/6)🧐Character Consistency for Video Games in #Midjourney
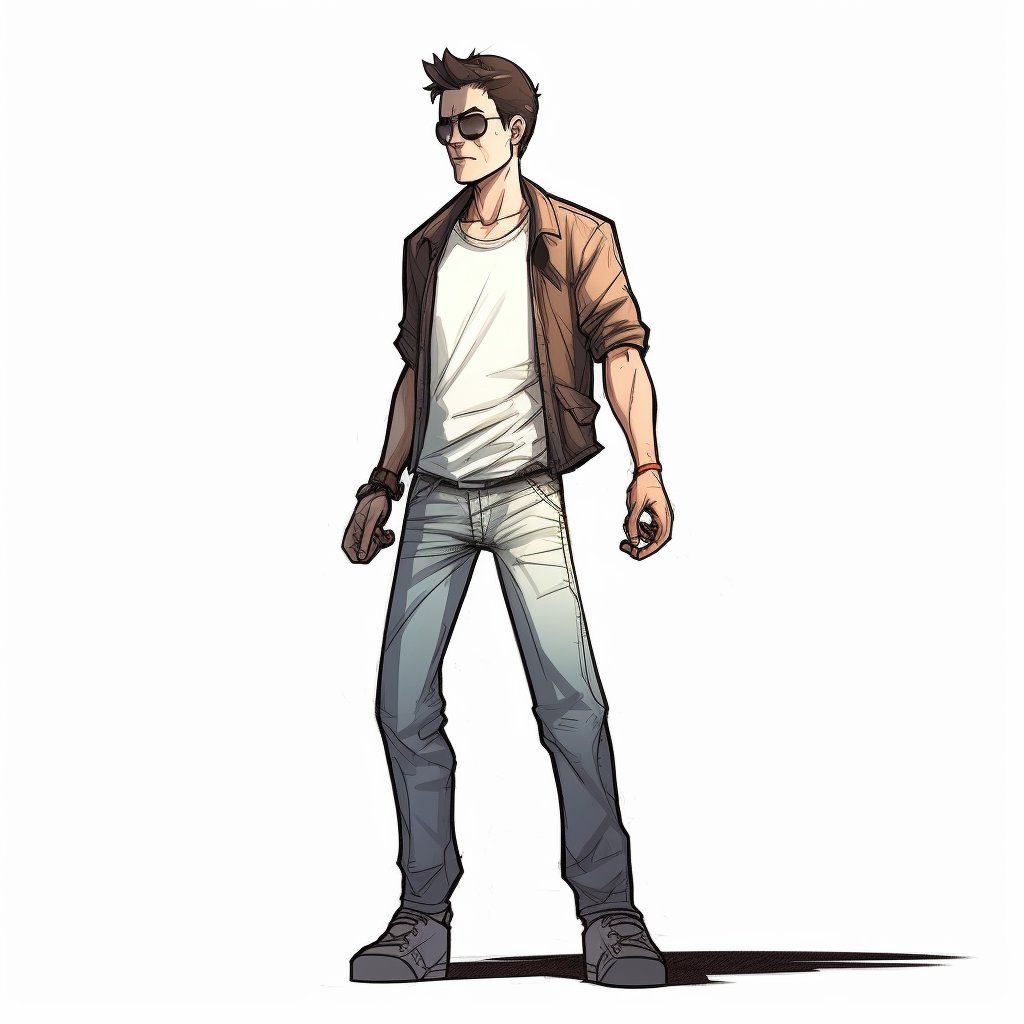
🧍♂️Introducing Jimmy Jazz, a potential character for a Lucas Arts-style 2D adventure.
🧵In this thread, I'll show you how to do it so that you can apply it to your own projects.
#AI #AIart #conceptart #videogames
🧍♂️Introducing Jimmy Jazz, a potential character for a Lucas Arts-style 2D adventure.
🧵In this thread, I'll show you how to do it so that you can apply it to your own projects.
#AI #AIart #conceptart #videogames

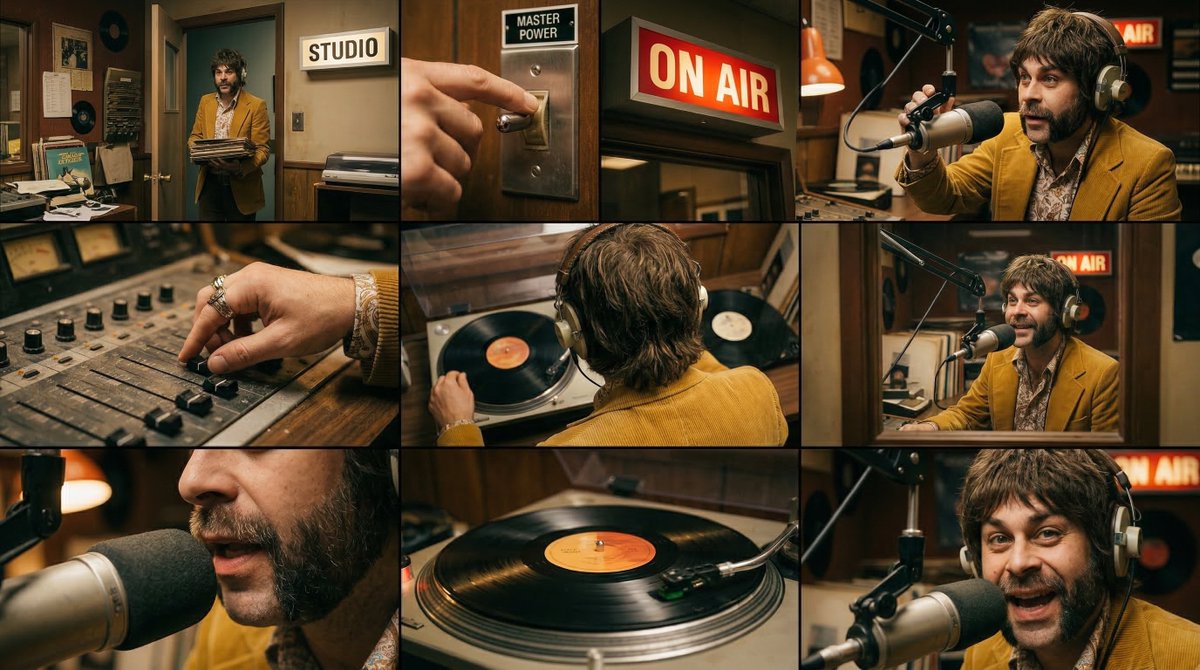
(2/6)The tricky part is keeping our character consistent while applying variations.
So let's do just that. Copy the URL of the initial image (ensure to open it on browser first), use /imagine prompt:, and then paste the same prompt as before. But let's add a little modification
So let's do just that. Copy the URL of the initial image (ensure to open it on browser first), use /imagine prompt:, and then paste the same prompt as before. But let's add a little modification

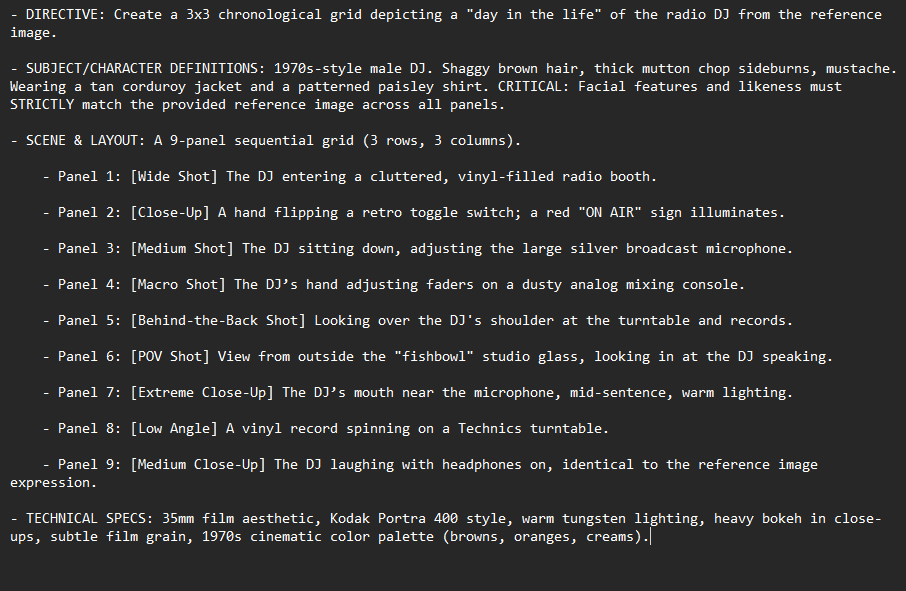
(3/6) Now, do the same, maintaining the original image url, but modifying his status. Lets say... bowing!

(4/6) And keep going on! Now Jimmy is prepared to run

(5/6) We can also add accesories, such as sunglasses
(6/6) I know the results can be improved, but certainly this can greatly accelerate the process of designing characters, animations... Give it a try and let me know!😊
• • •
Missing some Tweet in this thread? You can try to
force a refresh