Thread time 🧵
Here's how to precisely design a small building in a game (such as an isometric bunker) by fine-tuning #StableDiffusion
This example was inspired by #RedAlert, which I spent countless hours on (in 96-97 - pls don't call me old 😅)
CC scenario.gg
Here's how to precisely design a small building in a game (such as an isometric bunker) by fine-tuning #StableDiffusion
This example was inspired by #RedAlert, which I spent countless hours on (in 96-97 - pls don't call me old 😅)
CC scenario.gg

Style-consistency is paramount when it comes to designing #game assets.
I trained a fine-tune using @Scenario_gg (alpha), using 16 images (below), inspired by the Red Alert/Command & Conquer buildings.
Fun fact: I generated them all in... @midjourney.
I trained a fine-tune using @Scenario_gg (alpha), using 16 images (below), inspired by the Red Alert/Command & Conquer buildings.
Fun fact: I generated them all in... @midjourney.
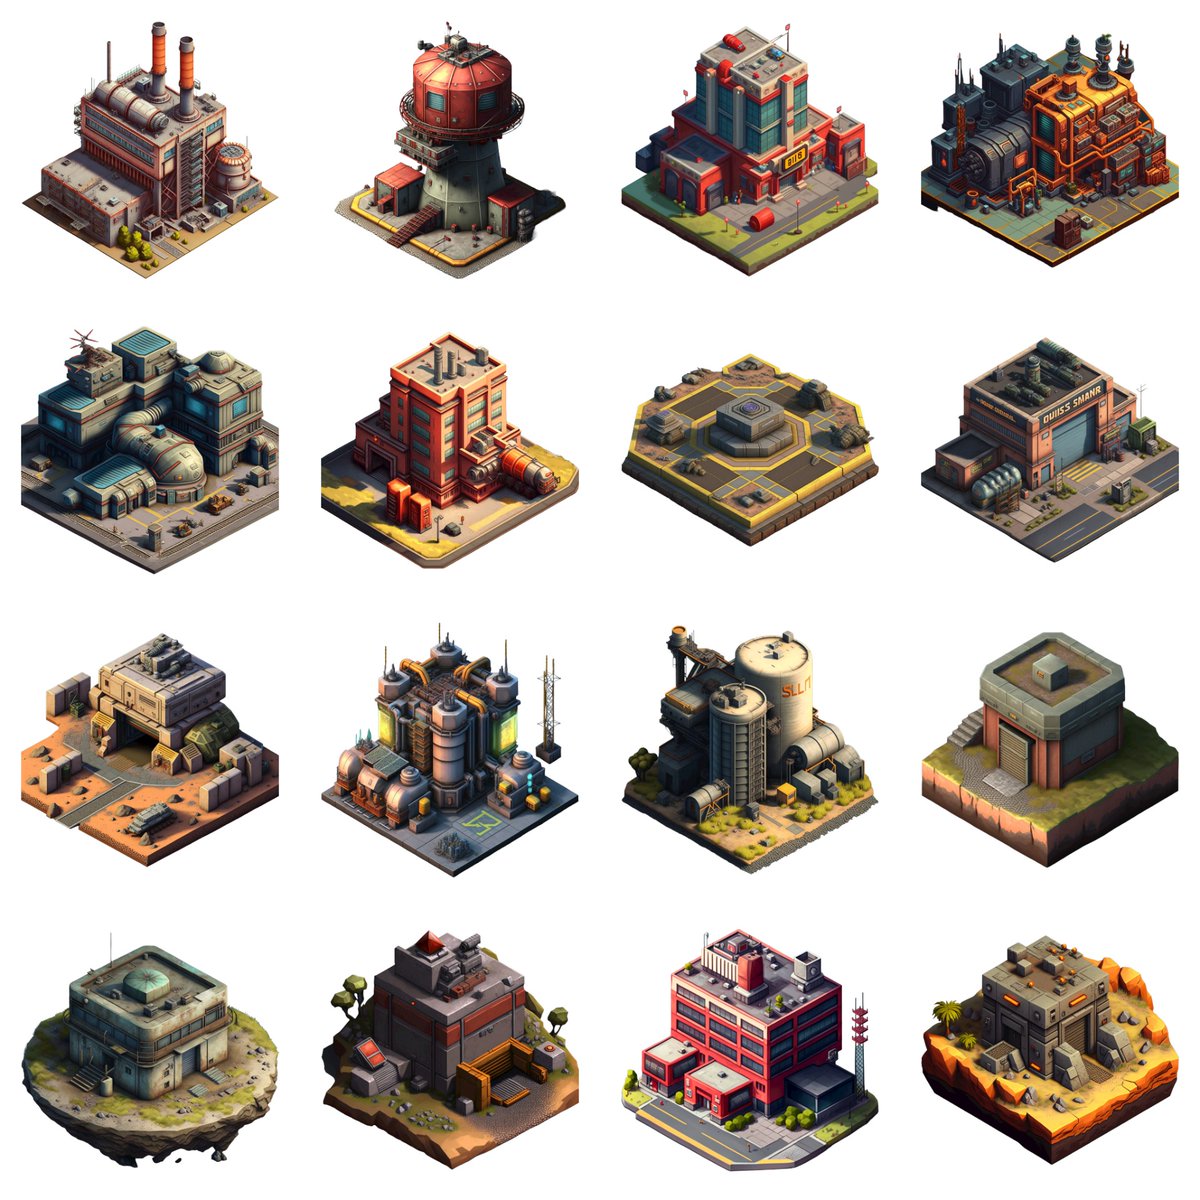
I actually generated more than 200 buildings (and even some vehicles), from which I picked a smaller dataset, keeping enough variability within a certain consistent style.
I will keep the remaining data for new trainings in the coming days :)
I will keep the remaining data for new trainings in the coming days :)

Once the model was trained, I tried a few simple prompts to evaluate which type of isometric buildings it could generate.
Such as... a nuclear plant (not really in the original training dataset)
Such as... a nuclear plant (not really in the original training dataset)

Or a factory

A soviet bunker.

A radar dome.

A garage...

A refinery.

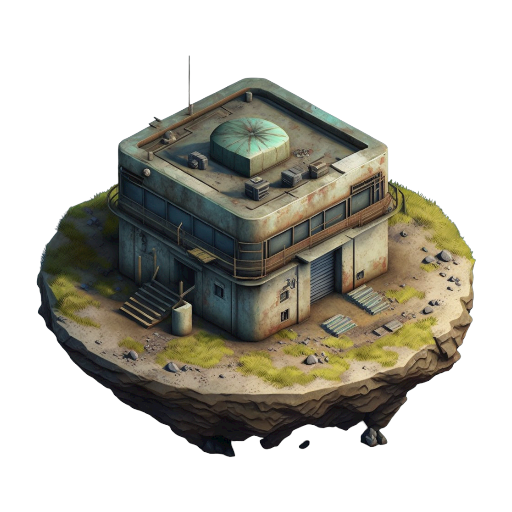
And finally... the bunker. An easy example, in the style of a "pillbox" in Command & Conquer.
This board was generated using #img2img, from one initial image (to the right, from the original training dataset).
This board was generated using #img2img, from one initial image (to the right, from the original training dataset).


I tried other "shapes" for a bunker, such as the ones below (taking the “factory“ image as the input data to img2img)
It worked too, but maybe not as well as the one above.
It worked too, but maybe not as well as the one above.


So I re-trained the model with two differences > reducing the dataset to 12 images (to increase the consistency, at the risk of lowering the variability). I also set the text encoder at 50% (vs. 100%)
And it worked much better. Here's a first bunker (tower-shaped)
And it worked much better. Here's a first bunker (tower-shaped)

Back to the "pillbox" shape.

The pillbox looked good, so I customized it as if it was a soviet bunker.
"isometric bunker, realistic, soviet flag, red, video game".
Boom done.
"isometric bunker, realistic, soviet flag, red, video game".
Boom done.

Of course, there has to be the "allied" counterpart.
"isometric bunker, realistic, USA flag, blue, allied, video game"
"isometric bunker, realistic, USA flag, blue, allied, video game"

I changed the original image to generate bunker with a wider angle (and some structures around).
"isometric bunker, realistic, video game".
That's it. 3 words, a good fine-tune, a curated image (for img2img) and the possibilities are just infinite.
"isometric bunker, realistic, video game".
That's it. 3 words, a good fine-tune, a curated image (for img2img) and the possibilities are just infinite.

Close-up views
"Dataset engineering" >>> "prompt engineering"
"Dataset engineering" >>> "prompt engineering"


Another img2img, another shape, another style... but the same "Command and Conquer-like" universe.

And another style of bunker or "command tower".
For this img2img batch, I used an ATC tower as an input (right)
The #AI transformed the control tower into a vertical bunker (and kept some of the original visual features)
For this img2img batch, I used an ATC tower as an input (right)
The #AI transformed the control tower into a vertical bunker (and kept some of the original visual features)


I even explored other buildings, such as a #lighthouse, always in the same style (generated from the fine-tune)

This is just infinitely powerful. ESPECIALLY for artists with all the creativity, knowledge, and culture of gaming art.
Once you master different features (training finetunes, prompts, img2img, inpainting...), then the possibilities are just endless.
Once you master different features (training finetunes, prompts, img2img, inpainting...), then the possibilities are just endless.
I predict game #studios will end up managing hundreds (if not thousands) of finetuned models, which will undergo some validation process before being used in production by various teams (artists, developers, designers, marketers...)
And if you still doubt it, this is a quick example of the SAME concept and methodology, but this time applied to the "Fallout" video game (post-apocalyptic #RPG)
A radar dome.
A radar dome.

A radar dish/antenna.

A decaying building, etc etc.
If you like this concept, RT this thread, give us a follow (@Scenario_gg), or get on the waitlist (scenario.gg) 🚀
We start rolling out in 10-15 days and after.
And let us know what you'd like to see next!
🤝
If you like this concept, RT this thread, give us a follow (@Scenario_gg), or get on the waitlist (scenario.gg) 🚀
We start rolling out in 10-15 days and after.
And let us know what you'd like to see next!
🤝

• • •
Missing some Tweet in this thread? You can try to
force a refresh