This is how I generated 180 #pixelart flowers (16 types, one consistent style) in 20 min.
This 🧵is also a @Scenario_gg run-through (web app) - with the prompts I used and the step-by-step workflow.
Reach out for any questions.
#StableDiffusion #AI #AIart #Gaming #GameAssets
This 🧵is also a @Scenario_gg run-through (web app) - with the prompts I used and the step-by-step workflow.
Reach out for any questions.
#StableDiffusion #AI #AIart #Gaming #GameAssets

I started from a (royalty-free) dataset available on #Craftpix, with 10 images of pixelated flowers (such as the ones below).

Since the dimension of each image was only 32 × 32, I upscaled them 16x using @LospecOfficial, to get 512× 512 images.
Here's a before/after comparison.
Each image was sRGB / 8-bit.
I kept the grey background this time (I often remove it otherwise).
Here's a before/after comparison.
Each image was sRGB / 8-bit.
I kept the grey background this time (I often remove it otherwise).


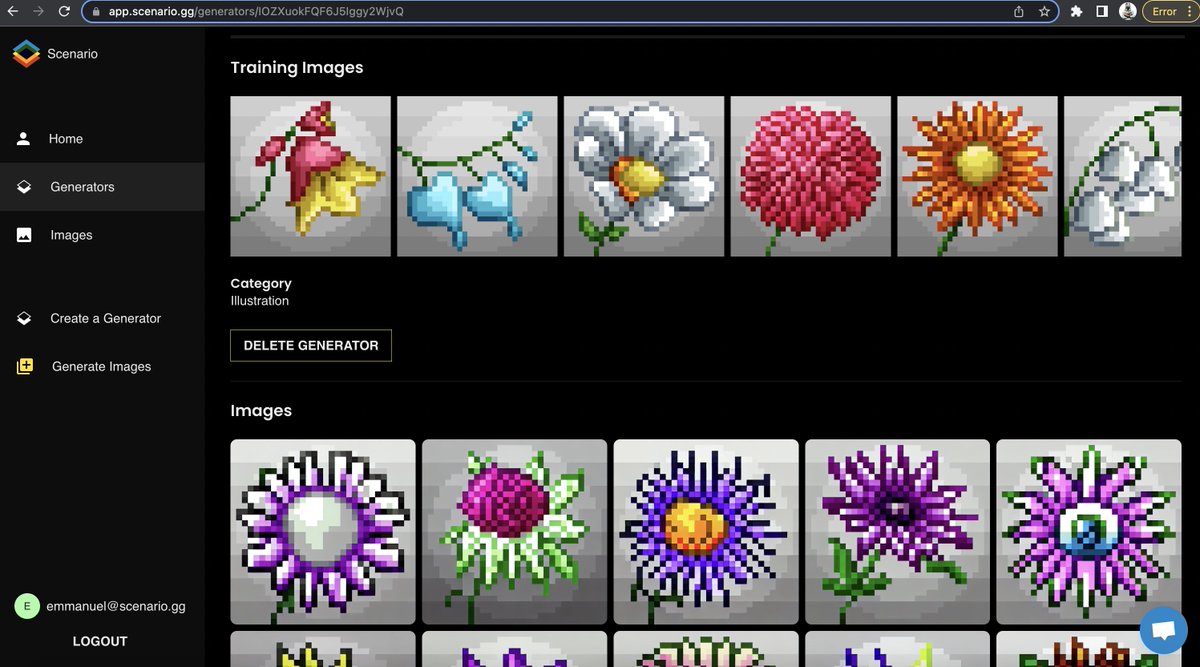
I trained a generator on @Scenario_gg (web app) with the upscaled images.
As shown in the screen recording below, launching a training takes less than 30 seconds.
I used "Art Style > Illustration" as the regularization class (more on classes later).
As shown in the screen recording below, launching a training takes less than 30 seconds.
I used "Art Style > Illustration" as the regularization class (more on classes later).
20 minutes later, the generator was trained and "ready for prompting" on app.scenario.gg (and also via the iOS app)
The next step is to start exploring some prompts and modifiers. It takes 30 seconds to generate a batch of 4-10 images, as shown below:
The next step is to start exploring some prompts and modifiers. It takes 30 seconds to generate a batch of 4-10 images, as shown below:
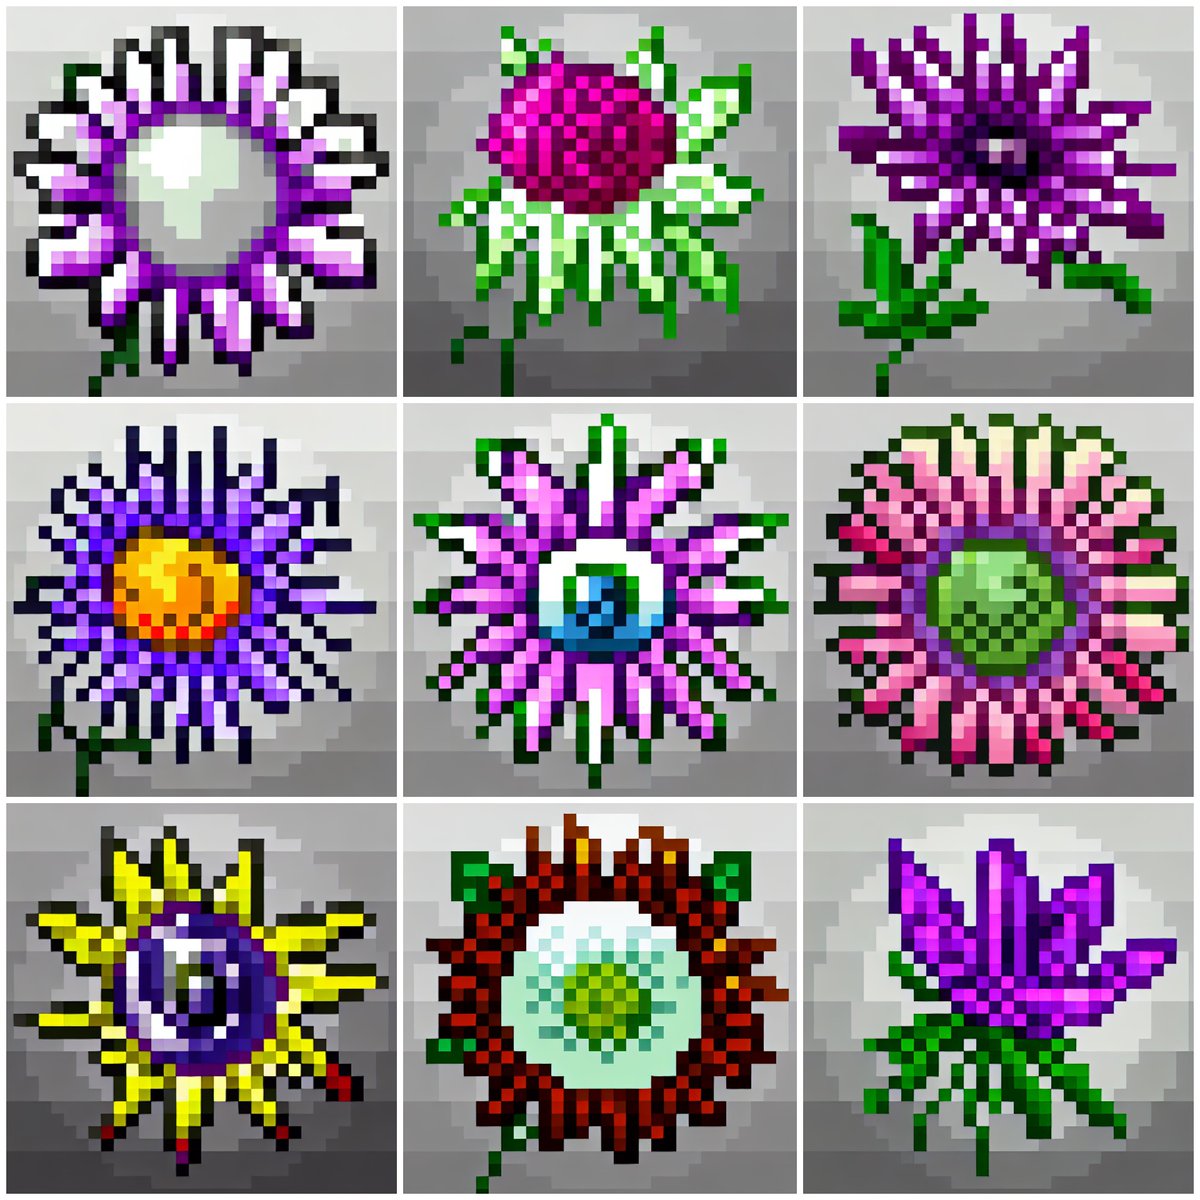
My first prompts are simple, such as "red flower, pixel art".
I also tried other modifiers, including "sRGB", "game icon", "game asset", "pixel", "8-bit", "16-bit", etc.
The goal is to gauge the quality of the generator and which modifiers should be kept going forward.
I also tried other modifiers, including "sRGB", "game icon", "game asset", "pixel", "8-bit", "16-bit", etc.
The goal is to gauge the quality of the generator and which modifiers should be kept going forward.


I landed on "XXX flower, pixel art, 8-bit, sRGB, icon" with "XXX" being the name or description of the flower (e.g. "white", "iris", etc).
In minutes, I could start prompting to get consistent images with the right style, and only varying "XXX“
Here's a pink rose 🌹
In minutes, I could start prompting to get consistent images with the right style, and only varying "XXX“
Here's a pink rose 🌹

"Colorful Tulip, pixel art, 8-bit, sRGB, icon"

"Colorful Orchid flower, pixel art, 8-bit, sRGB, icon"

"Lily flower, pixel art, 8-bit, sRGB, icon"

"Daisy flower, pixel art, 8-bit, sRGB, icon"

"Marigold flower, pixel art, 8-bit, sRGB, icon"

"Jasmine flower, pixel art, 8-bit, sRGB, icon"

While we're here... I'm not a flower specialist. So I asked #ChatGPT to provide me with some ideas of well-known flower species.
Prompt: "list the names of 20 of the most beautiful flowers"
Done.
Prompt: "list the names of 20 of the most beautiful flowers"
Done.

"Iris flower, pixel art, 8-bit, sRGB, icon"

"Peony flower, pixel art, 8-bit, sRGB, icon"

"Lavender flower, pixel art, 8-bit, sRGB, icon"
Note: it looks like the AI took "lavender" as the color of the flower, not precisely its type (genus/species).
Note: it looks like the AI took "lavender" as the color of the flower, not precisely its type (genus/species).

"Hibiscus flower, pixel art, 8-bit, sRGB, icon"
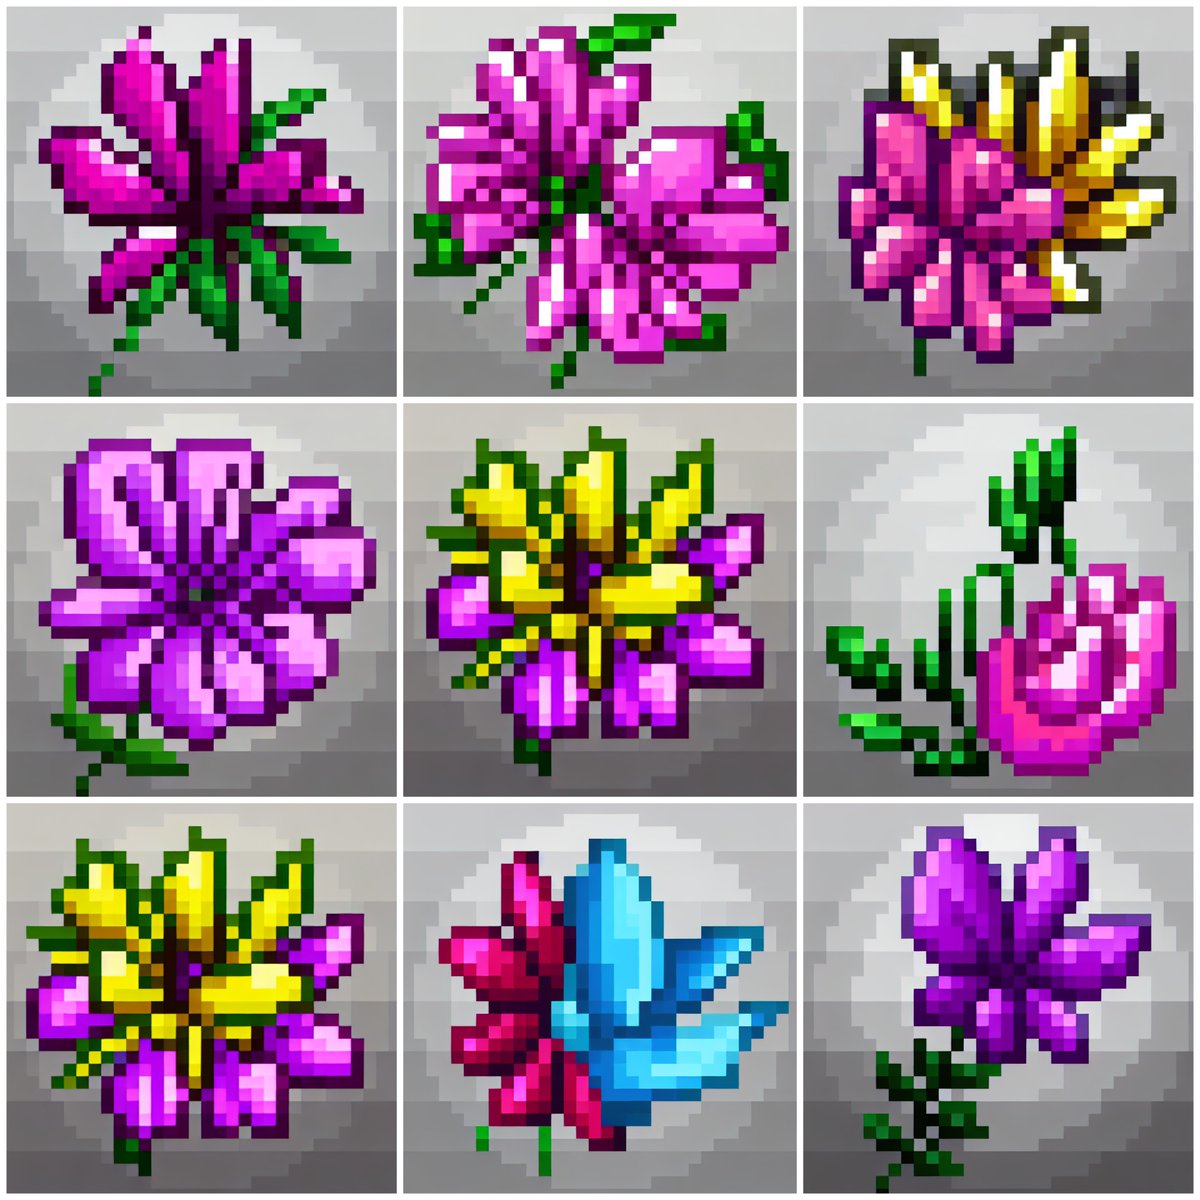
"Chrysanthemum, pixel art, 8-bit, sRGB, icon"

"Clematis flower, pixel art, 8-bit, sRGB, icon

"Poppy flower, pixel art, 8-bit, sRGB, icon"

"Carnation flower, pixel art, 8-bit, sRGB, icon"

"Passion flower, pixel art, 8-bit, sRGB, icon"
I can access all my AI-generated images under the "Images" tab and also via the "Generator" icon itself.
I can easily see the prompts I used, compare batches, or download individual images (more filtering/sorting features are coming shortly).
I can easily see the prompts I used, compare batches, or download individual images (more filtering/sorting features are coming shortly).
While not all output images are perfect (some prompts could have been more precise, and some flowers could have looked better), it's still an excellent example of how to use Stable Diffusion finetunes (with @Scenario_gg) to explore a specific graphic direction, consistently.
• • •
Missing some Tweet in this thread? You can try to
force a refresh