Just about to have a play with the @adafruit @lobe_ai @Raspberry_Pi kit... This will be fun! I'll let you know how I get on @cohenjacobd @jenfoxbot and @_jpacifico. @MicrosoftIoT @MSIoTDevs 
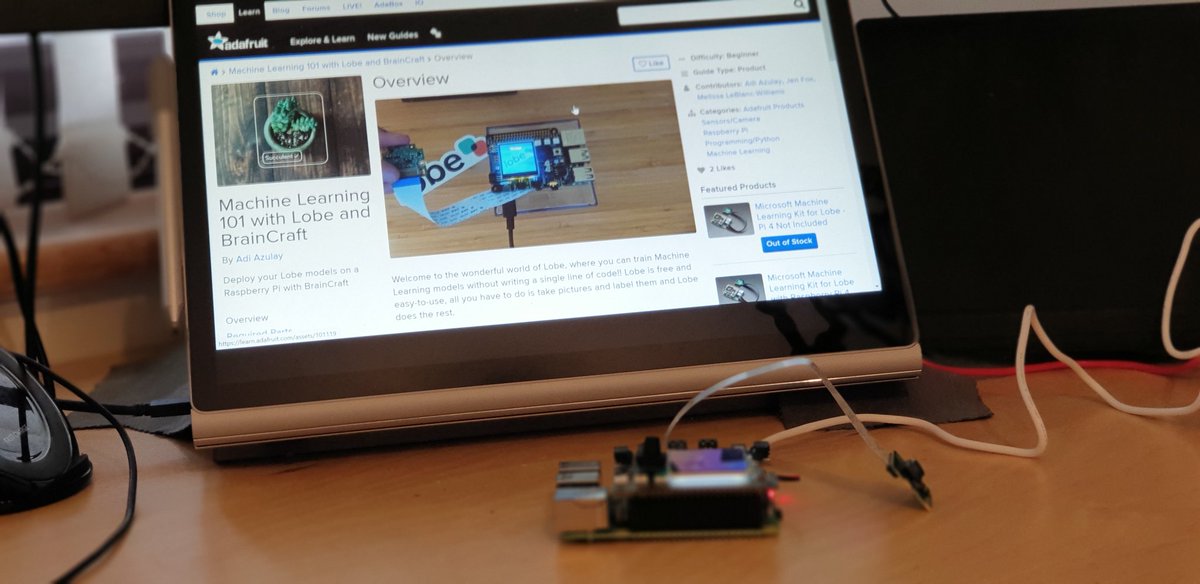
This is what I'll be following... learn.adafruit.com/machine-learni…
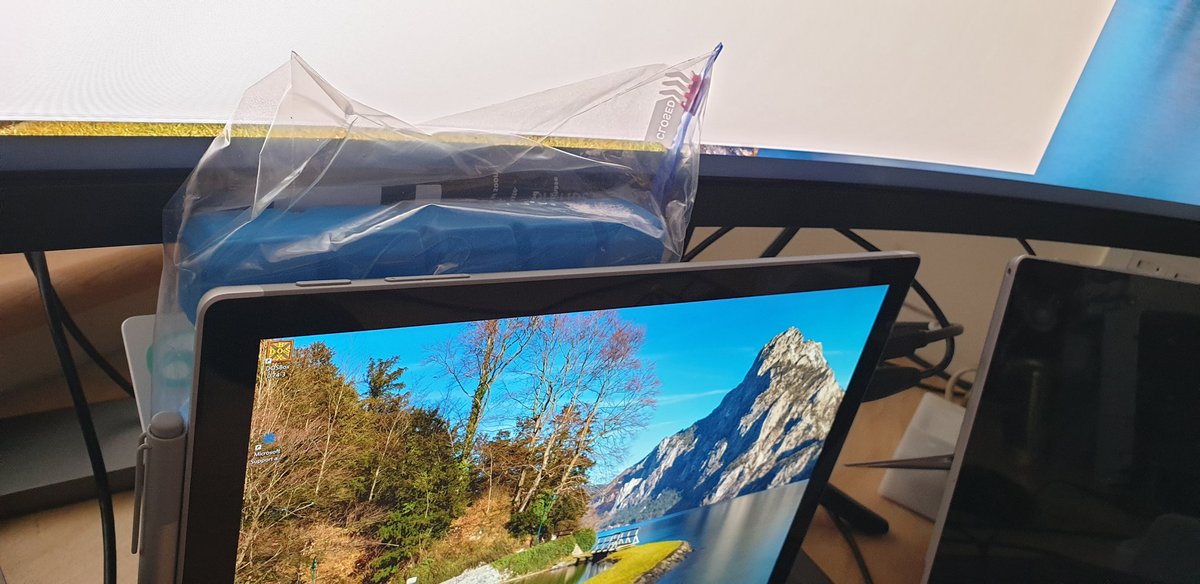
I bought all of my pieces from the fabulous @pimoroni ... Here's a @Raspberry_Pi 4... shop.pimoroni.com/products/raspb…
Here's a PSU... shop.pimoroni.com/products/raspb…
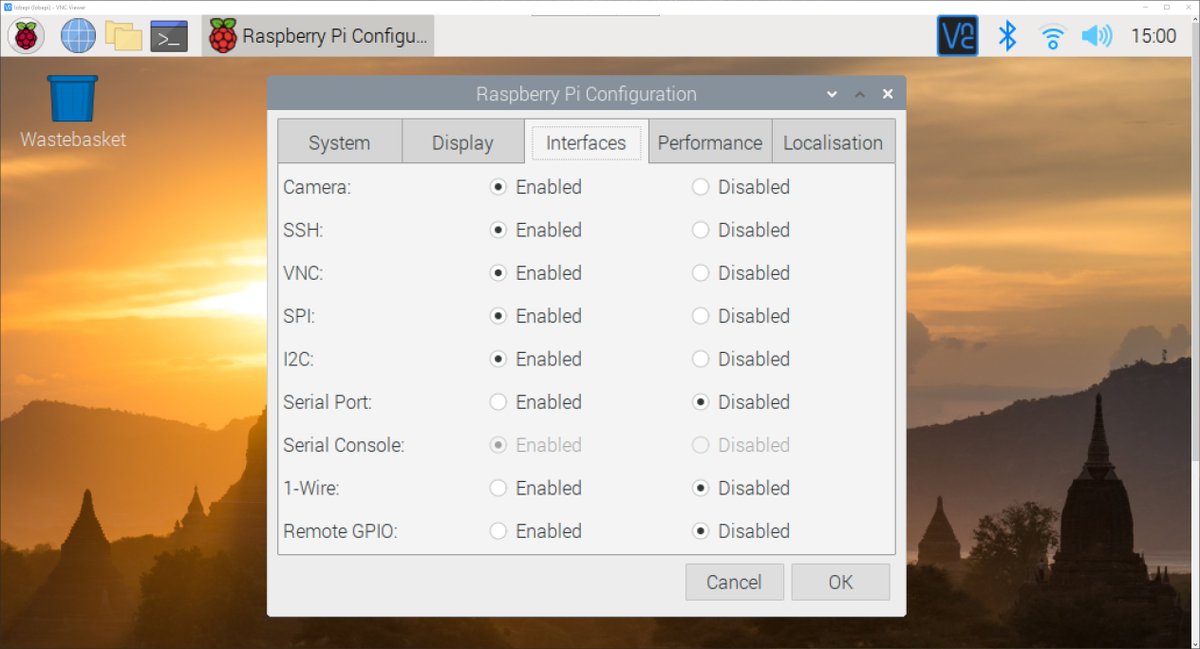
I've already downloaded and configured #Raspbian, including making sure that I've enabled the various interfaces...
You'll be asked to join the Beta Program...

You can then download the client... It's 334Mb, so may take a minute or so to download depending on your internet connection...

Once @lobe_ai is downloaded, you can go ahead and install it...

It's a reasonable size app so may take a minute or so to install...

with @lobe_ai installed... We can leave "Run Lobe" checked and hit the finish button...

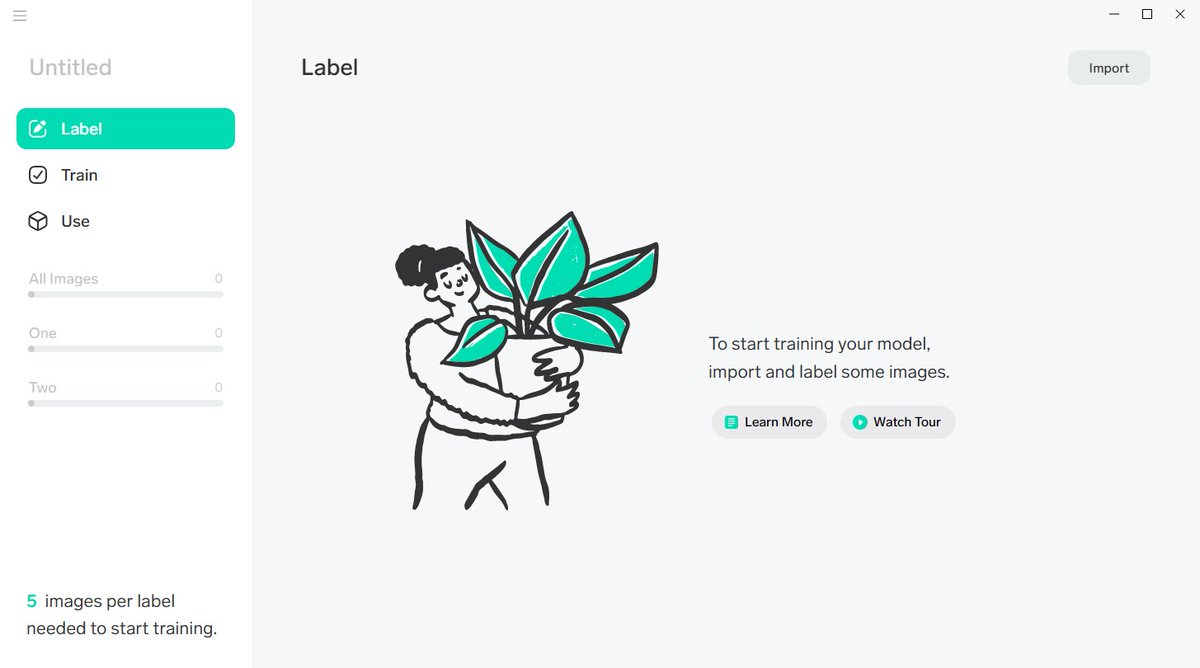
We then see the @lobe_ai app interface...

We need to create a new Project... If we hit the "New Project" button at the bottom left... We see the new Project window...
We need to import from the camera now... I'm wondering if I should be doing this on my @Raspberry_Pi or on my PC... I'm doing this on my PC for now... Let's see what happens... Clicking the Import button in the top right, we can select the "Camera" option.

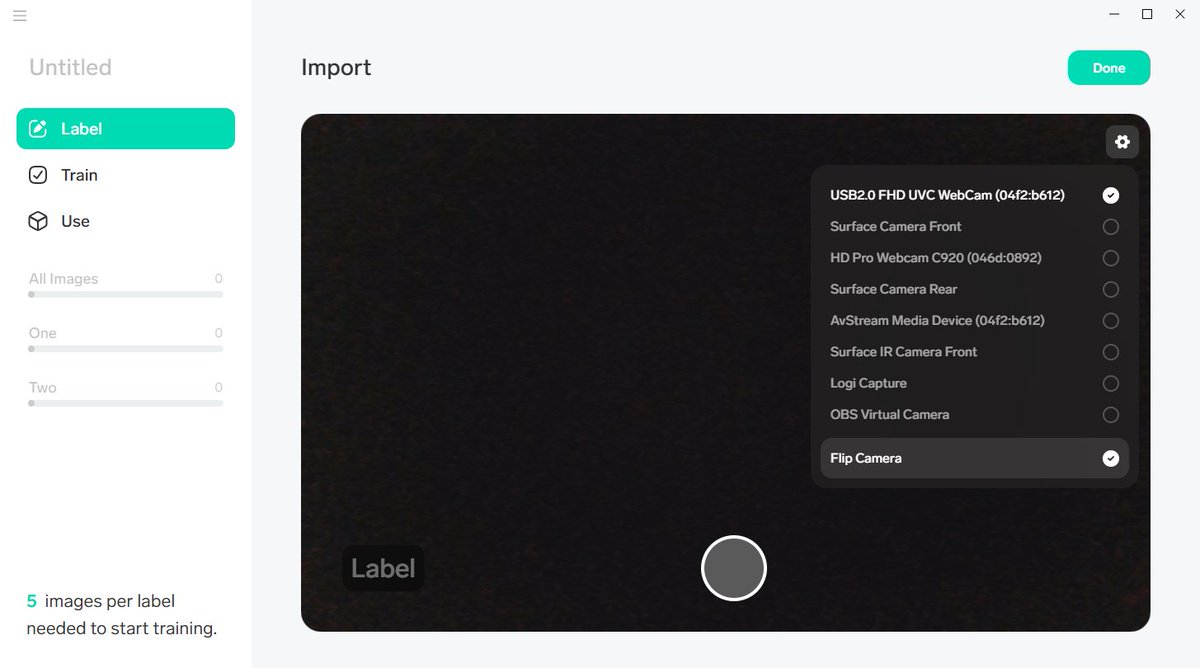
We're now shown the Import screen... Looks like we need to choose the correct camera...

If I hit the Settings Cog in the top right of the screen I can choose which camera @lobe_ai is using... I've chosen the Rear Camera on my @Surface_UK...
I'm going to try training is on a Pen as the tutorial suggests...

We can label our image with the name of the thing we're training... This is... Well... A pen!

Clicking the Shutter button, we get a satisfying "Ding", and that's the first image trained...

I now need to train between 10 and 20 different images of this same pen...
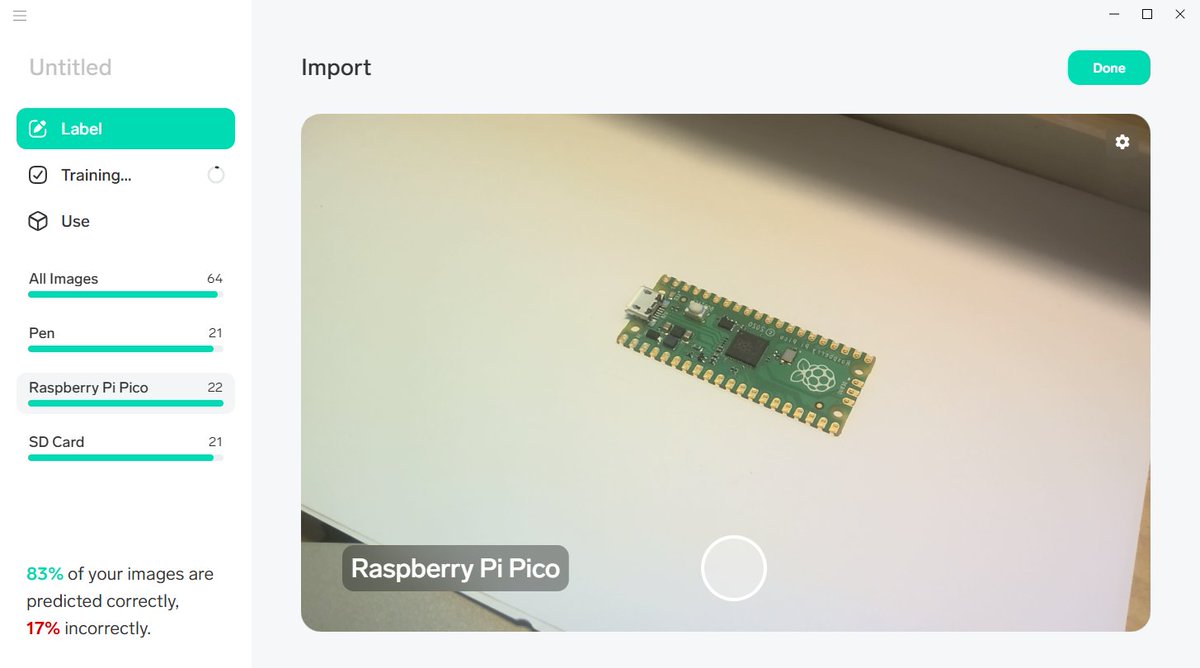
Now that I've got 20 or so images of the pen from a heap of different angles etc... I can move on to other items...

Let's do an SD Card...

Every now and then, we get a different satisfying "bling" as I think Lobe is automatically testing the model and attempted to identify what's currently in shot... Apparently it identified 97% correctly and 3% Incorrectly....

If you accidentally take a photo with the wrong label... You can click on the items on the left, right click on an image (or set of images) and delete...

We now add a "Nothing" category

I don't know if I needed to train that one of not... So I went ahead and did that anyway...

We can now test our model out... We hit the "Use" menu item on the left, and select "Camera" as Import option at the top...

We can now drop different objects into the shot and see if @lobe_ai can recognise them... It's spotted the @Raspberry_Pi #RaspberryPiPico...

And the SD Card...

And the pen too... Pretty cool!

We can improve the model by using the validation tools in the bottom right of the window to let @lobe_ai know if the image was identified correctly... The Tick will add the image to the dataset...

If we add all three objects into the frame... It kinda just picks one...

We can now export the our trained model to a @TensorFlow Model to use on the @Raspberry_Pi We need to use TensorFlow Lite

We're then prompted for a location to save our model... I'm gunna choose the Desktop...

We're prompted to Optimize before we Export for better results... I'll do that...

It's now busy Optimising...

It's finished Optimising... Now it's exporting...

Now the export is complete...

And a quick pause for some fresh air before carrying on! Back in 30 mins...

@ThePSF PIP is already the latest version

Now "Setup Tools"..


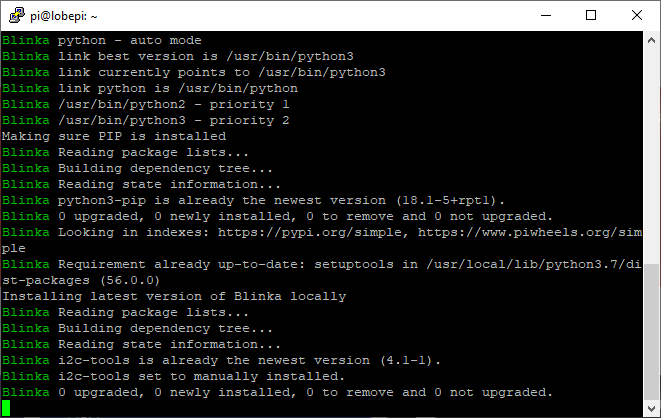
Now #Blinka...

We're prompted to update @ThePSF from 2.7.16 to Version 3... I'll hit "y" for "yes"...

The script downloads, installs and sets up a bunch of stuff...

We're now prompted to reboot... So we can hit "y" for "yes" to reboot...

This disconnects our SSH session of course...

Restarting the session after a few seconds...

Then a few last libraries, including; dot-star, @CircuitPython Motor and BMP280...

Now to setup the Fan Service... There's a fan in the @adafruit #BranCraft Kit for the HAT... Making sure first that the Adafruit @ThePSF shell is up to date again... We already did this.. But won't do any harm to do it again...

Next the Fan Service Python Script...

And we can then run that script... We're told that this script will turn on the Fan using a pin and Enable the Fan Service... I'll hit "y" for "yes" again here...

Fan Service installed... Time to reboot...

When I was assembling the @adafruit #BrainCraft HAT, I didn't know which way around to install the Fan... I made a guess that the label should be facing away from the HAT... Anyway... After the reboot, we're now connected back again...

Interestingly... I got a different prompt for the Fan Service to the instructions... My fan isn't on either...

Looks like on newer @Raspberry_Pi's it's possible to use the inbuilt fan control instead... We need to use the Raspberry Pi Config utility... "sudo raspi-config"...

Heading to Performance Options...

Then "Fan"...

We can enable "Fan Temperature Control"... We're prompted for which GPIO pin the fan is connected to... The @adafruit #BrainCraft HAT has the fan connected to Pin 4. The instructions say the default is 14... Mine had 4 prepopulated... I'll leave it as 4 and tab across to "Ok"...

We're now prompted for a Temperature... Looks like the default is 80 here... We'll leave that as it is and head across to "Ok" again.
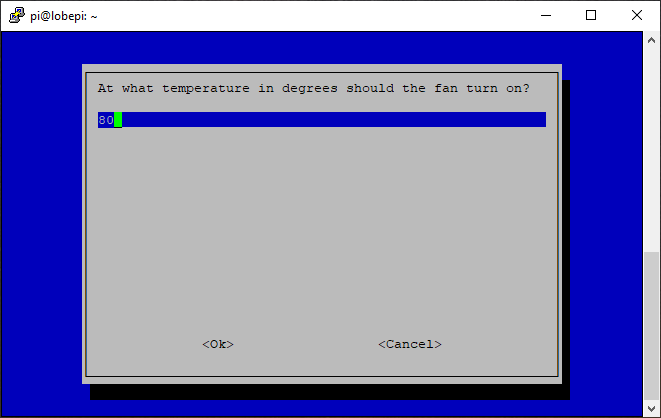
We're now told that "The fan on GPIO 4 is enabled and will turn on at 80 degrees..."... We can hit enter now...

We're now back to the Config main screen... We can tab across to Finish to exit...

Time for another reboot...

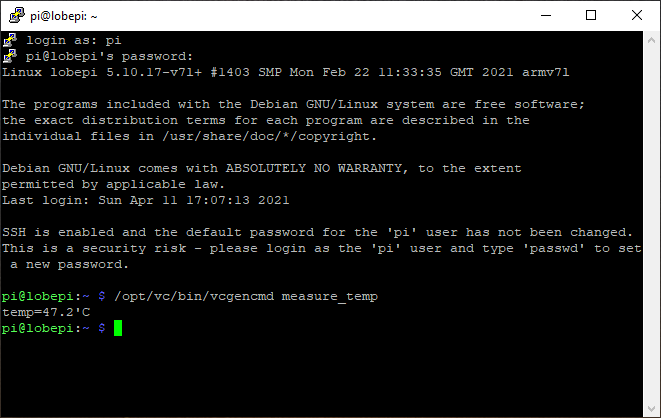
After the reboot, my fan isn't on... We can check the temperature of the CPU using "/opt/vc/bin/vcgencmd measure_temp"... Ah... 47.2 degrees C... The fan won't be on until it hits 80 degrees C...
Ooo... Big red and orange boxes here in the instructions... Turns out there's a conflict with the latest Pi Audio Drivers and the #BrainCraft display...

The red box is telling us to head over to the "Display Module Troubleshooting "section... I think it actually means the "Kernel Module Troubleshooting" section which is actually next up in the instructions...

The first thing we need to do is check which Kernel version we're using with "dpkg -l raspberrypi-kernel". Looks like I'm using "1.20210303-1". The instructions say if we're anywhere above "20210104", then there's a fix to run. 20210303 > 20210104, so we're good to run the "fix"

First we can grab the Kernel pinning script...

We can then pin our Kernel to 1.20201126-1...

This process takes a little while...

A few warnings about stuff being downgraded...

Unpacking the Kernel takes some time...

Unpacking the Kernel Headers also takes some time...

While I'm waiting... I'm gunna peel off the screen protector... #sacrilege

The Kernel Pinning script has completed successfully... Time to reboot...

SSH'ing back into the Pi and checking the Kernel version again with "dpkg -l raspberrypi-kernel", we've now got version "1.20201126-1"... So success... I guess now we need to head back a step and set the display up...

I've also just noticed that I may have replied to the wrong tweet a couple of times, so left some dead ends in this thread... Annoying.. Ah well...
So... We have two options for how we set the display up now... The "Easy way" or the "Advanced Way"... The easy way just uses Python to draw to the Display... The "Advanced way" actually uses the display as the Pi display, but means we can write whatever we like to the display.
I'm going down the "Advanced" Path...
First we install "click"...

Next we make sure Git is installed... It already is of course...

Next we grab the @adafruit Installer Script for the Display...

Next we can go into the new directory, and run the Install Script... Interesting that it says it will upgrade our Kernel... I guess that's why we "Pinned" it there a while back...

This process takes a little while while it installs a bunch of stuff...

More display installation happening...

The Display Setup script is finished... The red text doesn't seem to indicate anything in particular... We can now reboot (again)...


Clicking through to the next step (which is back to the Kernel Pinning instructions), and scrolling to the bottom, I nearly missed that we now need to setup the @adafruit #BrainCraft Audio...

We need to check that our Kernel Version is around 5.4 with "uname -r"... I'm on "5.4.79-v7l+"... So that looks to be ok...

Another orange box in the instructions now, telling us to enable i2c... I already took care of that as a matter of course when I set the Pi Up...

Running "sudo i2cdetect -y 1" we can confirm that we have an entry under 1A... Is that 10A? Does it mean the text in that location? That looks like "LA" to me... Either way... I think we're good to carry on...

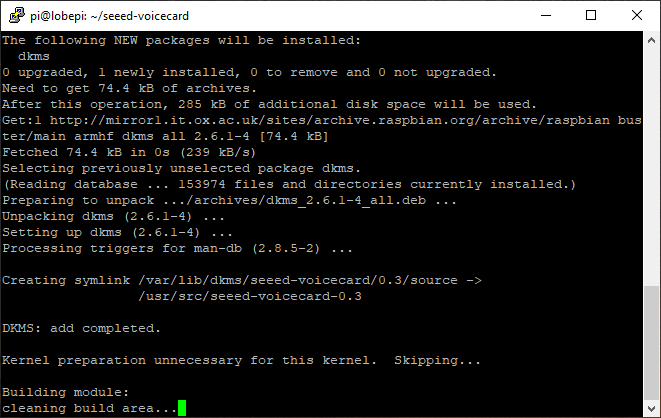
The instructions call for us to install git again, we've already done that, so we can clone the @seeedstudio "VoiceCard" @github repo...

The instructions tell us that if we're on or around Kernel version 5.4, then we need to switch to the v5.5 branch of this repo... We're on "5.4.79-v7l+", so I reckon we need to switch...

Next, we can run the install script with "sudo ./install.sh"...

This takes a little while...
And we're done... We're prompted to reboot (again!)...

After reconnecting, we can run "sudo aplay -l" to list the sound cards on the @Raspberry_Pi... We have our @seeedstudio soundcard listed at the bottom... The instructions correctly tell us that the Card Number is "Card 2". Apparently we need to take a note of that...

We can then use "Alsamixer" to adjust the sound levels...

We now need to select the correct sound card by hitting F6... Where we can then use the cursor keys to go down to the "2 seeed-2mic-voicecard" option...

Hitting enter, and we're now shown a more complicated UI...

We can use the left and right cursors to go left and right between the inputs and outputs... Then use the up and down keys to change the gain... We'll change them all to 60% as per the instructions.. I'm not sure what the left hand speaker is, but I can only select 61 there...

We can now plug in a speaker and see if the sound works...

Running the Speaker Test... I hear nothing though...

The Audio switch is definitely set to On...

Double checking with headphones... Still no sound...

Meanwhile the @Raspberry_Pi is busy cycling around a test loop. I assume it's supposed to be outputting some white noise to each channel...

Ctrl+C-ing out of the speaker test... Let's check the AlsaMixer settings again... I wonder if it's because the "Headphon" setting in 0?

Setting this to 61... (Closest I can get to 60)...

Still nothing from the speaker sadly...

Time for dinner now... So fault-finding will have to wait!
Actually... VNC-ing in... I wonder could it be that the audio output is set to HDMI?

Setting this to @seeedstudio instead...

Contact! I can hear white noise!
Next step is to test the Microphone. We use "sudo arecord -f cd -Dhw:2 | aplay -Dhw:2"... Where my sound card is actually number 2. So the Dhw parameters take "2" instead of the default "1". And, that works. It's kinda loud. But I hear myself back with a delay in the headphones

Hitting next in the instructions tells me that the Audio Setup was a way before the Display module troubleshooting page... I need to skip forwards, as I'm no back at the Fan Setup instructions...

Time to test the camera now... We can run "raspistill -t 0"...

And that works a treat...

Next up we'll be testing some of the board features using Python. There's some code samples to run. First off is testing the Joystick and Button. I figure in the not too distant future we're going to also have to copy that @TensorFlow file to the pi. I reckon it's time for Samba.
We can install the Samba File Sharing Client with; "sudo apt-get install samba samba-common-bin"... I can hit "y" to install Samba...

During the installation process, we can say yes to the prompt to "Modify smb.conf to use WINS settings from DHCP"...
The installation process will take a little while...

Samba is now installed...

Next we can create a "share" directory that we can then access from our PC... Using the -m 1777 parameter makes sure that it has all the access permissions turned on

We can now configure Samba to share that new folder, by editing the smb.conf file (why does editing only have one "t"?), with "sudo nano /etc/samba/smb.conf"...

If we scroll (using page down), to the bottom of the file, we can add a section to share our new "share" directory...

Exiting and saving the file with "ctrl+x" followed by "y" and Enter... We can now add a Samba User with; "sudo smbpasswd -a pi".

We'll create a user that simply matches our "pi" user password... Entering the usual password here (Why does "entering" only have one "r"?)... We can then confirm it...

Our "pi" user has now been added to Samba...

We can now restart the Samba Service with; "sudo /etc/init.d/samba restart"... Oh... Command not found.. Let's try a reboot first...

That didn't work after the reboot... I think the command is now "sudo systemctl restart smbd" actually...

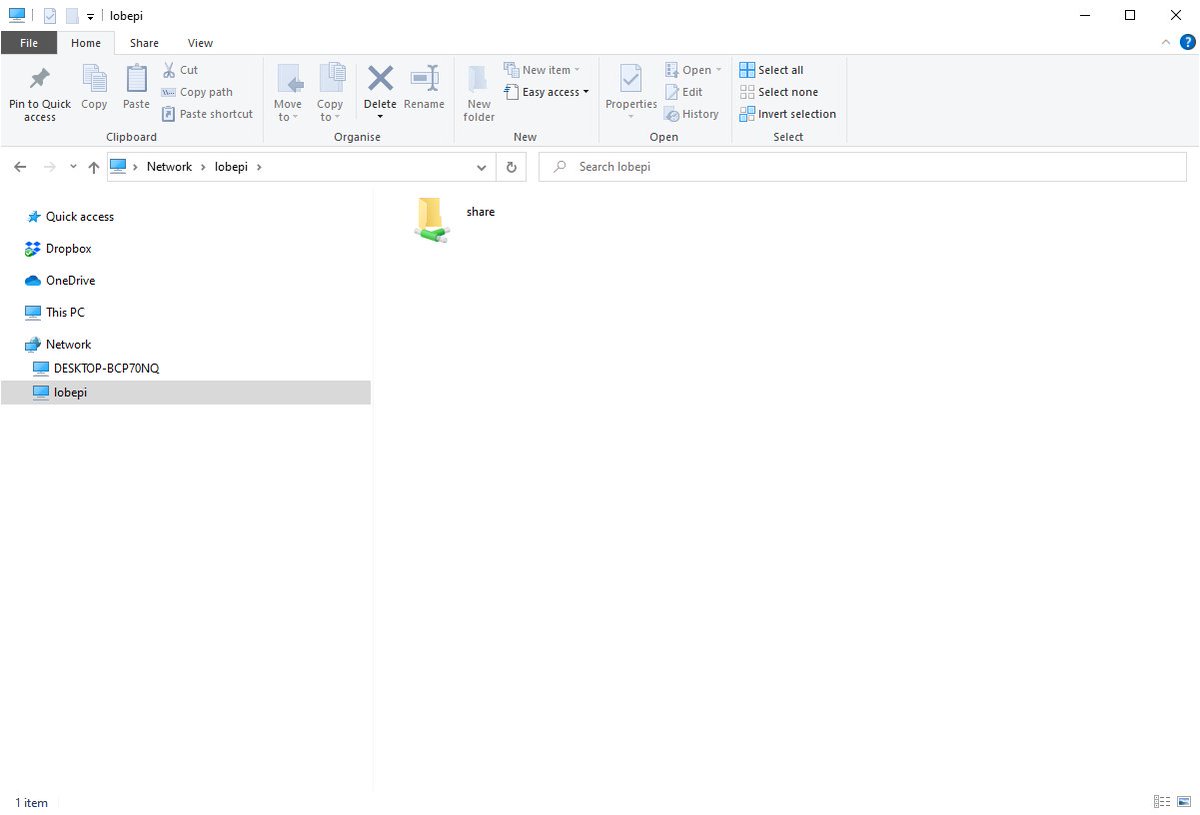
Let's see if we can we can now browse that new Share folder from our pc... going to "\\lobepi" (the name I chose for the pi in the Config tool when I set the pi up), shows us the "share" folder... So that's all working...
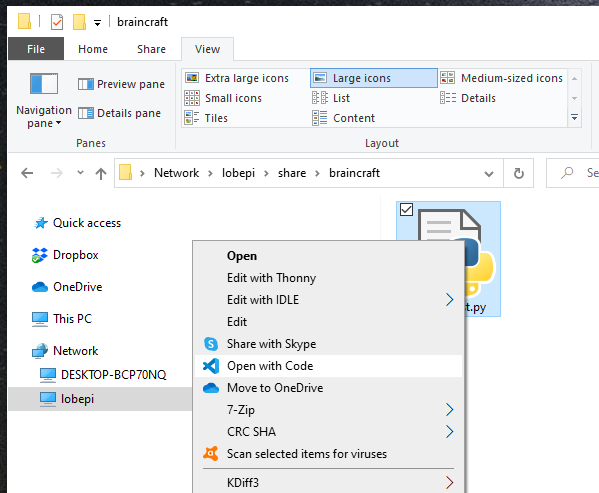
We can now create a new folder in our share folder called "braincraft"...

In there we can create a new python file called "joysticktest.py"...

With the sharing setup up, itmeans we can now do any editing in @code on our local machine rather than nano on the @Raspberry_Pi. Although, I realise we can install VS Code on the Pi now... Good luck getting that to work on that tiny little @adafruit #BrainCraft display! Ha...
We can paste in the example code from the tutorial and hit save in VS Code...

Switching back across to the terminal, we can run the file with; "python joysticktest.py".

Moving the joystick and pressing the button on the @adafruit #braincraft HAT shows output in the terminal window... Nice...
Let's test the DotStar LEDs...

Switching back across to the Terminal again, and running this one with; "python dotstar.py"

We have some nice disco light action! Darn tho... Those LEDs are bright!
Ahhh... D'oh... Seems we can control a servo here too... But, I don't have one with a JST cable...

I'll go ahead and create the @ThePSF file while I'm here anyway...

Ah... Next bit requires a BMP280... I've got one of those... But I don't have a cable for it...

Again, let's create the python file nonetheless...

Clicking the next button in the instructions a couple more times takes me to the Downloads page... I've not actually gotten the pi doing any AI yet tho... What did I miss?

I don't see anything obvious on the @adafruit homepage...
Ah... Going back to a tab I had open from earlier... I have some extra menu items... Clicking on the "Set up an FTP Connection" item...

Oh! We can actually FTP into the Pi. All these years, and I didn't know there was a built in FTP server. I always thought I needed to install one. Unless it got installed with one of the scripts did it? Either way, we won't be using it... We've set Samba up, which is better!

Now it's time to "Get predictions on the Pi"!!!

As a side note... Seems that if I use the Screen Snip shortcut when I've got @MicrosoftEdge focussed, then it borks the whole Screen Snip app... A reboot is then needed to get it back... Frustrating!

We now need to create a model folder...

We now need to copy the "saved_model.tflite" file from the folder that was created earlier when we exported out @lobe_ai model onto the pi. I'll use same and copy it to our share folder first.. This might take a little while as it's a 100Mb+ file!

I can then copy it to the model folder with; "mv saved_model.tflite /home/pi/model/"

Oops... We also need the "signature.json" file...

Let's move that to the models folder too...


Now we can install that...

This may take a little while...

Lots of things being downloaded and installed...

And that's installed...

We can now start the @lobe_ai app...

I've got the camera pointed at the desk at the minute... It seems to thing it can see a @Raspberry_Pi #raspberrypipico ...

Nicely tho... It's showing the label of the detected item on the screen for us...

Picking the camera up and pining it at a blank peice of paper... We now get a label of nothing!


And a pen works too!

Likewise... An sd card... Mega cool!

Of course... We also get some details in the terminal too, showing the label, the confidence, the FPS and the Predictions FPS...

That'll do for now I'd say... Next time, I'll have a play with the example "Rock paper scissors" and "Build a Package Detector" samples!
@threadreaderapp Unroll please!
• • •
Missing some Tweet in this thread? You can try to
force a refresh