I've explored a reliable method to create high-quality, style-consistent #game assets w. #StableDiffusion
We're just scratching the surface here & I believe this can become a very potent creation tool (like a "@procreate on AI-steroids"🤔)
A demonstration with... spellbooks 🧵
We're just scratching the surface here & I believe this can become a very potent creation tool (like a "@procreate on AI-steroids"🤔)
A demonstration with... spellbooks 🧵
Spellbooks are another ubiquitous asset in heroic #fantasy games, tabletop games, D&D, etc.
However (like for potions), the Unity/Unreal asset stores have limited choice, and most assets have a rather simplistic design.
Here's how #AI can solve such a situation.
However (like for potions), the Unity/Unreal asset stores have limited choice, and most assets have a rather simplistic design.
Here's how #AI can solve such a situation.

At first, I generated a set of 38 "random" spellbooks, which I used to train a finetune model of Stable Diffusion (Dreambooth). It took 1 hr.
I then explored a set of possibilities with simple prompts and or limited modifiers (intricate, detailed, beautiful, 3D render...)

I then explored a set of possibilities with simple prompts and or limited modifiers (intricate, detailed, beautiful, 3D render...)

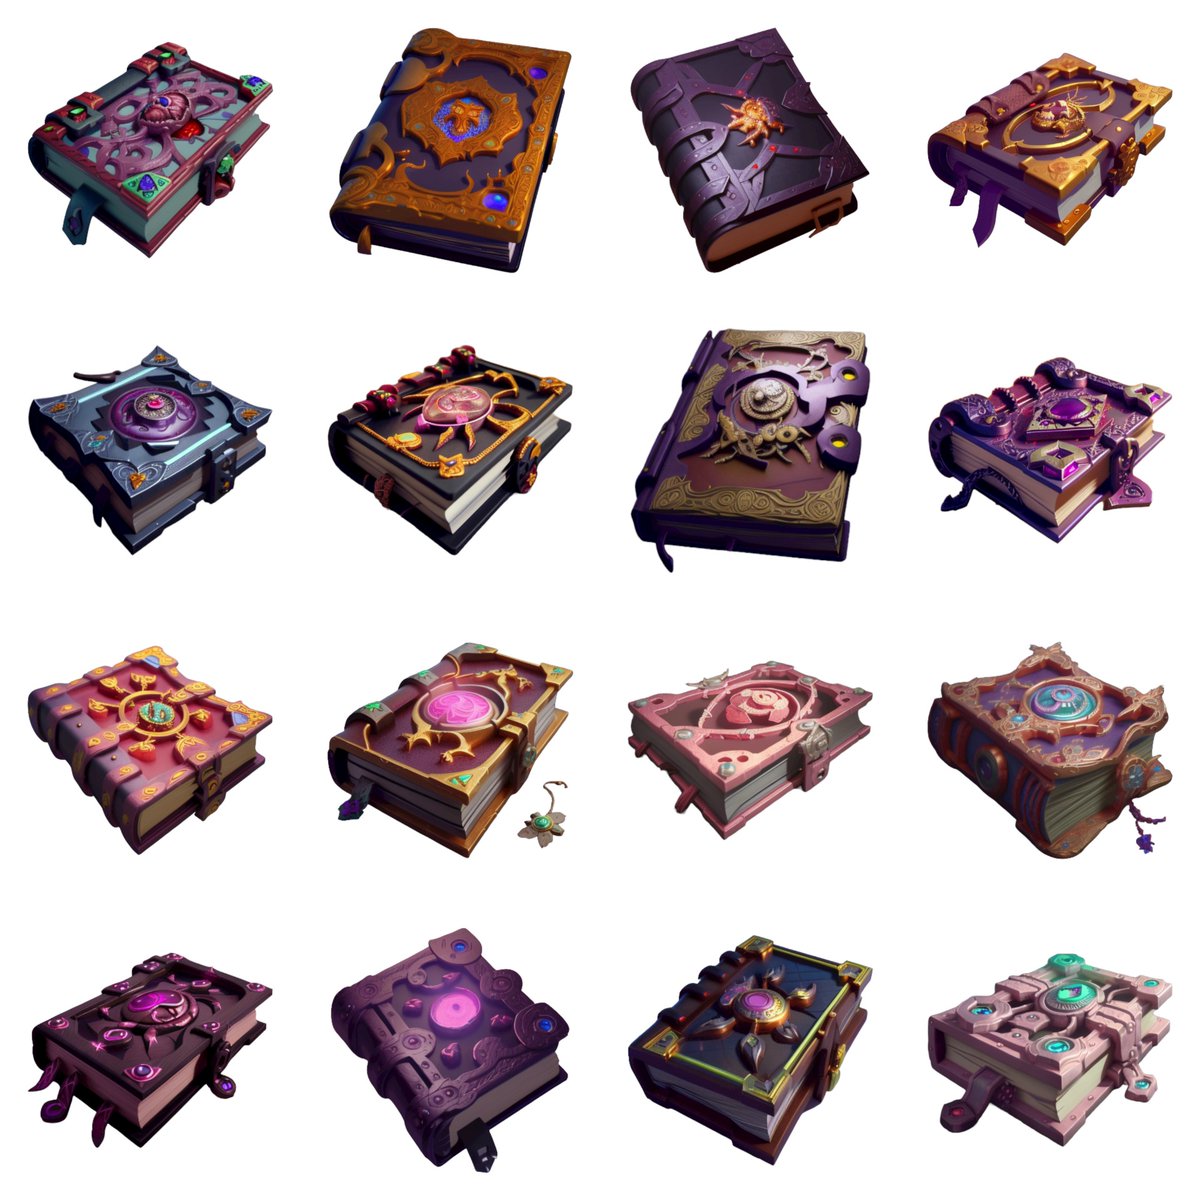
One word can make a difference!
In the example below, I added "realistic" (on the right). The cover is less intricate, more simplistic, and primarily leather.
Find and save your favorite modifiers (massive databases are being shared, by the way).

In the example below, I added "realistic" (on the right). The cover is less intricate, more simplistic, and primarily leather.
Find and save your favorite modifiers (massive databases are being shared, by the way).


If you're #modding a game and need to fit into the initial art, try typing the game's name. In the example below, I added "illustration dungeons and dragons"
The style usually changes accordingly ("simpler", in that case)
You can even test a combination of two or more games :)

The style usually changes accordingly ("simpler", in that case)
You can even test a combination of two or more games :)


When I like a specific item, I don't hesitate to generate a bunch of close variants (16 variants in 30 secs).
Some variants (left) can look better than the original item (right)

Some variants (left) can look better than the original item (right)


Now instead of random variants, you can easily change the main color, by adding it in the prompt
Such as "purple" or "green" below

Such as "purple" or "green" below


Aside from colors, I often try adding details and ornaments to the item(s).
These are spell books with "a volcano", "an island", "a skull", and "an eye" on the cover. All done in seconds
Think about the time needed to draw each concept manually...


These are spell books with "a volcano", "an island", "a skull", and "an eye" on the cover. All done in seconds
Think about the time needed to draw each concept manually...


One direction I took when exploring this collection was to specifically play on the materials.
For example, "grimoire, precious metals and gemstone, stylized, natural, game icon, digital illustration, hdr"
For example, "grimoire, precious metals and gemstone, stylized, natural, game icon, digital illustration, hdr"

... but I could do 400 variants too!
This tool is fantastic for games that need a lot of unique content (such as web3 games, where users value unique/rare assets)
This tool is fantastic for games that need a lot of unique content (such as web3 games, where users value unique/rare assets)

If gemstones aren't the right fit, it's easy to change the materials by changing the prompt.
Let's do "grimoire, gold, silver, bronze, wood, stylized, natural, game icon, digital illustration"
The gemstones are gone, replaced by gold ornaments.


Let's do "grimoire, gold, silver, bronze, wood, stylized, natural, game icon, digital illustration"
The gemstones are gone, replaced by gold ornaments.


Another way to test variations is to leverage #img2img with random images or sketches on the web (or self-drawn). Below are examples of the SAME prompt (precious metals and gemstone) but different #img2img input. 


Another books with skulls, also via #img2img 

Now beyond shapes, colors, ornaments, or materials, you can play on "VFX". i.e. particles or potential animations that could appear around your items
Here's "magic book, enchanted, lighting sparks, fireflies". The whole batch isn't perfect, but some of the results are neat.

Here's "magic book, enchanted, lighting sparks, fireflies". The whole batch isn't perfect, but some of the results are neat.


And I'm ending this thread with one of my favorite ideas, "a magic #vortex inside of a book": 


I hope this provides a good example of properly leveraging AI by "fine-tuning" Stable Diffusion.
Bespoke AI engines will have incredible applications in #gaming. Check the other examples I recently provided (golems, potions, etc.)
Bespoke AI engines will have incredible applications in #gaming. Check the other examples I recently provided (golems, potions, etc.)
https://twitter.com/emmanuel_2m/status/1589995198289182720
And (as I had quite a few questions over the past few weeks) >> we're going to make this available to anyone that wants to build great content for games (game artists, game developers, studios, indie devs, art directors, etc)
100% online, no technical skills required
Stay tuned
100% online, no technical skills required
Stay tuned
PS: if you like it or want to support us, feel free to RT, we would really appreciate it!
And let us know what we should be sharing next :)
And let us know what we should be sharing next :)
• • •
Missing some Tweet in this thread? You can try to
force a refresh


