
A #thread on #wildlifephotography for beginners was pending for long. So finally I penned it down.
I hope this helps someone pursue one of the most enjoyable, thrilling and by far the most difficult forms of photography.
Do share & please please do read. 😀🙏
I hope this helps someone pursue one of the most enjoyable, thrilling and by far the most difficult forms of photography.
Do share & please please do read. 😀🙏

Equipment- Now before I start on this, ‘I would like to tell you that please don’t go over board on spending lakhs of hard earned rupees before you have understood the basics of using a DSLR.’
Picking the right camera in your budget is much harder than it might appear.
Picking the right camera in your budget is much harder than it might appear.
Fast auto-focus, sturdy, and a fast burst are something you need to check in the body. ISO capability is also key as wildlife has only one source of light-The Sun.
More amount of money you spend, more the capabilities of the camera will be. But don’t go over board.
More amount of money you spend, more the capabilities of the camera will be. But don’t go over board.
For beginners, I strongly suggest to go for Crop Censor bodies. A) they are cheaper. B) their reach is much farther. Thats what you want in wildlife! A 400 mm lens will give you a reach of approx 600mm!
Now once you buy the body, the next question is what lens to buy for wildlife.
There are so many wide variety of focal lengths available that you may get confused. However, prime lenses are very very expensive and will restrict you to a particular focal length.
There are so many wide variety of focal lengths available that you may get confused. However, prime lenses are very very expensive and will restrict you to a particular focal length.
Hence, I always suggest the beginners to start with a 70-300mm lens and then further upgrade to 150-600mm. If you have lots of money. But invest in a lens only after you have mastered the camera settings.
Always remember that the bigger and longer lens is not necessarily the best lens for wildlife. Sometimes the animal is right beside you and then those big lenses are absolutely useless. So do keep the kit lens handy always.
Wildlife photography is daunting. You’ve got to be the master of your gear and know how to use it. You’ve got to be good at using low light, change settings quickly depending on the movement of the subject with a long focal length lens. And you’ve got to do all of it at once.

Most photography equipment doesn’t handle moisture well. It doesn’t like temperature changes, and it doesn’t like dust or grime. Wildlife photographers encounter all of these things regularly.
So what can you do? For one thing, you need to invest in a good gear bag that can protect your gear when it’s being carried or not in use. It should have heavy enough canvas with weatherproofing to prevent drizzles or splashes from getting in. Also, the inners should be soft!
You’ll also need something to protect the actual camera and lens from rain for actual shooting. There are many aftermarket “raincoats” that give you access to the controls but keep at least a bulk of the moisture off. It’s a small price to pay to protect your expensive equipment.
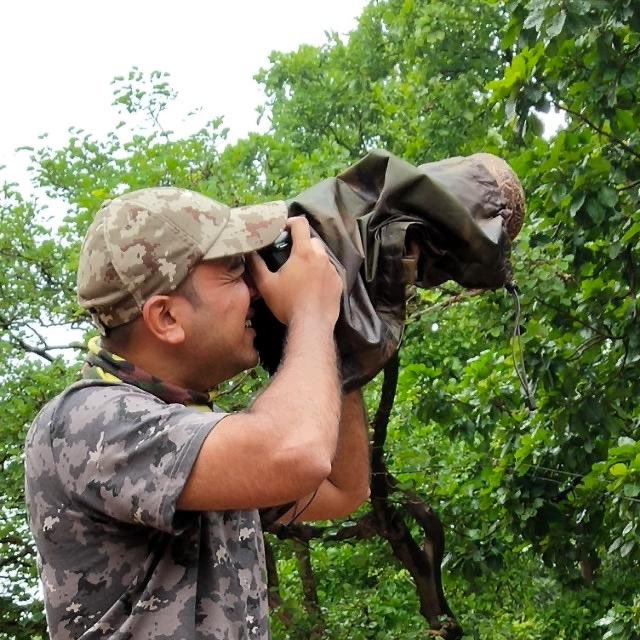
Keeping dirt and grime off the camera is also crucial, especially in dusty environments. Make sure your camera bag is well stocked with cleaning rags and a suitable dust blower.
Wildlife photographers spend a lot of time learning about the species that they are after. The more you learn about the wildlife you are shooting, the better you will be at photographing them. Study their habits and traits, which will give you a better idea of what to expect.

All of this helps you get amazing photographs. What time of day do they like to come out? Where are they going? How common are they?
The more you learn about the ecosystem as a whole, the better you will do as well.
The more you learn about the ecosystem as a whole, the better you will do as well.

The best wildlife photographers respect the animals and their environment. Wildlife photography is photojournalistic–the photographer is there to document the events and not create or affect them in any way.
Unfortunately, not everyone approaches it this way. Some unscrupulous photographers scare birds into flight or get so close to the animals that it startles them. The photographer’s goal must also be not to affect the animals’ behavior.

Ideally, the animal should not know that you’re there and should go about their business. Feeding or baiting animals should never happen. Likewise, following animals closely or provoking them to give a response or a flight is unethical.

Now, you have to be a low light master. Knowing the low light characteristics of your camera can make a world of difference in your photos. Shooting with a long lens means you’re often working at the threshold of slow shutter speeds and high ISOs.

Knowing the limits is critical. If you don’t, you risk coming home with a card full of blurring images.
Image stabilization is really important for lenses like these, and the best ones have optical systems built right in.
Image stabilization is really important for lenses like these, and the best ones have optical systems built right in.
You’ll need to push the ISO sometimes. If you’re shooting a quick-moving animal or a bird, you probably can’t stop that motion otherwise. DSLR bodies are great at shooting at high ISO, but you need to know your camera well enough to know when the ISO will cause too much noise.

These images can be unusable, even if they are technically perfect otherwise. Just because your wildlife photography camera can go to ISO 102,400 doesn’t mean you should!
Another part of your camera you want to know how to use is the autofocusing system. Play around with it in all conditions, especially with moving objects. If you’re after something that moves fast, be ready to use the continuous focus tracking with the burst mode.

A lot of the images will be trash but you will have a few keepers if you know your camera well.
I strongly suggest,use the back button focus and not the shutter for wildlife!
Also, don’t always be stuck to the view finder.Get your head up often and check what’s happening around.
I strongly suggest,use the back button focus and not the shutter for wildlife!
Also, don’t always be stuck to the view finder.Get your head up often and check what’s happening around.
Composition is something I have spoken at length earlier. Thats the key!
Another most important aspect to get good shots is PATIENCE. Buckets of it! 😀
If you have reached till this tweet then I am sure you enjoyed it. Hope the last 2-3 minutes were good fun!🙏
Happy shooting!
Another most important aspect to get good shots is PATIENCE. Buckets of it! 😀
If you have reached till this tweet then I am sure you enjoyed it. Hope the last 2-3 minutes were good fun!🙏
Happy shooting!
• • •
Missing some Tweet in this thread? You can try to
force a refresh


