,
31 tweets,
14 min read
Read on Twitter
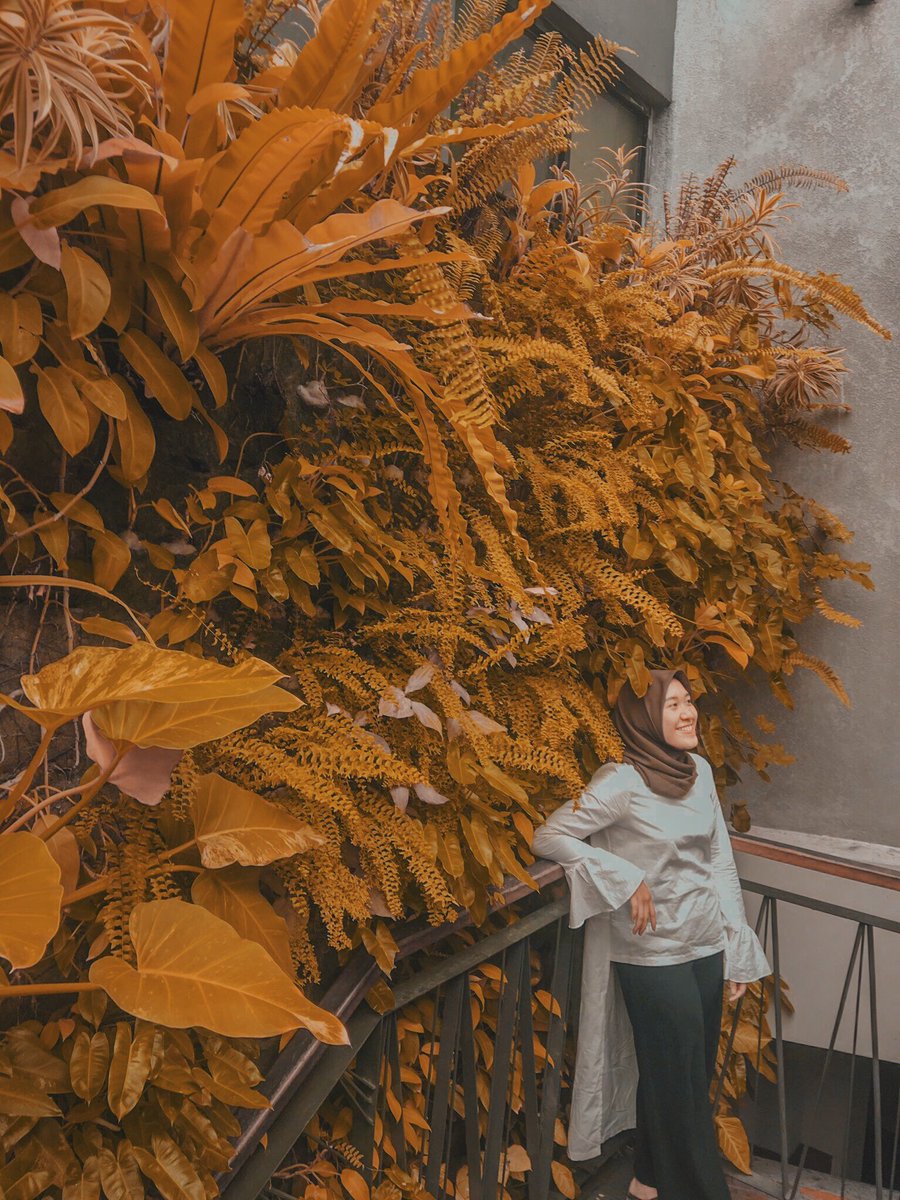
📷How I Edit My Photos & Instagram Feeds📷
P a r t X X
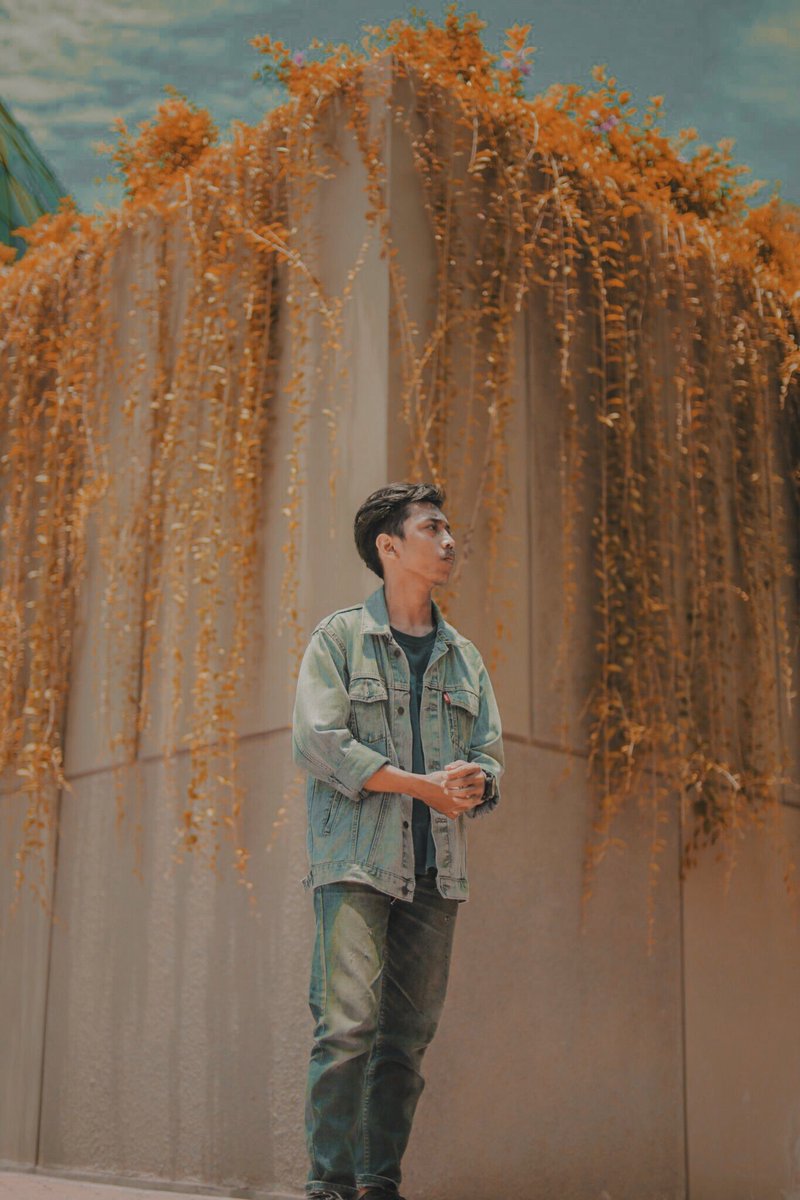
“Dark orange feeds.”
P a r t X X
“Dark orange feeds.”


Sebelum lanjut, RT dan Follow dulu yuk, Gratis kok. Bagiin ke temen kalian karena berbagi itu indah.
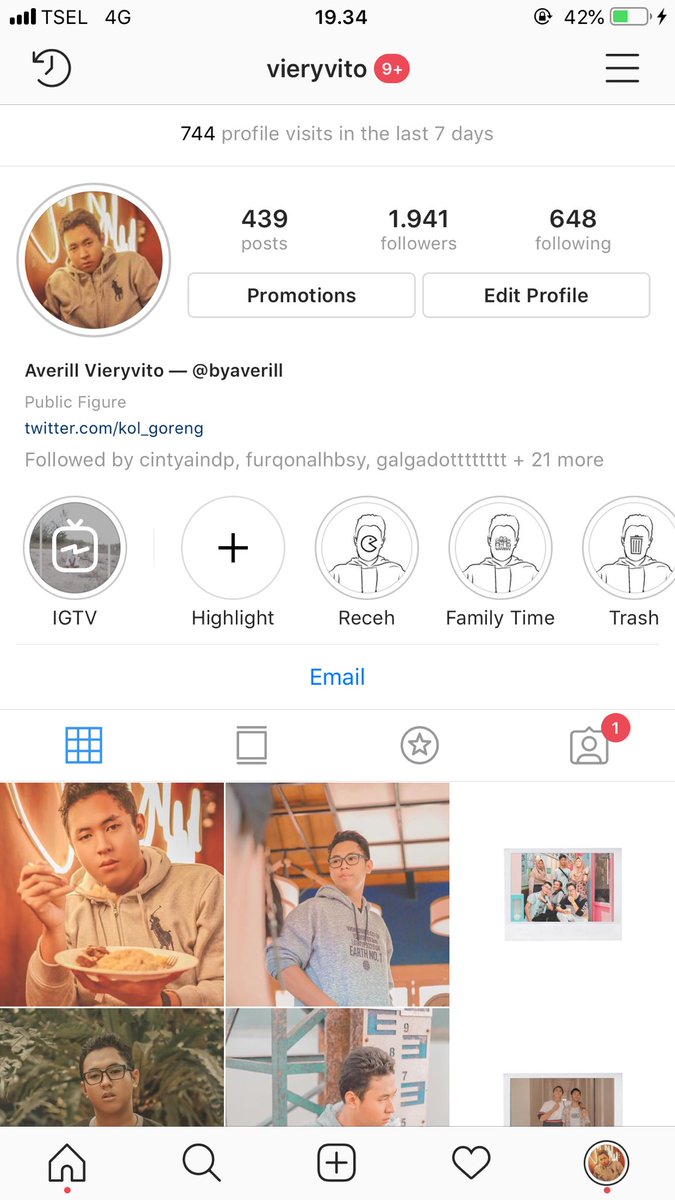
Sebelum mulai edit, jangan lupa follow instagram aku di @/vieryvito buat yang udah cobain tutorial ini boleh post di igstories dan tag ke aku! Nanti aku repost.
Di tutorial ini aku akan pakai karya karya dari @Franova26 @AwYoki @madelinsilalahi @syffau @schoonoverrr @AnnisaDHan @Hanifmsyidz19 @dellacecilia sekaligus mohon ijin buat dijadiin tutorial. Boleh kan?
Kali ini aku edit pake LIGHTROOM dan VSCO cam. bisa di unduh di appstore/playstore. Lightroom yang gratis dan VSCO yang fullpack. VSCO fullpack skrg mudah didapetin kok, banyak thread yang ngasih tau caranya. Yang tau bisa drop dibawah ya.

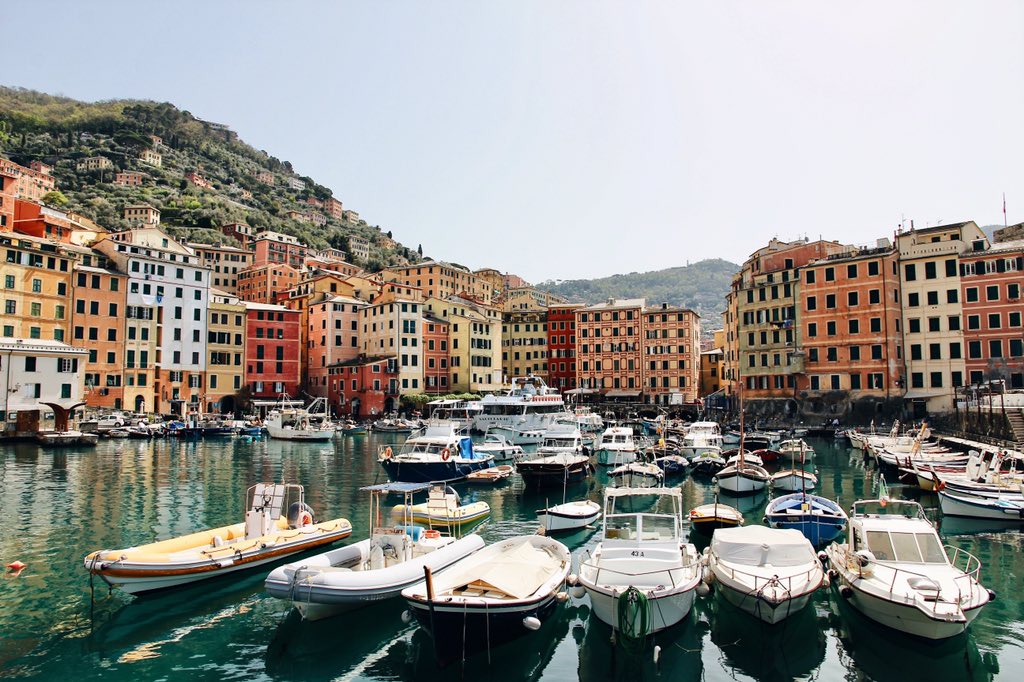
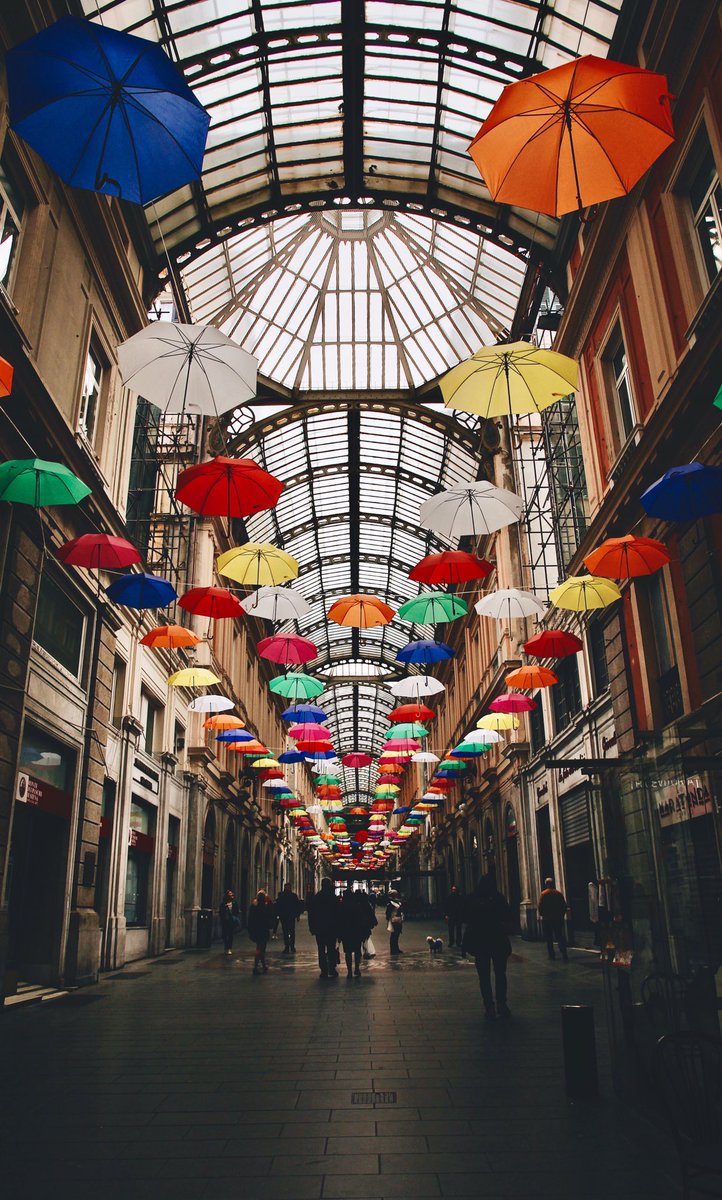
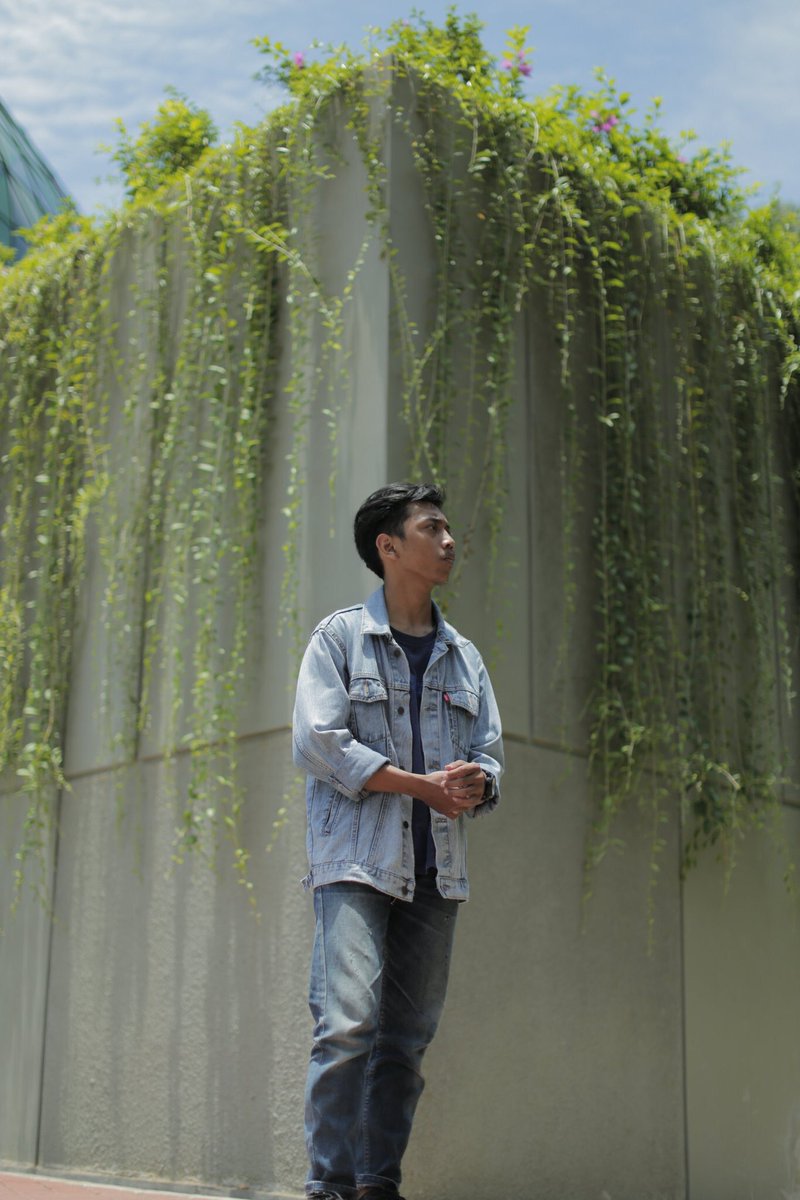
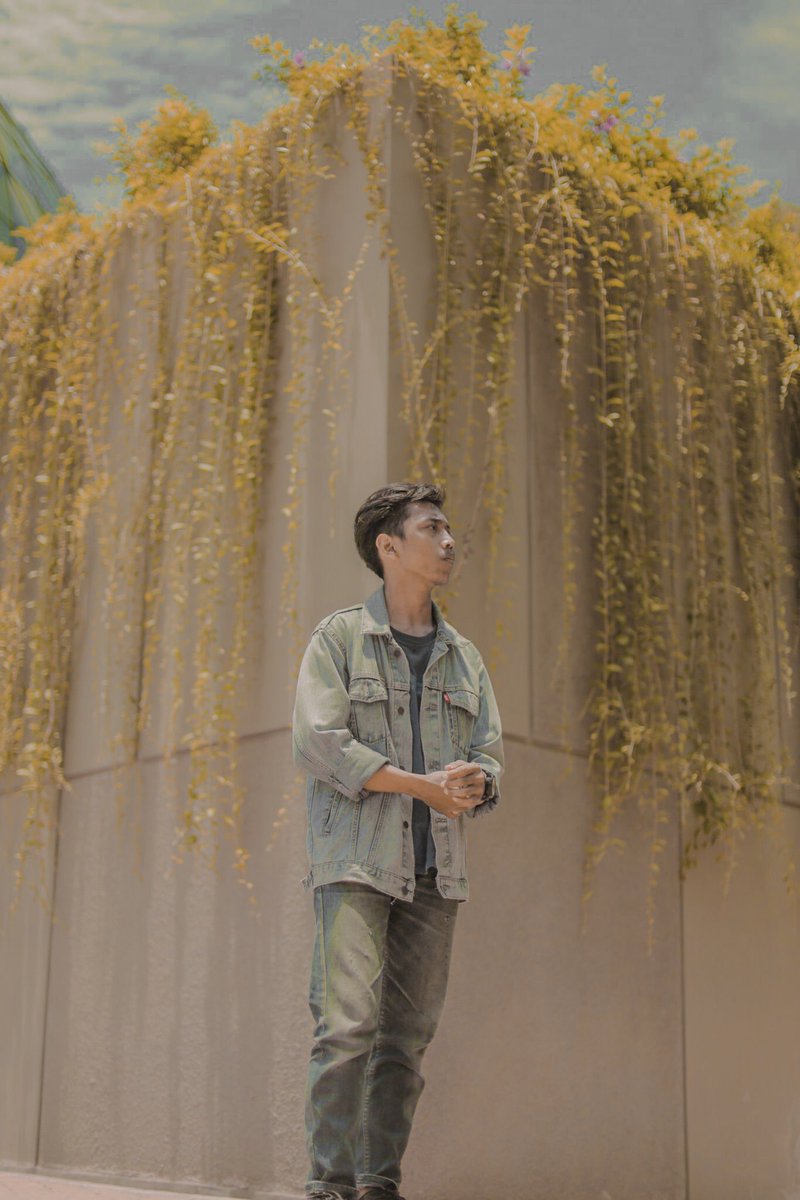
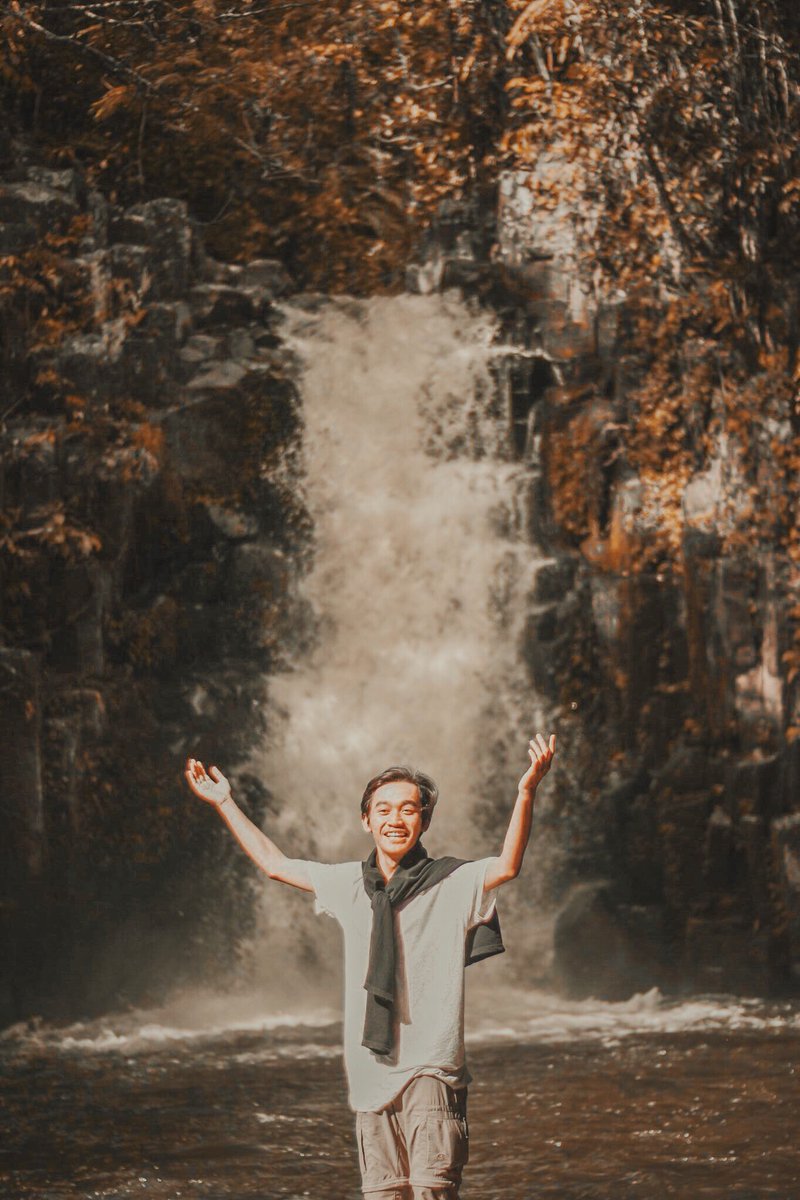
Oke untuk memaksimalkan hasil edit, pilih foto outdoor ya! Kalo foto indoor nanti kurang maksimal. Contoh aku pake foto dari @Hanifmsyidz19
Oke tahap pertama adalah LIGHTROOM.
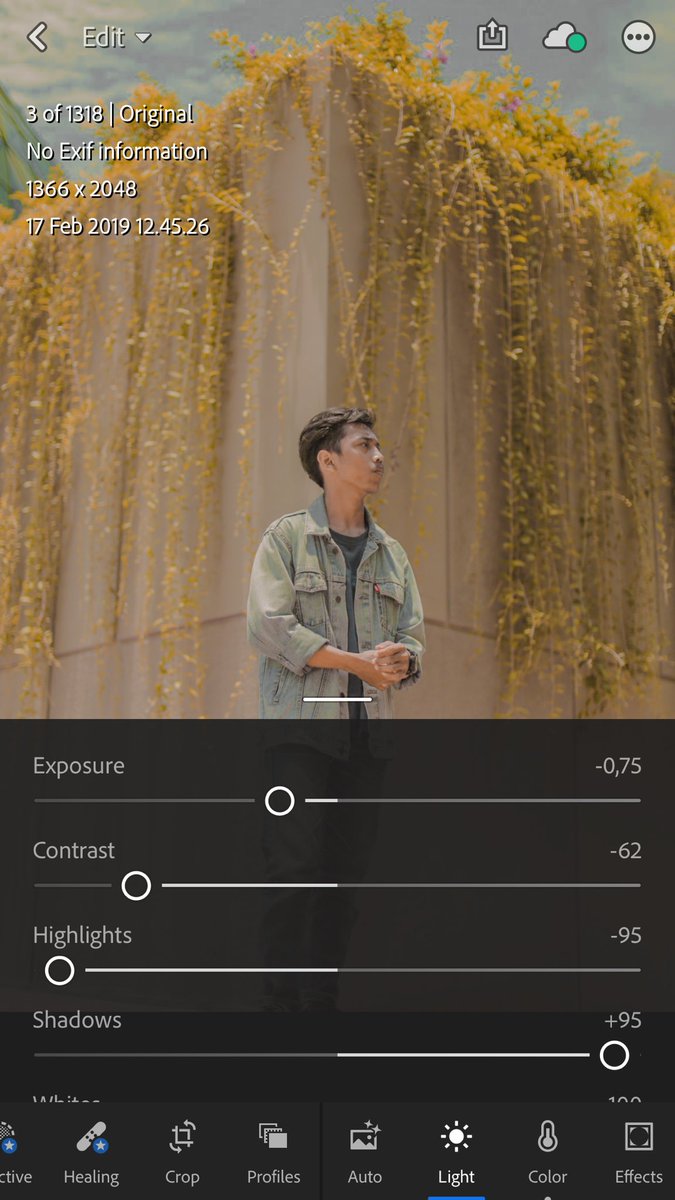
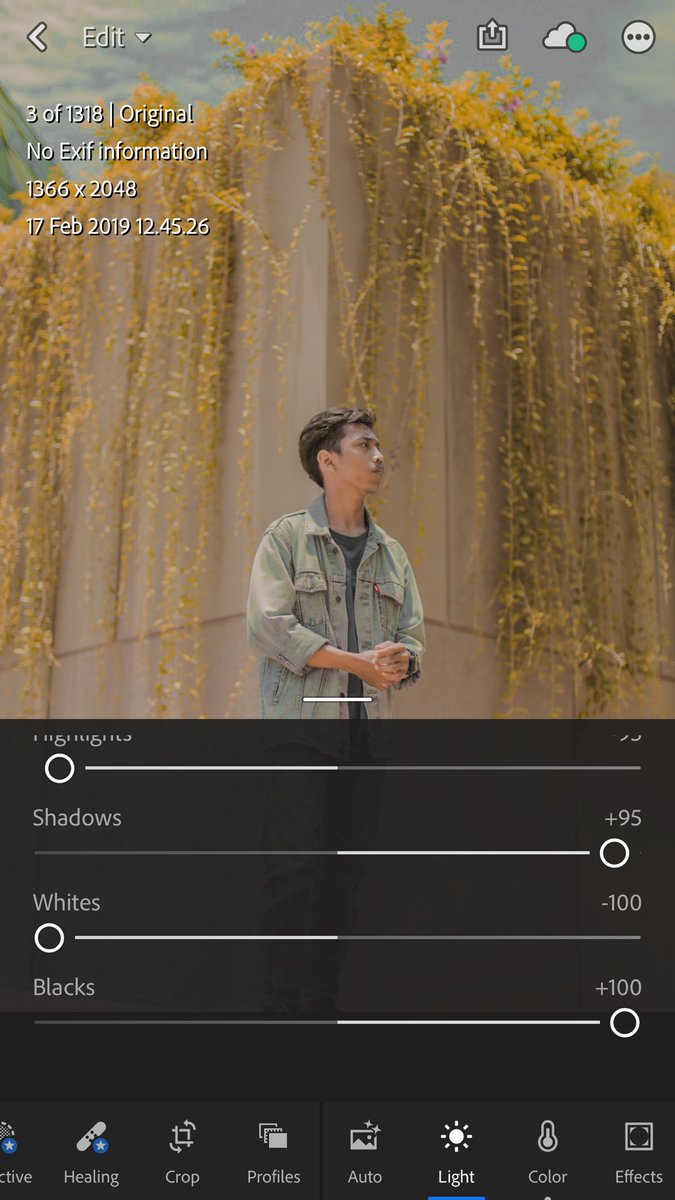
Dibagian light kalian atur begini:
Exp: -0,75 (disesuaiin sama foto kalian)
Contrast: -62
Highlight: -95
Shadow: +95
Whites: -100
Blacks: +100
Exp: -0,75 (disesuaiin sama foto kalian)
Contrast: -62
Highlight: -95
Shadow: +95
Whites: -100
Blacks: +100
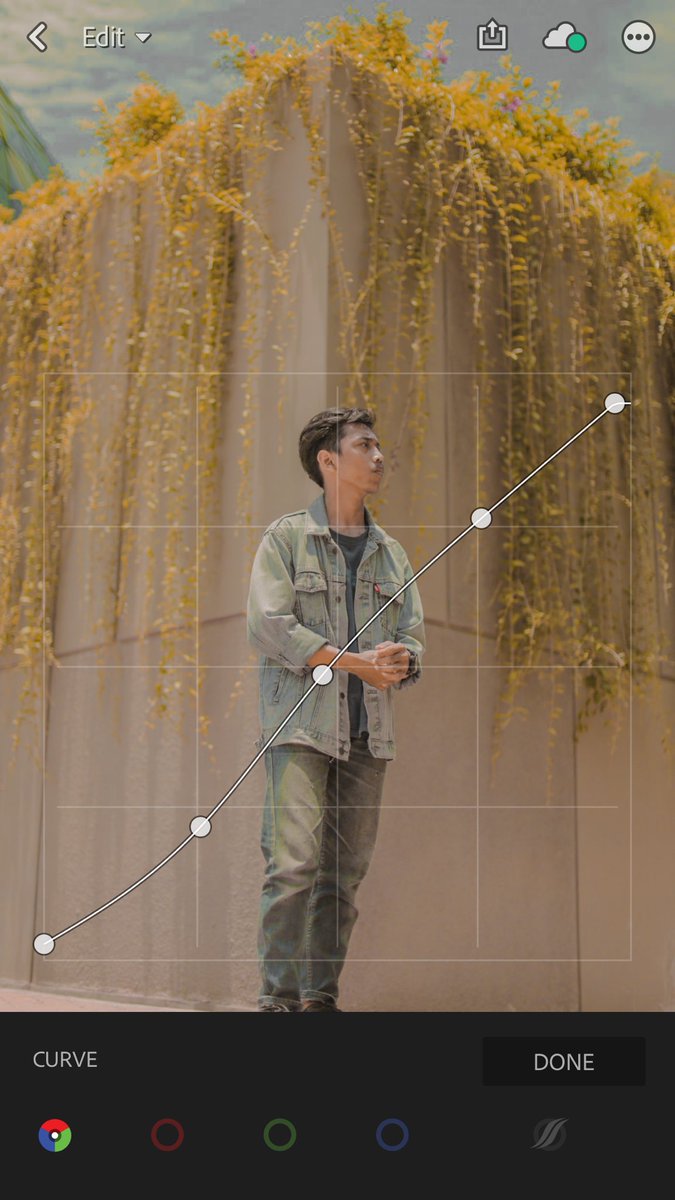
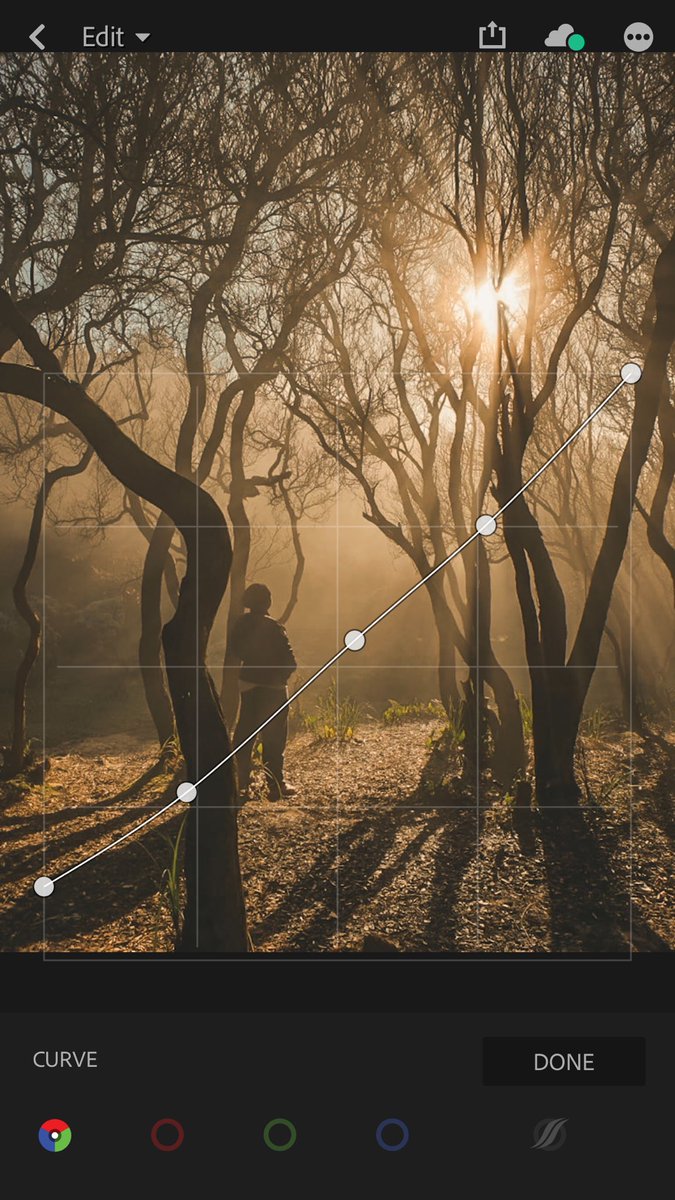
Atur curve jadi seperti ini biar jadi mantaab
Masuk ke bagian color:
Temp: +19
Tint: -19
Vibrance: 0
Saturation: 0
Temp: +19
Tint: -19
Vibrance: 0
Saturation: 0

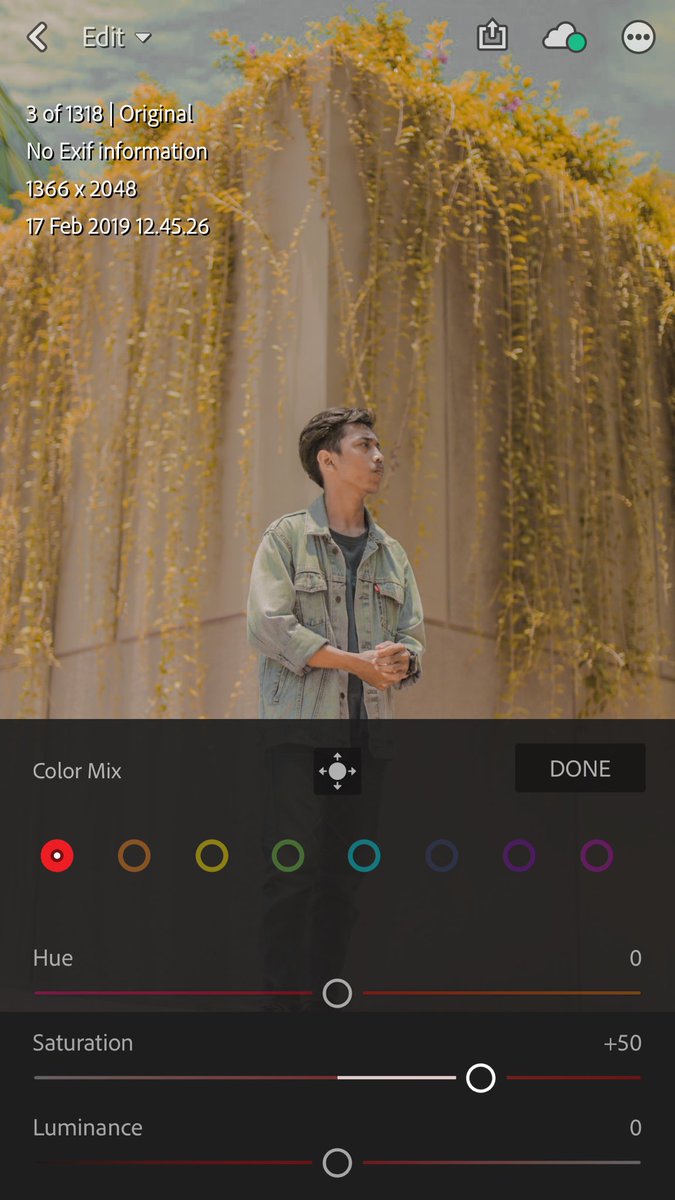
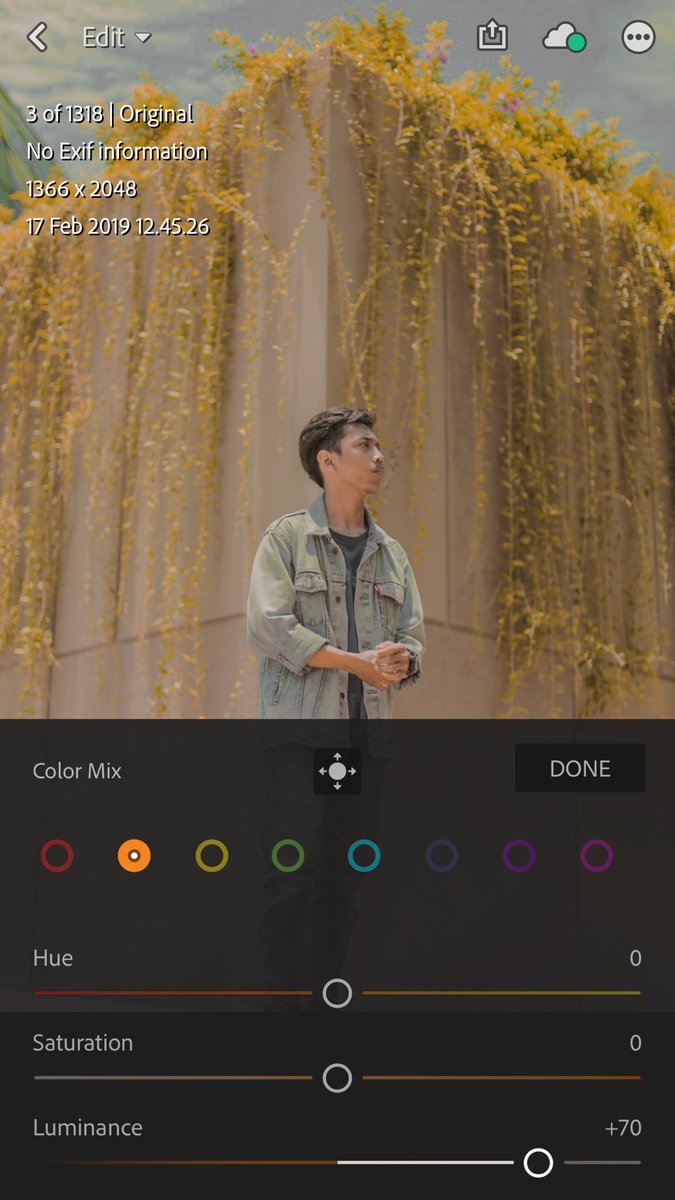
Masuk ke color mix!
Merah
Hue: 0
Sat: +50
Lum: +0
Oren
Hue: 0
Sat: 0
Lum: +70
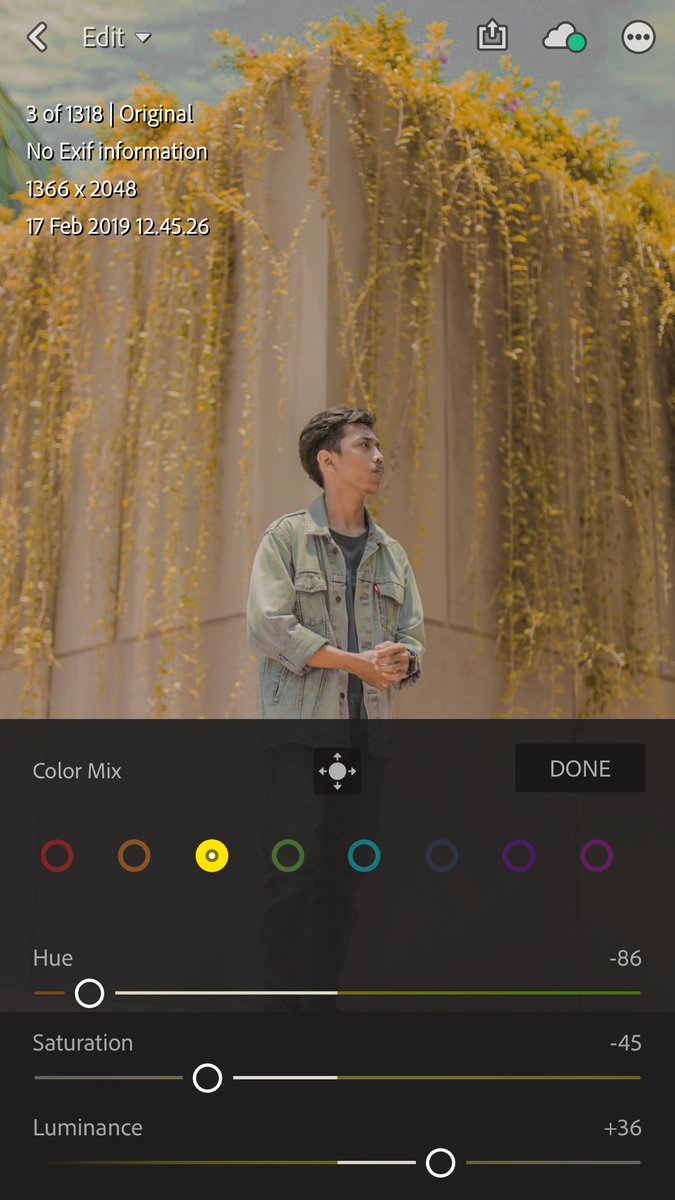
Kuning
Hue: -86
Sat: -45
Lum: +36
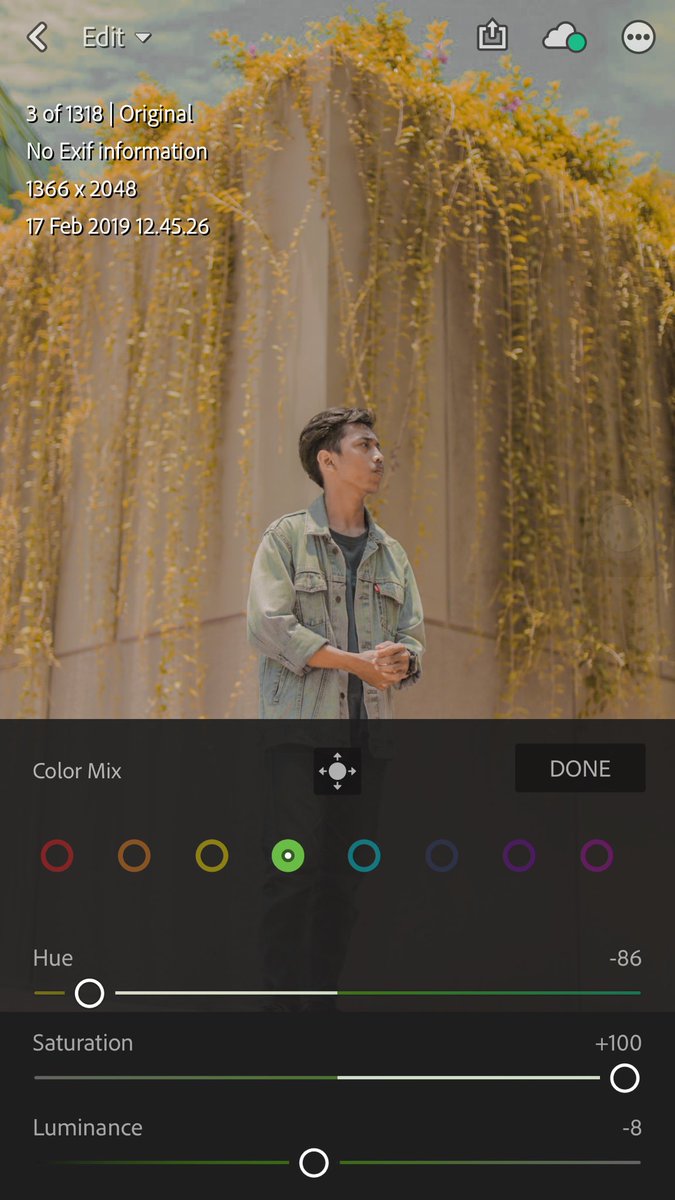
Hijau
Hue : -86
Sat: +100
Lum: -8
Merah
Hue: 0
Sat: +50
Lum: +0
Oren
Hue: 0
Sat: 0
Lum: +70
Kuning
Hue: -86
Sat: -45
Lum: +36
Hijau
Hue : -86
Sat: +100
Lum: -8
Aqua:
Hue: -13
Sat: -87
Lum: -86
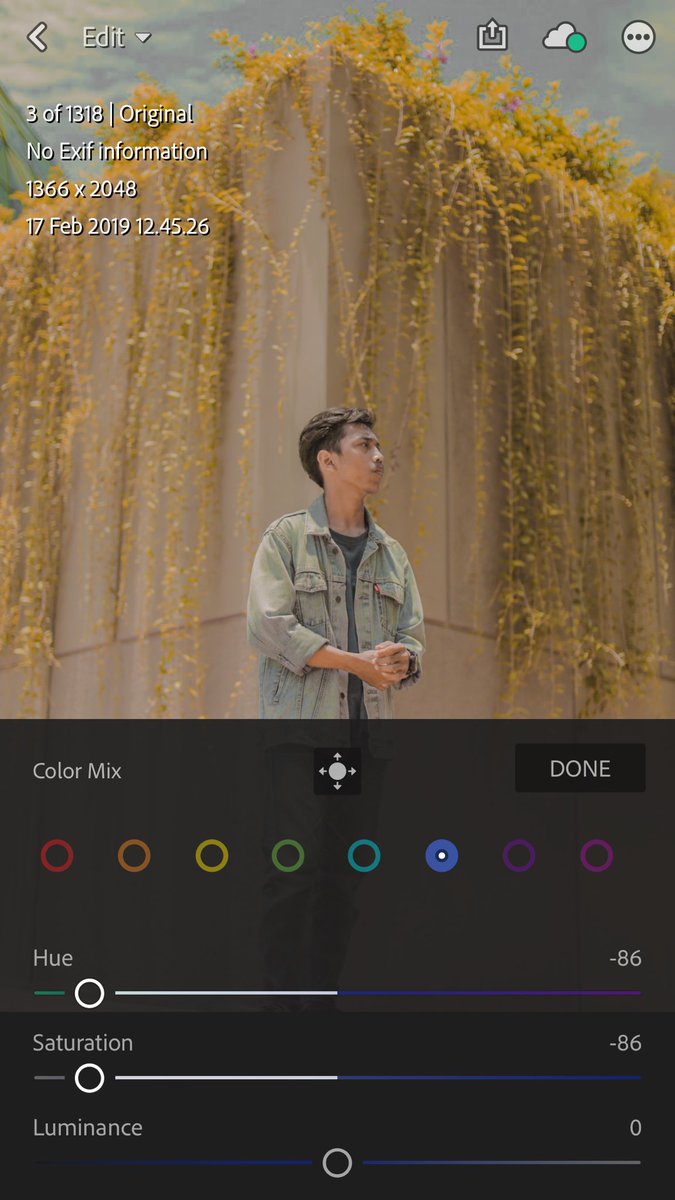
Biru
Hue: -86
Sat: -86
Lum: 0
Hue: -13
Sat: -87
Lum: -86
Biru
Hue: -86
Sat: -86
Lum: 0

Nah tahap di Lightroom selesai, kita lihat perubahannya dulu:

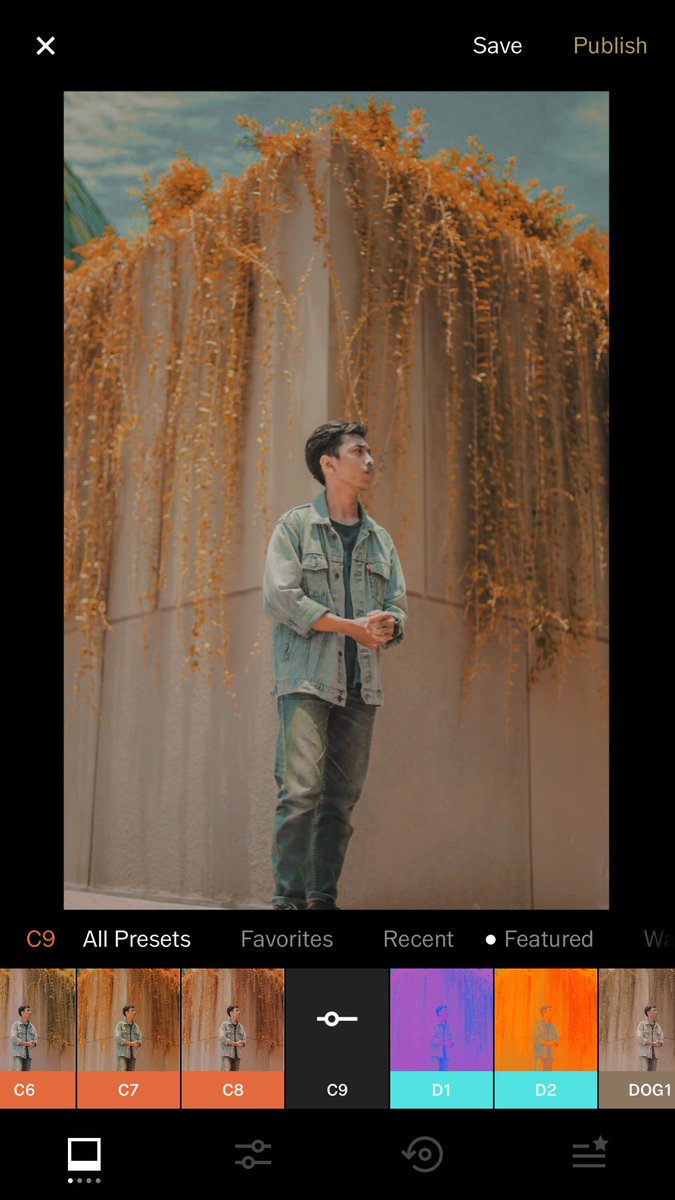
Tahap kedua yaitu VSCO.
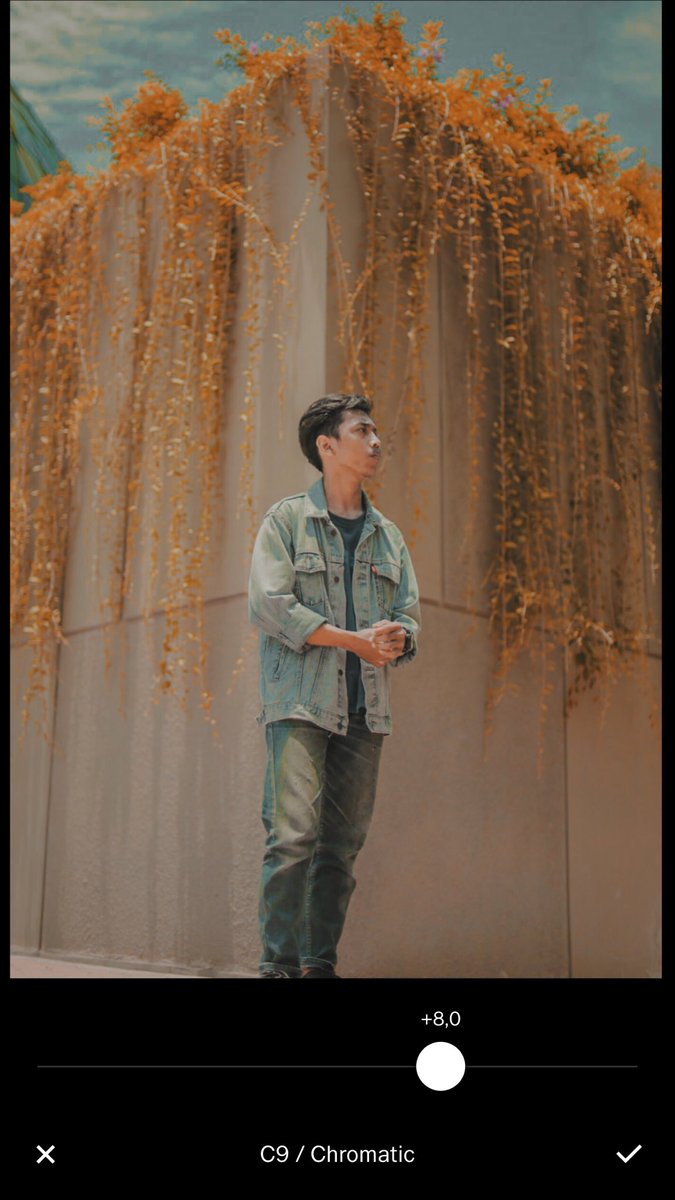
VSCO:
C9 : +8,00
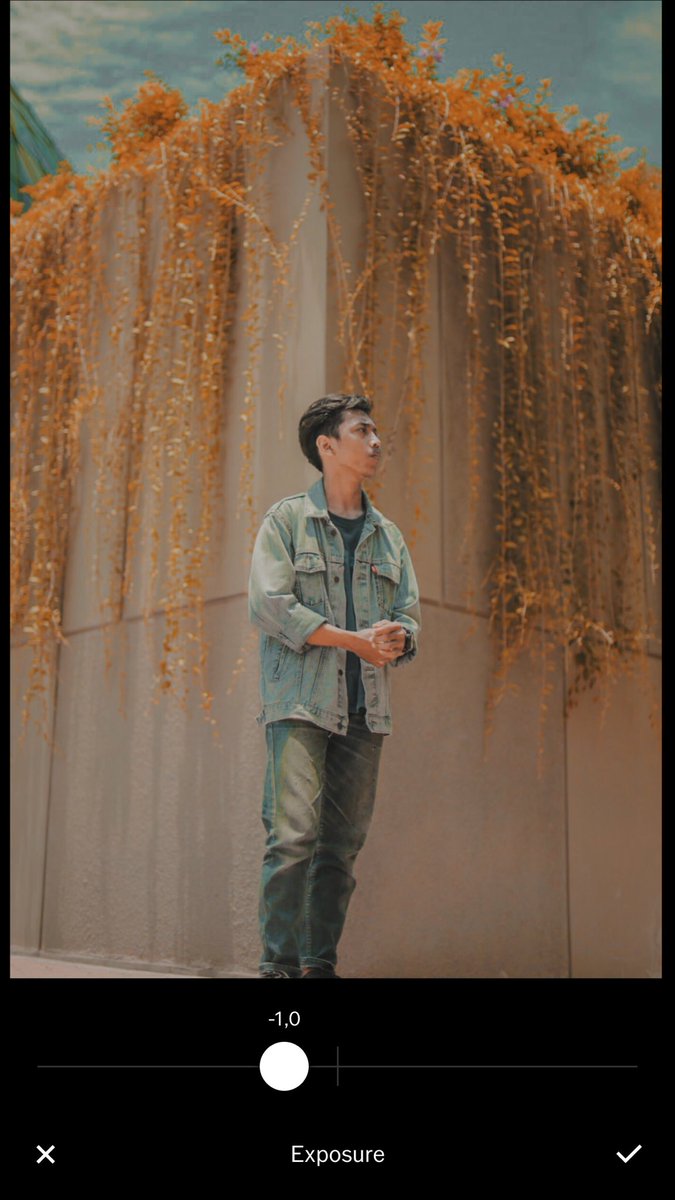
Exp: -1,0
Contrast: +1,0
C9 : +8,00
Exp: -1,0
Contrast: +1,0

Sharpen: 0
Clarity: 0
Saturation: -1,0 (sesuaiin foto)
Highlight: +1,5
Shadow: +2,5
Temp: +0,5
Vignette: +6,0
Clarity: 0
Saturation: -1,0 (sesuaiin foto)
Highlight: +1,5
Shadow: +2,5
Temp: +0,5
Vignette: +6,0


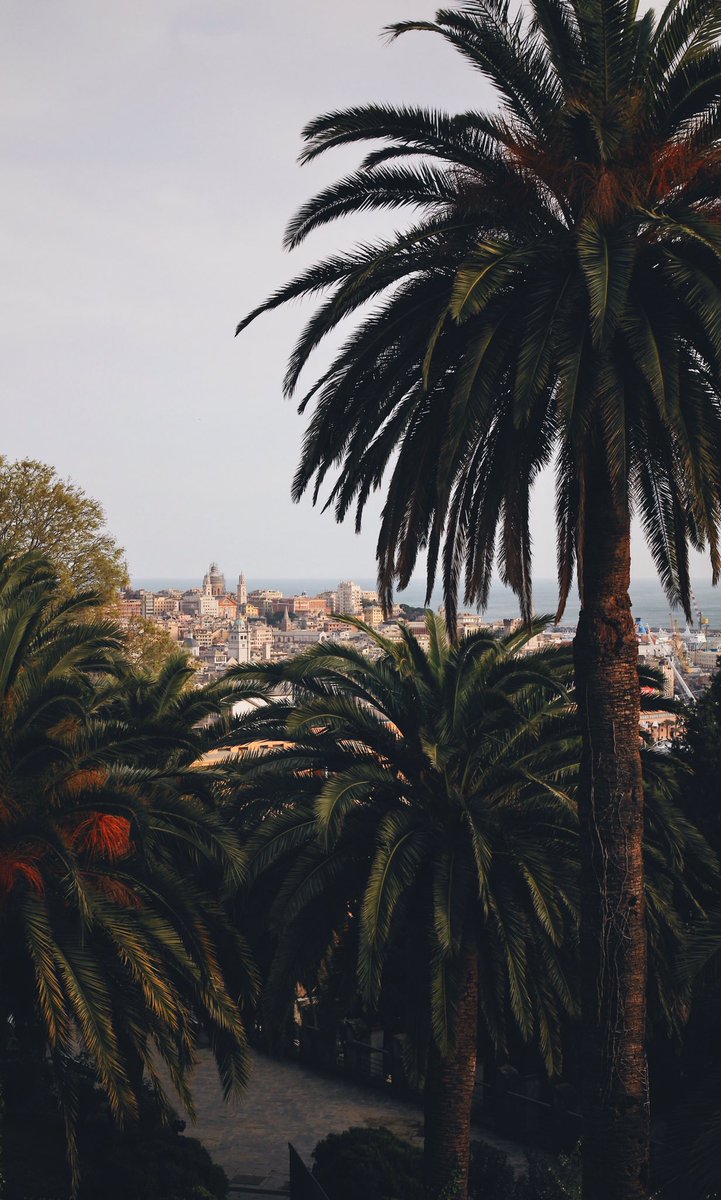
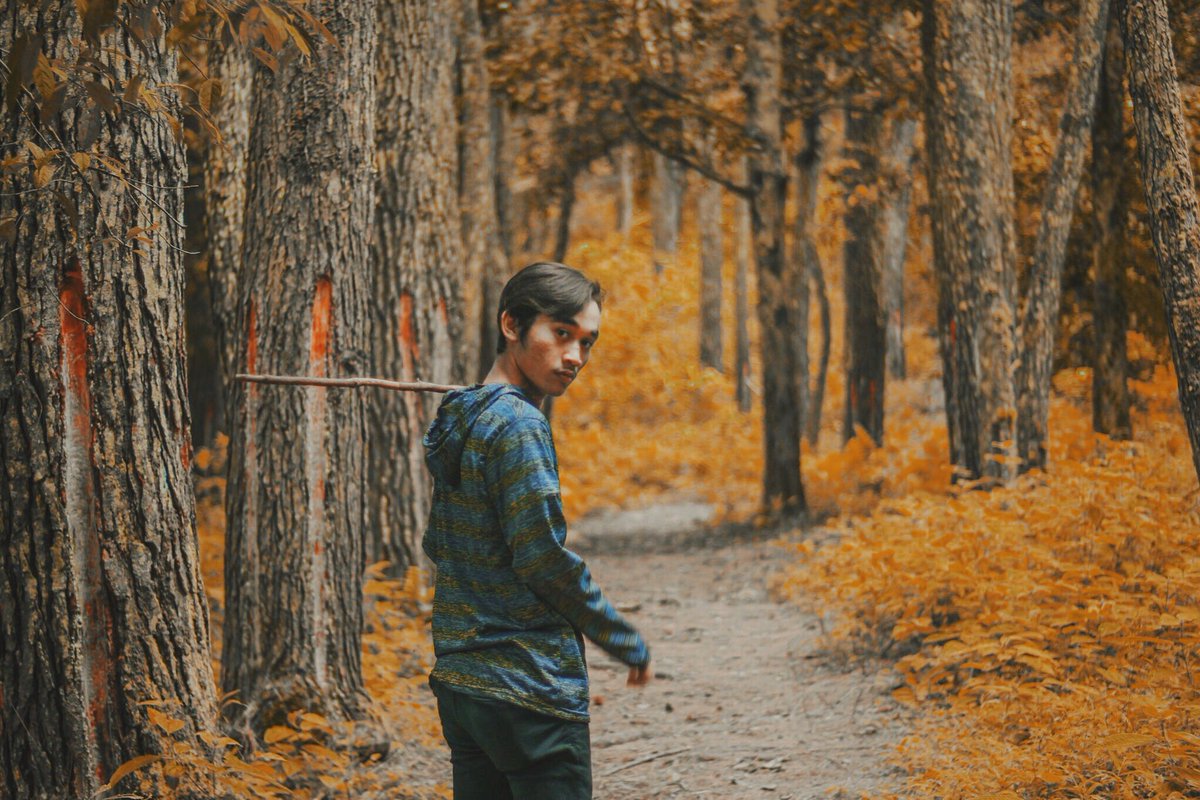
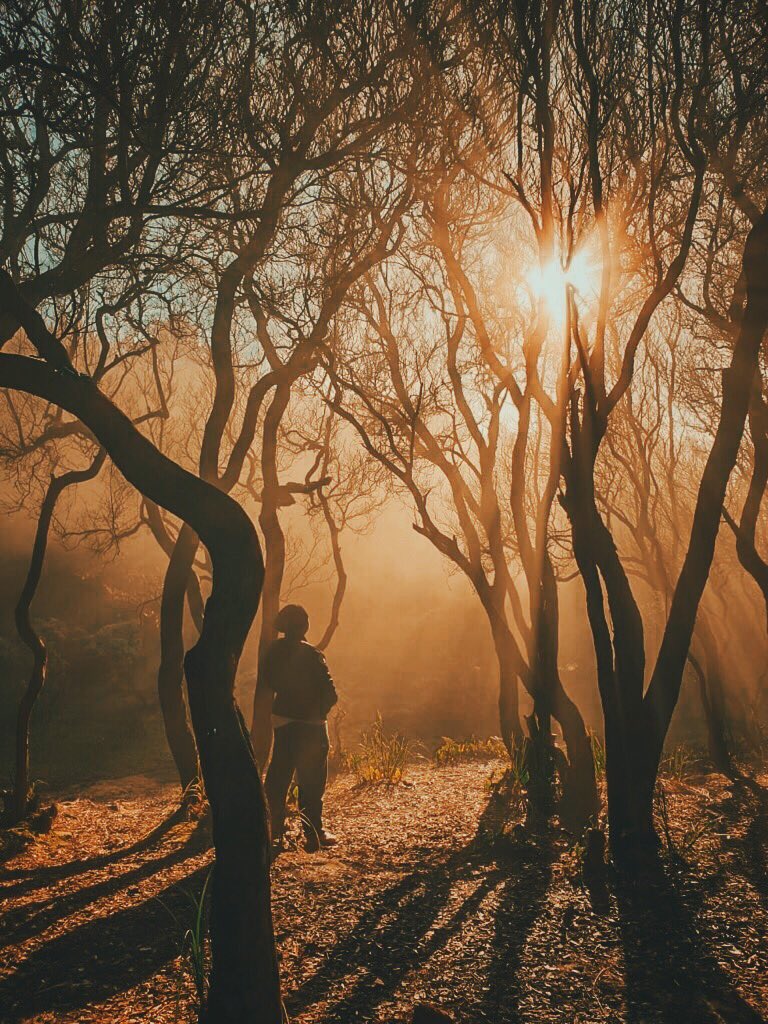
Nah gitu aja sih, ini dia perbedaan before afternya:

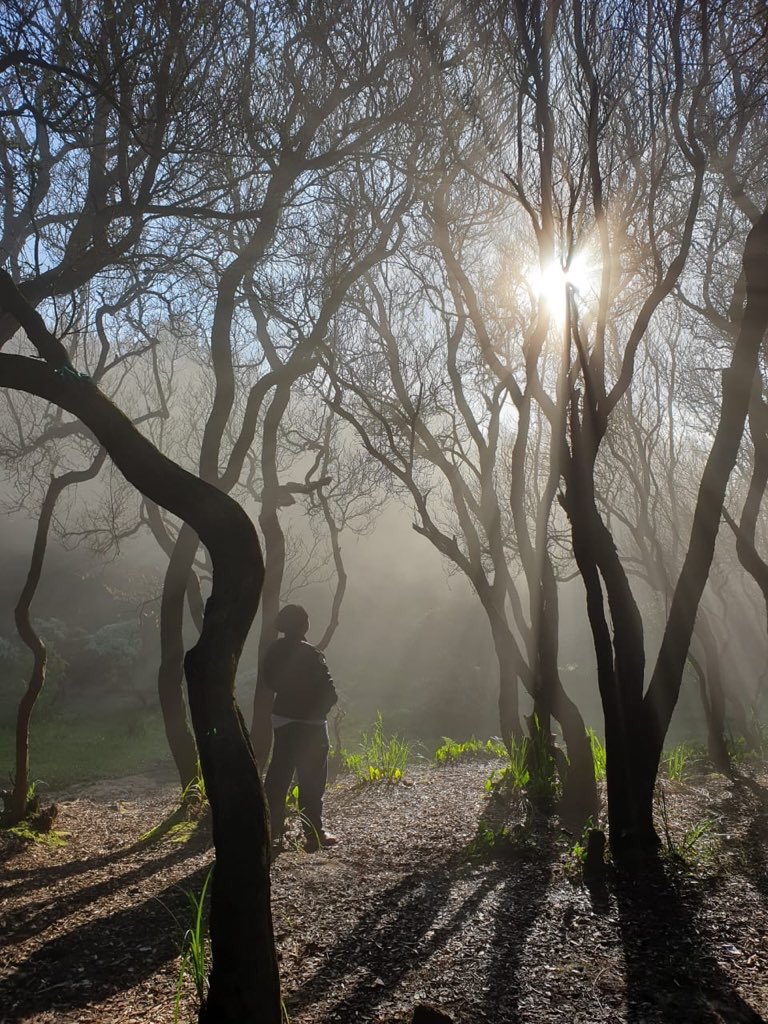
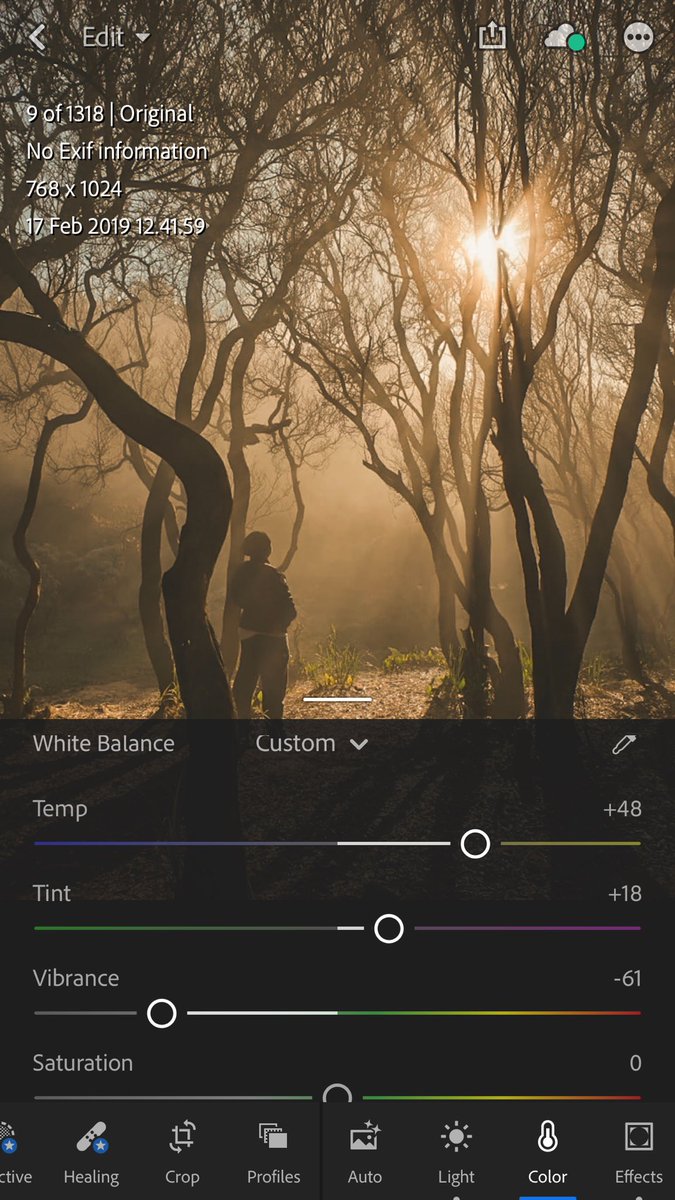
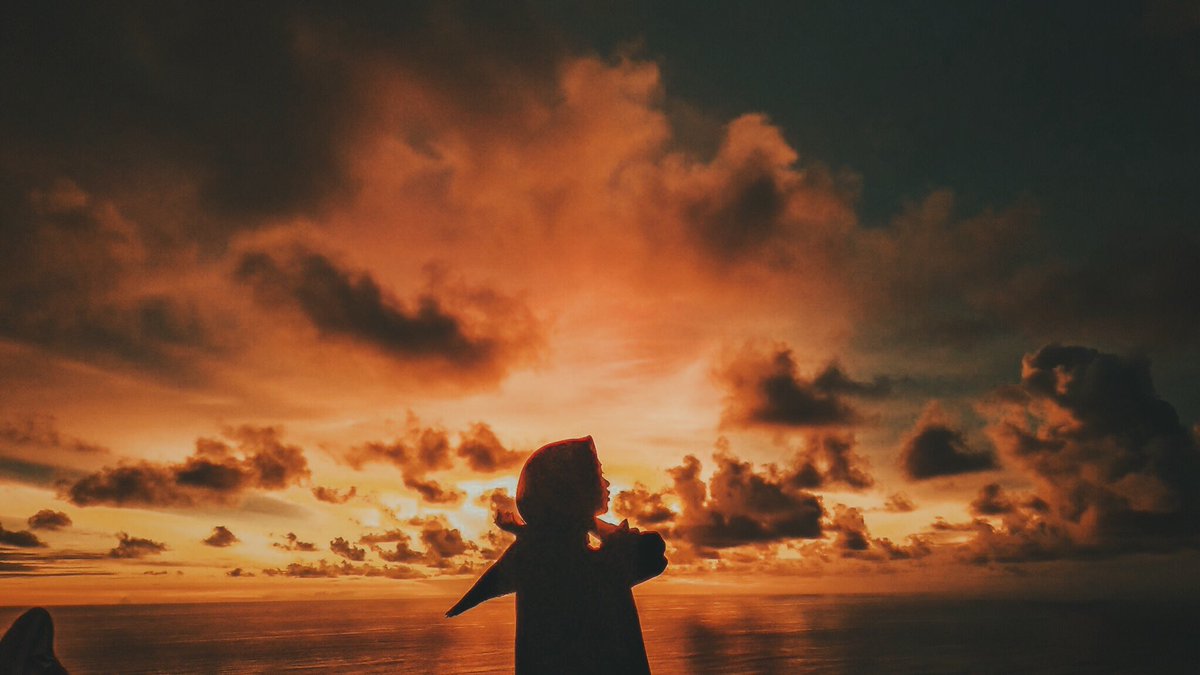
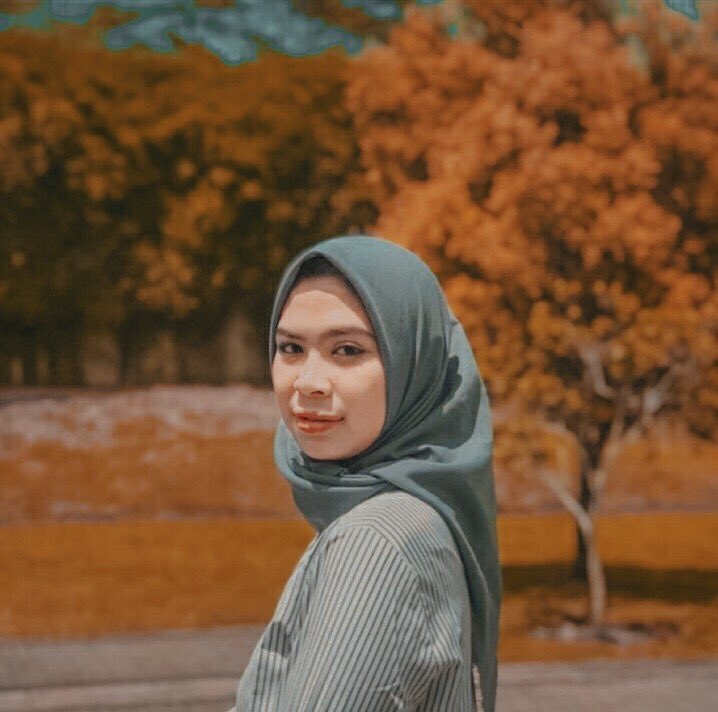
Nah untuk foto sunset ato yang ada mataharinya aku ada resepnya sendiri nih! Aku mau pake foto dari @Franova26
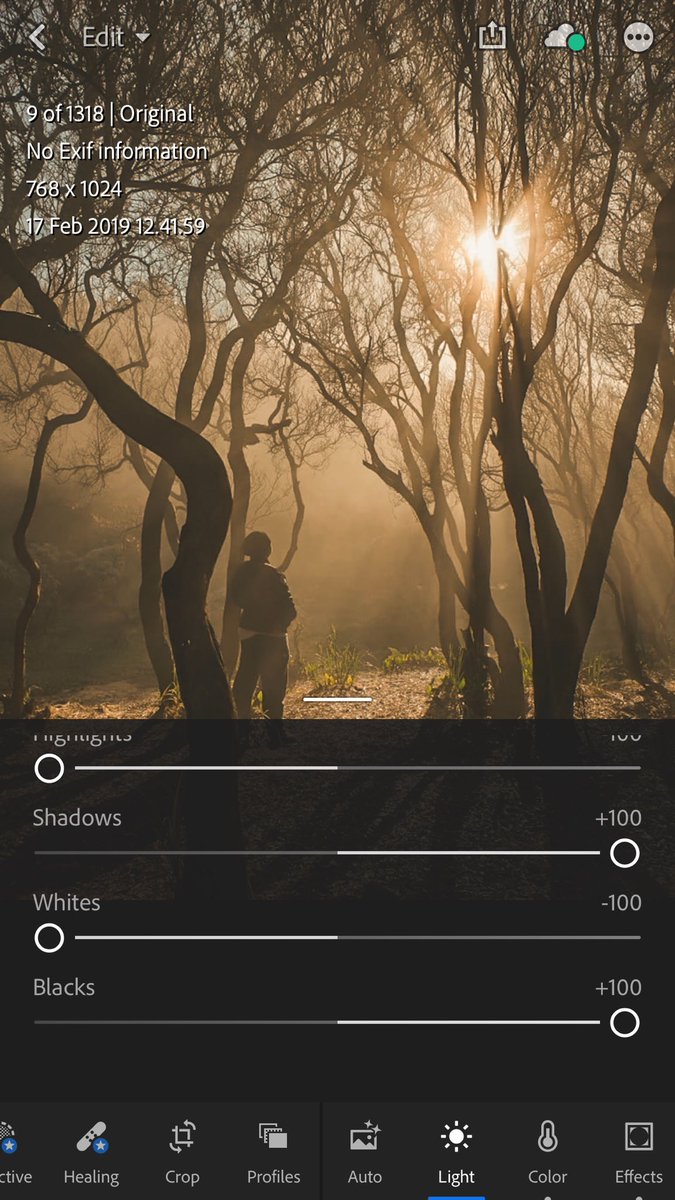
Ini light, curve sama color:
Exp: -0,86
Contrast: +100
Highlight: -100
Shadow: +100
Whites: -100
Blacks: +100
Color
Temp: +48
Tint: +18
Vibrance: -61
Exp: -0,86
Contrast: +100
Highlight: -100
Shadow: +100
Whites: -100
Blacks: +100
Color
Temp: +48
Tint: +18
Vibrance: -61

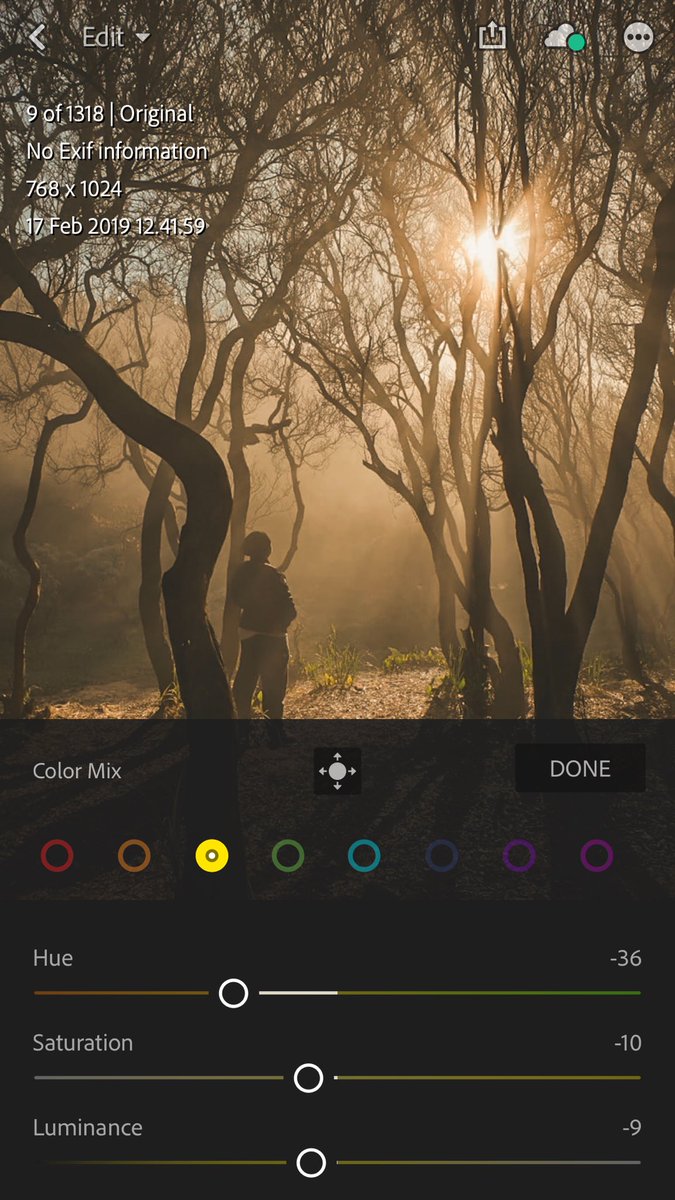
Color mixnya cuma atur 3 warna:
Merah
Sat: +100
Oren
Hue: 0
Sat: +52
Lum: +55
Kuning
Hue: -36
Sat: -10
Luminance: -9
Merah
Sat: +100
Oren
Hue: 0
Sat: +52
Lum: +55
Kuning
Hue: -36
Sat: -10
Luminance: -9


Lalu tahap VSCO
Sama kaya tadi cuma agak beda di saturationnya!
C9 : +8,00
Exp: 0
Contrast: +1,0
Sharpen: 0
Clarity: 0
Saturation: +0,6 (sesuaiin foto)
Highlight: +1,5
Shadow: +2,5
Temp: +0,5
Vignette: +6,0
C9 : +8,00
Exp: 0
Contrast: +1,0
Sharpen: 0
Clarity: 0
Saturation: +0,6 (sesuaiin foto)
Highlight: +1,5
Shadow: +2,5
Temp: +0,5
Vignette: +6,0

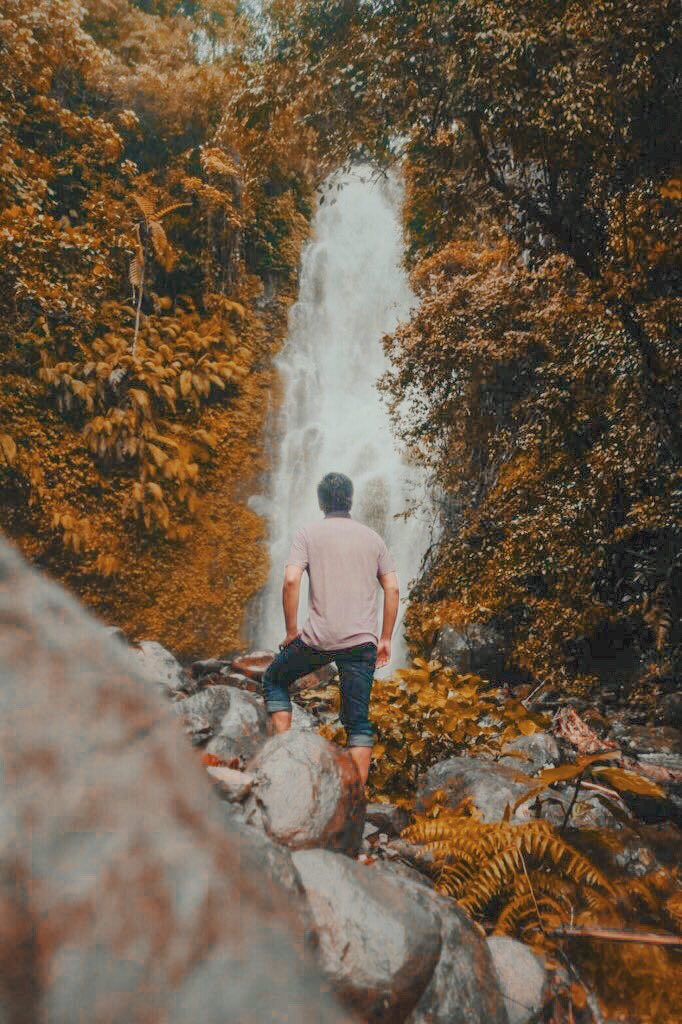
Ini before after foto kedua:


Nah segitu dulu guys tutorial kali ini! Kalian bisa subscribe Kol Goreng di Youtube karena nanti suatu saat aku bakal buat konten disana!
m.youtube.com/channel/UC8gkp…
m.youtube.com/channel/UC8gkp…
Yuk setor bahan buat tutorial selanjutnya!
Bisa send hasilnya disini ya!
Thread editing lainnya cus cek disini:
Terimakasih semua! Sampai jumpa di next part ya!
Bagian ini ilang ya?