Ok, the poll is still going but 88% has voted for the journey so let's catch you up!
Last night
Me: what stuff shall we put in the basement when its finished?
Hubster: cool posters!
Me: what kind of posters?
Hubster: resistor poster?
Me: 🙄
Hubster: @Raspberry_Pi pin out poster?
Last night
Me: what stuff shall we put in the basement when its finished?
Hubster: cool posters!
Me: what kind of posters?
Hubster: resistor poster?
Me: 🙄
Hubster: @Raspberry_Pi pin out poster?
Me: ooo like a MASSIVE one? How do we make a massive one that looks good? 🤔 I know: vinyl cutter! *starts designing gpio pina poster
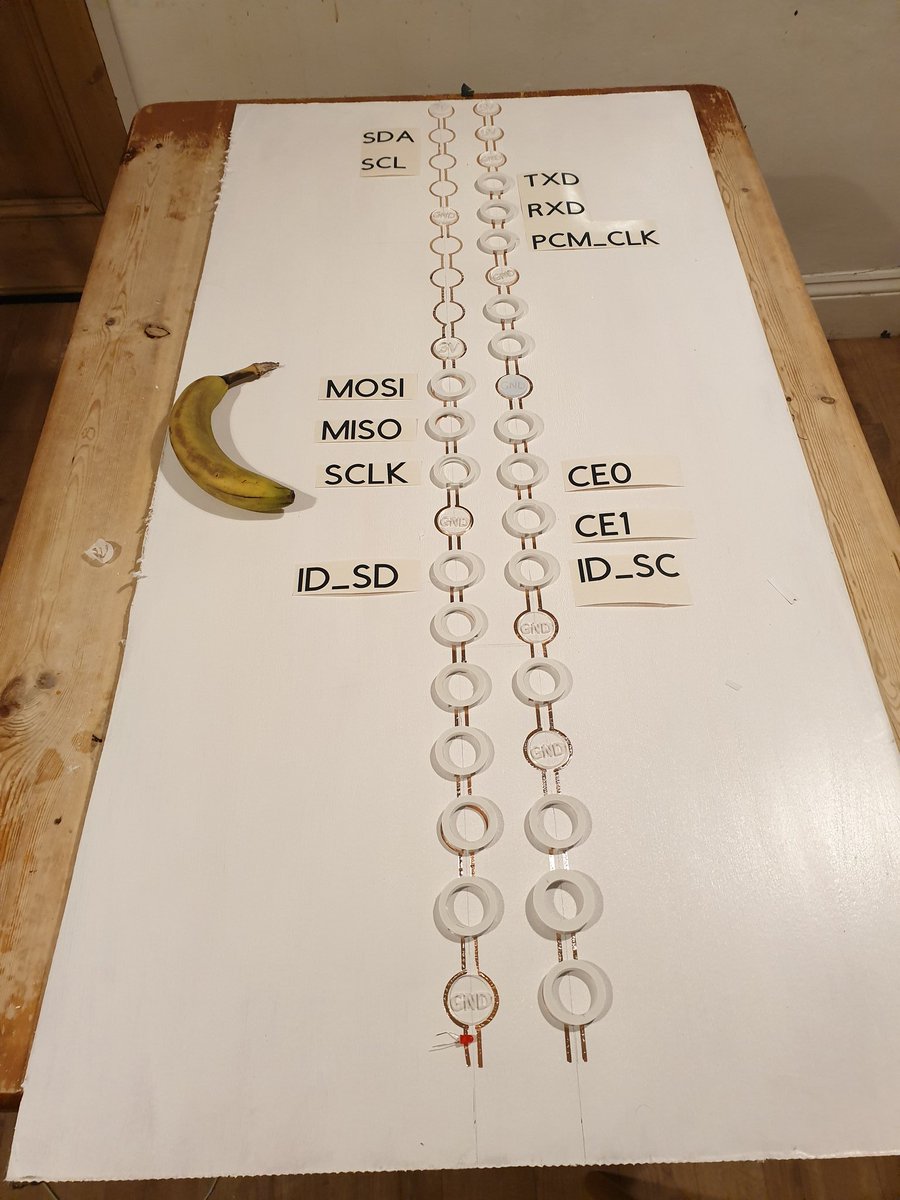
So I was going to print the stickers in different colours so you could quickly look up and see ground, power, etc. I figured 2cm was big enough per circle for 20 circles horizontal for a 1 metre poster 

Then I thought this would look cool and really stand out if the circles were in acrylic.... but then my husband caught my eye and said 😈
If you're going to laser cut the border why not stick an LED in and light up the sign?
If you're going to laser cut the border why not stick an LED in and light up the sign?
Off to the laser cutter! Here's the test outer in red and a clear circle with 3V etched in the middle. I stuck a normal LED in the bottom and ooooo, shiny! Off to laser cut all the centre pieces

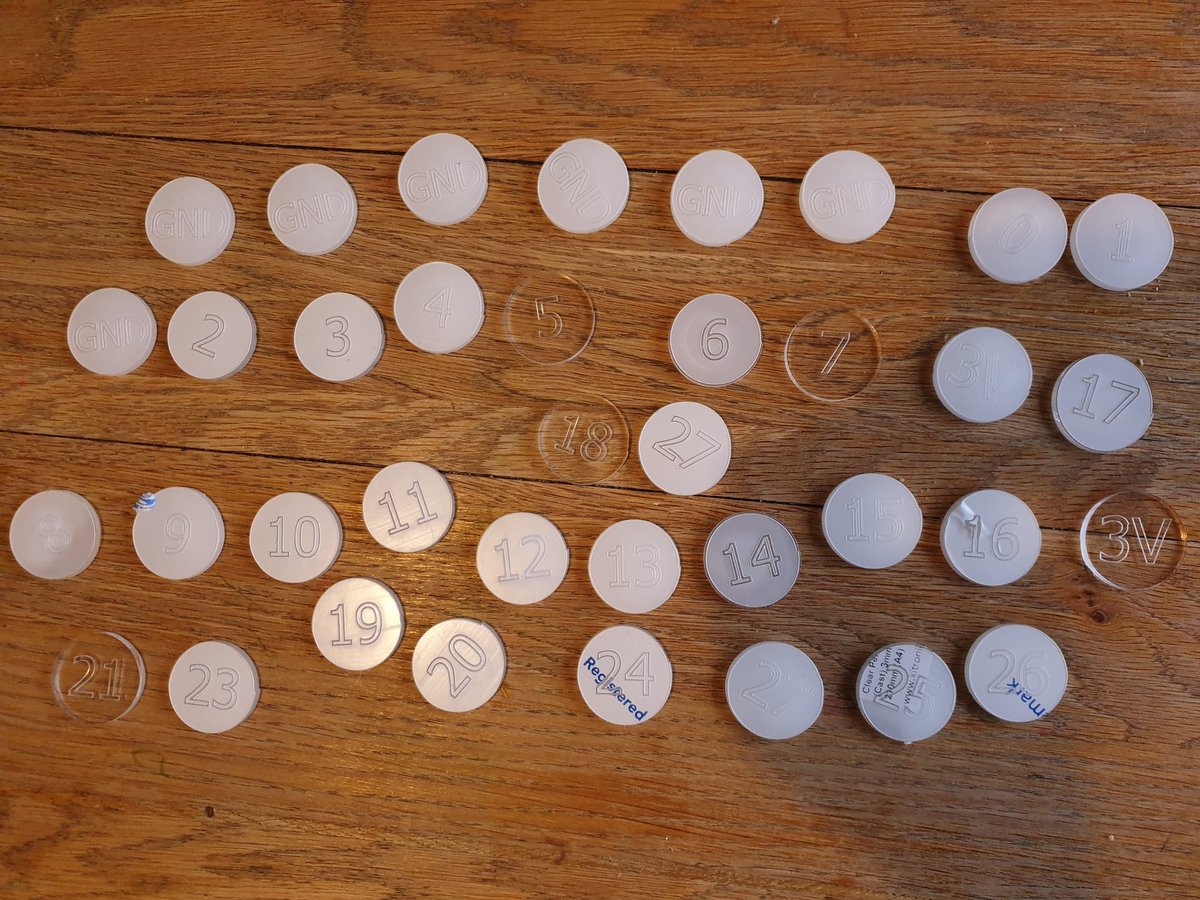
Last night, before bed, I cut all 40 clear acrylic circles on the @HPCLaser laser cutter
The acrylic is clear 3mm from @Kitronik
Most of them in the pic below still have the protective film on them
Next step: how to mount the LED at the bottom of each one. Time for breakfast and some games of mario
Most of them in the pic below still have the protective film on them
Next step: how to mount the LED at the bottom of each one. Time for breakfast and some games of mario
We brought out our LED stash and had a think. How bright, how much power, resistors?? Wiring? With all these mind we went for the @Kitronik e-fashion sewable LED, a 3d printed mount & copper circuits, simples! 😉
3d case prototype 1: too chunky, no way to access LED copper holes
3d case prototype 1: too chunky, no way to access LED copper holes
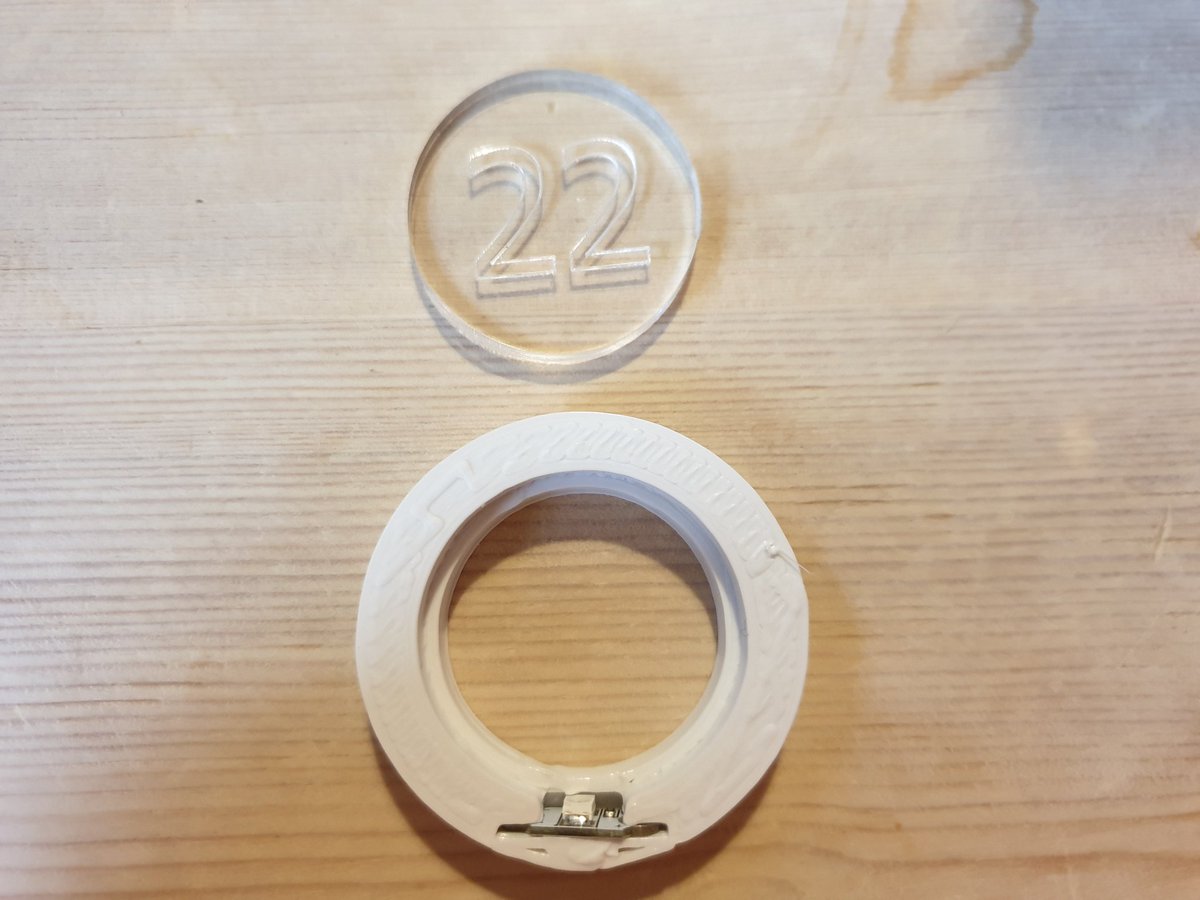
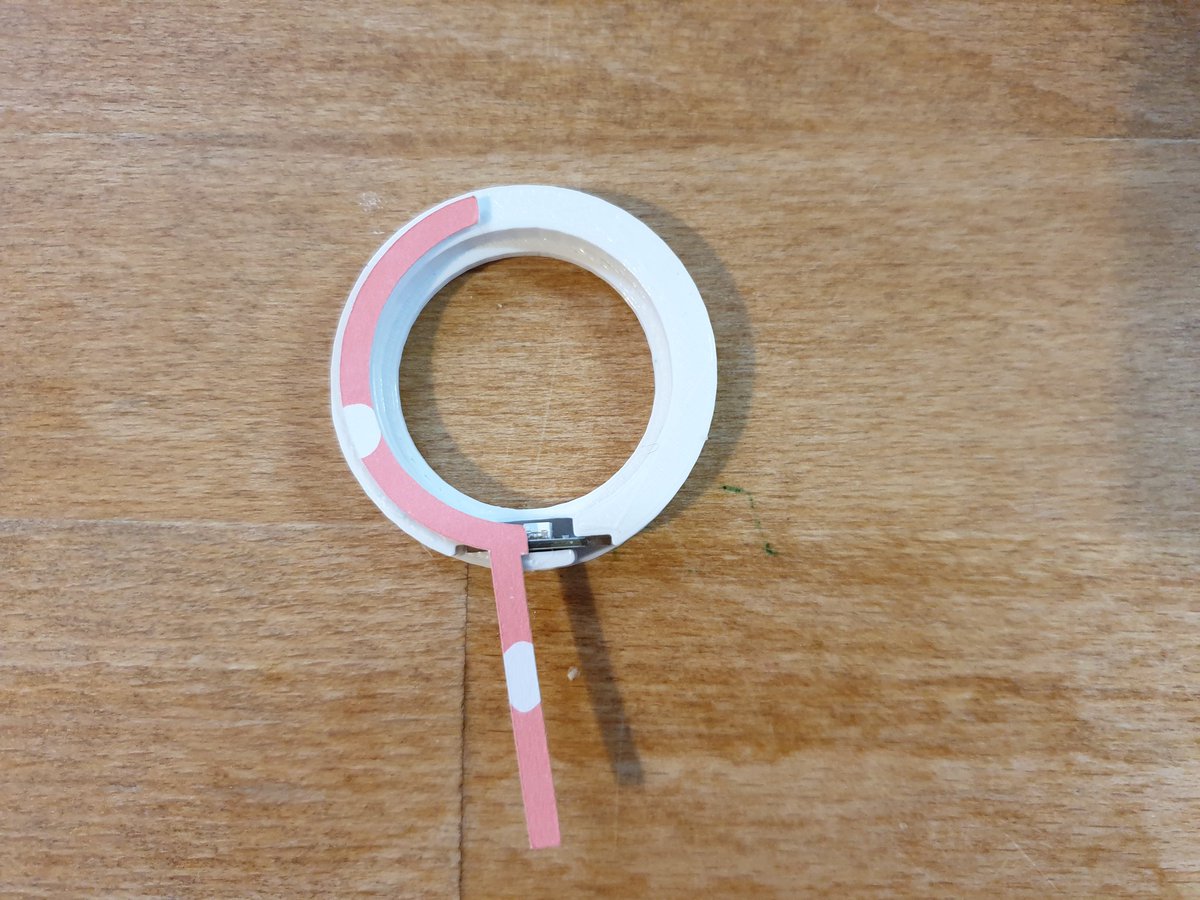
Prototype 2 was perfect, just a bit loose. Prototype 3 looks the same. Here you can see the LED in place. The clear circle fits in really snug

Lunch while we print prototype 3 then lego building with the kids. Almost caught up! Gotta clear all my stuff off the kitchen table before lunch ☹ #3dprinter
Lunch then clear the kitchen table AGAIN. Basement refurb can't come soon enough. Before we create copper circuits I want to test the LED is bright enough. Quick solder while youngest makes us pretend lunch and oldest packs for a sleepover. What do you think?

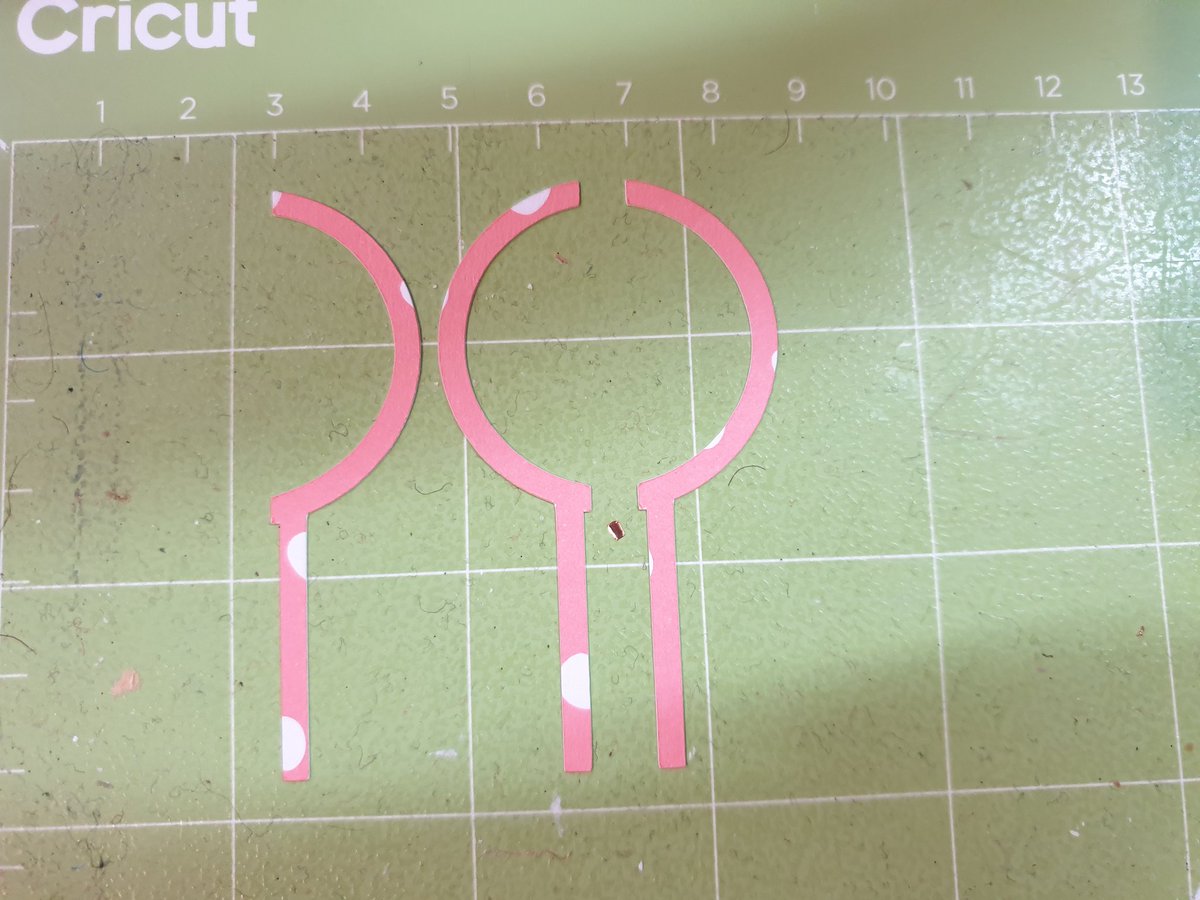
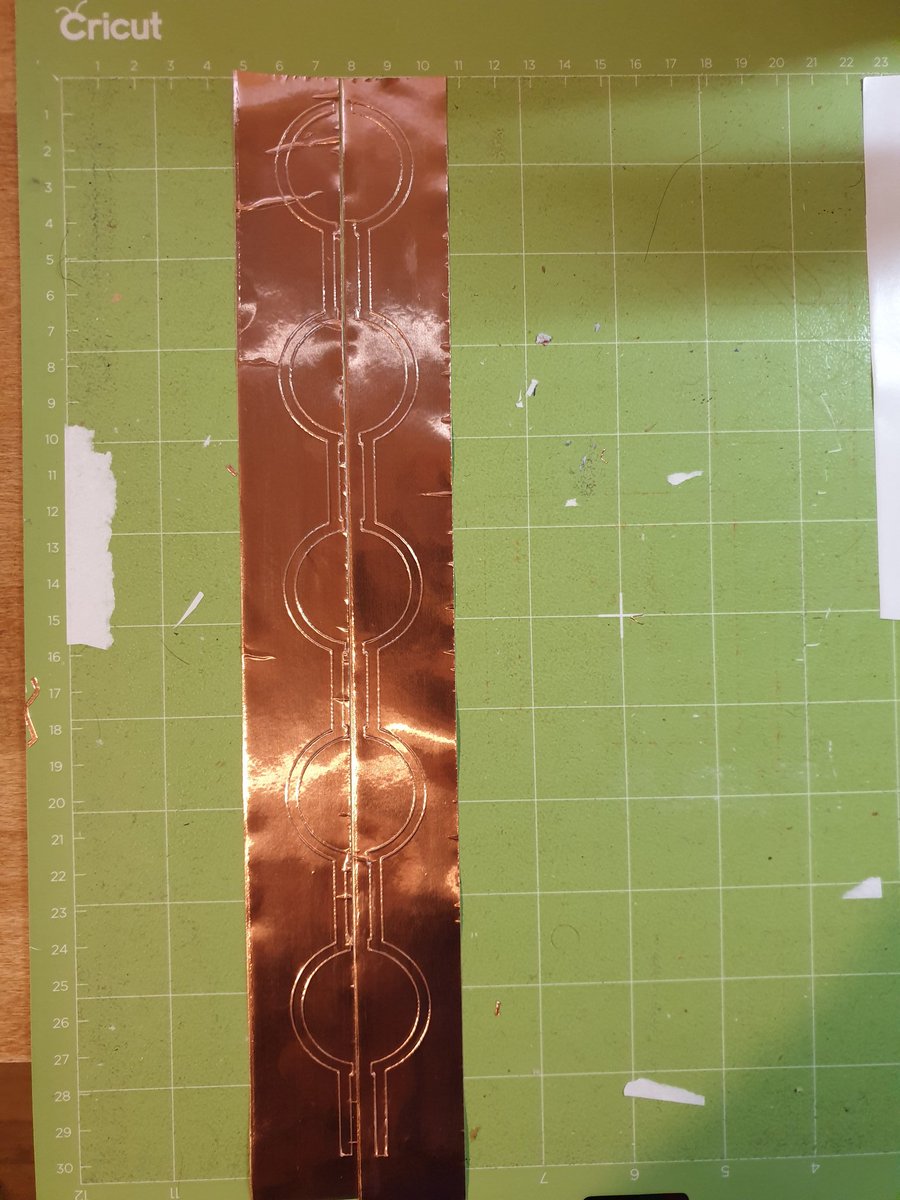
Onto the copper circuit. I don't just want two strips going behind each circle, I want it to look like the circles are connected just using 2 wires..
Let me show you! I cut the design out in cardboard first to test it. Saves wasting copper tape
Let me show you! I cut the design out in cardboard first to test it. Saves wasting copper tape
Cut on a @CricutUK vinyl cutter on card first then two strips of copper tape
@CricutUK and you're all caught up! Now having a rest watching hubster and youngest play mario on the wii. Next up will be to transfer the copper to a piece of wood or card, solder the LEDs onto the copper using wire. This is still a test project! It could all go horribly wrong
Right, that's enough mario! Before we cook tea let's 3d print another two holders and get our frame ready. It's going to be 1.2 metres portrait. Here's some plasterboard we got for piwars and never used

Very satisfying! And much easier than we expected
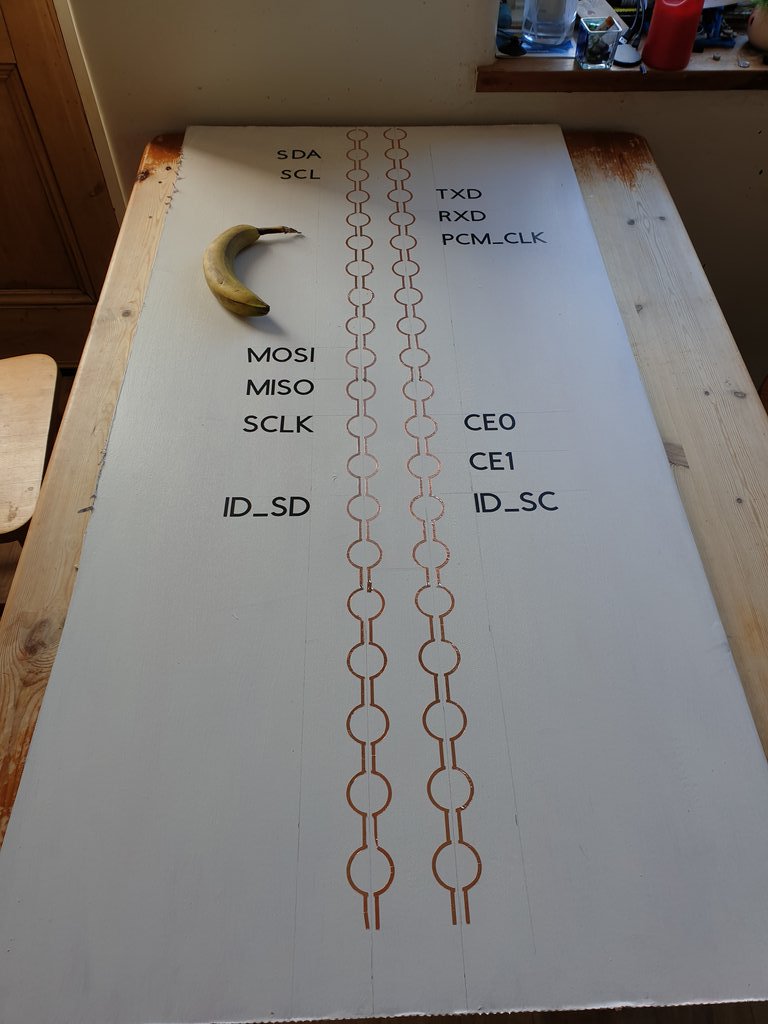
Added 2and coat of paint to my sons room and a coat before and after tea to the poster board. Weeded the copper circuit and 3d printed more holders.. bit of a waiting game now as I want to add the tape to the poster board.


Still in the testing stage. If 5 work together and look good I'll order the LEDs from @Kitronik to make the 40 pin poster. I think I have about 10 LEDs atm
Ok, I don't want to waste 5 copper circles on the test stage... so going for two. Solder time! Quickly, before bedtime

No time for testing! Bedtime for youngest. Do you think it's going to work?? Q

Answer: it worked!
The double sided sticky tape looks awful on the top circle, won't be using that in the final one. Ordering time 😀
The double sided sticky tape looks awful on the top circle, won't be using that in the final one. Ordering time 😀


Further testing shows the text isn't legible from a distance 😭 And I cut all 40 of them!
Trying to cut the text deeper and also scan it, see if that helps #FridayFail
Trying to cut the text deeper and also scan it, see if that helps #FridayFail
Cut out some more copper circuits this afternoon before I ran out of copper tape vm.tiktok.com/bAsBvA/
Not sure the above link works?
Here's the video
Here's the video
Off to @BandQ to buy more copper tape for our copper circuit poster. Will be good to get out of the house. Been waiting until it stops raining but I don't think it's going to happen!
Having tea out so I don't have to clear the kitchen table, hurrah!!
Having tea out so I don't have to clear the kitchen table, hurrah!!

The edges of the mat are not sticky. Repeat after me: the edges of the mat are no sticky!
Two strips got rolled up when the blade passed over and failed to cut.
Two strips got rolled up when the blade passed over and failed to cut.


Almost there... and its almost bedtime! After I put the kids to bed I'll finish the last 10 circles, solder the connections, put one light on one end and a battery on the other to test. Wish me luck!

Wahey! Testing the copper circuit from one end to the other with a single LED. Success!
There's a small break on the circuit closest to the camera that I'll fix now then test. #copperCircuits #LED #Maker
There's a small break on the circuit closest to the camera that I'll fix now then test. #copperCircuits #LED #Maker
It worked! My assistant disappeared for the testing bit 😂
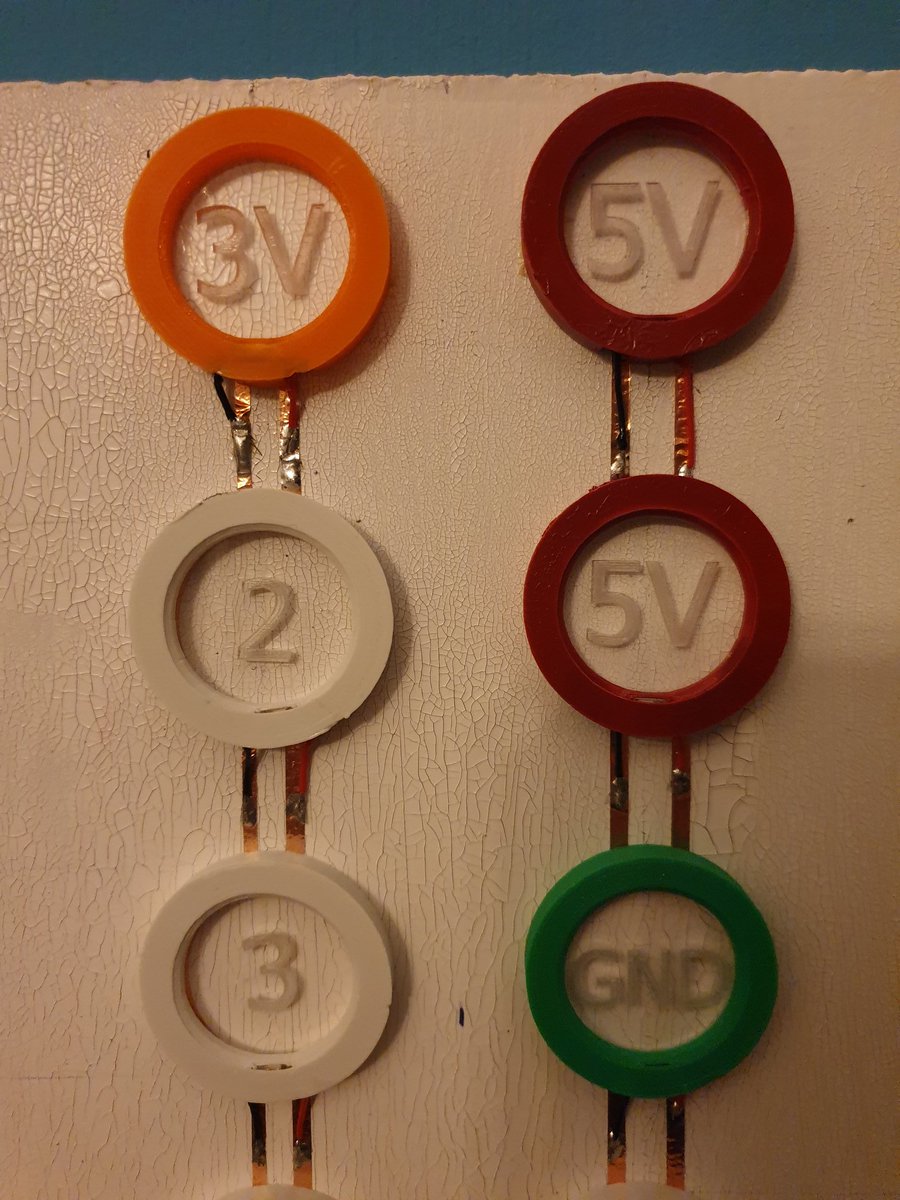
I need to #3dprint another 6 white holders before I change over to green for the 8 ground pins. Waiting for orange pla for the power pins to arrive as well as the LEDs. In the meantime going to add these stickers, so lots of straight lines to be drawn and redrawn.
Question: should I 3d print 5v and 3v pin holders in orange or print 5v in white and spray paint red like so?

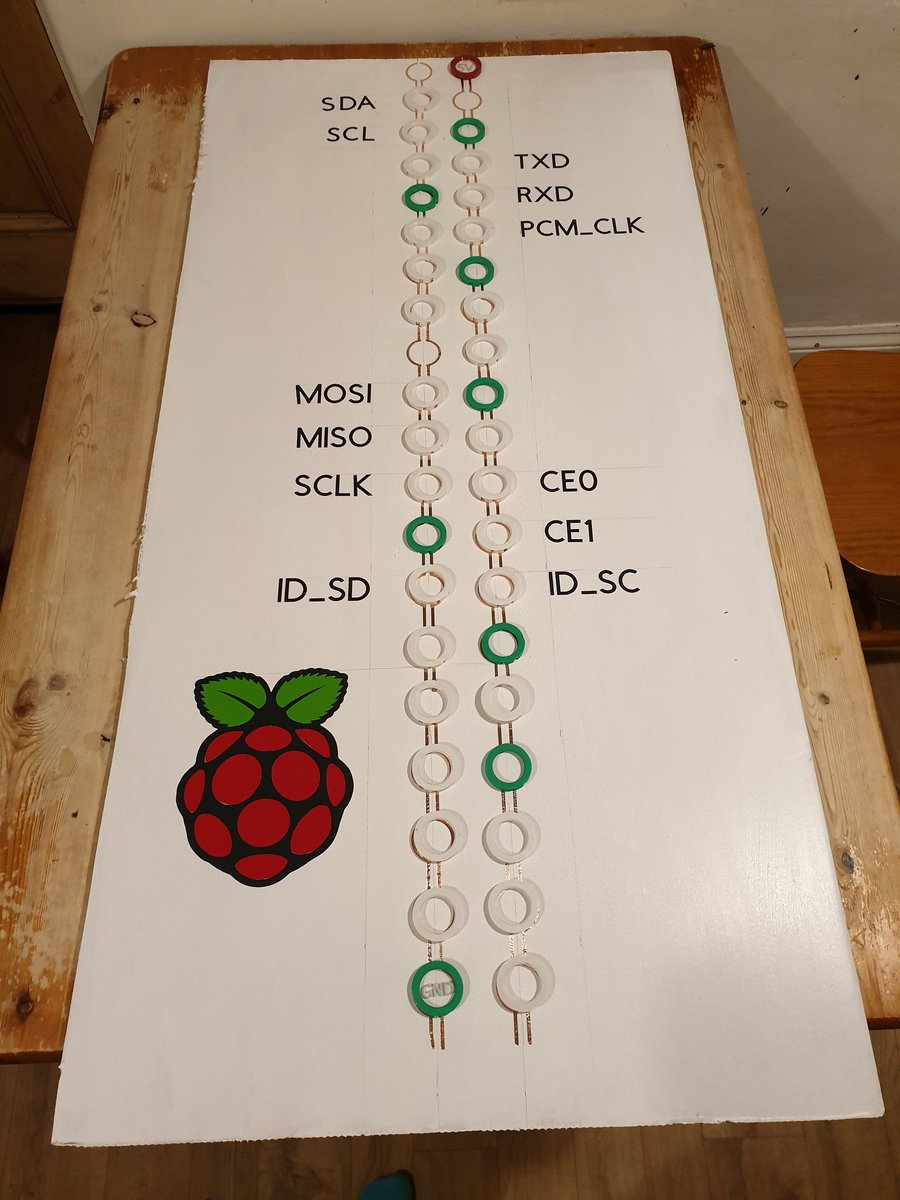
The #3dprinter is printing the last 7 holders. The stickers are on. This is all I can do now until the lights arrive from @Kitronik, hopefully on Tuesday. Might add a @Raspberry_Pi to the bottom left?
The green holders have been printed and one 5v holder is dry. It's a spray painted white holder. They take forever to dry. @Raspberry_Pi sticker is in place. It's coming together!
First light is soldered onto the board and glued on. Difficult to photograph, might try and stand it up


It is readable (but not any easier to photograph!) when stood up. And its going to look awesome with all 40 soldered on and lit up 😀

Tonight I'll be soldering most of the lights on. Besides the two 3v rings the poster will be complete

Soldered the lights into the 3d holders then onto the board.

Here it is... light off, ALMOST done. Just waiting for the orange pla to do the 3v holders

Here's my @Raspberry_Pi #GPIO pin light up poster ALMOST done! I'm going to use orange pla to print the two 3v pins. Loved loved this project. Got to use all our pretty tools & materials #3dprinter #pla #abs #lasercutter #acrylic #vinylcutter #solderingiron #coppertape #LEDs
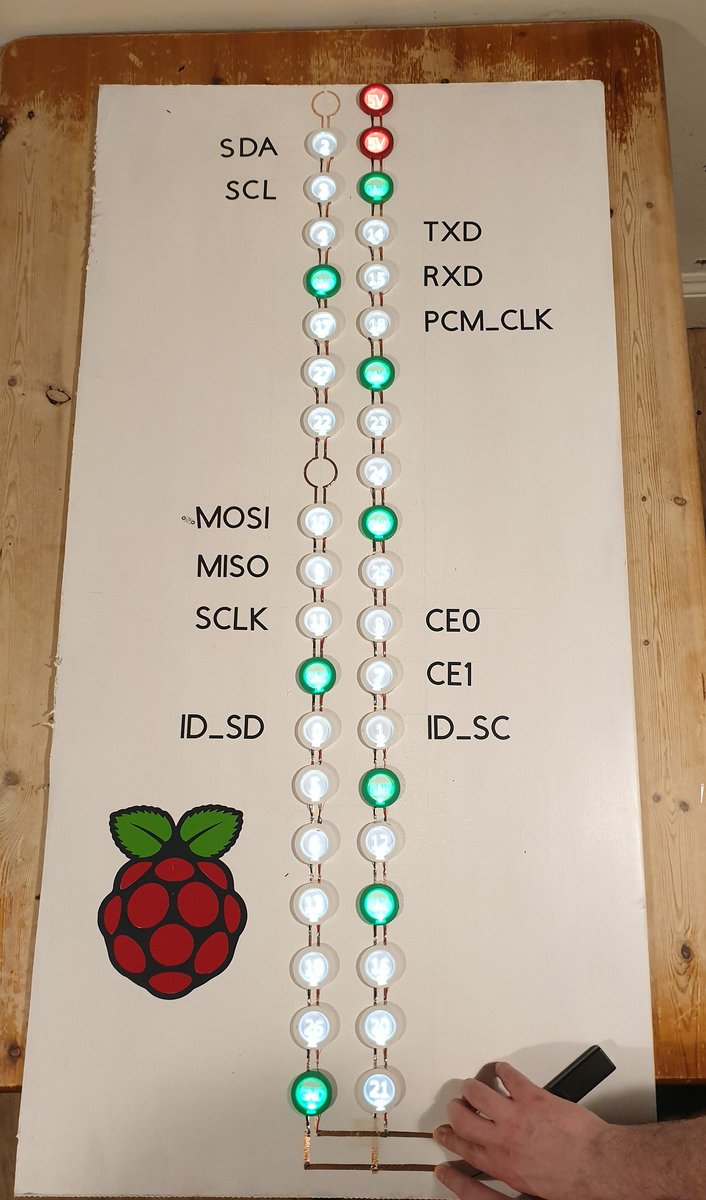
The numbers are visible in real life. Tricky to photograph 😀

And that's it! Journey over. Poster complete