,
26 tweets,
11 min read
Read on Twitter
I have more pics and tips from my “birthday project”, a modular #LEGO dungeon scenics set designed for #TheFantasyTrip. If you missed Part 1, you can find the thread collected here.
threadreaderapp.com/thread/1158142…
threadreaderapp.com/thread/1158142…
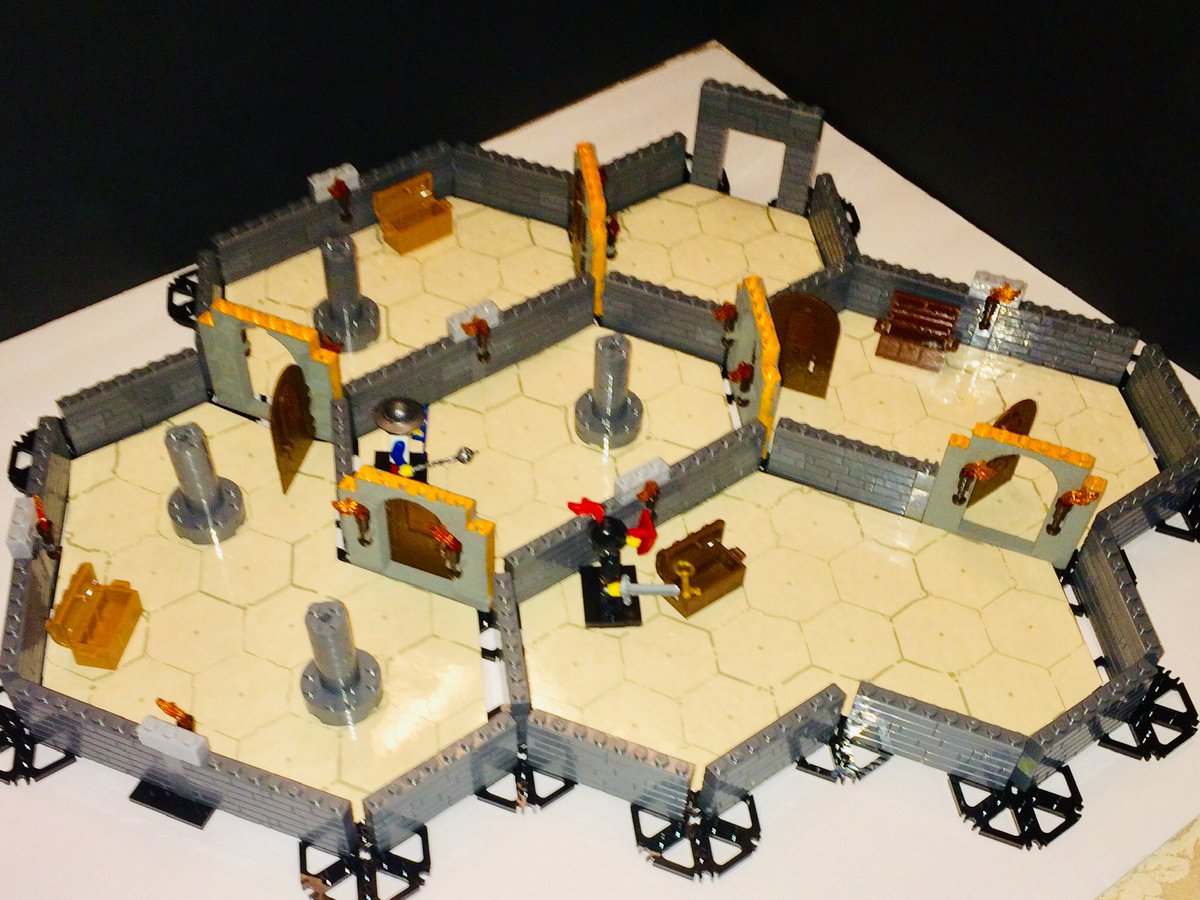
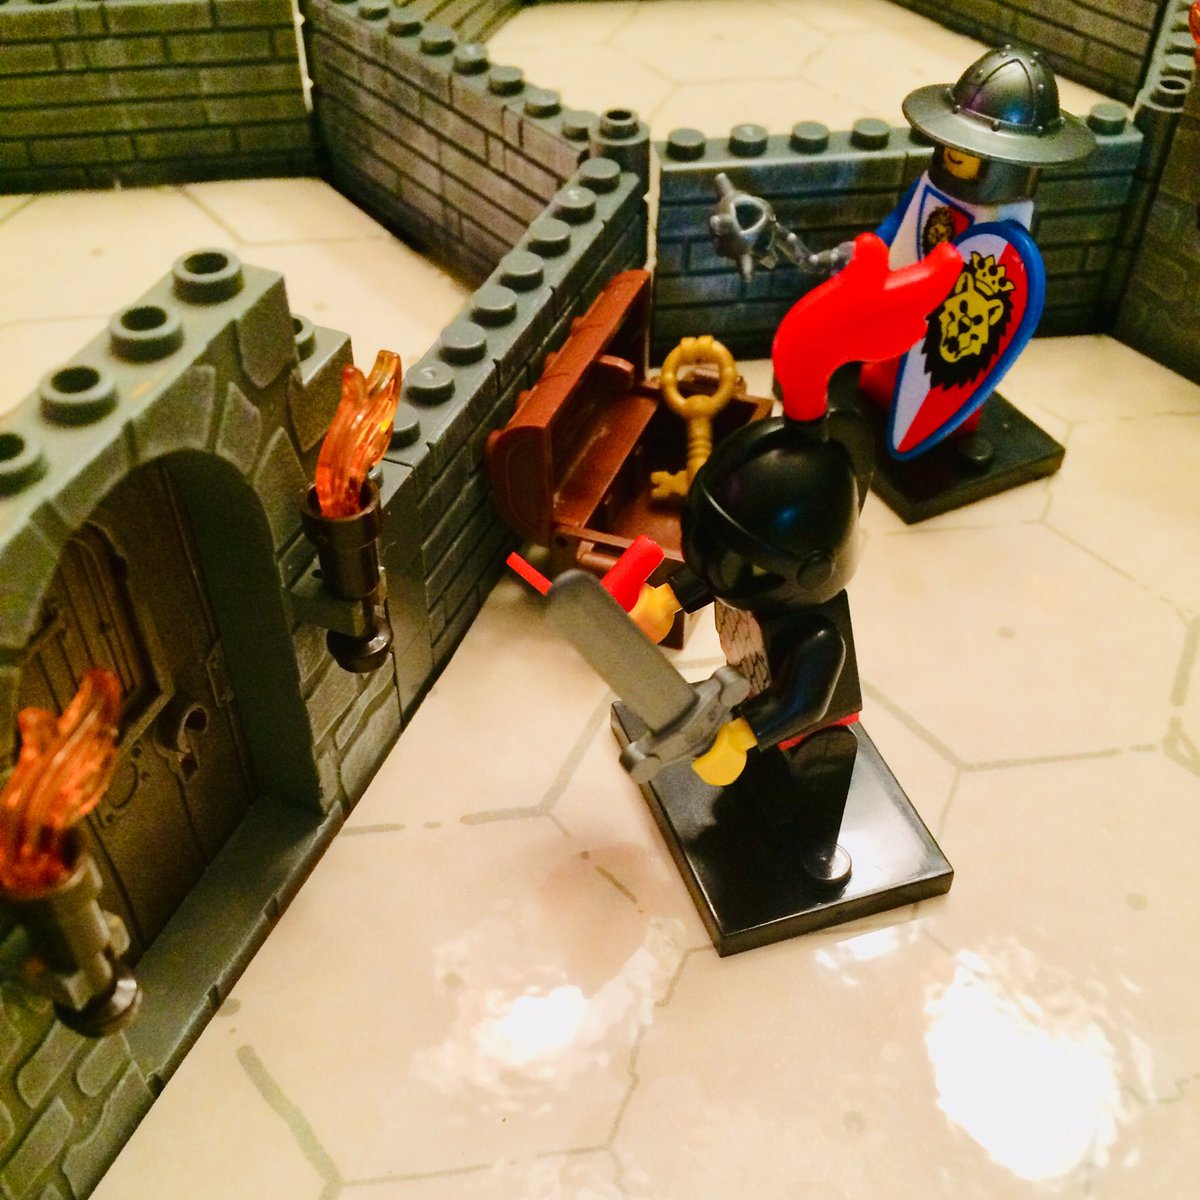
For this new version, I’ve finished texturing the wall sections and painting the doorways. I also have some construction detail pics and notes on construction variations. Here’s the Black Baron and his friend Leo (aka “Tin Hat”) entering the first room. 

I’m going for something easy to construct on the fly from pre-assembled components, with a nice balance of playability and appearance. Half-height walls are one of the decisions I made early.

I plan to use these walls with carved foam pieces I made earlier like this lighted platform and staircase. In these pics, you see how the wall sections can stack easily where you want taller wall sections.


Surprise! Our heroes found a wall panel which slides up to reveal a secret room! A standard wall section is removed by the GM and replaced by one attached to extended corner columns to make the hidden treasure room accessible.

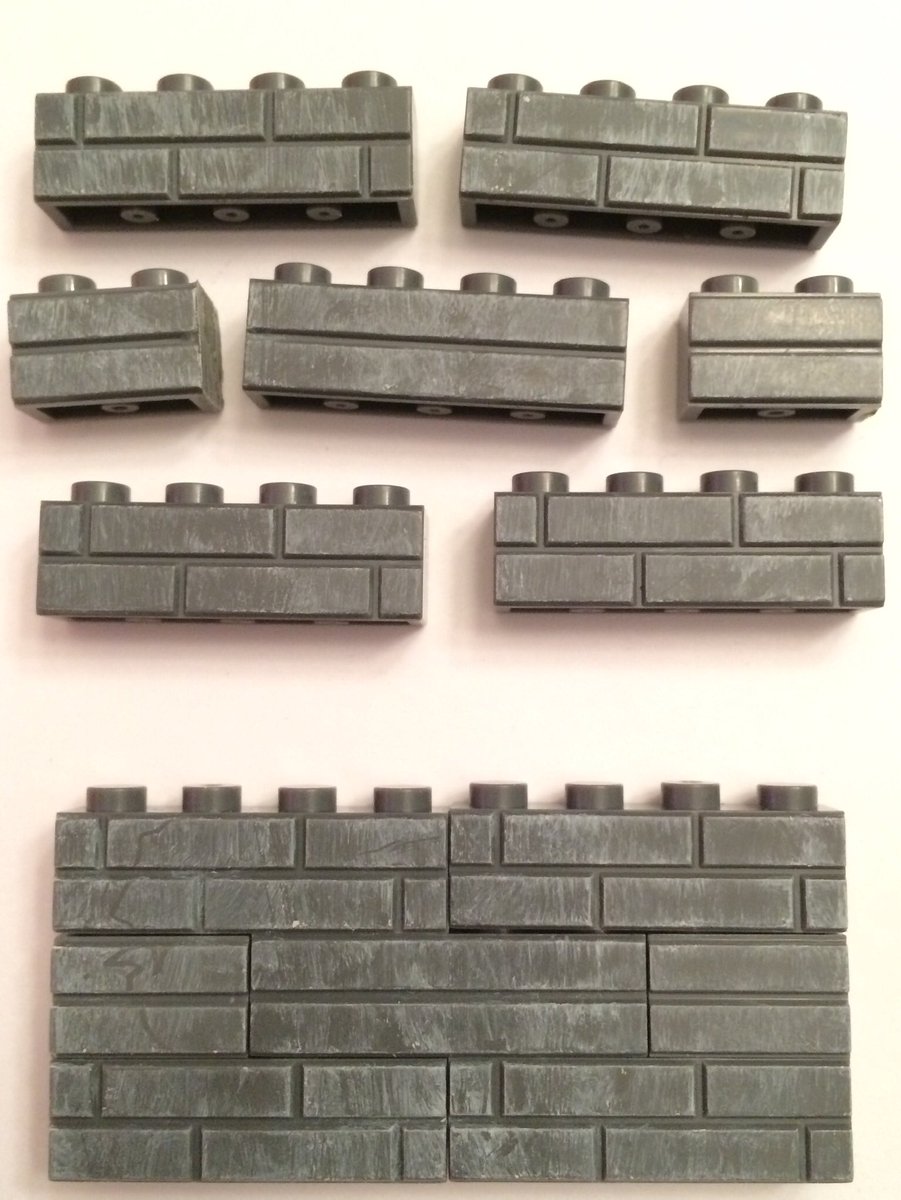
On to construction details! The walls shown in the first thread were just raw bricks. For the new ones, I stuck a bunch of modular walls together and dry-brushed them with a light gray acrylic paint.

This quick and easy detail makes the walls much more attractive without permanently sticking the bricks together with a coat of paint. I’m also trying light gray brick walls with a medium gray/brown dry-brush, shown here. I think I like the dark gray marginally better.

Here’s an exploded photo of the single modular wall section. Only two brick types are used - five 1x4 bricks and two 1x2 bricks per wall module.

You can use standard LEGO bricks, of course, but I like these “masonry” profile ones & I have a source for them in bulk in 1x2 & 1x4 sizes. One side of the brick is grooved like a brick wall, the other just has a single groove. I alternate rows
The floor plates to which the walls attach at the corners are a standard LEGO part, a Technic rotor.

This part is an alternative. I’ll show you later in this thread why I chose the larger part.

When you want longer straight walls, put the together using a Lego plate to join them at the bottom. Any plate will do, but the wider plate adds stability. You need to leave a one-stud gap so the measurements work out, so...

...I fill that gap with three stacked 1x1 bricks. By using a brick with a clip on it for the top one...


...I get a nifty torch holder. I top this with a 1x3 plate to keep it all in place.

The floor plates for the corners have six 2-stud rotors (ending in clips, which I don’t use) radiating from a cross-shaped hole sized for a Technic axle. I insert a 2-unit long axle stub there to hold the round bricks I use to fill the corner gaps.

A stack of three 1x1 round bricks slides over the axle stub and fills the wall gaps at the corners. I wish the plates had a central stud instead of the axle hole, but LEGO don’t play that. I’m determined not to fall back on 3d printed custom parts, so...


The smaller 3 bladed rotors do the same thing (with the same semi-annoying axle hole. But the larger rotor offers a design feature for my purposes here!

Here you see the walls using the slimmer rotors sitting on top of a megahex floor. Notice that the walls fall just outside the outer borders of the megahex. To use this on top of a megahex playmat, the walls should fall right on those lines. But LEGO don’t play that.

To use LEGO with 60 degree angle walls on a playmat, you’d have to change the hex size. I played with that for a LONG time, but didn’t like relying on customer mats and making the set incompatible with all my TFT megahex tiles.
Thus, The Idea, inspired by the way the larger rotors extend into the room. I decided to use the floor plates to support false floors (printed to cardstock and laminated) cut to rest atop the plates!

Where rooms meet, there is a floor gap. The doorways & walls cover them, though. You could also use a 1x8 LEGO plate or brick as a sill, of course. I just didn’t have one at hand for the photos.


I have played with using the smaller rotors to reinforce the walls at the top. Advantage: the rooms are rock solid - rigid enough to carry around. Disadvantage: they are a pain in the ass to pop on and off on the fly. My decision: lose ‘em.

And here are the painted and dry-brushed doorways. I wish they came in Dark Bluish Gray like the wall bricks but, again, #LEGOdontplaythat. For some reason, the most common color these are made in is a truly awful orange. (You can see it where I missed a couple of spots.)
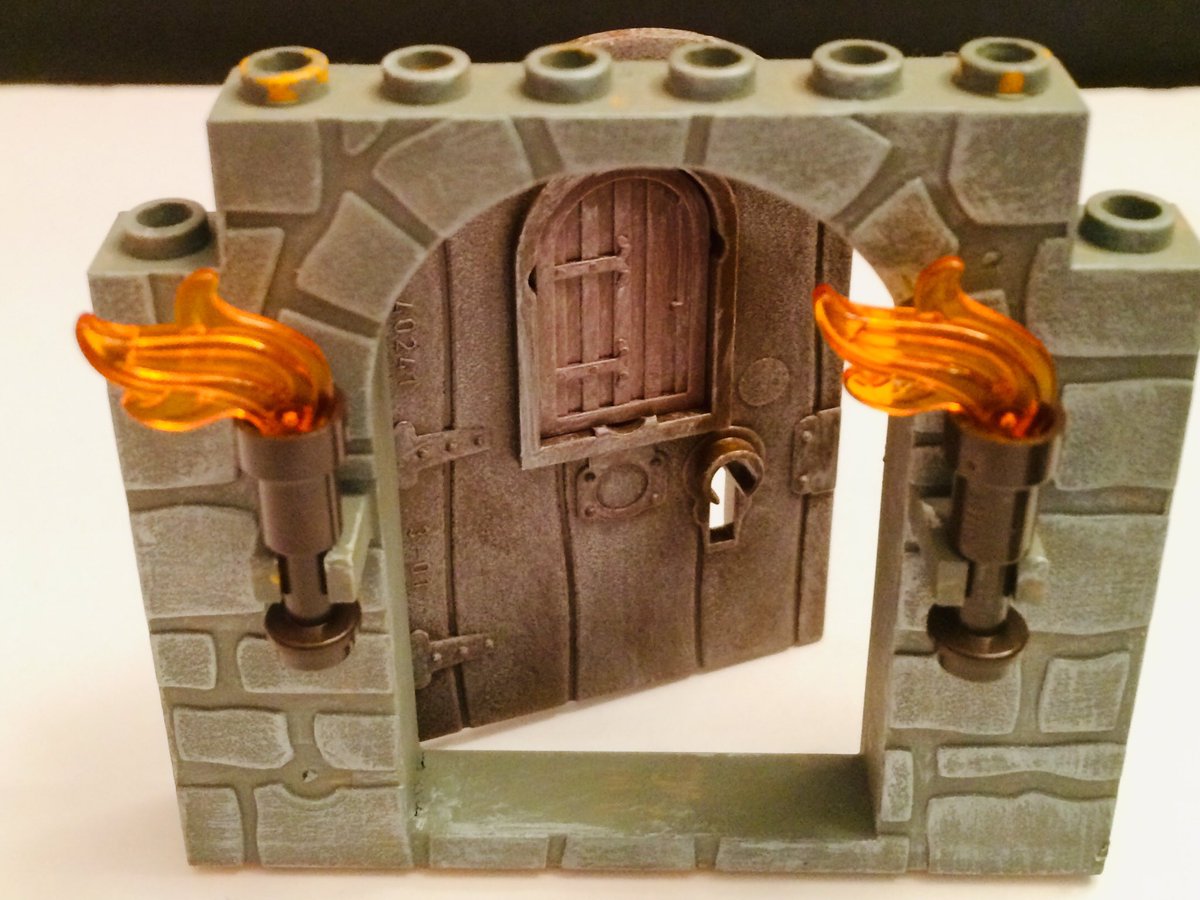
This is the back of the doorway, unfortunately not as nice as the front. You could build doorways from bricks, but I haven’t come up with a design I like as well. They are rugged, easy, relatively cheap, and they open nicely. Plus, I like the keyholes. Yes, LEGO has keys, too.

Thus ends Thread 2 on the LEGO modular TFT dungeon scenics set. A collected thread spool follows. (@threadreaderapp #unspool, please.)
Whoops. @threadreaderapp #unroll, please.